
With our step-by-step guide, you can create elegant decoupage seashell dishes. This technique is perfect for scallop shells, oyster shells, and more. It’s a great way to craft with decorative paper!
Updated Aug 2024
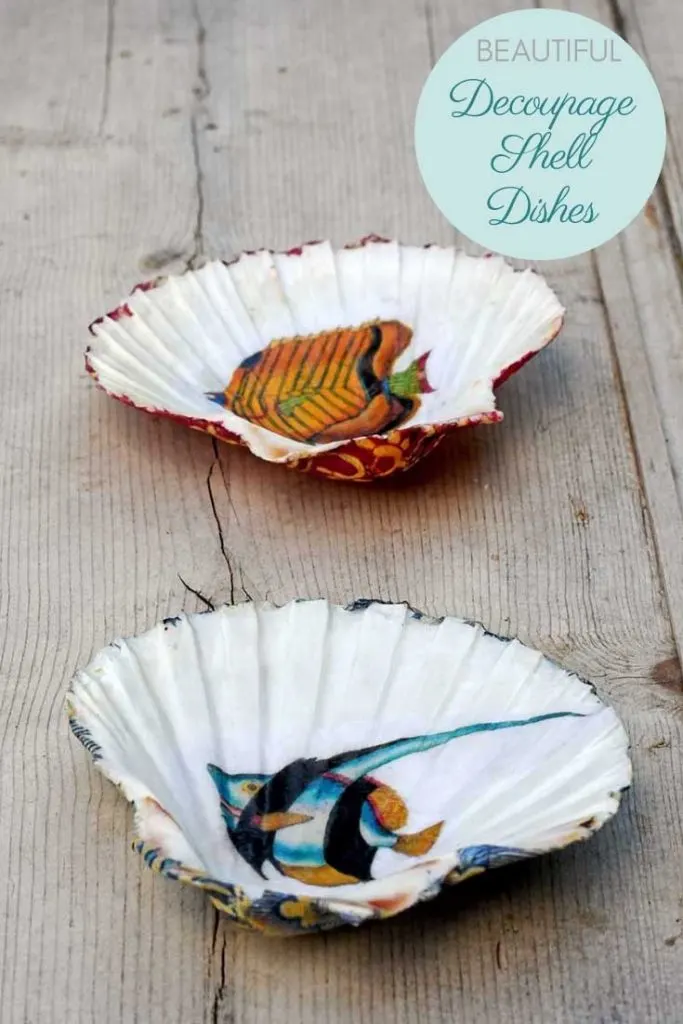
Even though Picture Box Blue is all about beautiful vintage images and maps, I occasionally love to show creative ways to craft with those images. This is my latest craft tutorial: a beautiful decoupage shell dish. Whether you use scallop shells or large oyster shells, this easy craft project is a great way to turn seashells into stunning trinket dishes that make perfect gifts or decorative pieces.
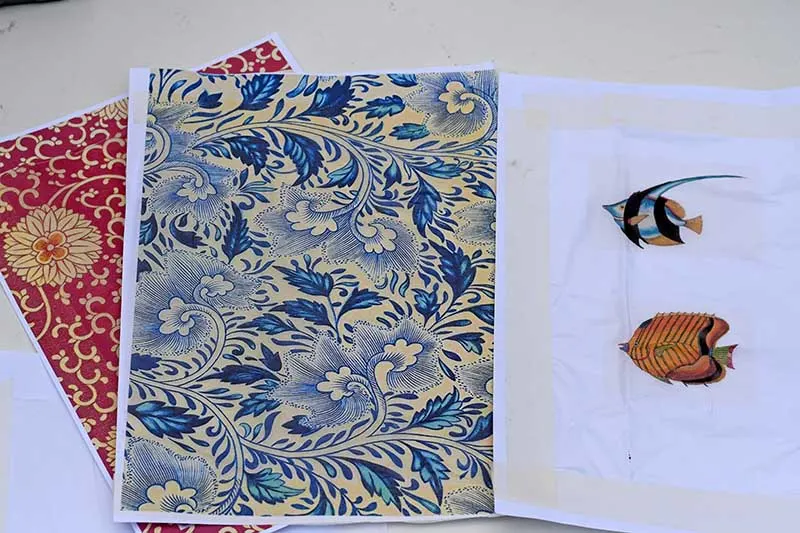
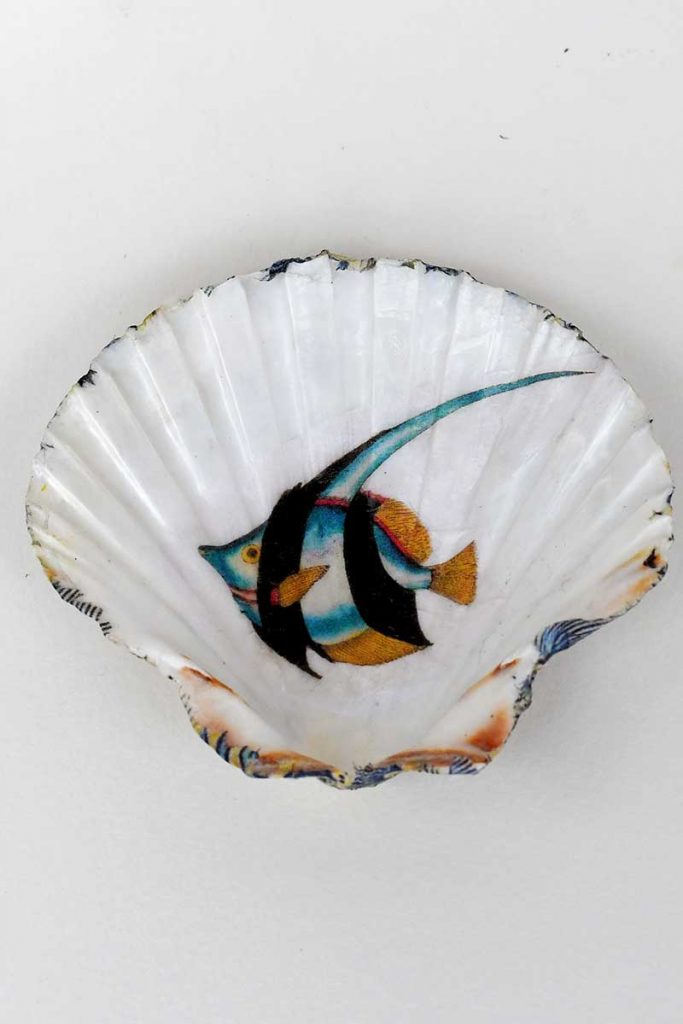
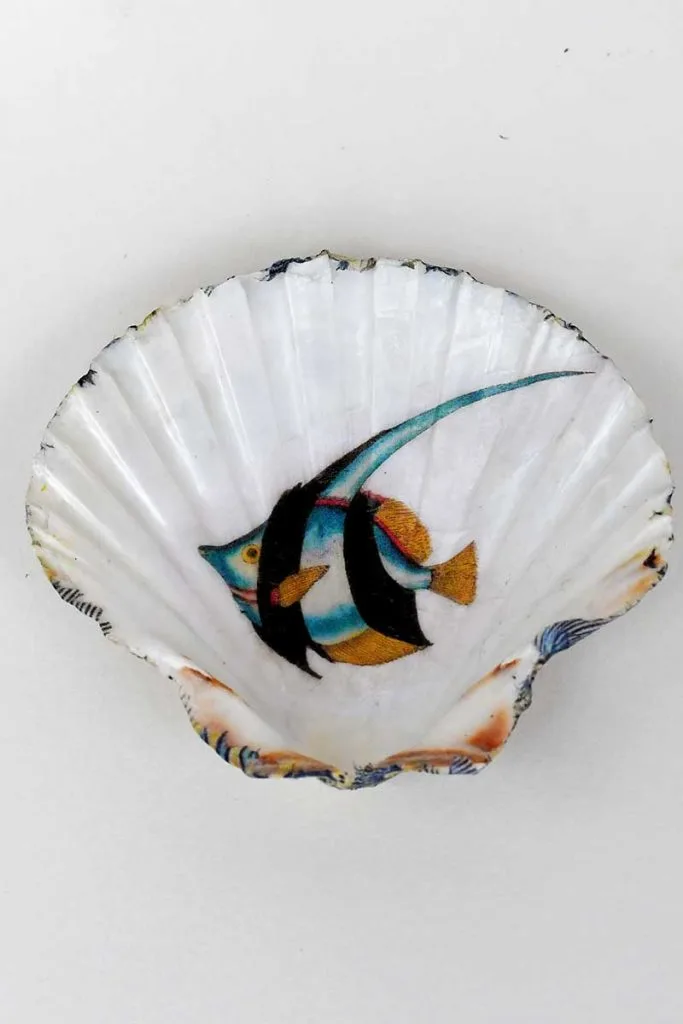
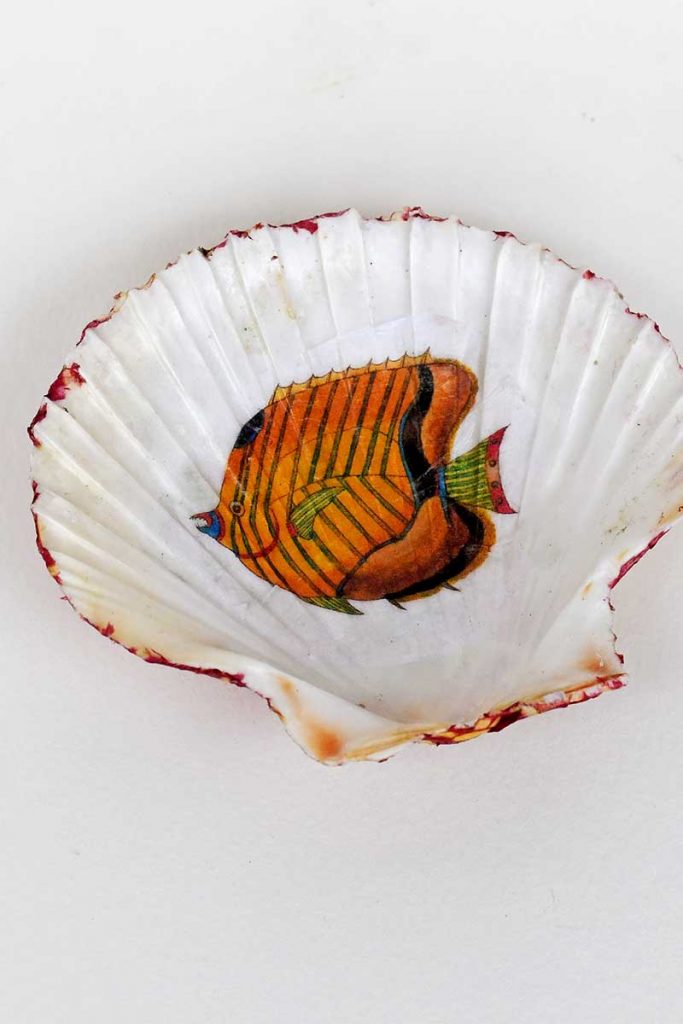
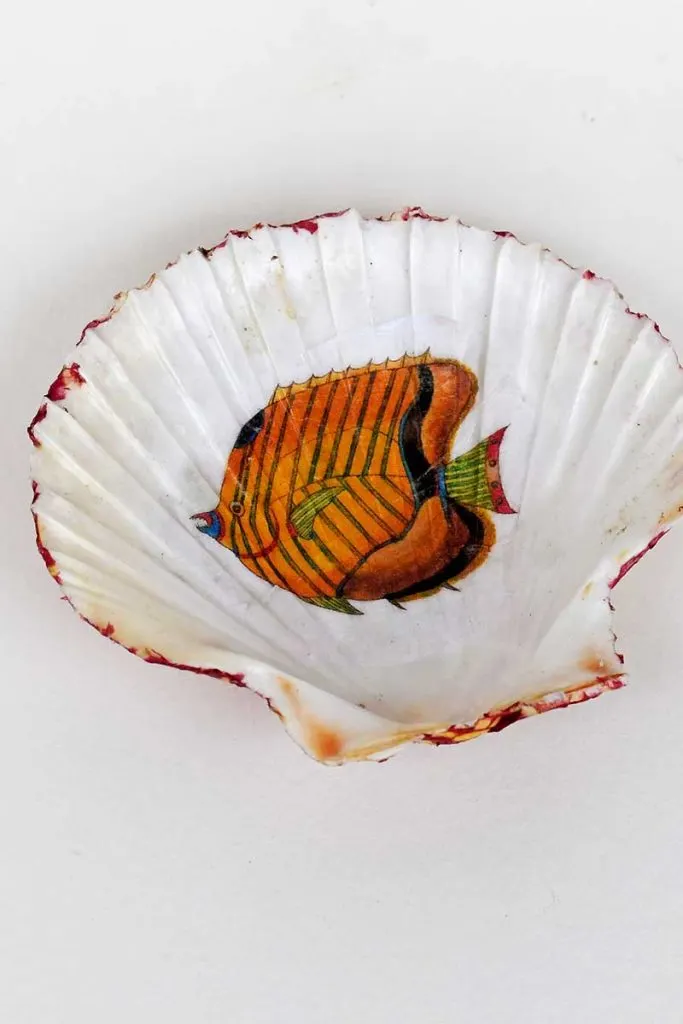
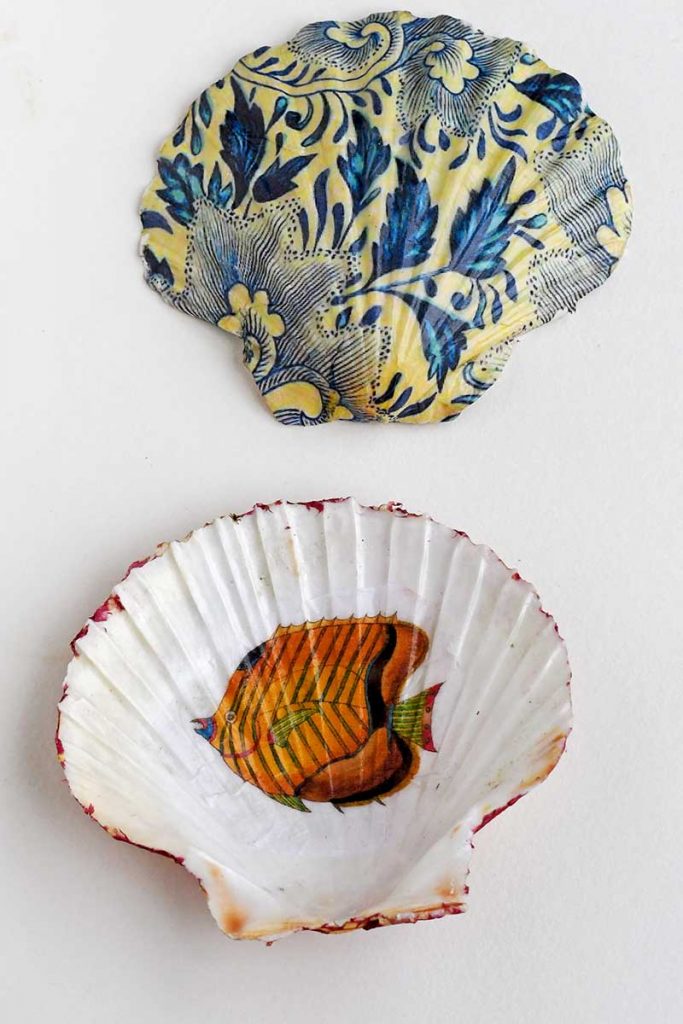
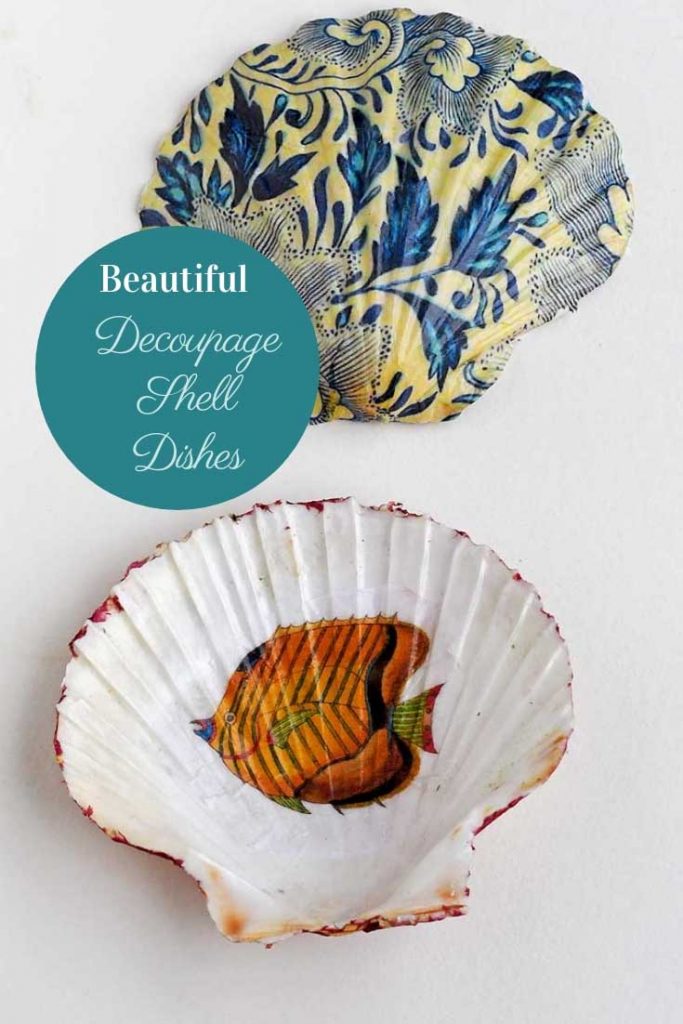
One of my favourite collections in Picture Box Blue is Louis Renard’s beautiful fish paintings. I’ve already hacked an IKEA lamp in my lounge with these stunning pictures. This time, when I was looking for an image to decoupage onto the scallop shells, I knew those fantastical fish would be perfect.
For the outer part of the shells, I wanted to use a pattern reminiscent of fine porcelain. The traditional Chinese pattern collection was perfect for this purpose, adding an elegant touch to the finished pieces. These decoupage seashells are a beautiful way to bring a touch of artistry to your home decor, and the best part is that they are straightforward to make with just a few simple steps.
A Lovely Decoupage Gift Idea
I love how the little shell dishes have turned out, and I think they would make a lovely gift. I have one on my bedside table; I use it to place my rings at night. This project is versatile, whether you’re making jewellery dishes, trinket dishes, or simply enhancing the inside of a shell with decorative paper.
Materials To Decoupage Shell Dish
We participate in the Amazon Services LLC Associates Program, an affiliate advertising program designed to provide a means for us to earn fees by linking to Amazon.com and affiliated sites. As an Amazon Associate, I earn from qualifying purchases.
- Scallop shells—My local supermarket sells a frozen Coquille St Jacques dish. I love the dish, and it is served in large scallop shells. I keep the shells for crafting. If you don’t happen to eat scallops, you can buy the shells online. Large oyster shells would work well too.

- Mod Podge
- White tissue paper and printer paper
- Masking tape
How To Make A Decoupage Shell Dish
Step 1: Wash the shells and ensure they are dust and grease-free.
Step 2: Decide on what images you want to use for the shell dish. There are lots to choose from on Picture Box Blue. I used fish paintings, but the octopus illustrations or Ernst Haeckel’s nature art would have looked good, too. This decoupaged placemat post has a collection of vintage clip art that would work well with this craft.
Step 3: Cut a sheet of tissue paper slightly smaller than printer paper. Then, tape the tissue paper to a sheet of printer paper. Place this paper in your printer and print the images you want to use onto it.

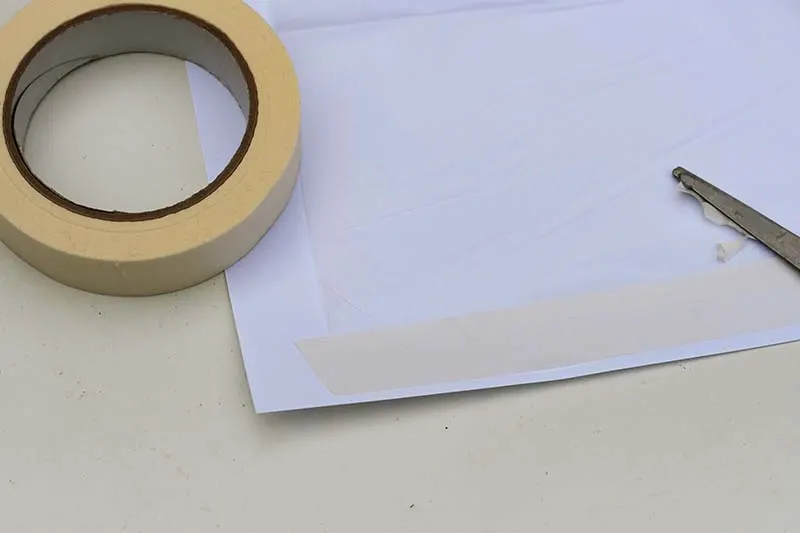
Tissue paper is fragile, making it great for decoupage. Unfortunately, it is too thin to print on directly, so it is taped to a piece of paper. This gives the tissue paper enough strength to pass through the printer.
Paper napkins are also great for decoupage and can be printed using this method. However, when printing, make sure you only use the top ply sheet of a paper napkin.

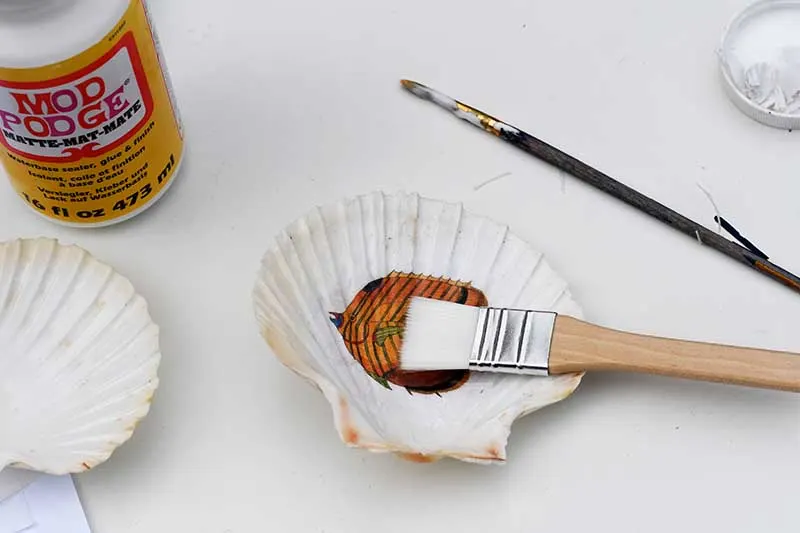
Step 4: Next, carefully cut out the printed tissue paper fish. Apply Mod Podge or other decoupage glue to the inside of shell. Carefully lay the fish onto the glue and then use a clean brush to remove any air bubbles.

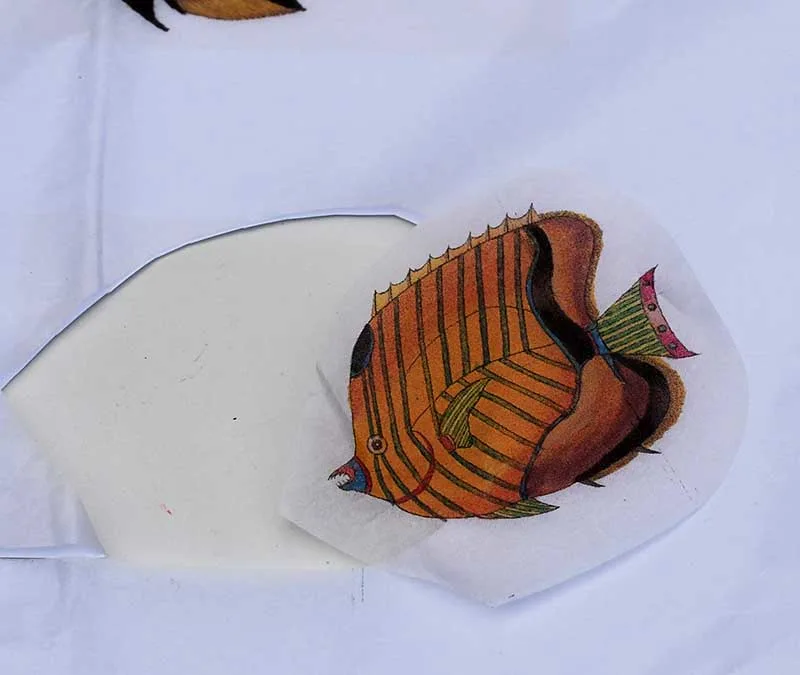

Although the tissue paper is so thin, you can still see the groves in the shell. The fish will look like it has been printed onto the shell dish.
Step 5: Next, turn over the shell and decoupage the outside of the shell dish the same way, applying the glue to the shell and using a brush.
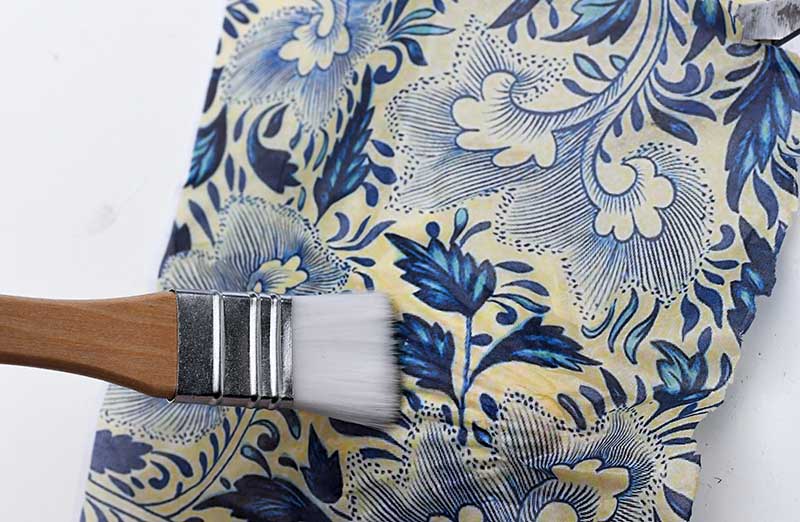

To remove any overlapping tissue, just dampen the paper and carefully tear it away.
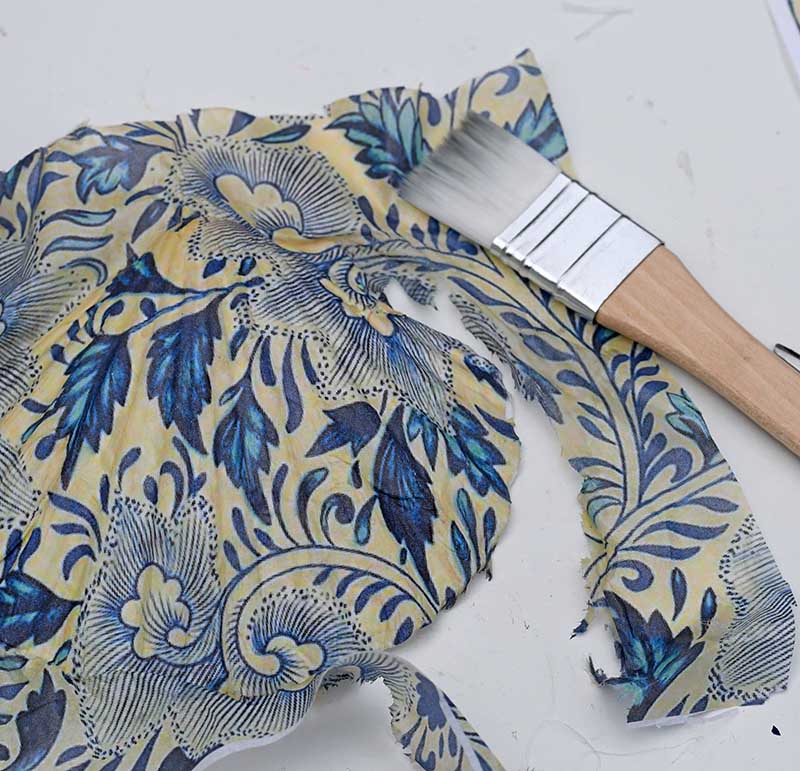
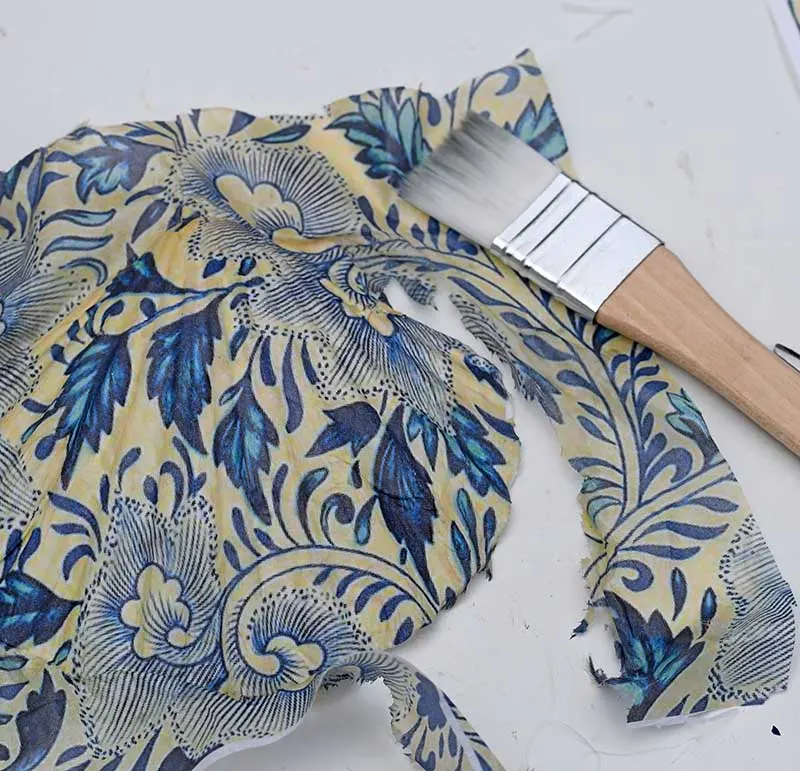
Step 6: Finally, to finish the beautiful shell dish, apply another coat of Mod Podge over the decoupage. The glue will dry clear and will act as a protective varnish. Apply the glue to both sides of the shell.
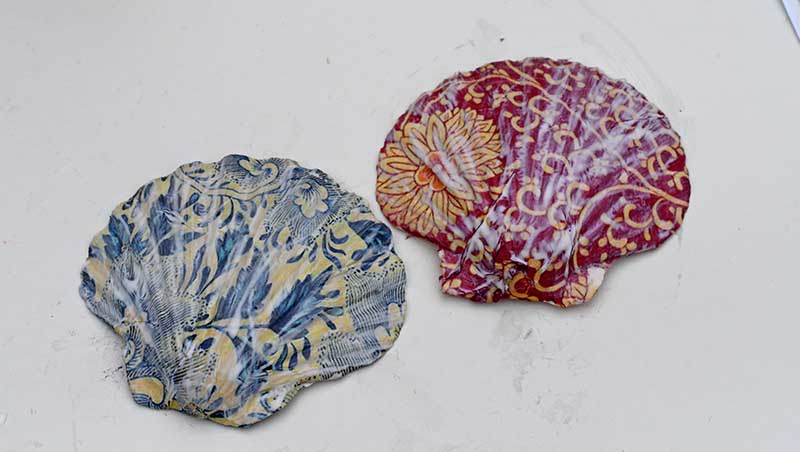
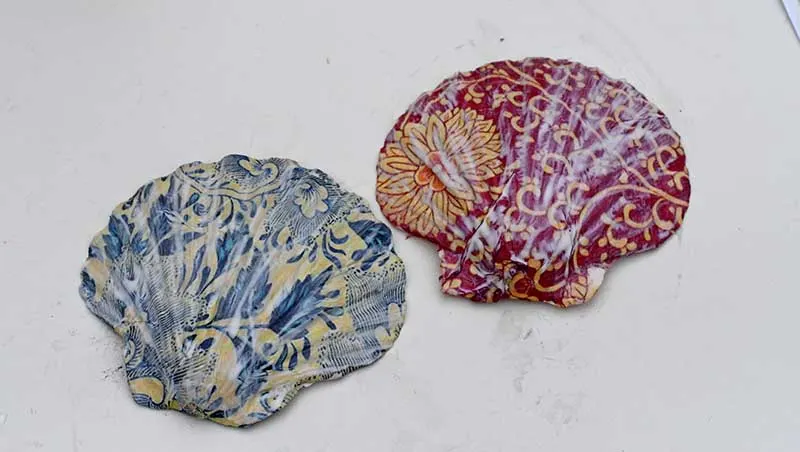
The Finished Shell Dish
FAQ’s On Decoupaging Seashells
1. Can I use different types of sea shells for this decoupage project?
Yes, you can use various seashells, such as scallops, oysters, or clam shells. Larger shells work better for this project as they provide more surface area for the decoupage designs.
2. What kind of paper works best for decoupage?
Decorative paper, cocktail napkins, or thin magazine cutouts are ideal for decoupage. The paper should be thin enough to mould to the shell’s shape easily but sturdy enough to handle the decoupage glue without tearing.
3. How do I prevent air bubbles when decoupaging?
To avoid air bubbles, apply a thin layer of decoupage glue to the shell and carefully press the paper down, smoothing it out from the centre to the edges of the shell. You can use a soft brush or fingers to work out any air bubbles gently.
4. Can I use these decoupage shell dishes for food?
These decoupage shell dishes are meant for decorative purposes only. They are perfect for holding jewellery, trinkets, or as a decorative accent, but they are not food-safe. However, if you seal the shell with a food-safe varnish, you can use them to serve food.
5. Do I need to seal the decoupage shell dishes?
Sealing your decoupage shell dishes with a clear sealant or varnish will protect the design, make the dishes more durable, and add a lovely sheen to the finished product.

Conclusion and Other Related Posts
You could also use the decoupage shell dish as a trinket dish and make shell ornaments. Just use smaller shells and drill a small hole from some ribbon into each one.
With care, you can print the images onto the shells instead of decoupage by following these instructions on how to print on rocks.
If you like this Picture Box Blue craft, you should check out some others on the site.
Or, if you are looking for more seaside-themed images.


You can find more decoupage crafts here.
Invest
Wednesday 3rd of June 2026
Pretty! This has been a really wonderful post. Many thanks for providing these details.
Brenda Guilkey-Jordan
Wednesday 9th of July 2025
It's been very nice watching you share your crafts with the world over the years...thank you...and I hope you never stop with the awesomeness!...
claire
Thursday 10th of July 2025
Thank you so much, that is lovely for you to say.
Finansal Okuryazarlık
Sunday 23rd of February 2025
Keep up the fantastic work and continue to inspire us all!
claire
Tuesday 25th of February 2025
thank you.
36 Amazing Decoupage Ideas You Will To Try - Solar Living Savvy
Thursday 4th of July 2024
[…] image source […]
37 DIY Seashell Crafts That Look Awesome - Craftsy Hacks
Wednesday 20th of October 2021
[…] Source: pictureboxblue.com […]