
Inside is a collection of free vintage still-life prints from the Dutch masters, along with a decoupage tray craft that utilises them.
Flicking through the many interior accounts I follow on Instagram, I’m always fascinated by everyone’s gallery walls. Many gallery walls comprise several pictures and paintings, each framed in a different size. I also notice a trend for still flower images.
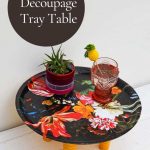
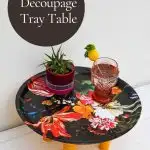
Painted flowers on a dark background seem to be a popular element of these gallery walls. This gave me the idea for an upcycled flower decoupage tray. The tray is featured in the A to Z of clever upcycling ideas.
On my gallery wall in the living room, there is a large old still-life painting of flowers on a dark background. I picked up my painting from my local junk shop very cheaply. It is a copy of some vintage floral still life masters. I haven’t been able to identify which one so far.
Free Antique Still Life Flowers Paintings To Download
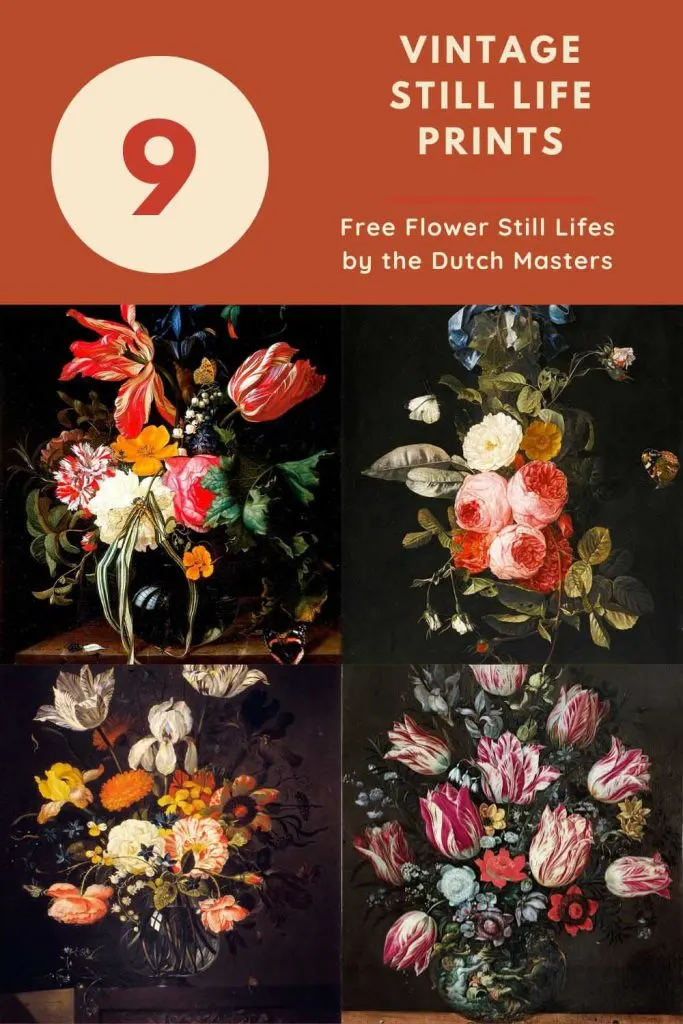
The Dutch Masters of the 17th Century were well known for their excellent floral still-life paintings. These were painted on a dark background, often with other objects in the paintings, such as insects and animals.
I have curated a collection of vintage floral still-life paintings that are available for free download.
You can download and print out these still-life flower paintings to frame your gallery wall. However, these images are also great for flower decoupage crafts and DIYs.
A craft tutorial follows the collection of free vintage floral still lifes. It shows how to make a pretty upcycled flower decoupage tray table using one of these floral still-life paintings.

Click on the title above the image to download the painting you want for your gallery wall or flower decoupage. The download will be of a higher resolution.

We participate in the Amazon Services LLC Associates Program, an affiliate advertising program designed to provide a means for us to earn fees by linking to Amazon.com and affiliated sites. As an Amazon Associate, I earn from qualifying purchases.
The Still Life Flowers Paintings
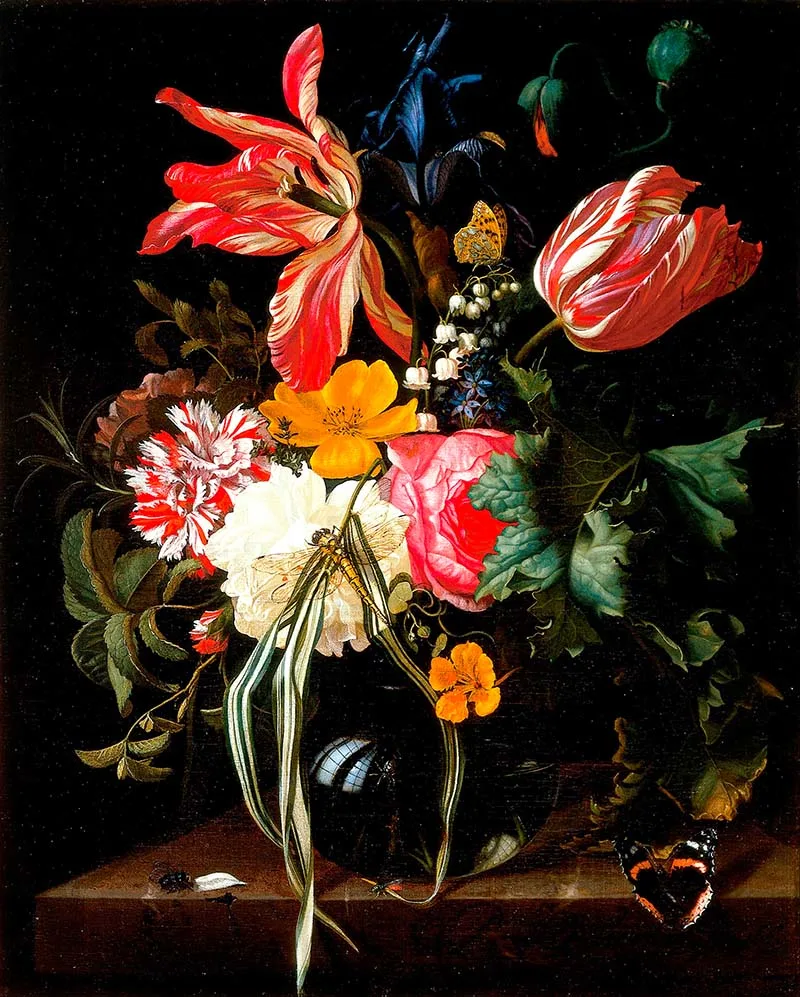
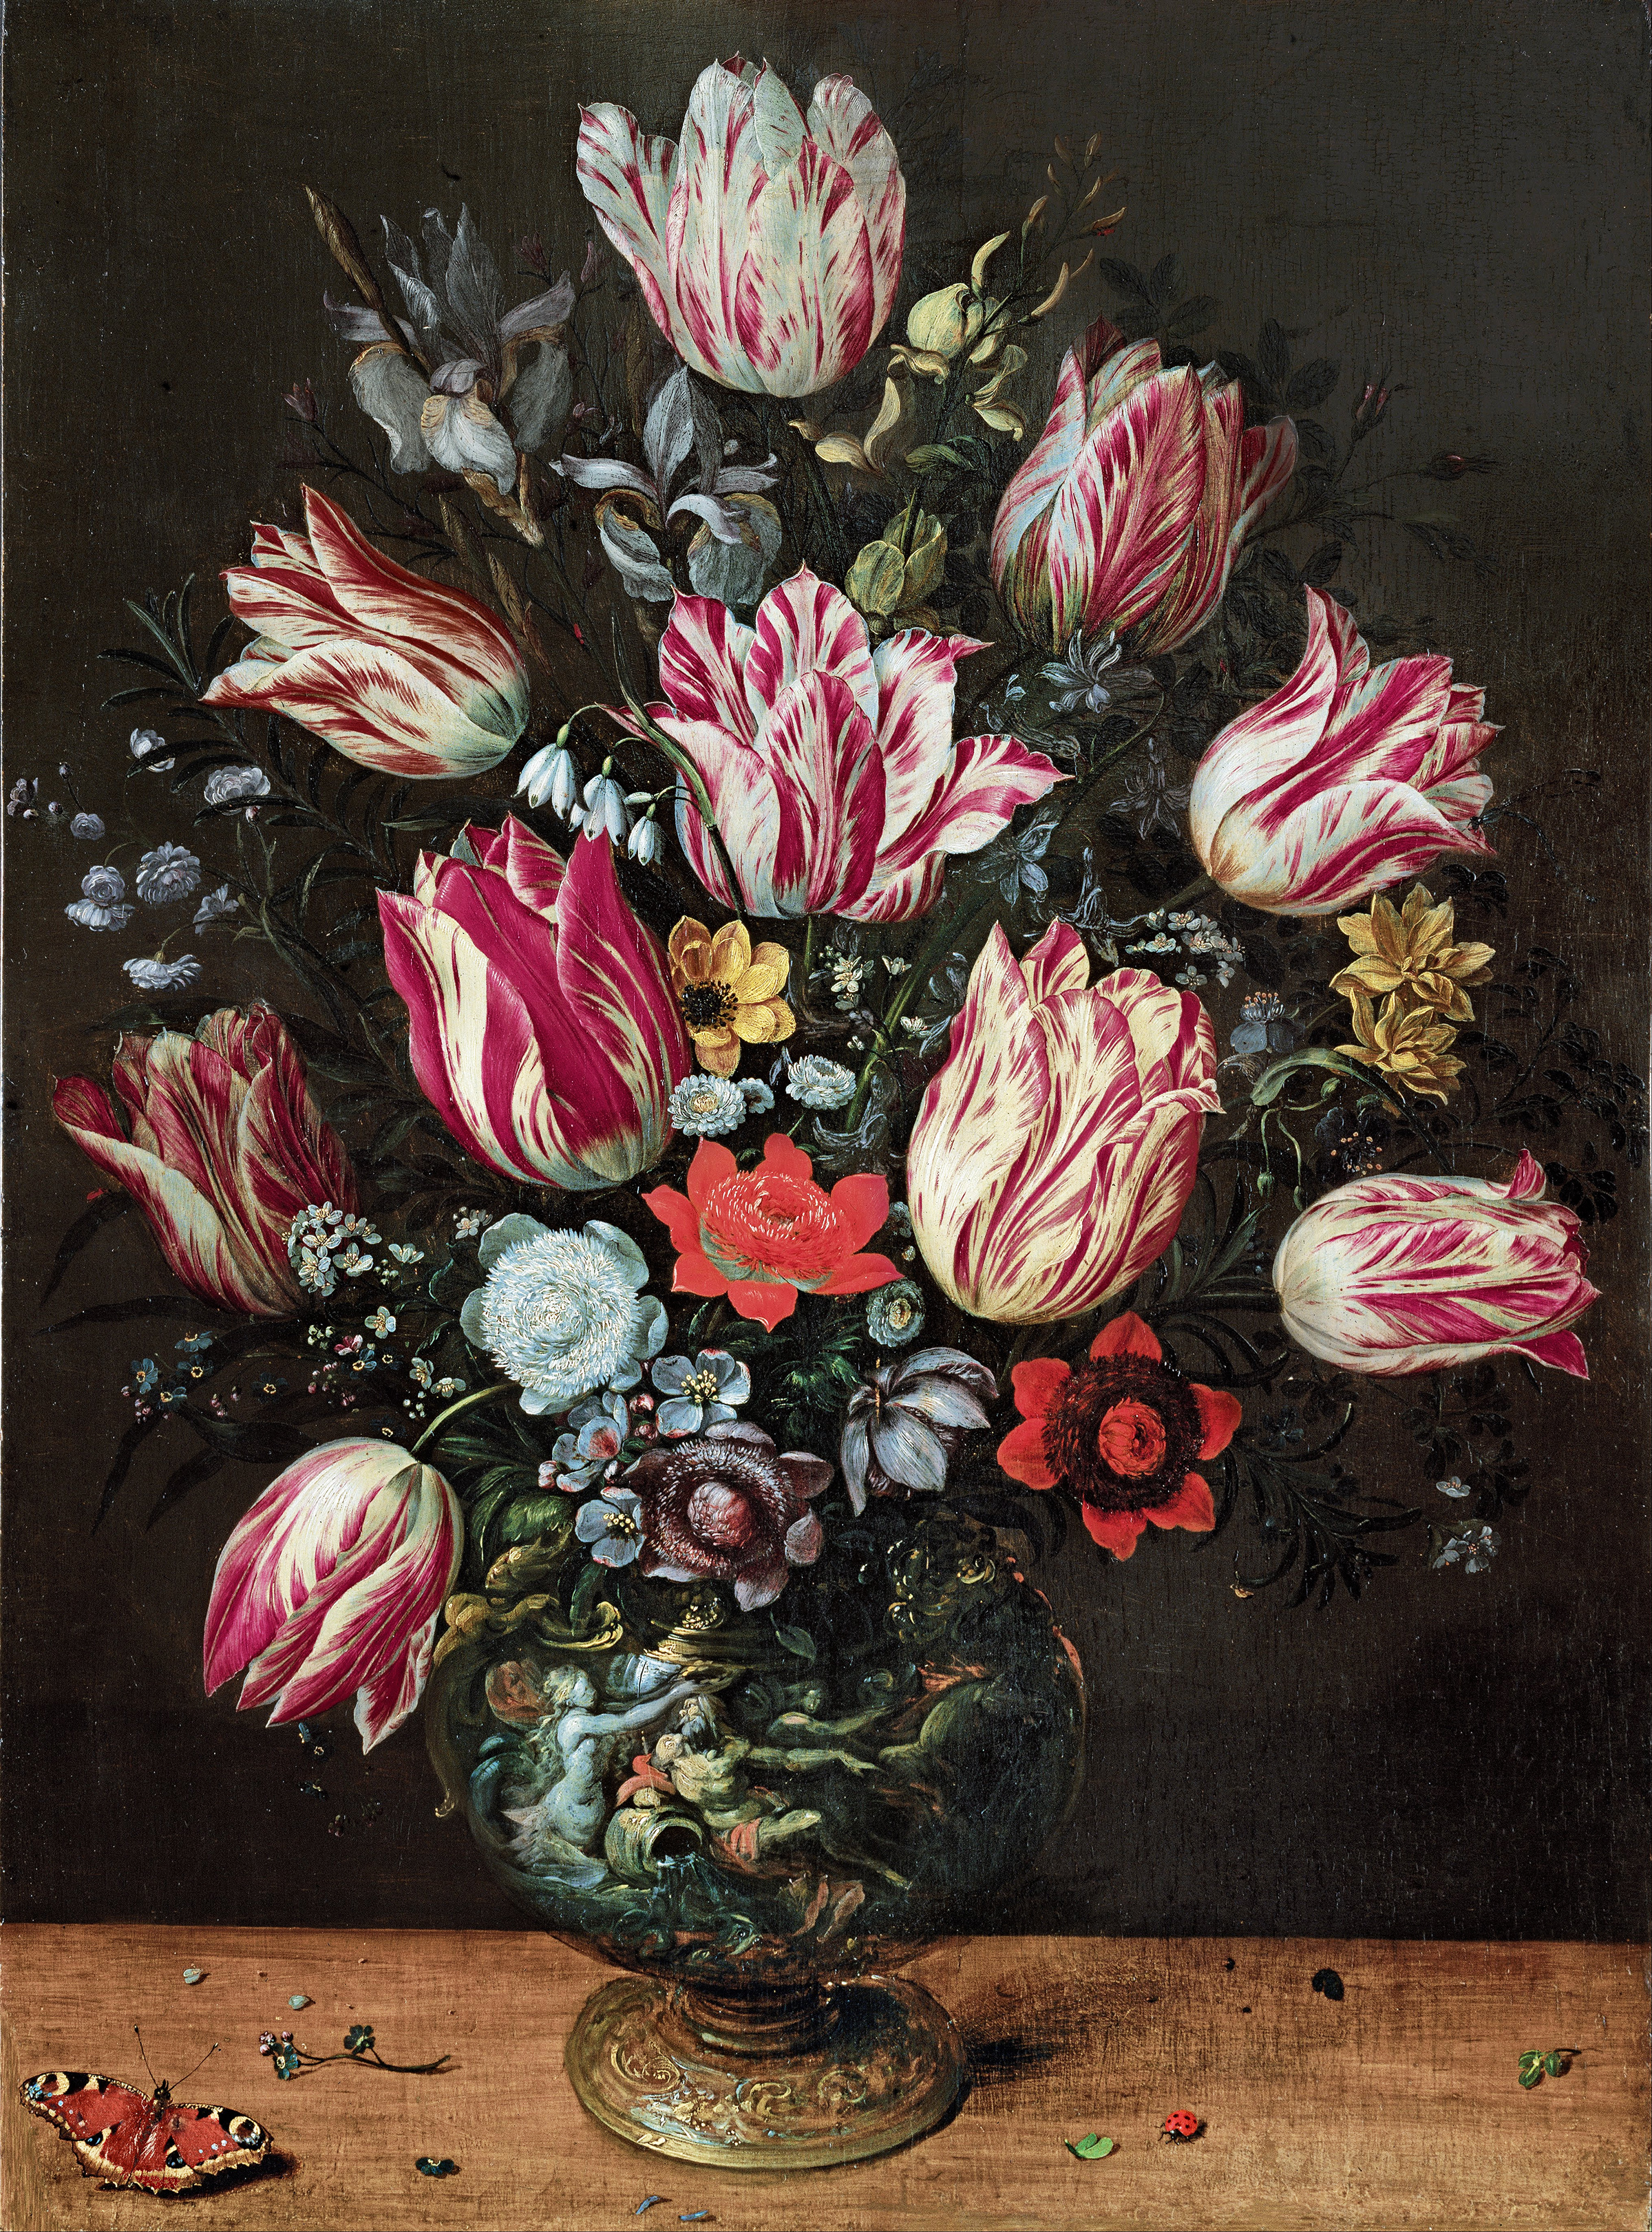
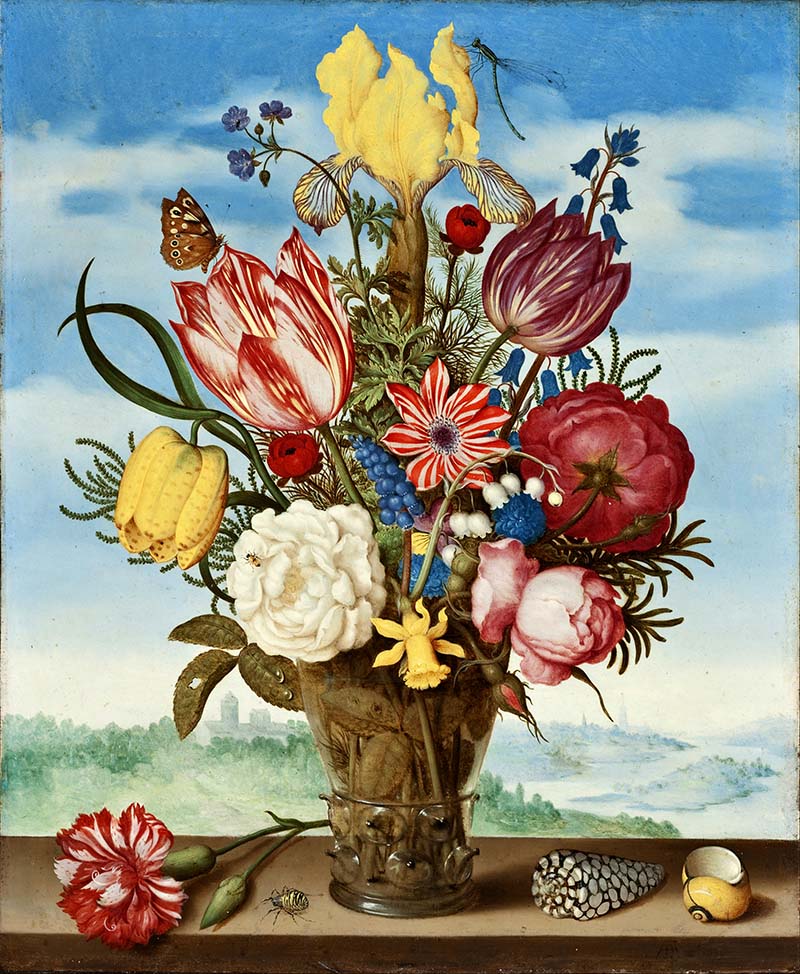
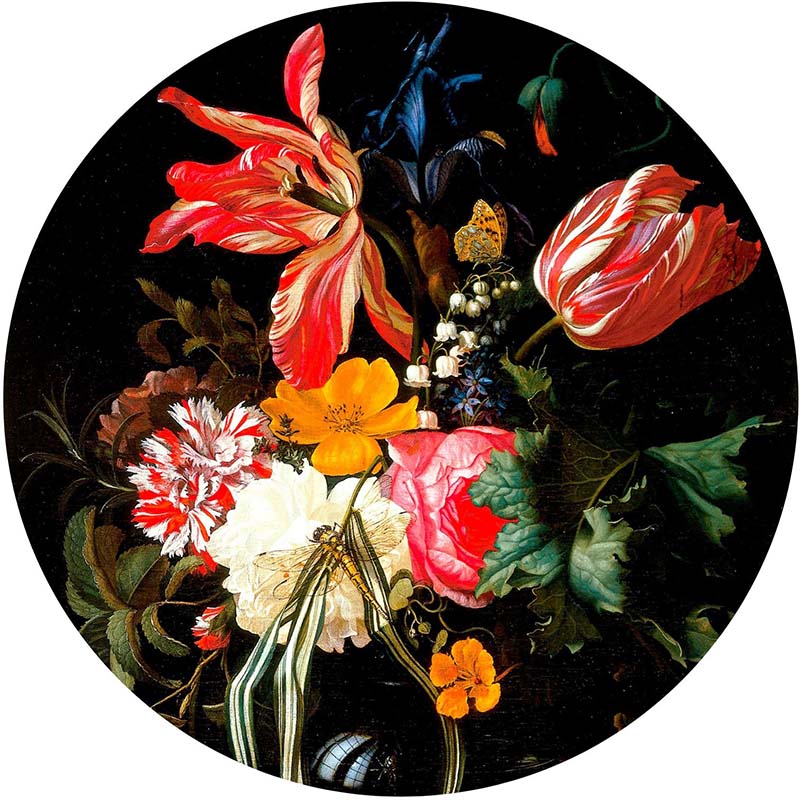
1. Maria van Oosterwijck – Flower Still Life (flower decoupage image)
Maria van Oosterwijck was a Dutch Golden Age painter, specialising in richly detailed flower paintings and other still lifes set against dark backgrounds. The floral still life was painted in 1669, and the image I used for my flower decoupage tray (tutorial at the end of the post).
I picked this painting for the flower decoupage because I loved the brightly coloured flowers and the extra detail of the insects within this still life.

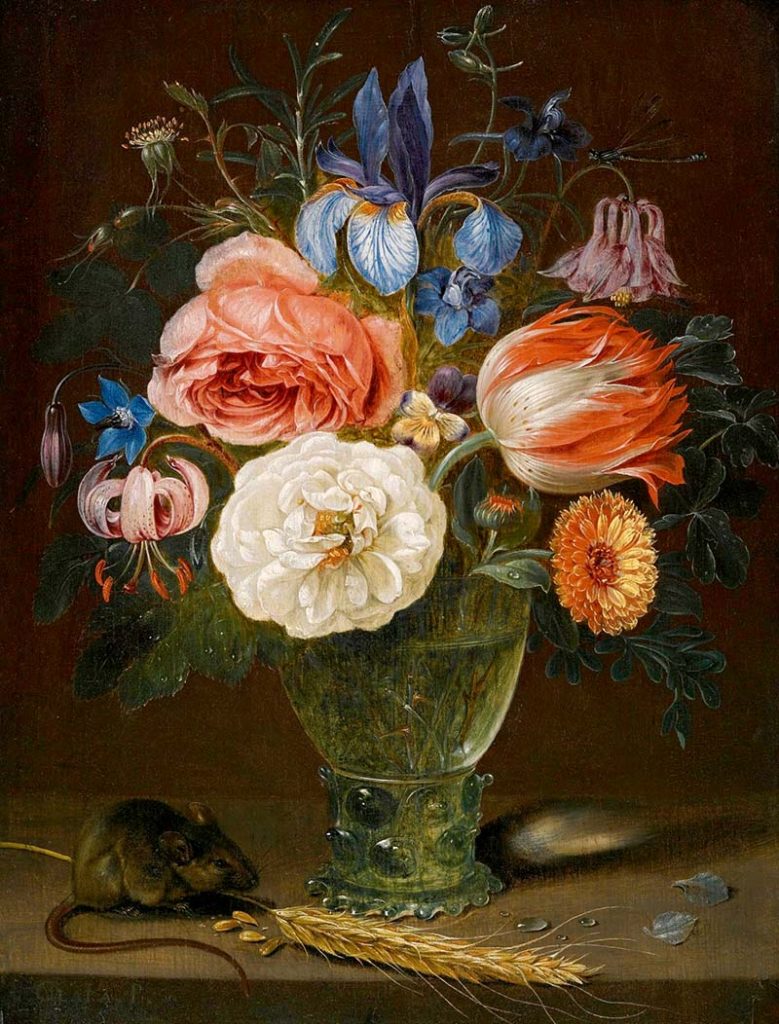
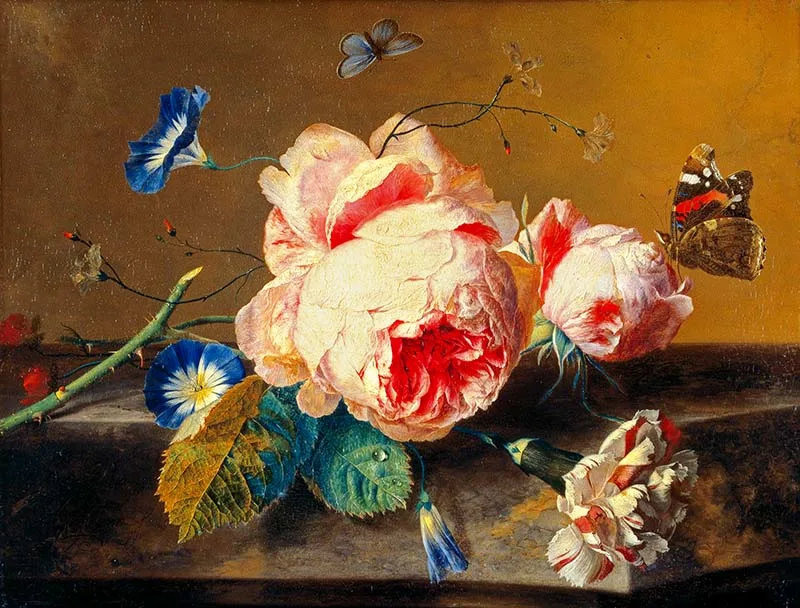
2. Clara Peeters – A Still Life Of Flowers In a Roemer
Another Dutch master still-life. Clara Peeters was probably the most famous Flemish woman of the 17th century. I love the added interest of the field mouse and ear of wheat in this painting. The glass vase of flowers is also stunning.

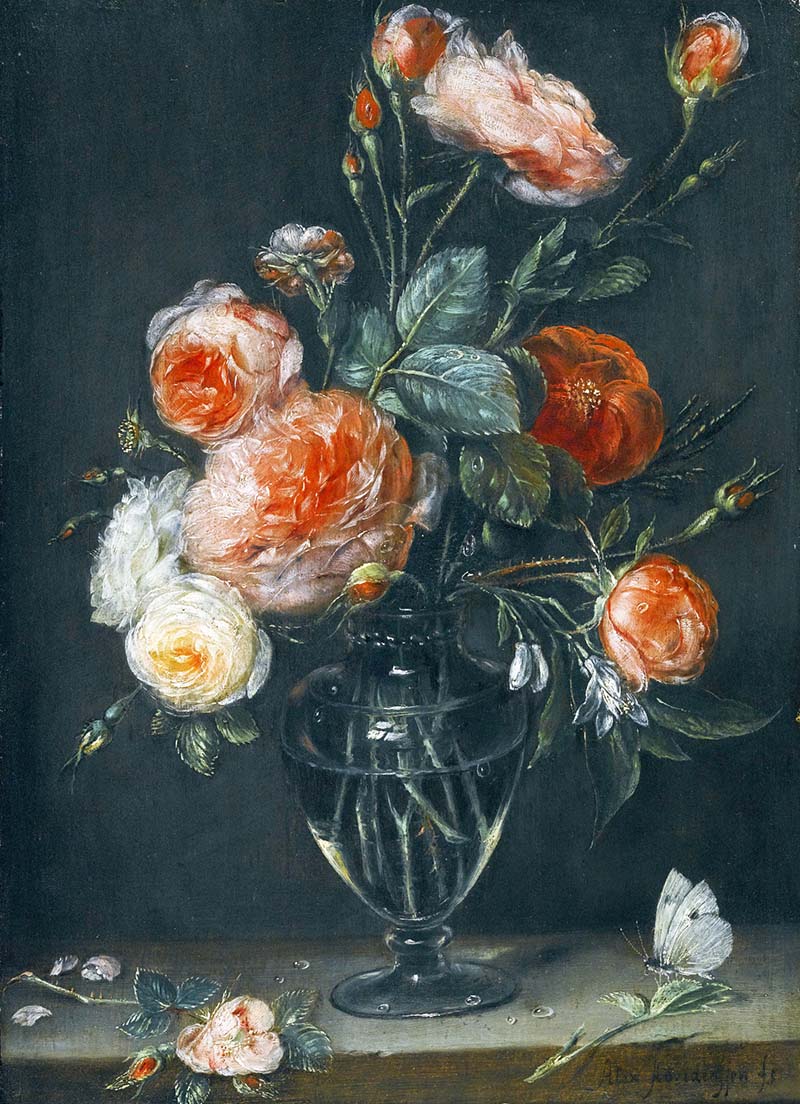
3. Alexander Adriaenssen – Still Life of Roses
Still life of roses in a glass jar on a stone ledge with a butterfly by Alexander Adriaenssen. Alexander Adriaenssen was a Flemish Baroque painter born in Antwerp in 1587. He was particularly well known for his still lifes of fish and game pieces, but he also sometimes painted flowers.

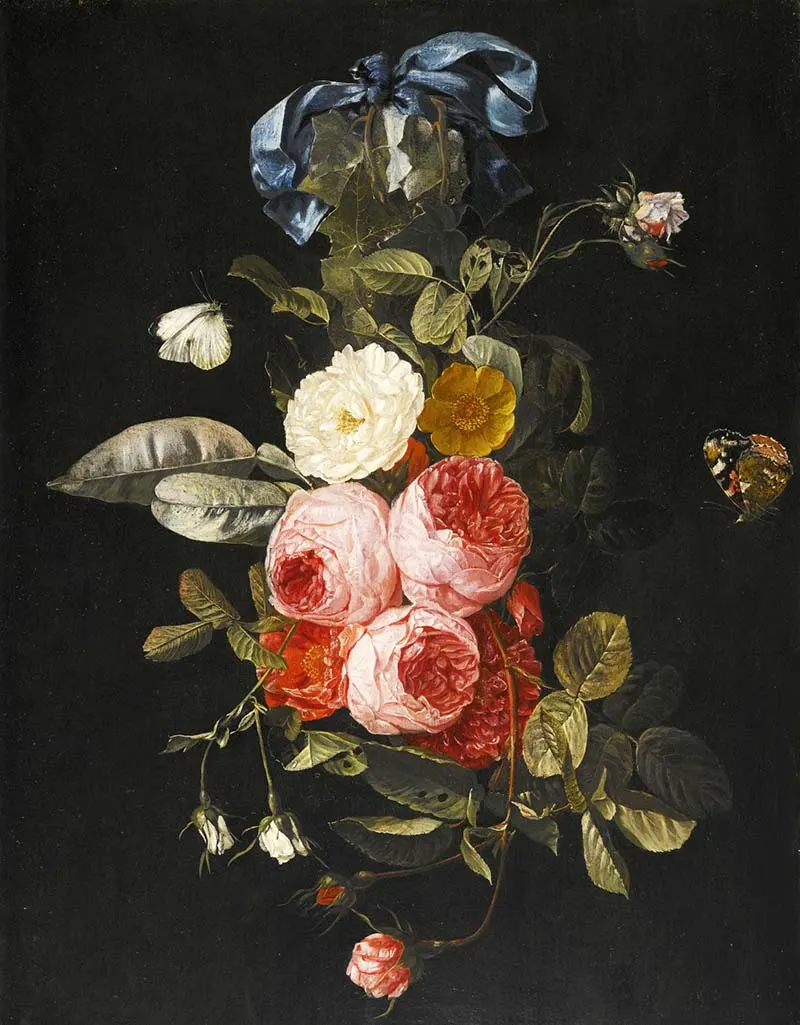
4. Carstian Luyckx – Still life of pink, yellow and white roses
Carstian Luyckx, another Flemish 17th-century painter from Antwerp, is famed for his still lifes. Still-life of pink, yellow and white roses hanging from a blue ribbon with a red admiral and a cabbage white.

5. Andries Daniels – Vase with Tulips
Still life of a vase with tulips. Andries Daniels, a 17th-century Antwerp painter known for his still lifes. In particular, still lifes of flowers in flamboyant vases, as well as flower garlands.

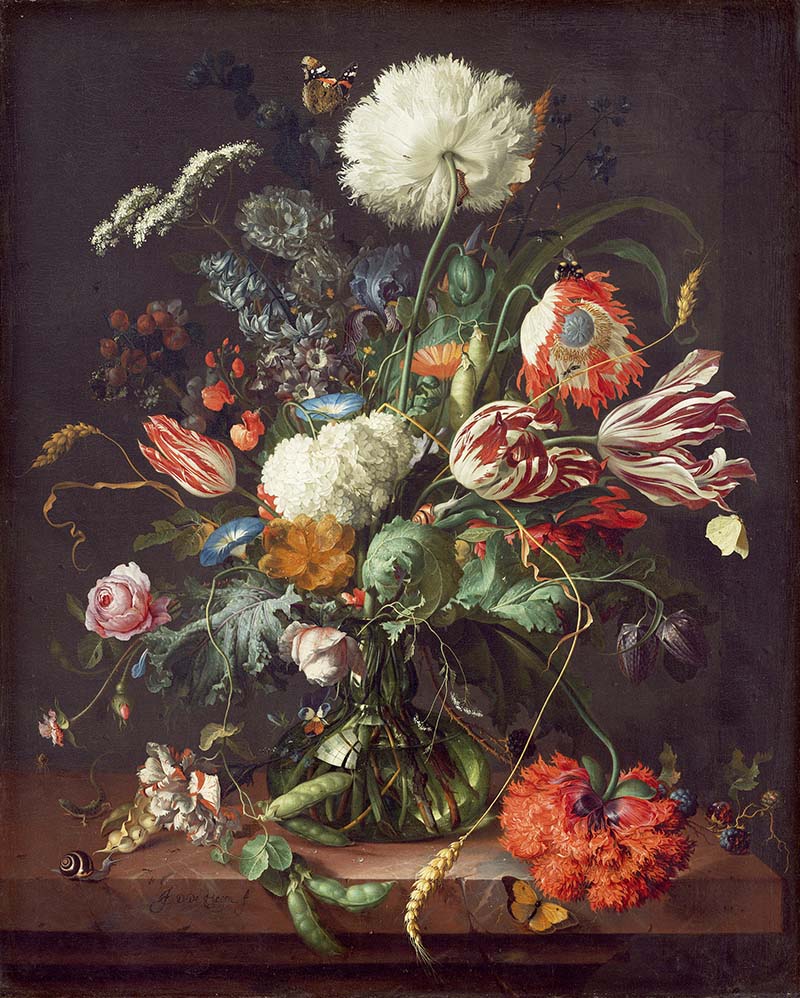
6. Jan Davidsz de Heem – Vase of Flowers
Jan Davidsz de Heem is a major representative of Dutch and Flemish Baroque paintings. Vase of flowers 1645.

7. Ambrosius Bosschaert – Bouquet on a Ledge
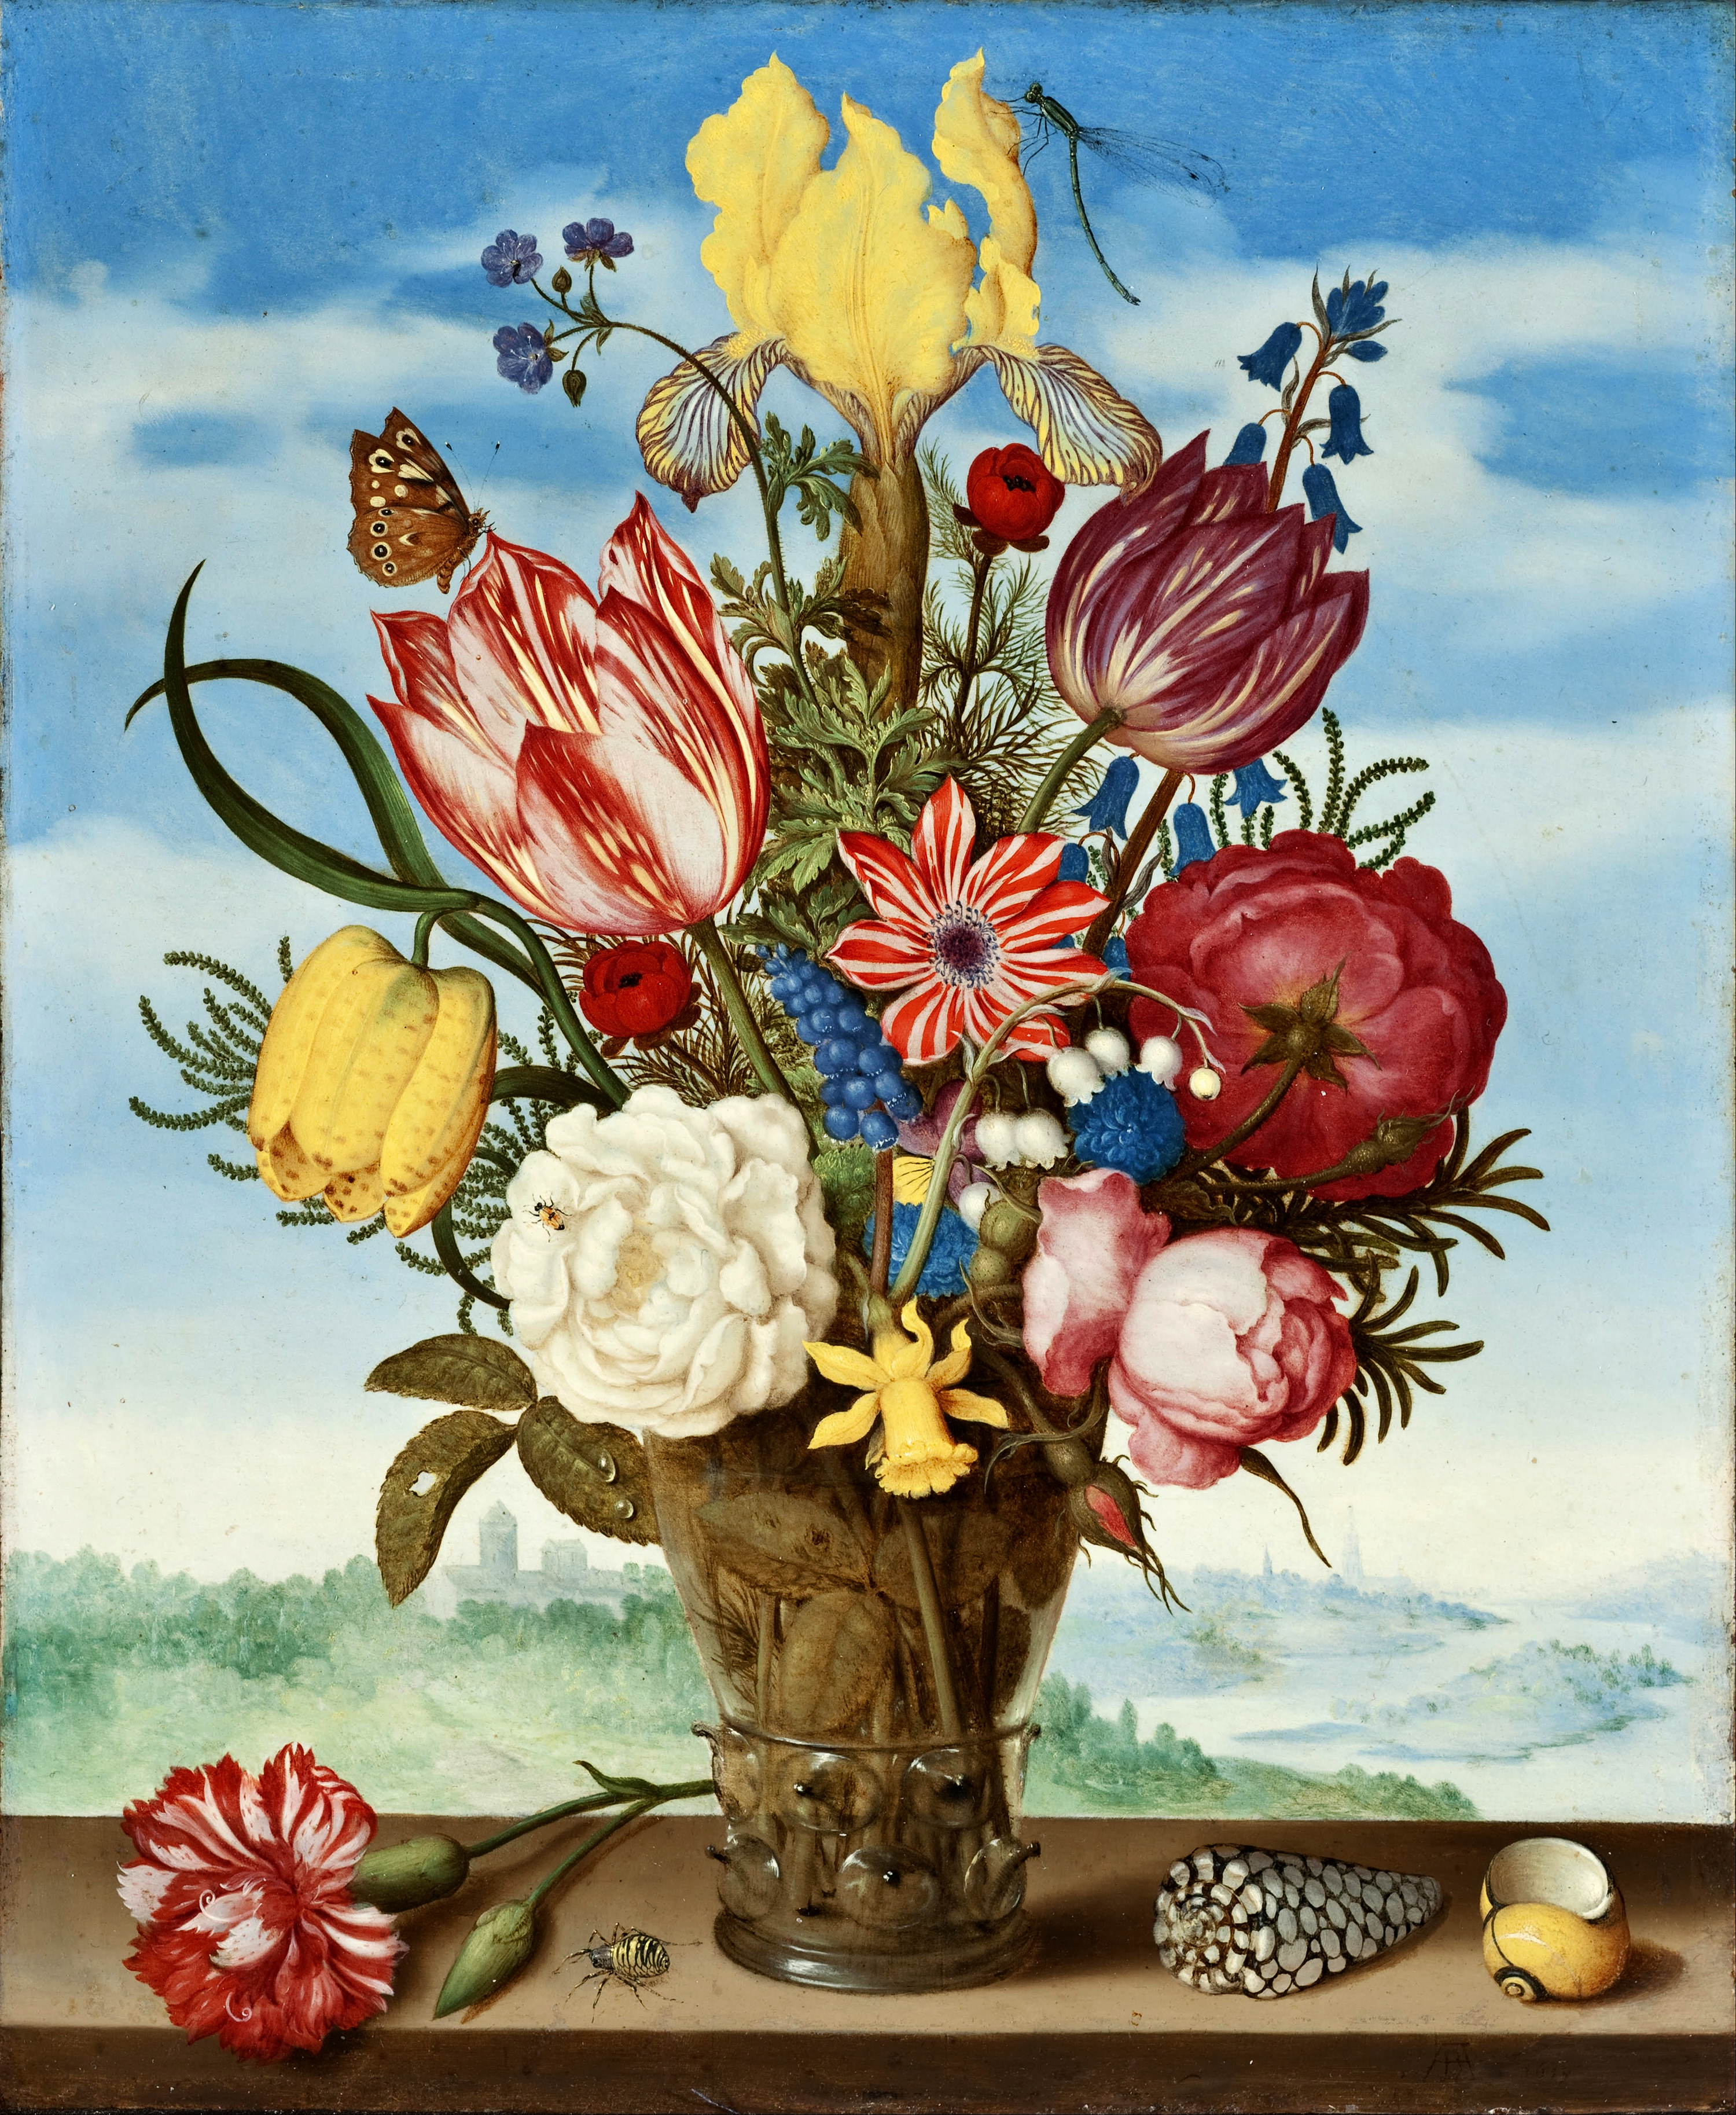
Ambrosius Bosschaert was a Dutch Golden Age painter from Antwerp. This painting, with its bright background, stands out from the other 17th-century Dutch floral still-life paintings.

8. Jan van Huijsum – Flower Still Life
I love this Dutch floral still life as the flowers aren’t in a vase, and the butterfly is a beautiful addition to the painting.

9. Marrel, Jacob – Still-Life with Flowers
Jacob Marrel was a German still-life painter active in Utrecht during the Dutch Golden Age. The still life with flowers was painted in 1650.

If you liked the still flower paintings with insects, check out these stunning Maria Sibylla Merian prints. And the calligraphy prints of Joris Hoefnagel, who greatly influenced the work of the Dutch Masters.
The Dutch masters also influenced Martin Gerlach with his vintage plant art book. There is also a wonderful collection of vintage flower bouquet paintings, one for each month of the year, on the blog to download.
Tutorial For An Upcycled Flowers Decoupage Tray Table
What You Need For Flowers Decoupage Tray
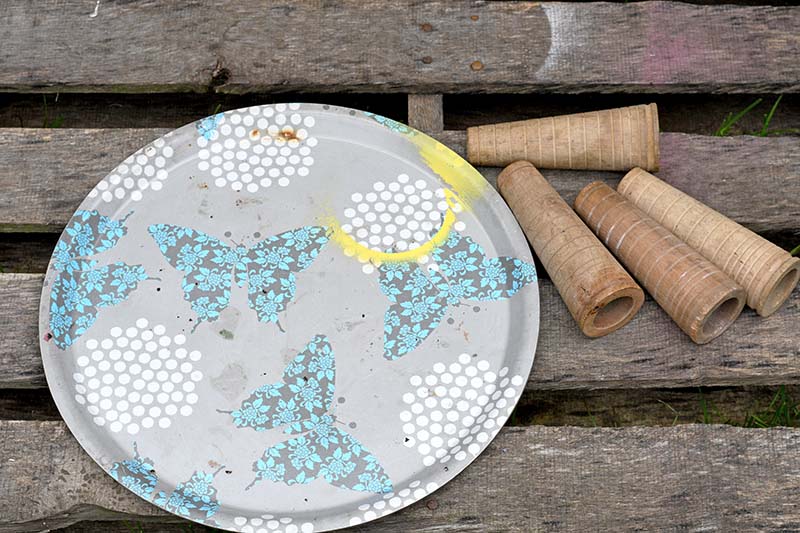
- Old round tray – the one I used was 39 cm in diameter
- Legs for the tray table – I used some extra-large old wooden thread spools
- Flower decoupage printout – you can download the one I used here.
- Mod Podge – decoupage glue
- Foam brushes
- Acrylic varnish sealer
- Spray paint
- Gorilla Glue
How To Make A Flower Decoupage Tray Table
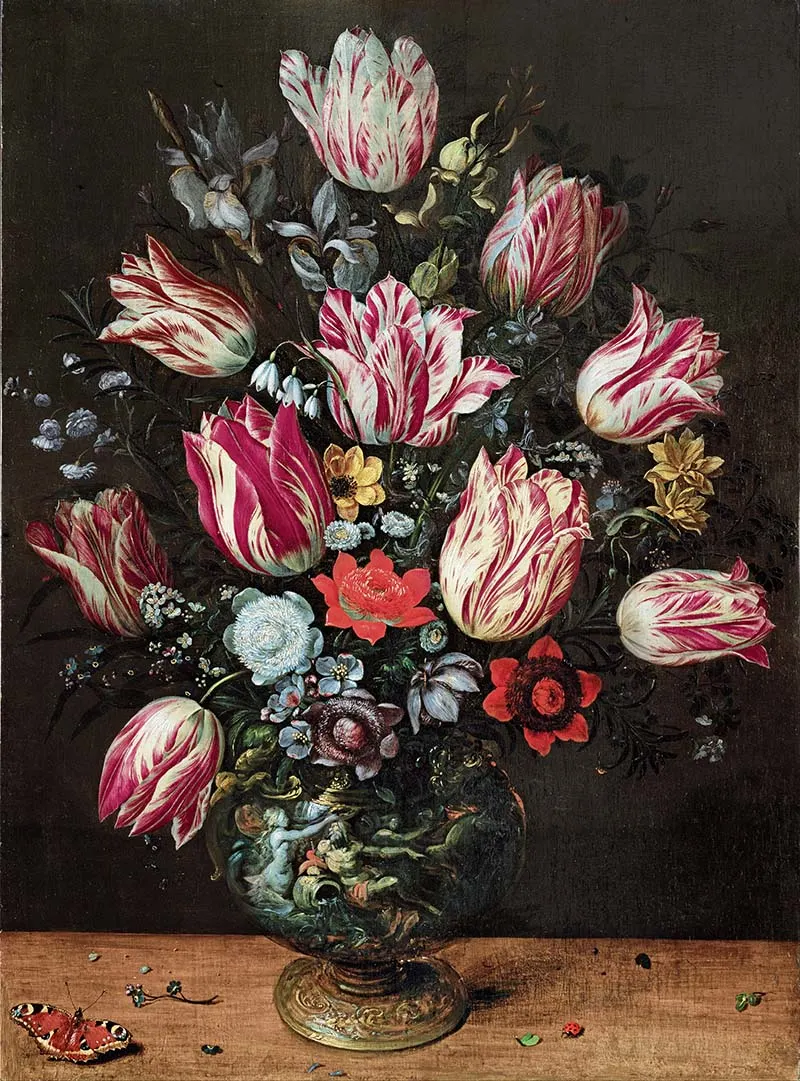
Step 1: From all the Dutch master still life images above, I chose the first one. That was the Maria van Oosterwijck Flower Still Life. I uploaded the image into Canva (a free image software program).
In Canva, I chose a canvas slightly bigger than my tray (40 cm). I then added a circular frame from the elements menu. I sized the frame to fit the whole canvas. Then I dragged and dropped the uploaded floral image into the frame. I then downloaded and printed the image for the flower decoupage.
You can use Canva to create a round image for decoupage, using any of the floral images above to any size you need.
My home printer doesn’t print on paper large enough for a 40 cm round image. I just got my local print shop to print out the image for me. The great thing about using a print shop is that they typically utilise laser printers. With laser printers, the ink won’t smudge when applying sealer. Whereas sometimes, with inkjet printers, the ink will smudge; this can be remedied with artist fixative (or hairspray).
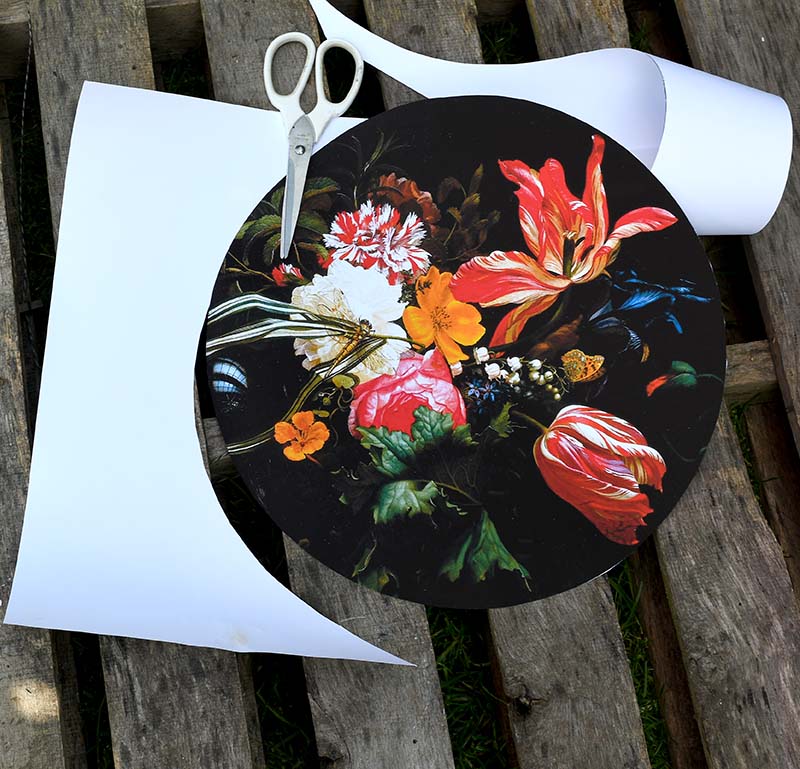
Download the round flowers decoupage image here.
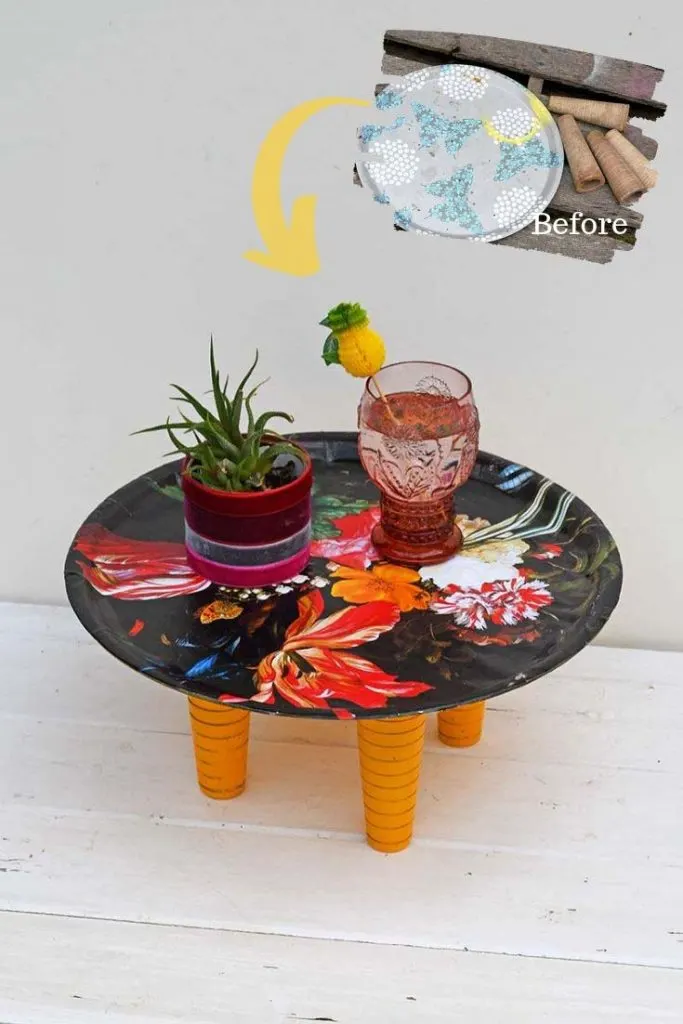
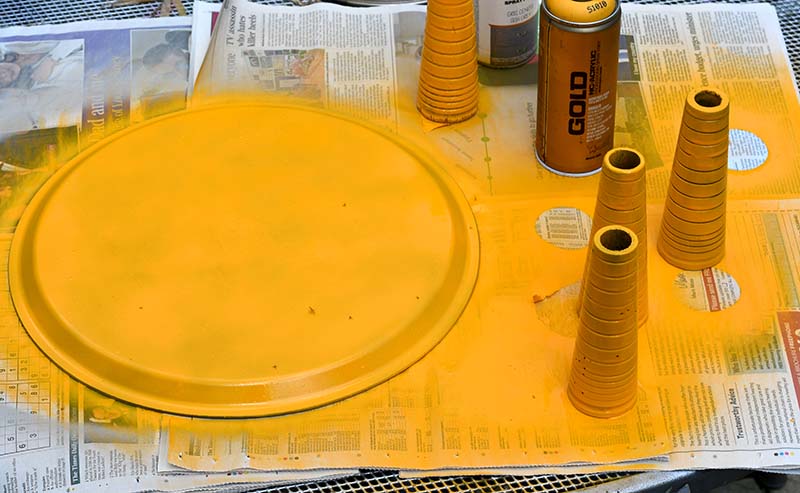
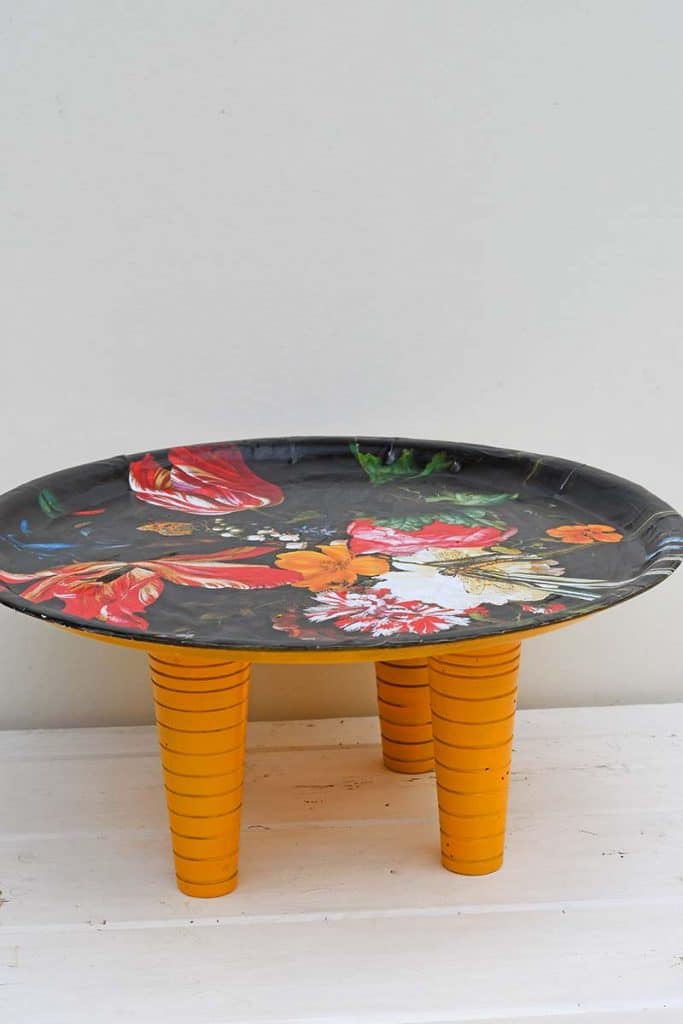
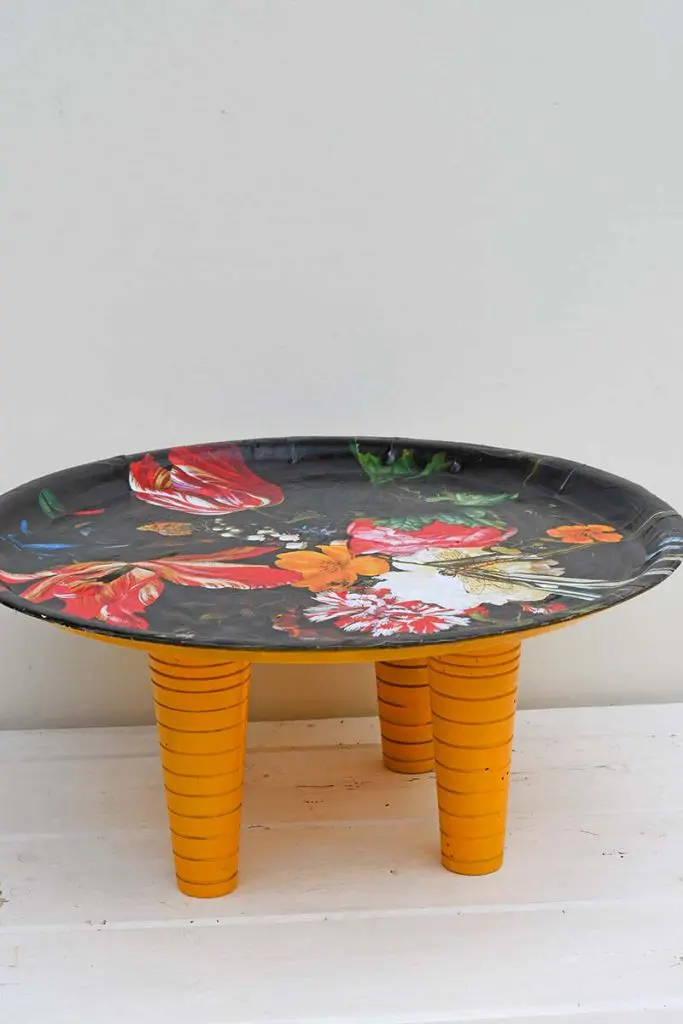
Step 2: Using bright yellow paint, I spray-painted the old round tray and legs. It doesn’t matter what colour you paint the top of the tray, as the flowers’ decoupage will cover this up.

Step 3: Next, I carefully cut out the round floral design. The image was slightly bigger than the tray. It is easier to work with a slightly larger image when decoupaging on the round and trimming it later.

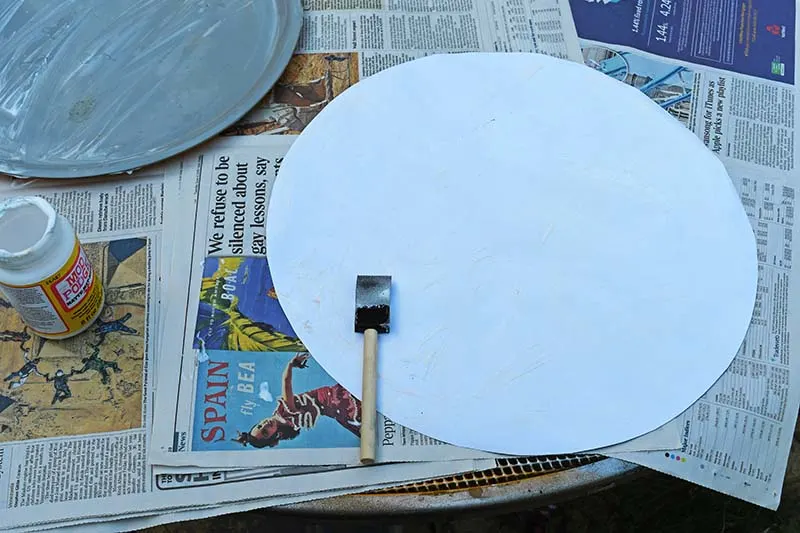
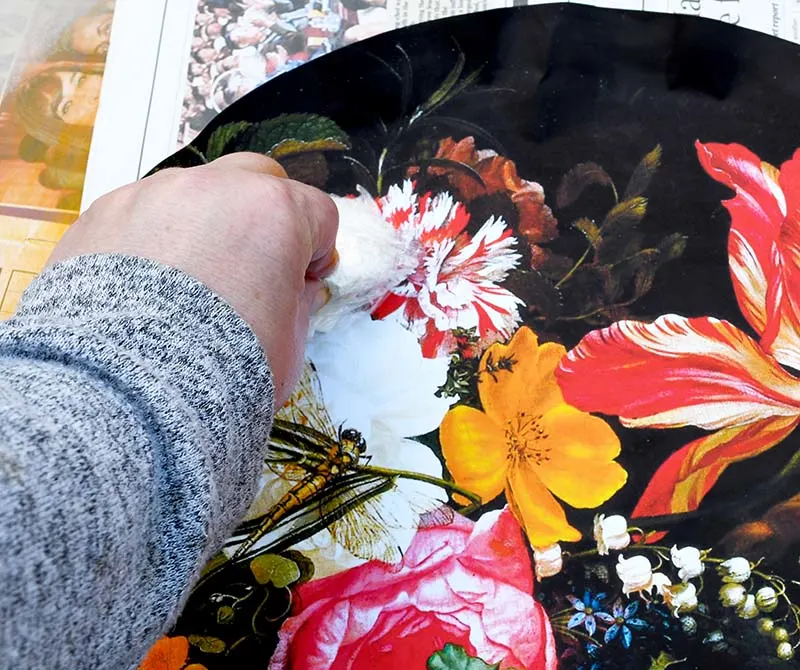
Step 4: Using a foam brush, cover both the top of the tray and the back of the flower decoupage image with Mod Podge. Ensure that you cover all surfaces, especially the edges.

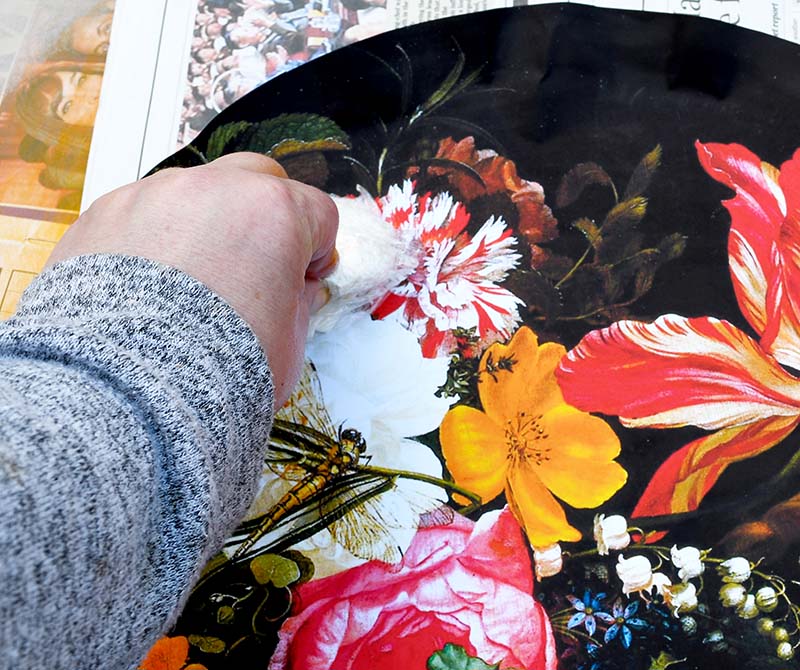
Step 5: Carefully place the flower decoupage image on the tray. Screw up a kitchen towel or a paper napkin into a ball, and then cover it with plastic wrap. Use this ball to press the image down onto the tray and squeeze out the bubbles to the edge of the tray, where they can escape.
The tray I used had a slight lip. I found that if I snipped the floral image every couple of inches around the edge, it was easier to lay the image flat to the tray.


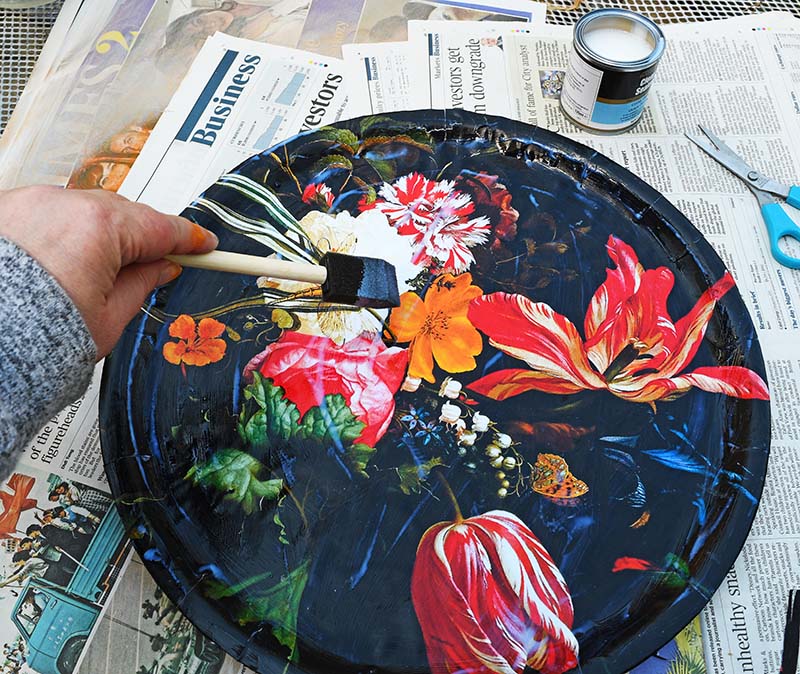
Step 6: Once the decoupage glue has dried. Turn over the tray and cut away any overhanging paper using a craft knife. I covered the tray with a varnish sealer to protect it from spills.

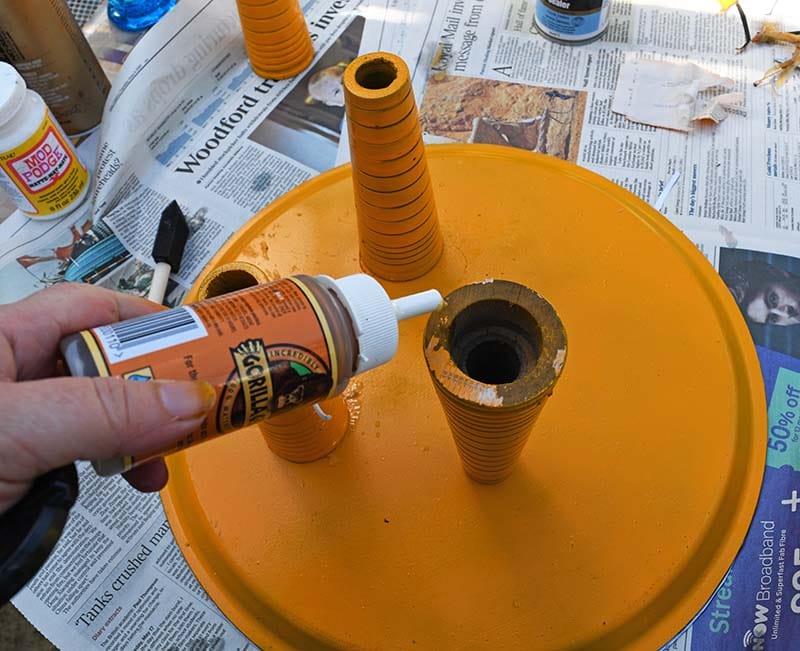
Step 7: Finally, attach the legs to the tray. I used Gorilla Glue for this. To use the glue, I dampened both the top of each leg and the underside of the tray. A small amount of glue was added to the top of the leg before placing it on the tray.
Whilst the glue is drying, weigh down the tray to help with the seal. The Gorilla Glue forms a small foam that works well and provides a strong adhesive.

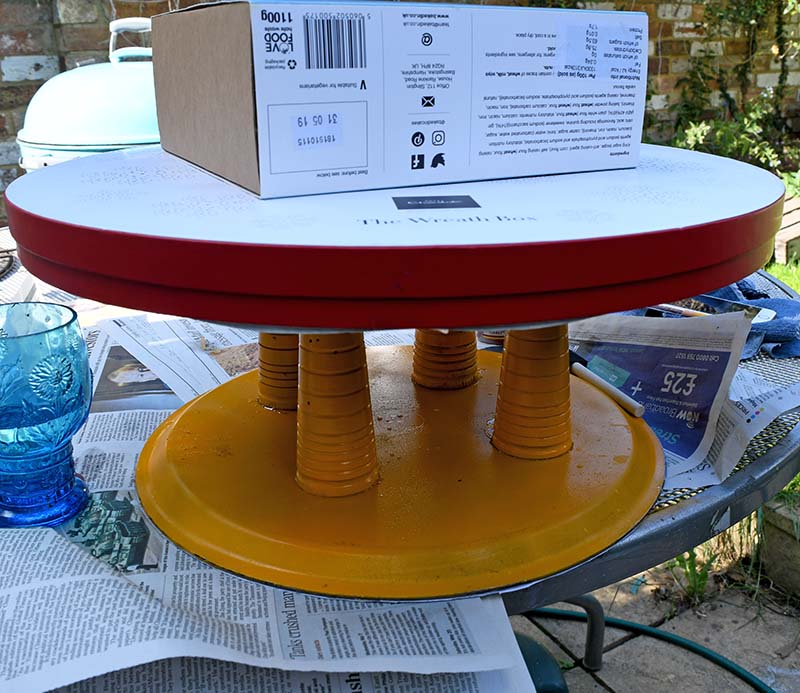

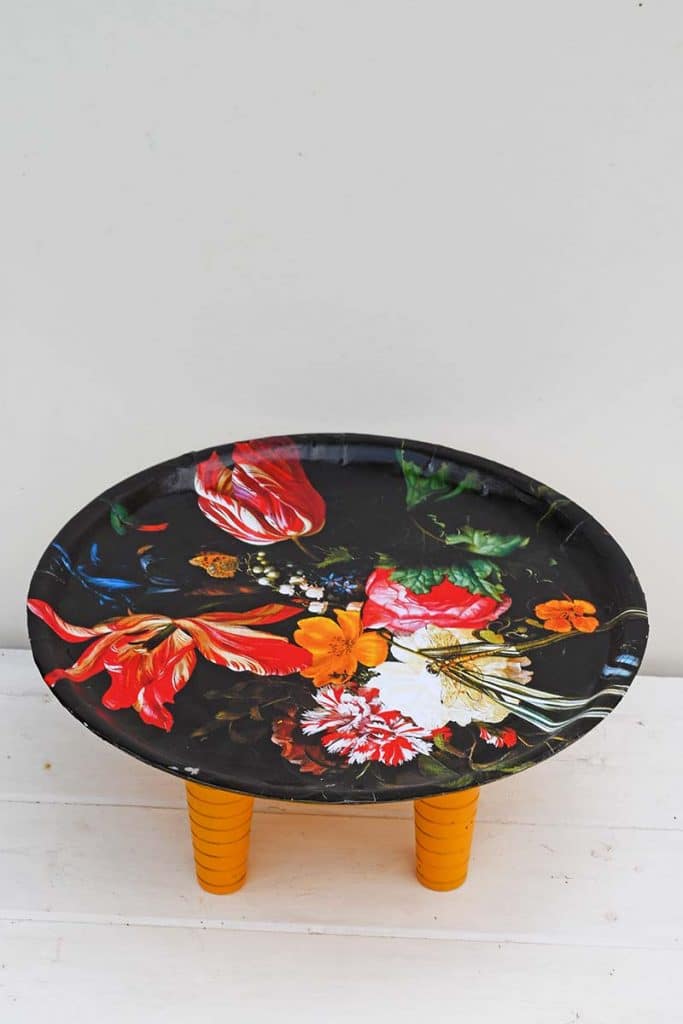

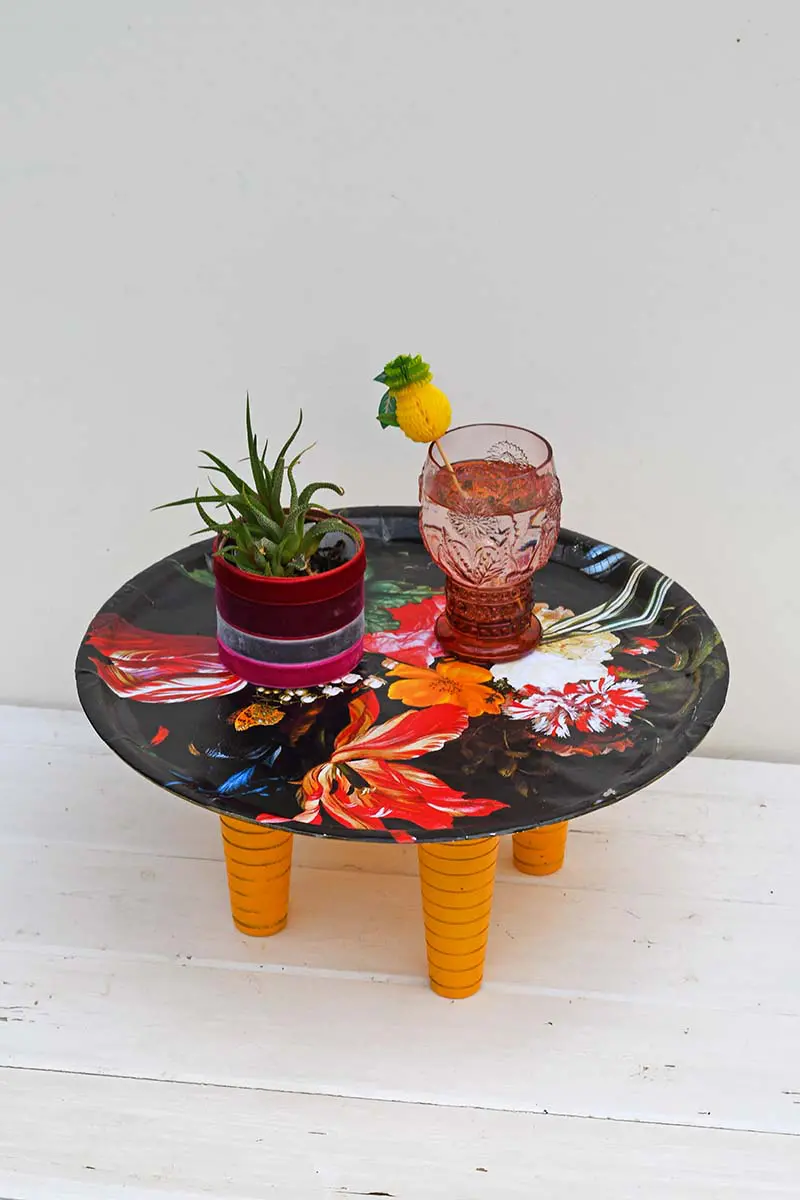
I love how the flower decoupage tray turned out. It’s just the perfect size for my drink next to the sofa outside.

Many fabulous images on Pictureboxblue would look wonderful decoupaged on a tray like these vintage rose illustrations from old gardening catalogues or the prints from the Temple of flora.
Or you can use them to make decoupage placemats or DIY tile coasters. Consider these vintage floral patterns if you prefer a lighter background. You’ll find more botanical crafts here.
- The Amazing Parrot Paintings of Edward Lear
- Watercolour Fruit Images
- Woodland Vintage Botanical Prints
- Vintage Cactus Paintings
Maps would also look fabulous as a tray table. Check out my map collection here to discover if you can find a special map for a decoupage project.
For other upcycled crafts, visit cheapandthrifty.com.
If you fancy, you can Buy Me A Coffee Here.
Laura Tibbles
Saturday 17th of August 2024
I really love this project it’s not to big yet not to small either you and easily serve drinks or a drink and snack to someone and it not spill as the legs help support what you are transporting thank you for sharing I’m going to try this
claire
Sunday 18th of August 2024
Thank you so much. It is a handy tray table and looks great. Good luck with it.
kathleen
Monday 12th of August 2019
Great idea. Thank you for explaining all the steps, including going to a commercial printer, so clearly. Where would one get extra-large old wooden thread spools?
claire
Tuesday 13th of August 2019
Thank you. Try junk shops for the thread spools.
Ann
Monday 24th of June 2019
Your tray came out beautiful. Thank you for sharing at Party In Your PJ's!
claire
Tuesday 25th of June 2019
Thank you, Ann
Julie
Sunday 23rd of June 2019
These pictures are beautiful. I love the tray table idea. It looks fab, I especially like the wooden spool legs.
claire
Sunday 23rd of June 2019
Thank you so much Julie. The legs were a lucky find.
Mary Beth
Wednesday 19th of June 2019
Oh, Claire! This is so beautiful.
claire
Wednesday 19th of June 2019
Thank you, Mary Beth. I just love those old flower paintings.