
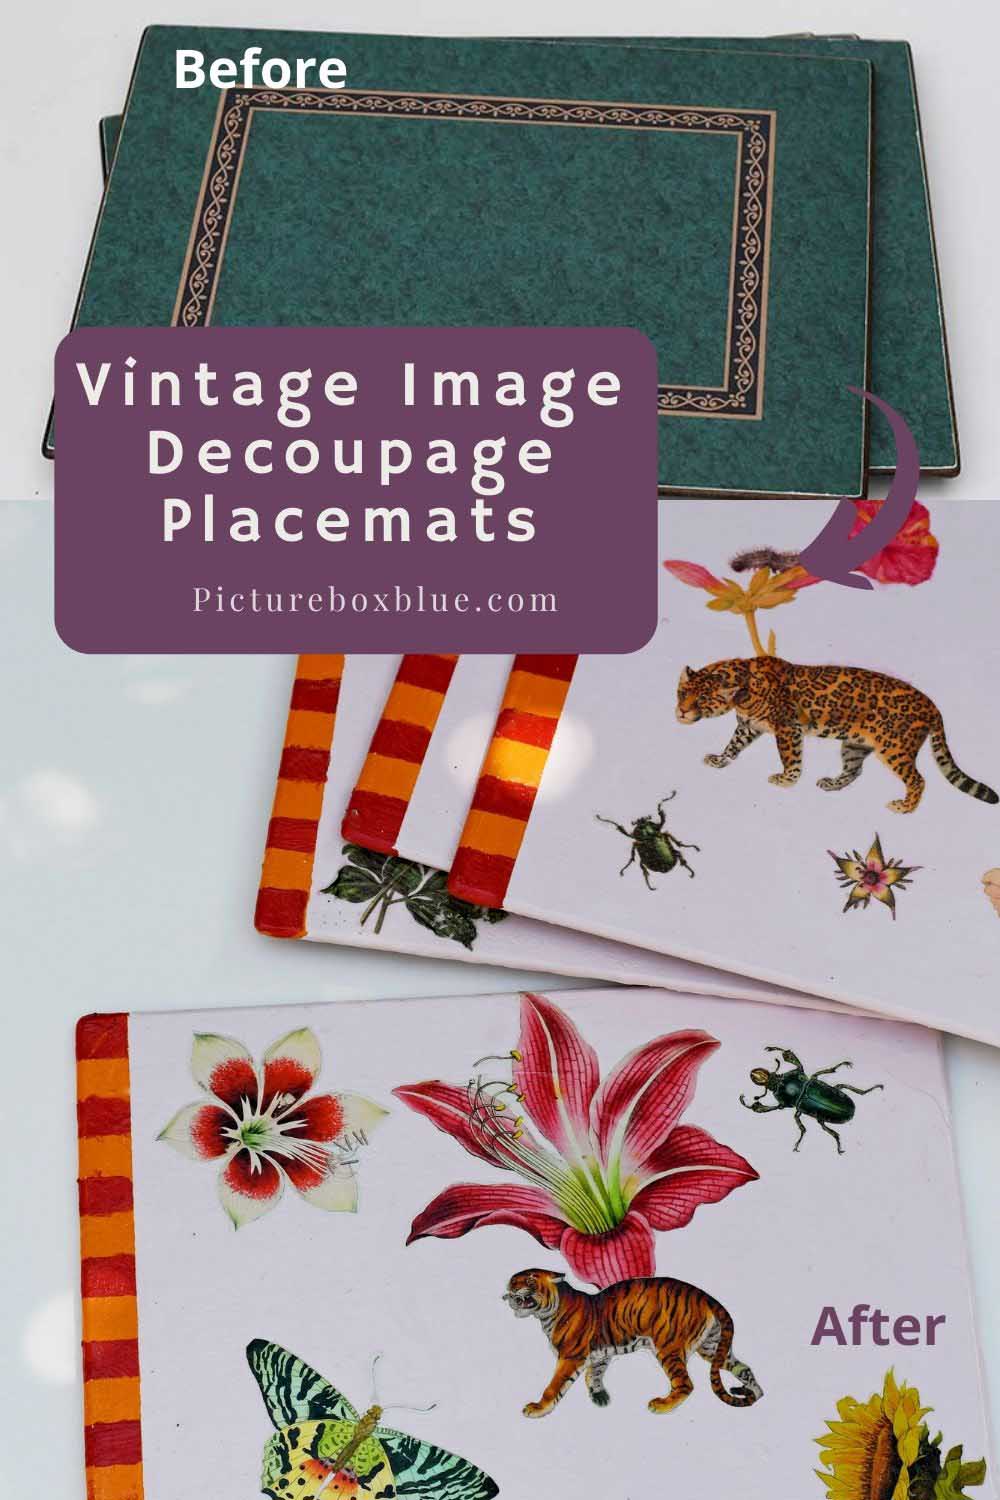
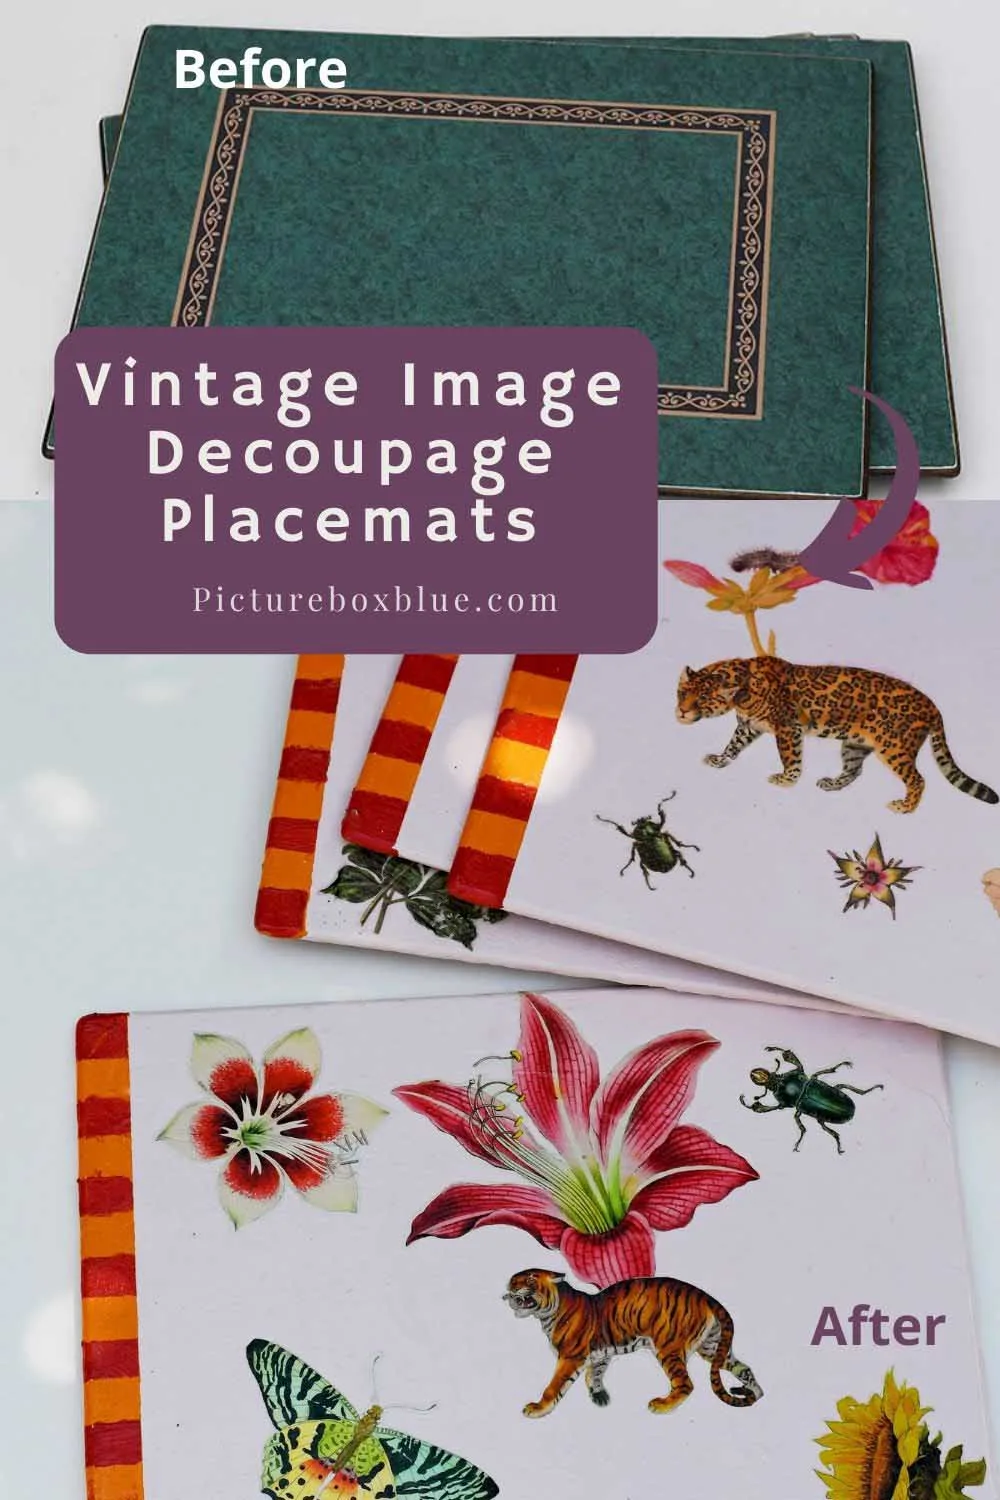
I’m always looking for fun ways to use fabulous vintage images on this site. This time I have used them to make these fun decoupage placemats.
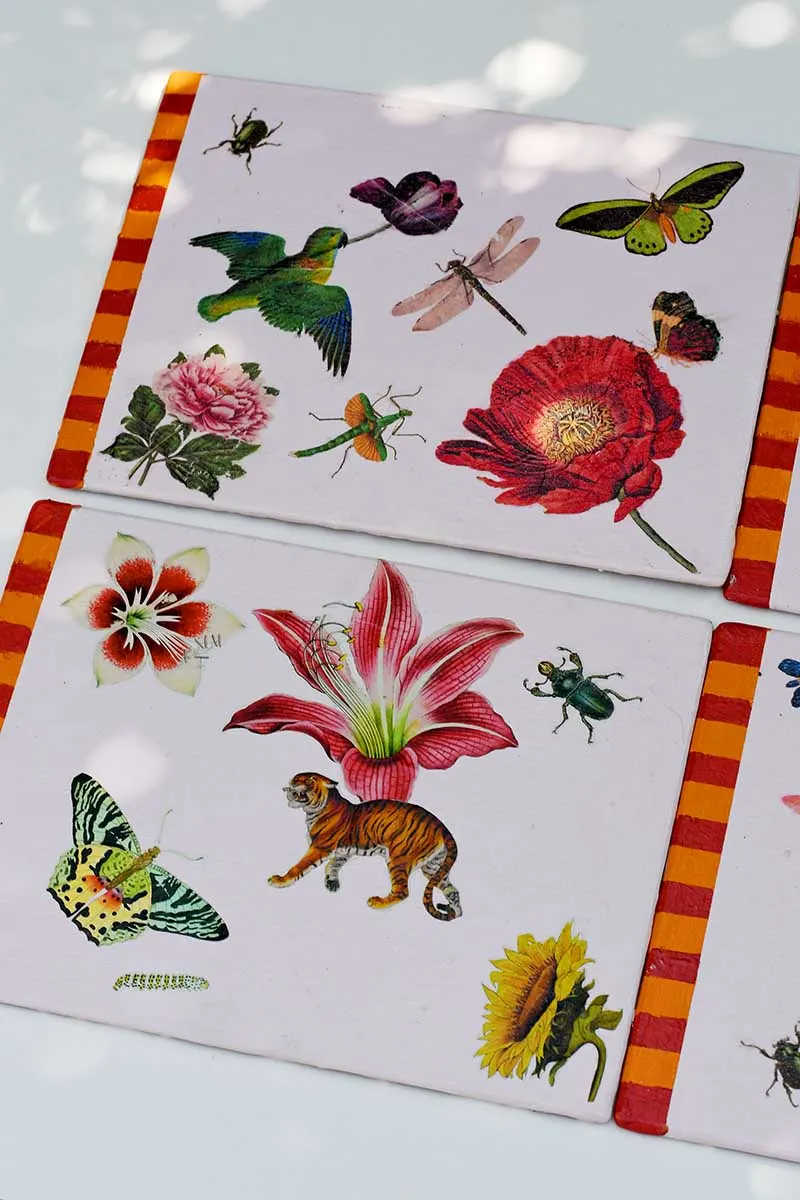
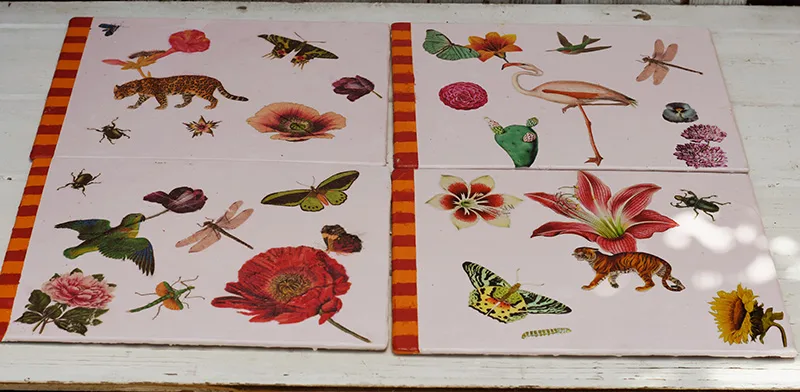
In the past, I have made placemats with kitchen patents. This time I used a collage of various vintage botanical and zoological images from the site.
This fun, affordable, easy botanical craft makes something cool for your dining table. I have found that the collage of images on the decoupaged placemats is quite a talking point. And I’m for anything that sparks conversation around the diner table.
We participate in the Amazon Services LLC Associates Program, an affiliate advertising program designed to provide a means for us to earn fees by linking to Amazon.com and affiliated sites. As an Amazon Associate, I earn from qualifying purchases.
What You Need For Decoupage Placemats
- Old placemats – if you don’t have any, they can be bought cheaply from thrift/charity stores.
- Paint – I just used old bits of decorating paint I had leftover from other projects.
- Washi/masking tape
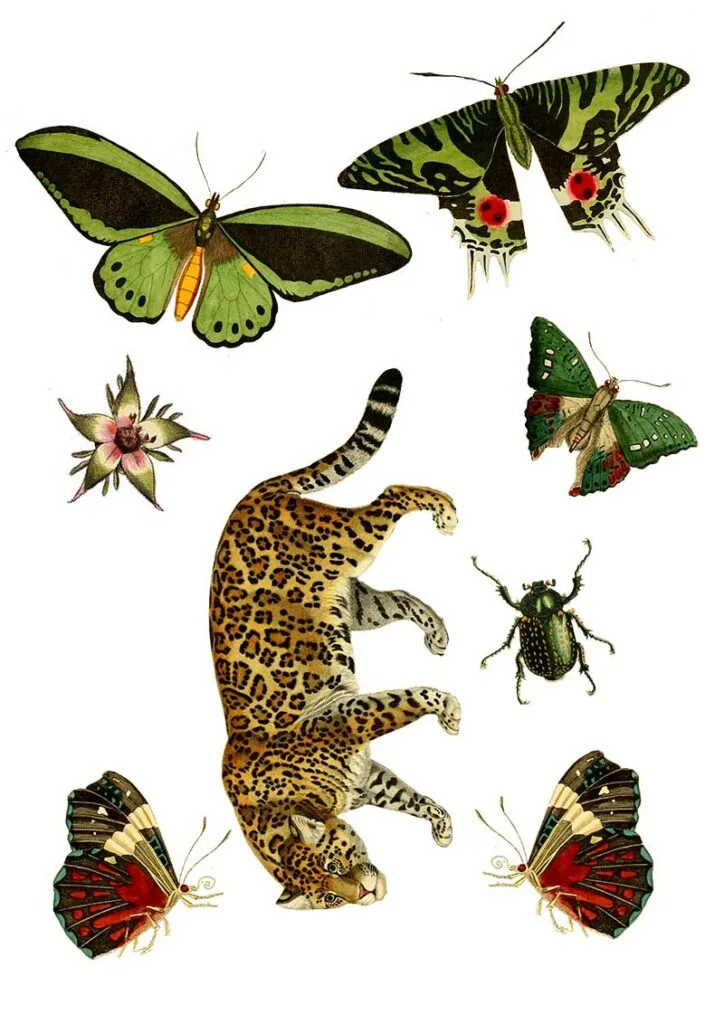
- Vintage images – this site is full of them. But you will find some handy collections of images that have been turned into clip art on my dictionary advent post, butterfly ornaments, and parrots cloche.
- Plain paper napkins
- Mod Podge
- Protective crystal clear varnish
Other sources for vintage images
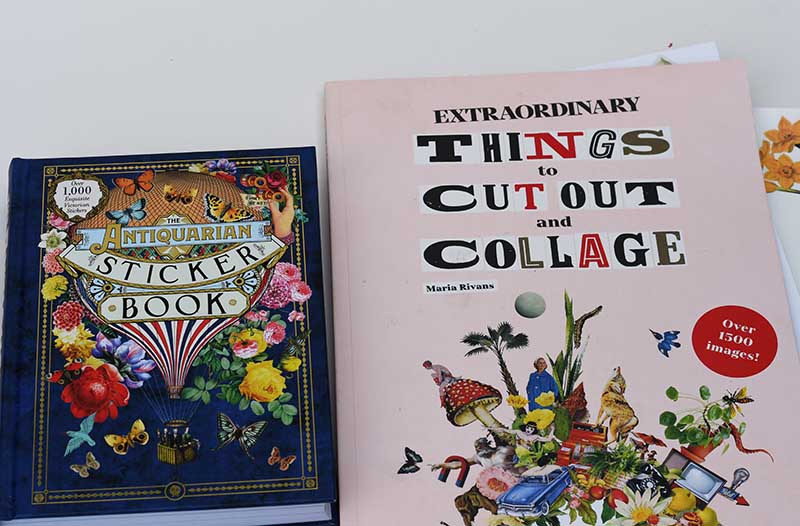
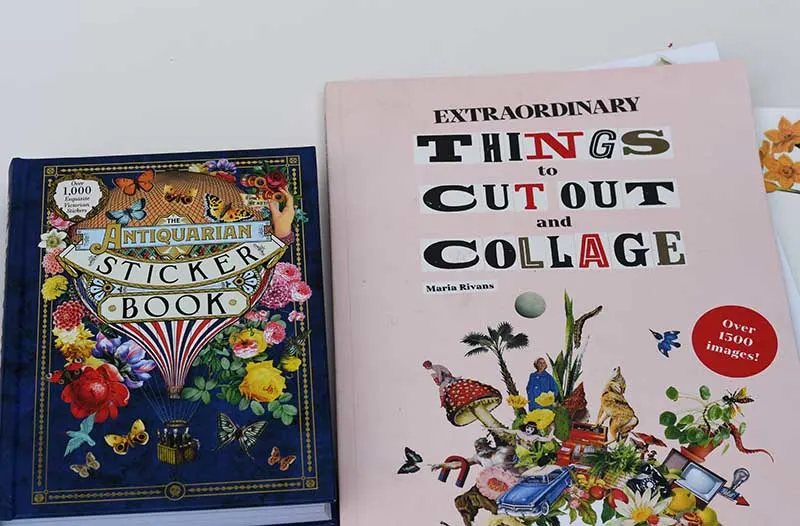
Suppose you can’t find the vintage images you want on the site. Or you don’t have the means to print the pictures out. Or you want an easy option. You can buy and use many excellent collage books for this craft.
Two books I use are “Extraordinary things to cut out and collage” & “The Antiquarian Sticker Book“
Preparing the Placemats for Decoupage
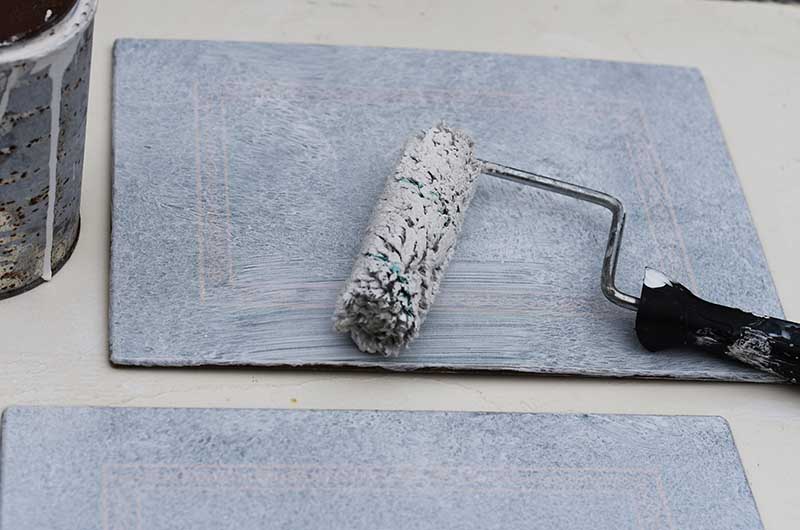
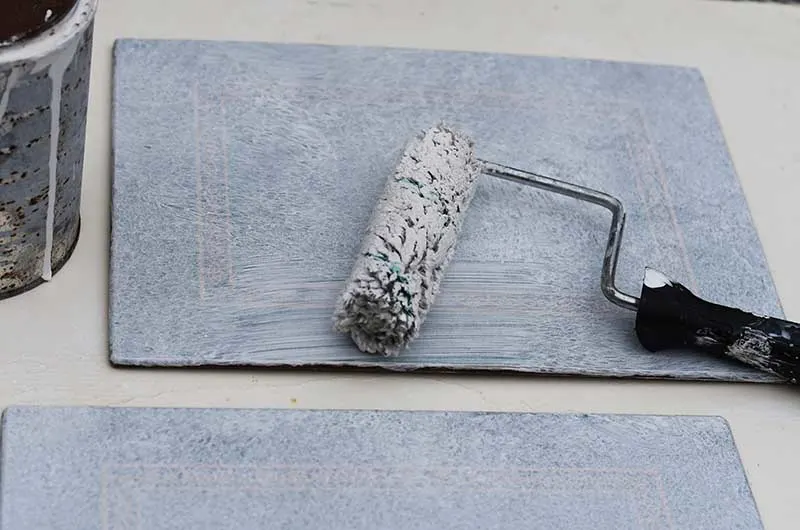
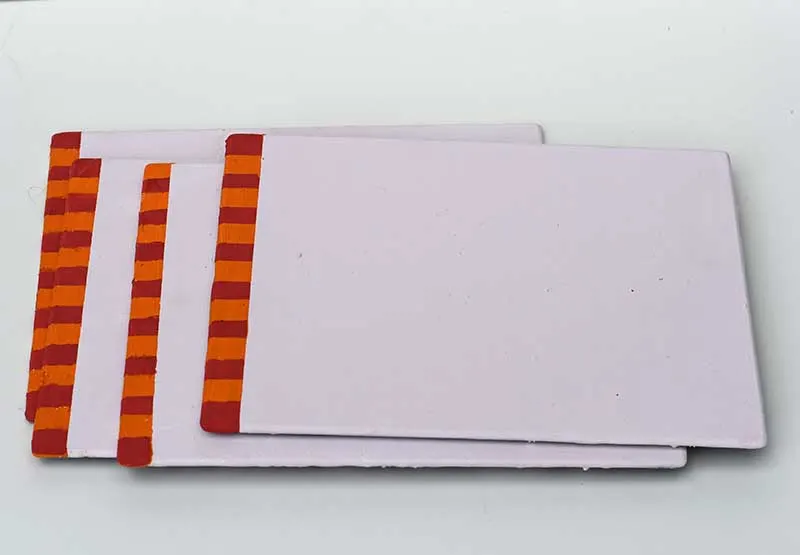
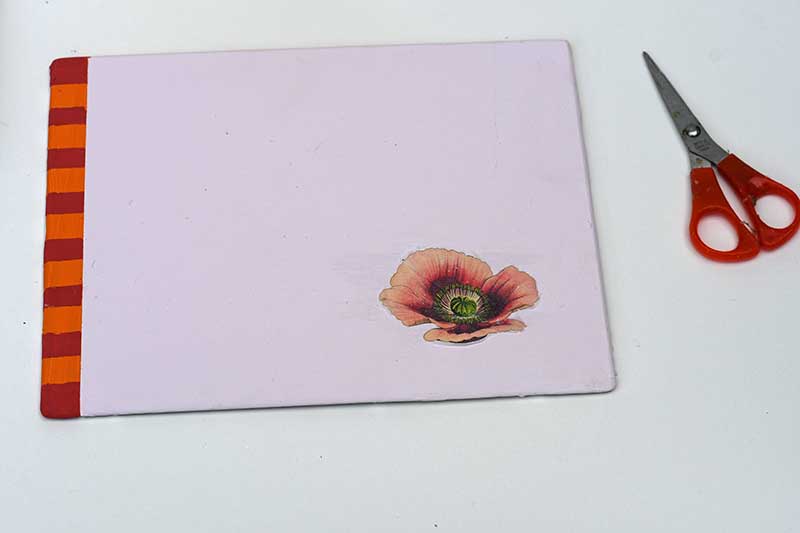
Step1: First, paint over the old design with a primer coat to prepare the placemats for decoupage. Once that has dried, paint the mats with a base colour to suit your décor.
It is best to use a light colour to better show the decoupage vintage images. I used pale pink as the base paint for my placemats.
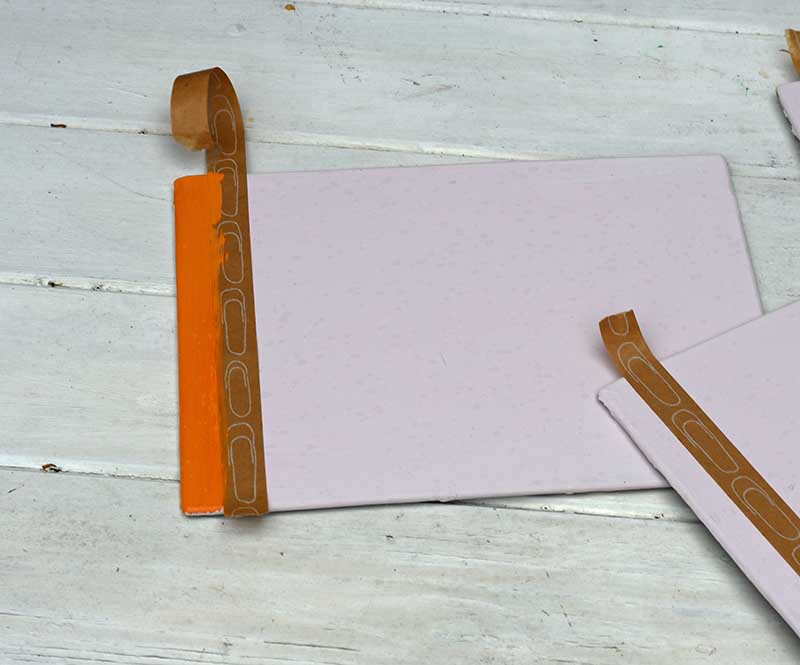
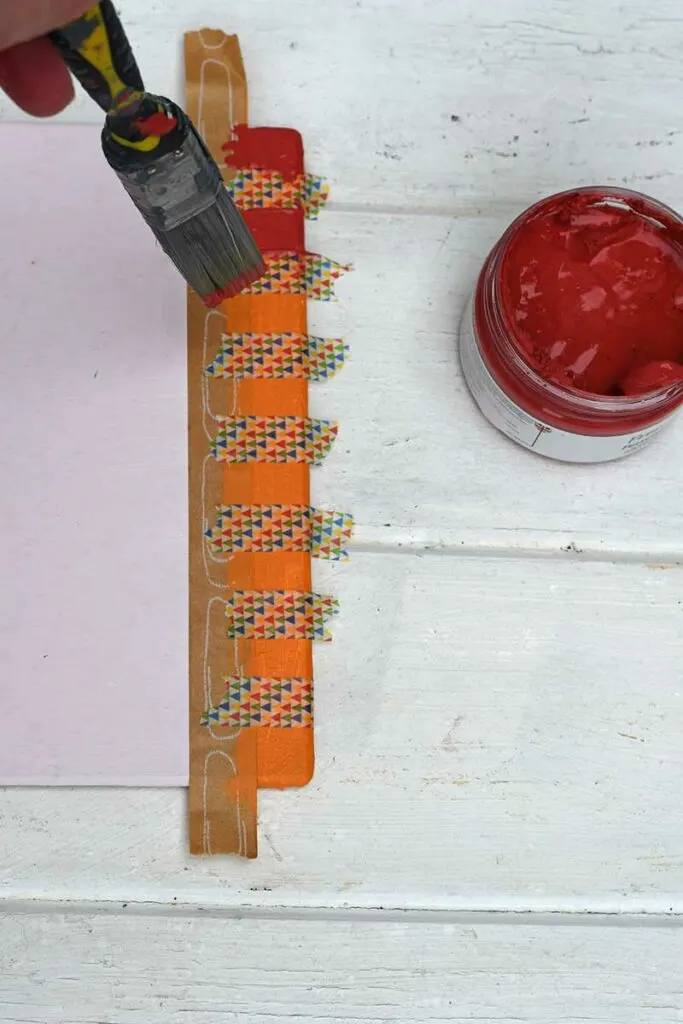
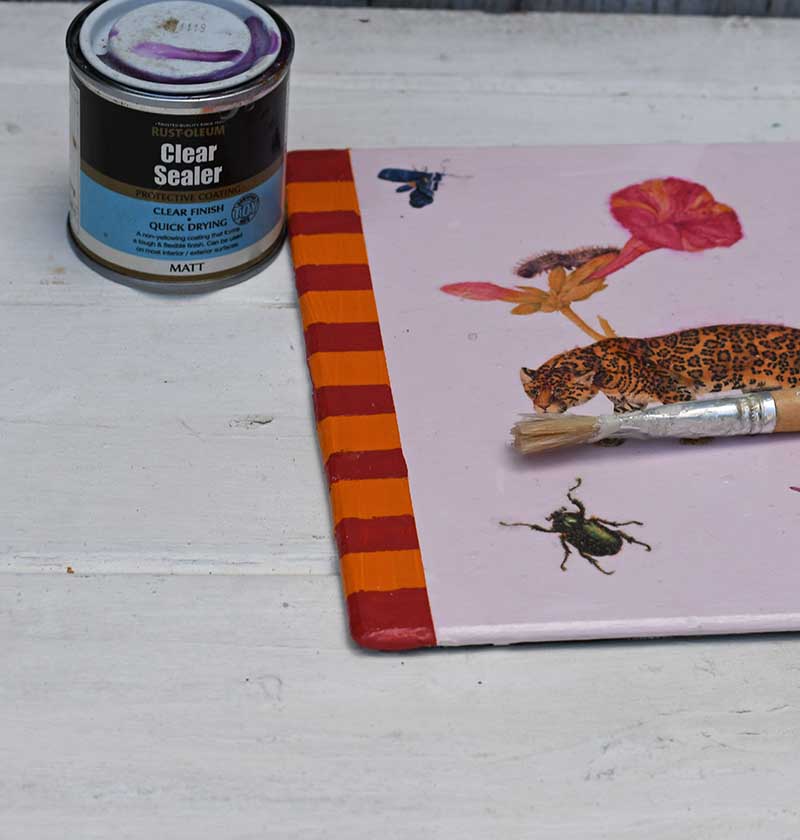
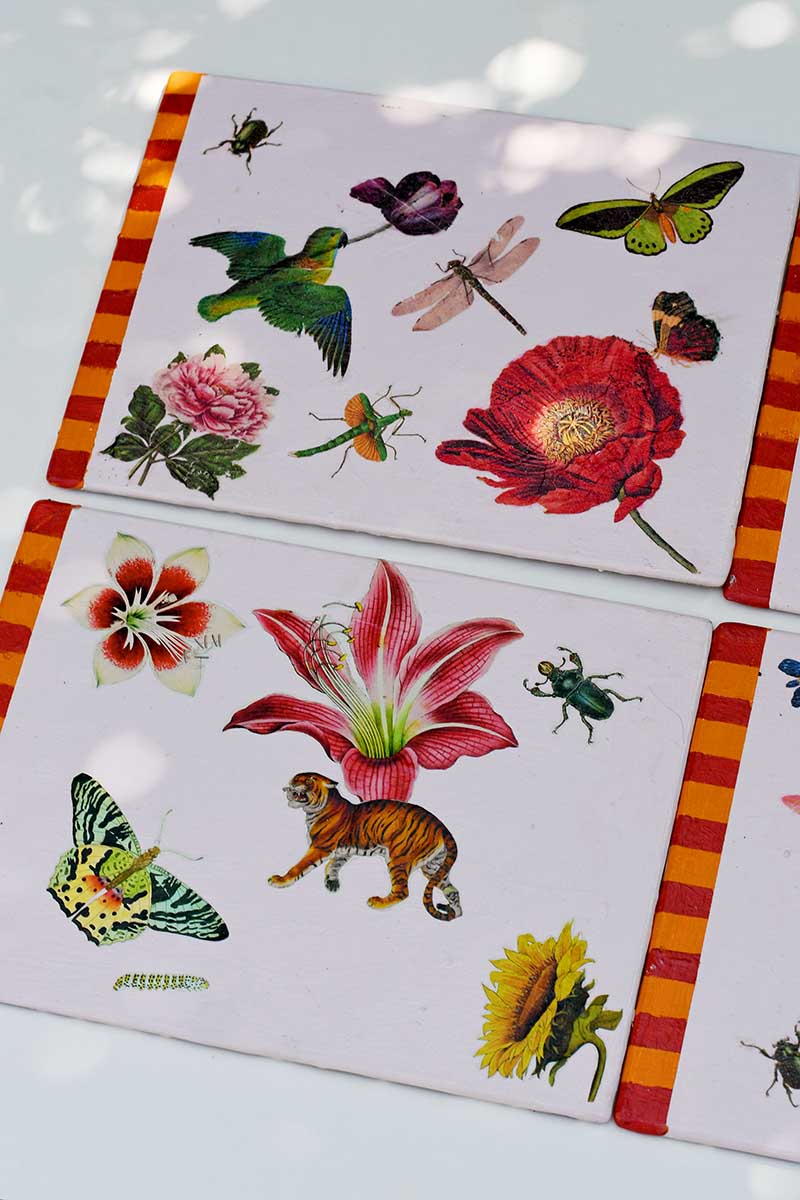
Step 2: No two decoupage placemats were going to be the same. Different vintage images were used for each placemat, making every one unique. However, to make them feel like a set, I added the same distinctive stripe and check the edge of each mat.
To do this, I marked off the right-hand edge of each mat to make a 1cm orange stripe. I then added dark pink checks to the stripe.


How To Decoupage The Placemats
Step 3: Once the paint has dried on the placemats, decide what images you will use for the decoupage.
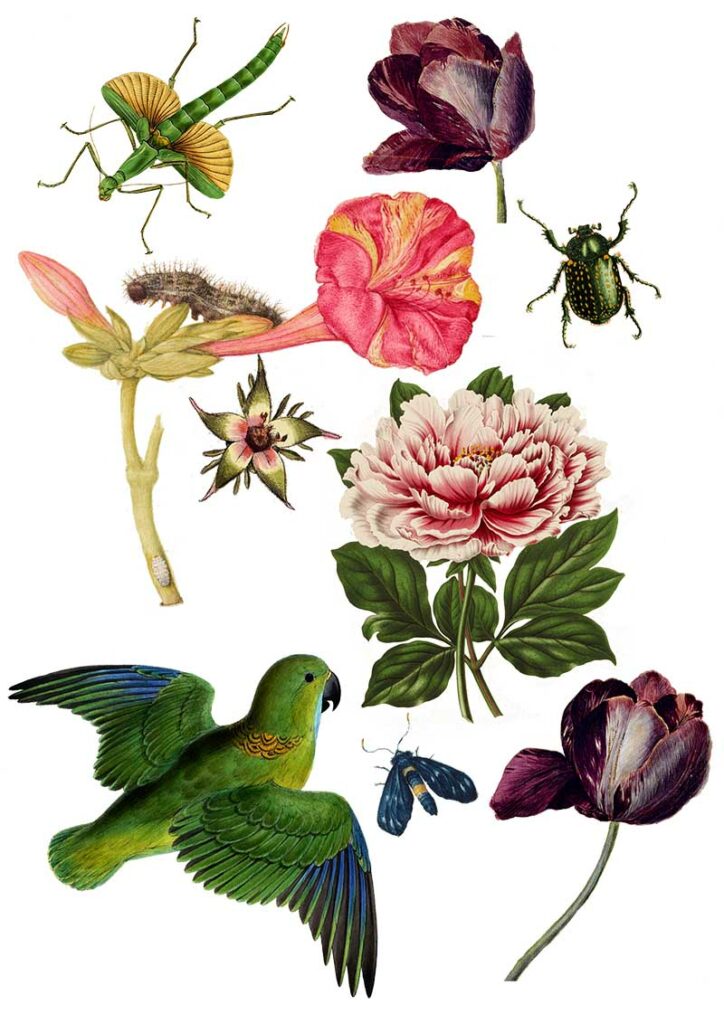
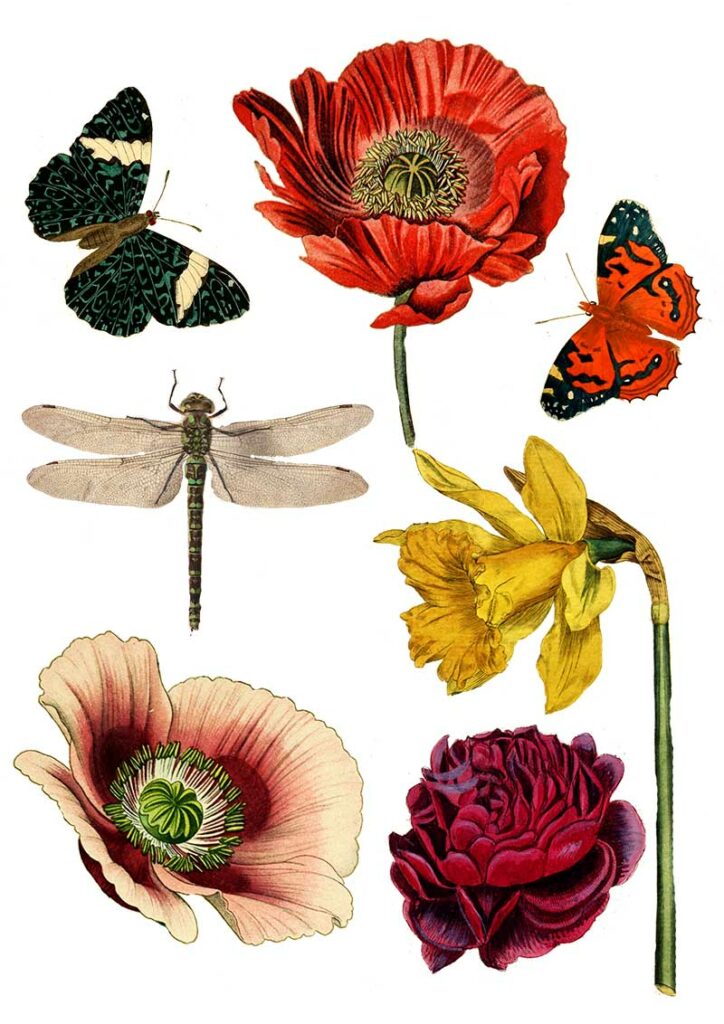
I mainly used images from this collection and a few others from the books I mentioned above. To download and use the images below, click on the title above them, and they will open in a new browser on your device.
Vintage Image Decoupage Collection 1

Decoupage Image Collection 2
Vintage Decoupage Image Collection 3

Step 4: I recommend printing the images onto paper napkins for the best results. To do this, get a plain white paper napkin and separate the ply (most napkins are 3-ply) so that you have just one very thin ply of paper. Tape the single napkin ply to a piece of computer paper using masking tape around the edges. Then feed this paper through your printer as usual.
Printed paper napkins give a very flat finish to the decoupage mats as the paper is so thin. It will look like the image is printed on the mats rather than decoupage with paper napkins.
Tissue paper works just as well as paper napkins.


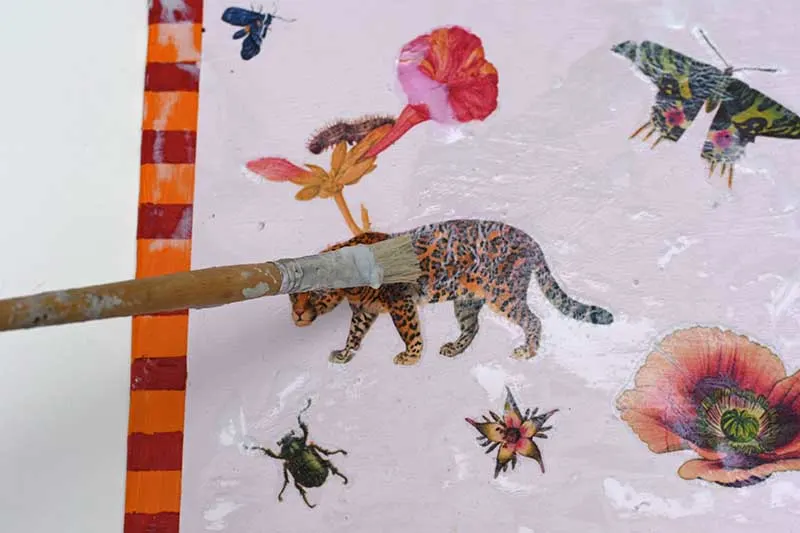
Step 5: Carefully cut out all the vintage images you want to use for the decoupage. I went for a mixture of flowers, animals and insects for each placemat. Play around with the layout before sticking any images down.

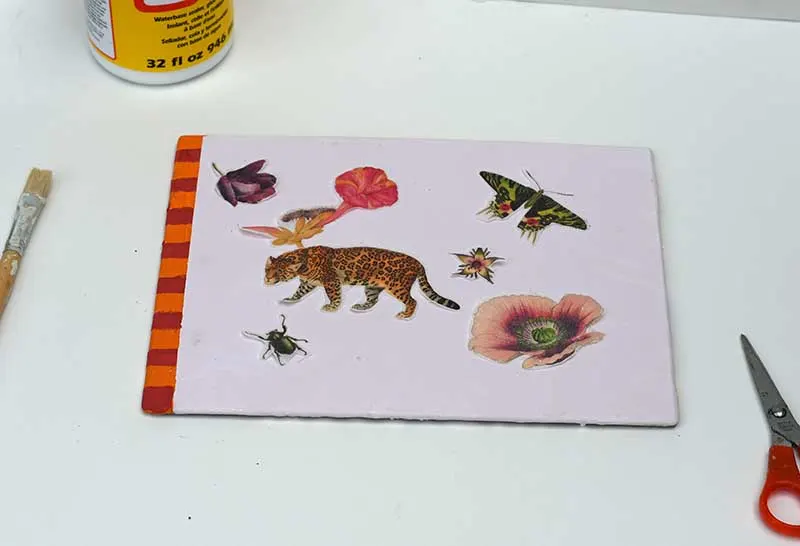
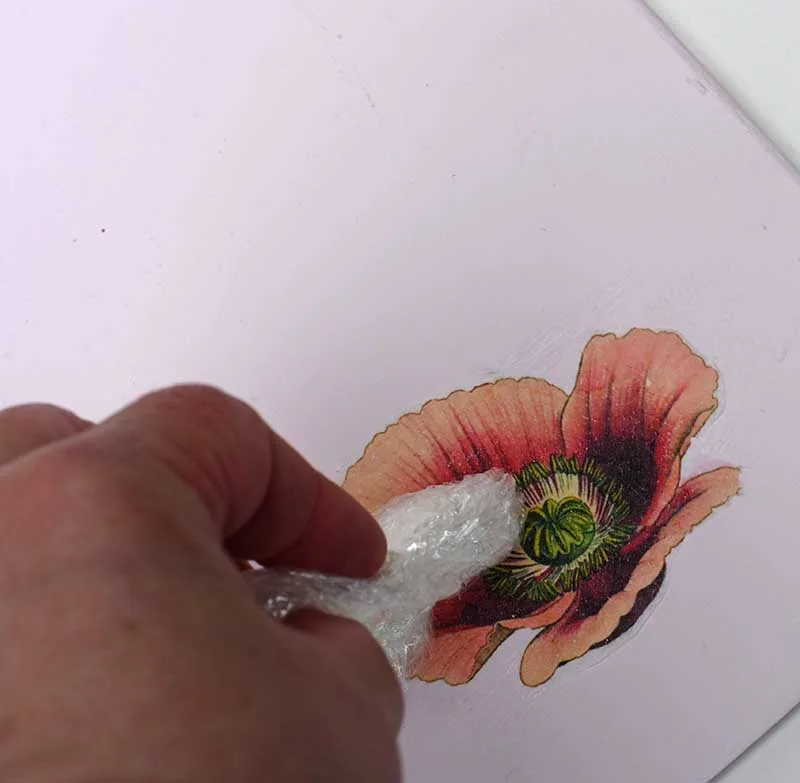
Step 6: Once you are happy with the design. Stick the images to the mat one by one. As the paper is fragile, brush the Mod Podge directly onto the placemat, not the image. Then place the image on top of the glue. Use a screwed-up ball of plastic wrap to press the printed image firmly onto the mat.
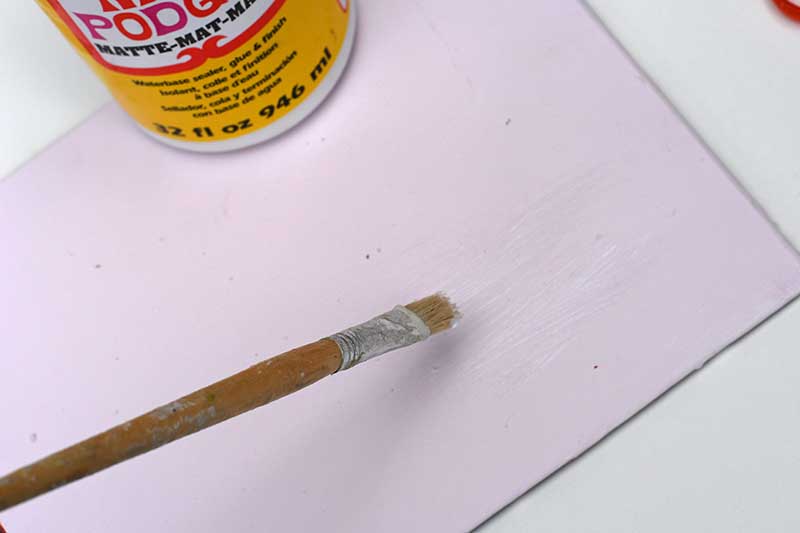


Step 7: Carry on sticking the images onto the placemat. When you are finished and the glue has dried, paste another layer of Mod Podge over the top of the whole placemat. Use a sponge brush and dab carefully over the images. Don’t worry if it looks milky the glue will dry clear and provide a protective layer.

8. Once the glue has dried add a final protective varnish layer to each decoupage placemat.

The Finished Placemats
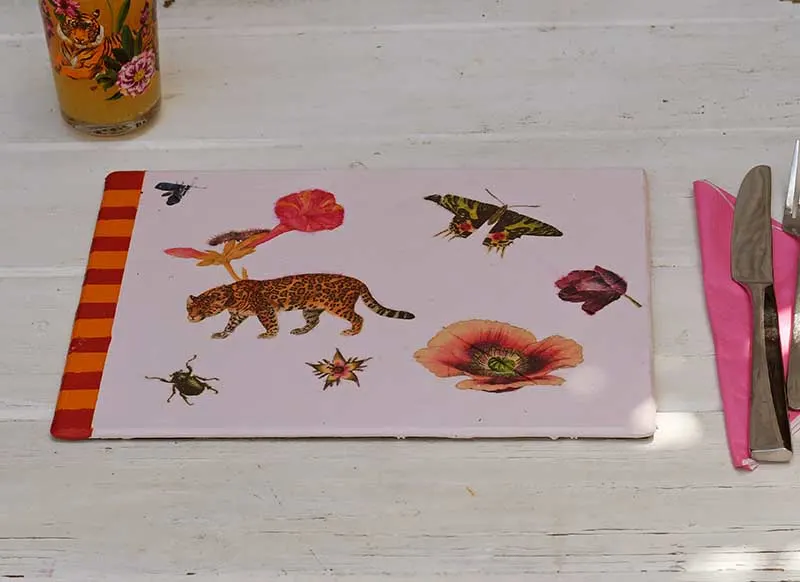
I love these finished placemats, each one is different and every member of my family has a favourite.
They remind me of something you would find in the Anthropologie homewares department. They match many of their Animal themed plates and glasses I already have in my home.


Another way to transfer the images onto the mat is to use iron-on paper like I use to put pictures on wood.
You can find more placemat ideas here. Also, check out some of my other vintage image decoupage crafts.
- Vintage flowers decoupage tray table.
- DIY Tile Coasters
- Decoupage sea shell decoration
- Songbird tin can wind chime
You can find more wonderful upcycled crafts here.
Blogger's Pit Stop #275 ~ The Blogger's Lifestyle
Thursday 17th of June 2021
[…] HOW TO MAKE VINTAGE IMAGE DECOUPAGE PLACEMATS by Claire […]
Kathleen Aherne
Wednesday 16th of June 2021
This looks like a fun project and your tutorial is very helpful. I would love to try this out. We will feature it in the next Blogger's Pit Stop. Kathleen
claire
Wednesday 16th of June 2021
Thank you, they are fun to make and look great on the table.
creativejewishmom/sara
Friday 11th of June 2021
Wonderful, now you have me thinking about decoupage......no time though, I'm on a mission to create art, so all my crafting is more or less on hold, except for little birthday projects here and there! And maybe some crochet for traveling? thanks for sharing on craft schooling Sunday!
claire
Friday 11th of June 2021
Thank you so much. Decoupage is a quick way to transform something.
Rebecca Payne
Wednesday 9th of June 2021
I love these. Thank you for sharing.
claire
Thursday 10th of June 2021
Thank you so much, they were fun to make.