
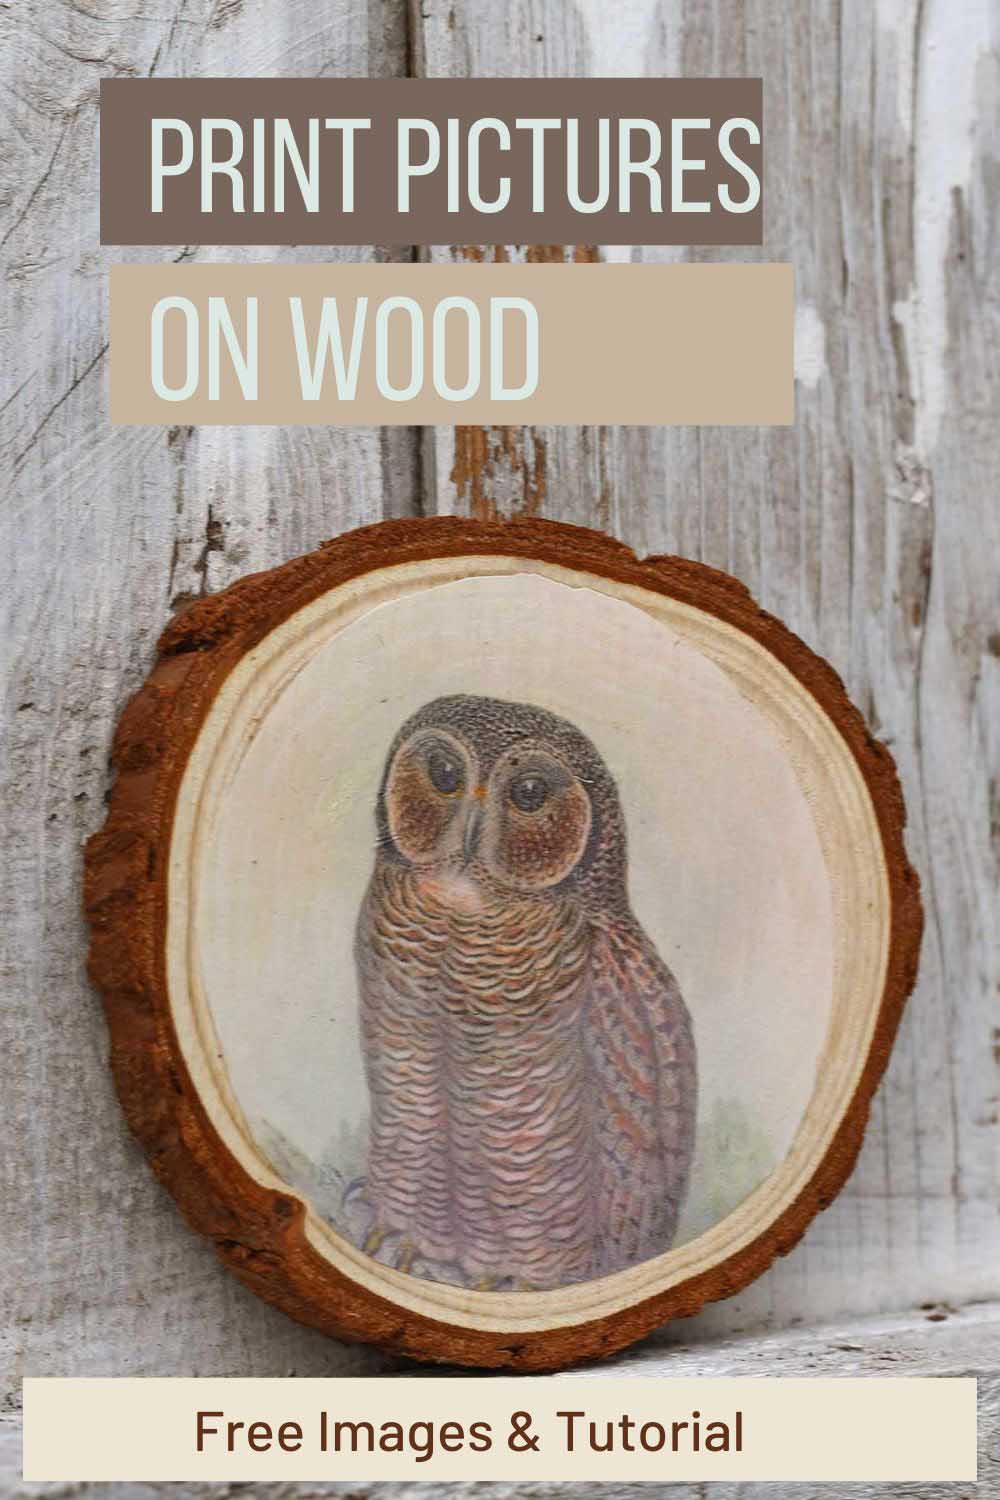
Turn ordinary wood slices or planks into beautiful, personalised décor using your favourite photos or prints. This tutorial guides you step-by-step through transferring images onto wood with iron-on transfer paper, creating stunning ornaments, keepsakes or handmade gifts. Perfect for craft lovers and home-styling projects.
My dad moved from North London to Hong Kong in the late sixties as a newlywed. His first job was to survey the Islands in the South China Sea, which is when he developed a passion for birdwatching. Now, as a retired world-renowned Onorthologist, almost every gift or card he receives is bird related.
He’s spending Christmas with me this year. I thought I’d keep up the tradition and decorate the tree with bird ornaments.
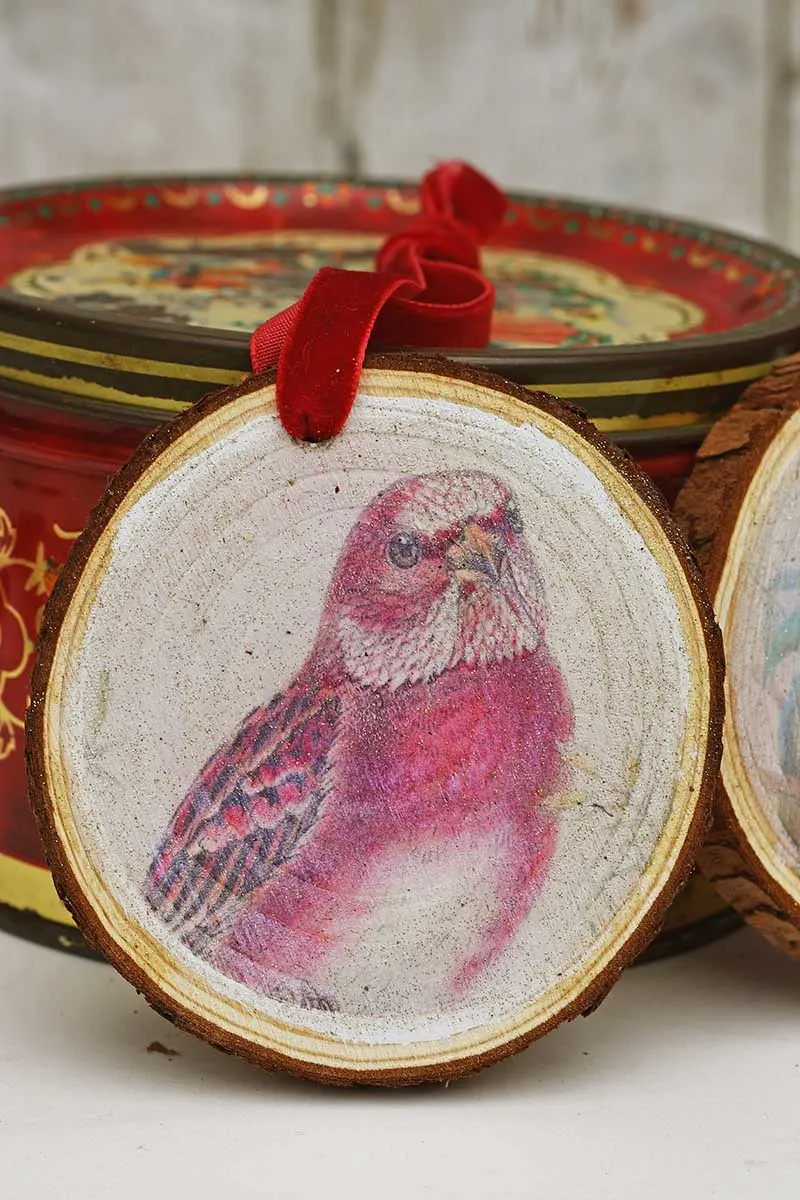
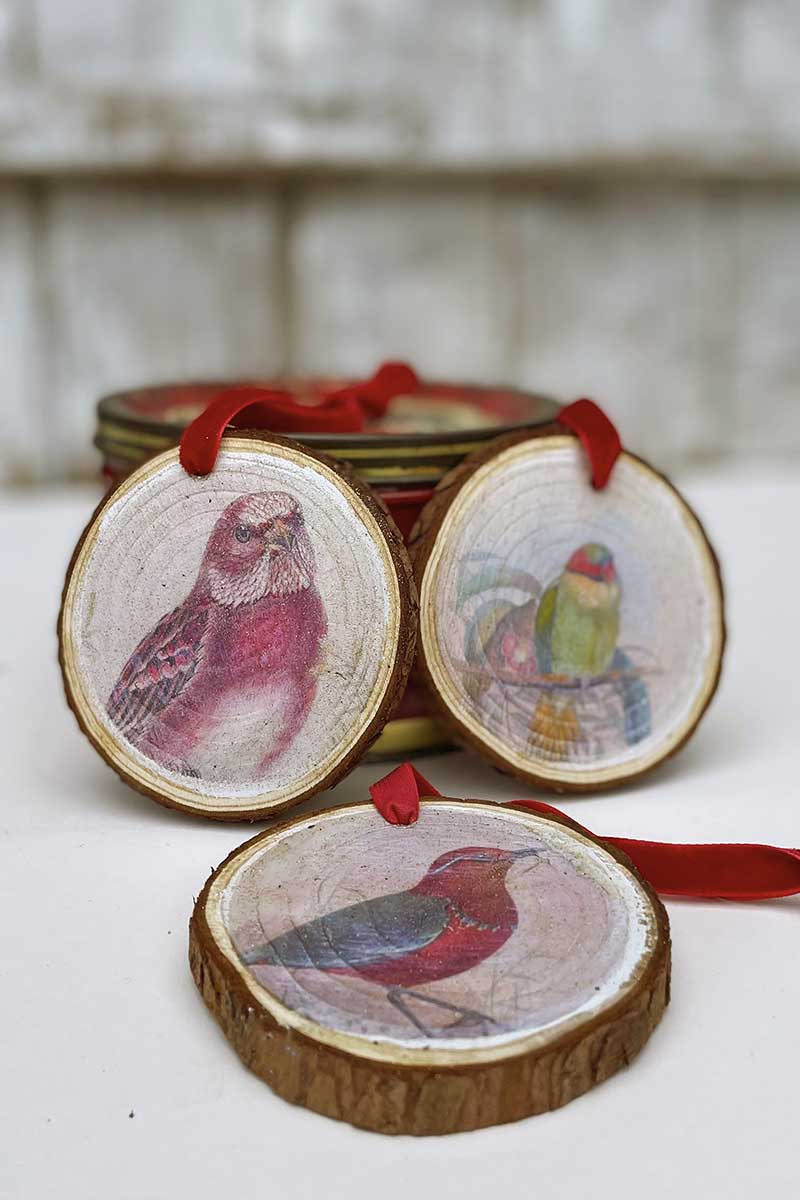
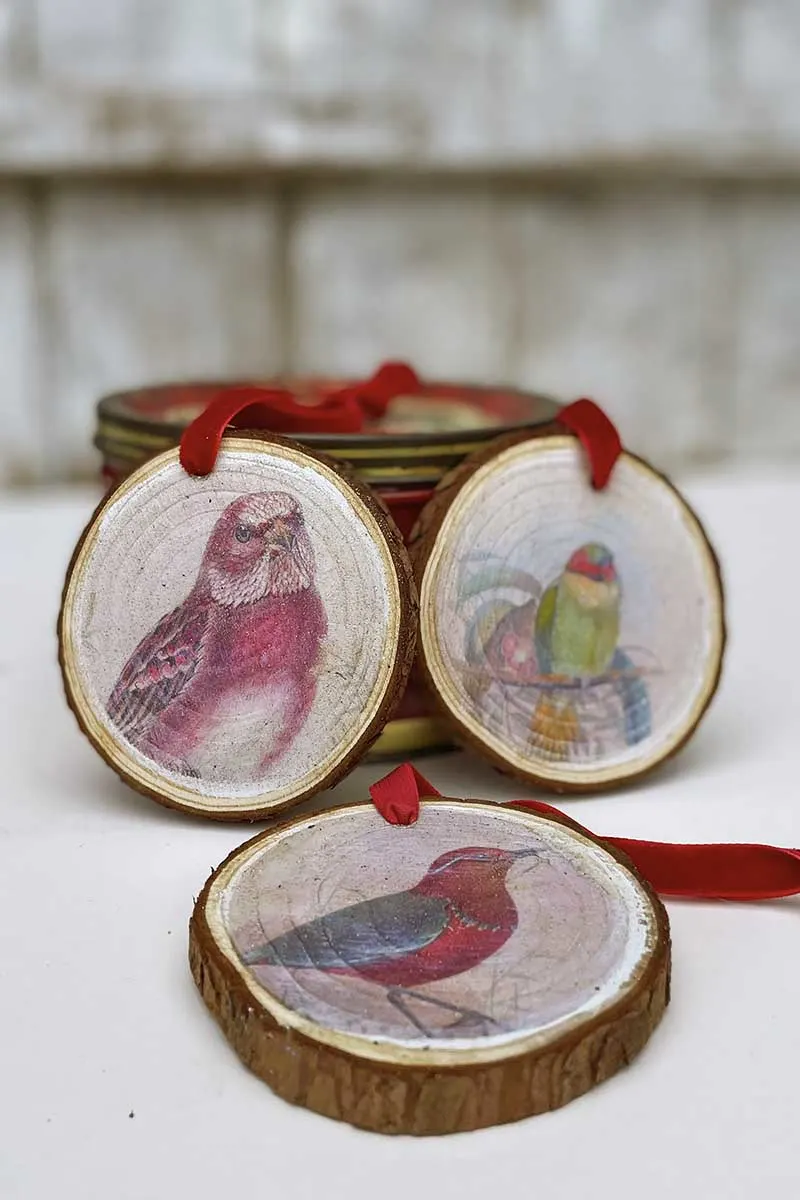
This craft was easy; I put pictures on wood slices and added a bit of glitter varnish. There are many fantastic vintage bird images on the site, but I went for birds in traditional Christmas colours of red and green.
The bird prints I chose to put on the wood slices are from Gould’s famous book “The Birds of Asia”. The full images I used are free to download at the end of this post.
Putting Images On To Wood
This tutorial shows how to transfer any photo or image onto wood. It is suitable for any wood surface, from wood slices to chopping boards, wooden boxes and furniture.
There are several different ways to transfer images onto wood. I used Mod Podge to transfer a vintage cheese label onto a lazy Susan. But this time, I chose an even more straightforward technique: Iron-On transfer paper.
The benifits of using iron-on transfer paper are:
- You can use an inkjet or laser printer to print your images (most other methods require laserjet printers only)
- You can use either transfer paper suitable for light or dark surfaces
- It’s swift; the whole process takes only a couple of minutes
- It’s a mess-free transfer method
- The technique suits small projects such as printing images on wood slices. I can cover up to six wood slices with one piece of transfer paper.
We participate in the Amazon Services LLC Associates Program, an affiliate advertising program designed to provide a means for us to earn fees by linking to Amazon.com and affiliated sites. As an Amazon Associate, I earn from qualifying purchases.
What Heat Transfer Paper To Use
The heat transfer paper is sold as iron-on t-shirt paper in sheets suitable for printing on an inkjet printer. It comes in two forms one for lighter surfaces and the other for darker surfaces.
Both types of paper transfer the image to the wood via heat (an iron).
- With Light paper, place the picture face down on the wood, then iron an ink image onto the wood. The picture printed on the wood will be a mirror image of the original.
- With dark transfer paper, the image is placed face up on the wood, and then a layer of parchment paper is placed before ironing. The printed image is placed on a very thin film on top of the wood.
- Both produce good results. The light-coloured paper is slightly more rustic but only works on light-coloured sanded bare wood. In comparison, the dark form is suitable for darker wood.
How To Put Pictures On Wood Slices
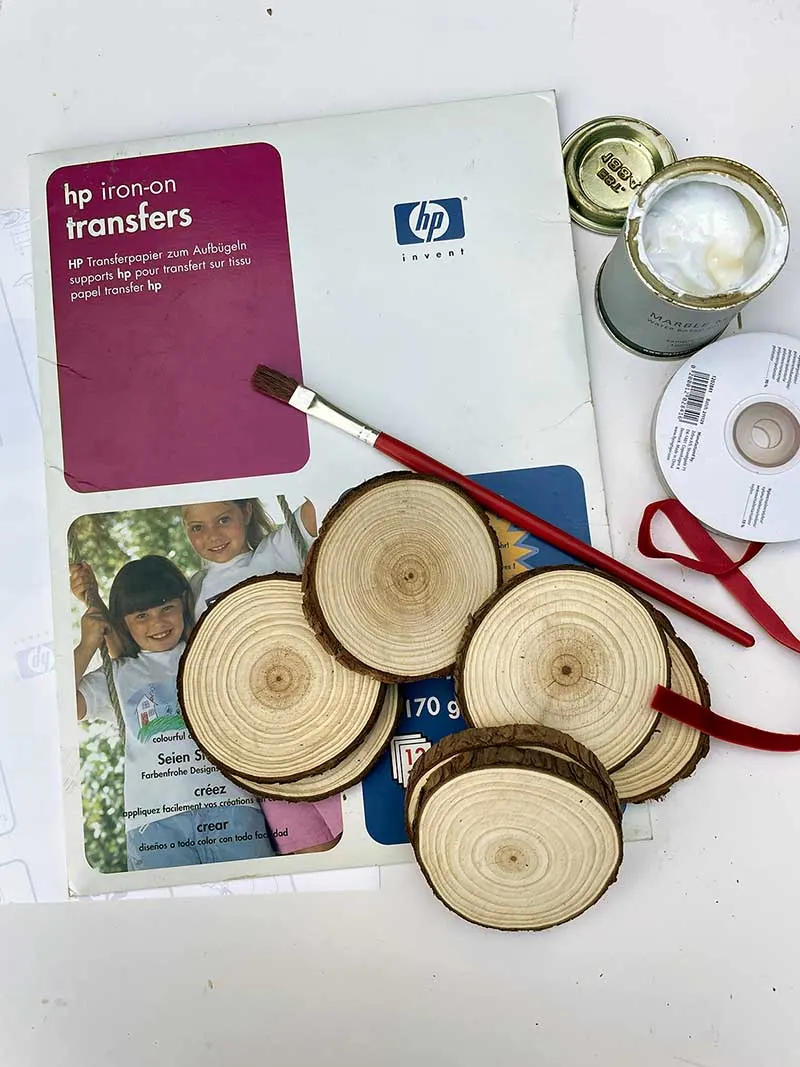
What You Need
- Light-coloured transfer t-shirt paper
- Wood slices – I used 7-8cm craft ones. Using your homemade wood slices, ensure the surface is sanded smooth.
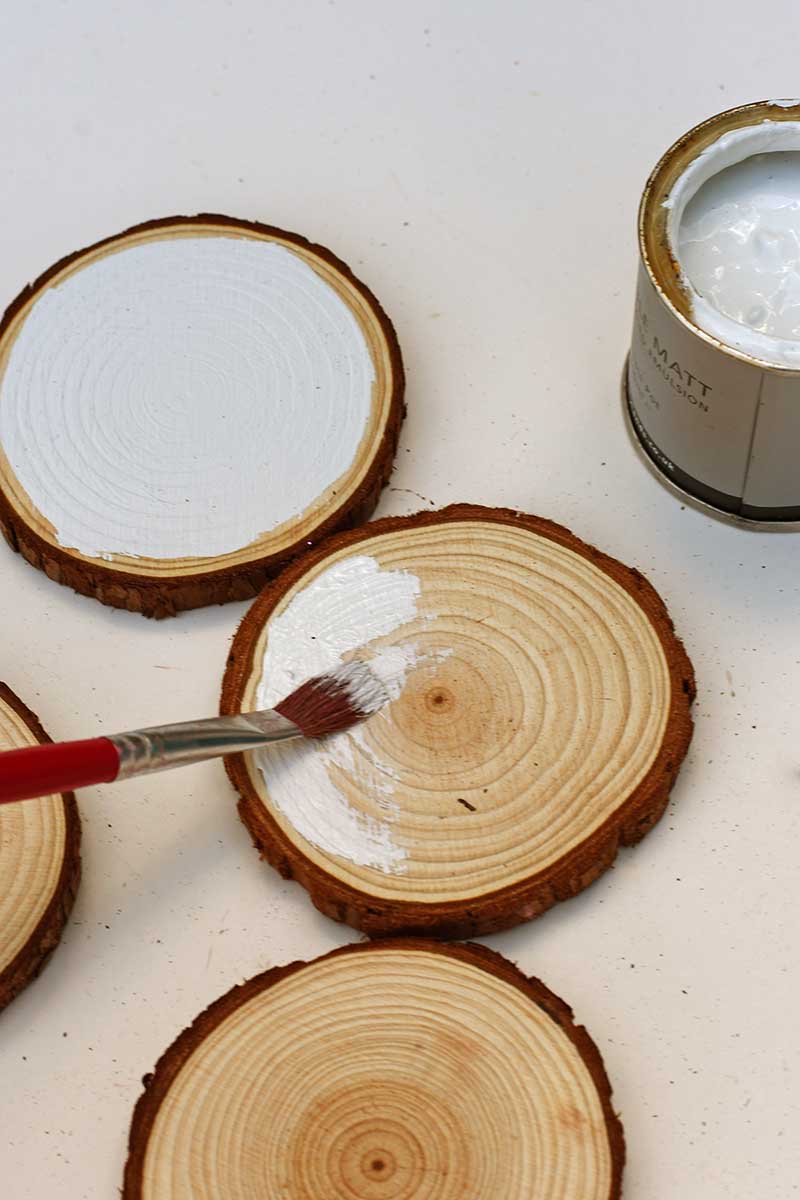
- Small tester pot of white/cream latex paint (optional).
- Iron
- Inkjet printer
- Glitter glaze sealer
- Red velvet ribbon

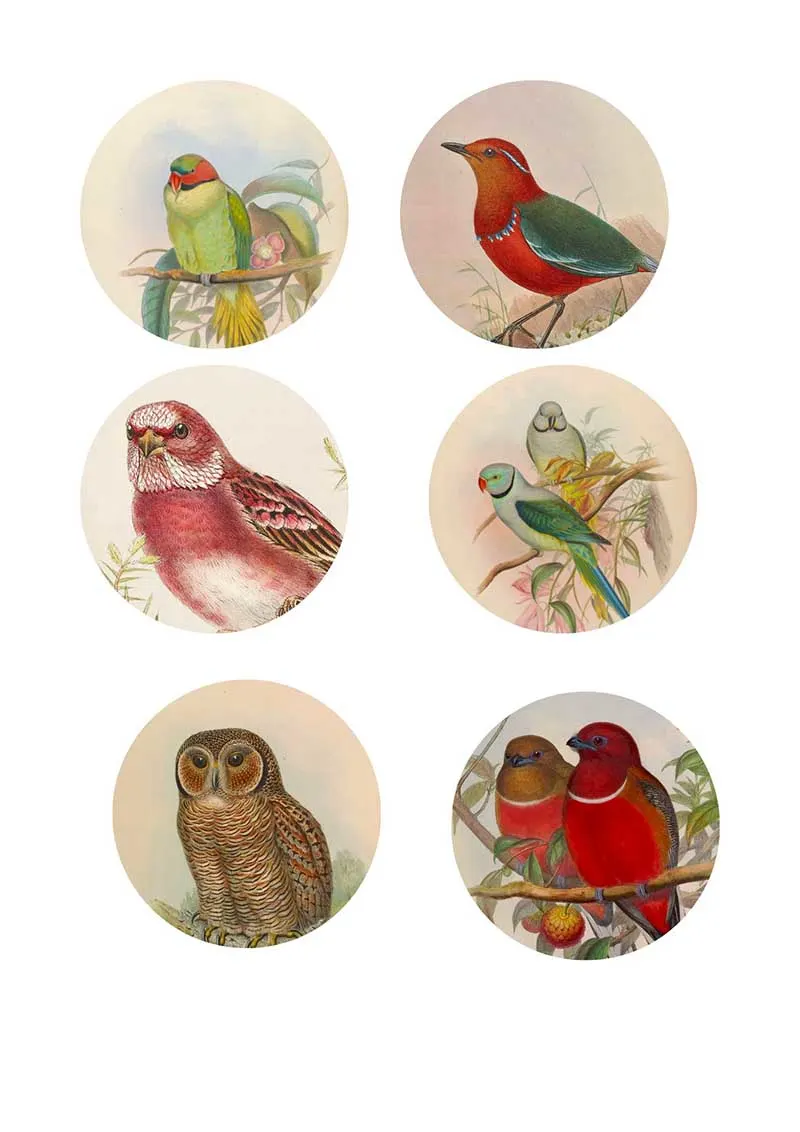
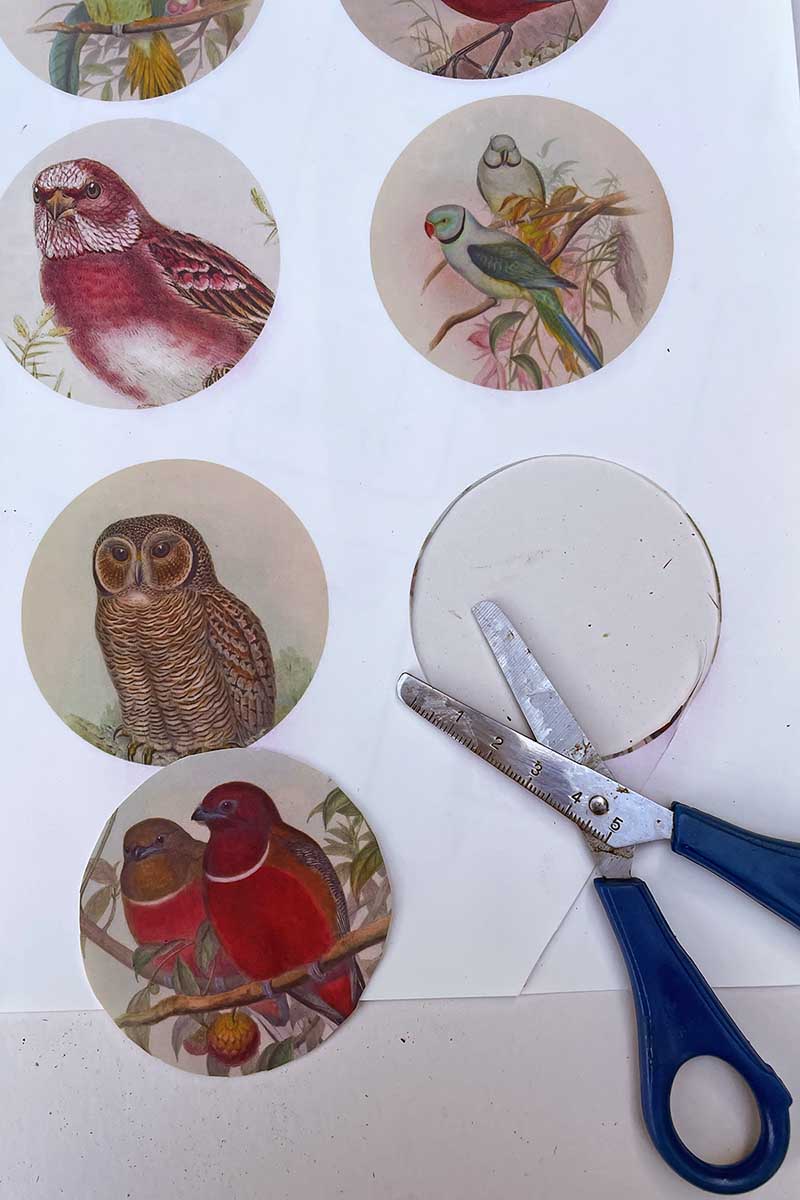
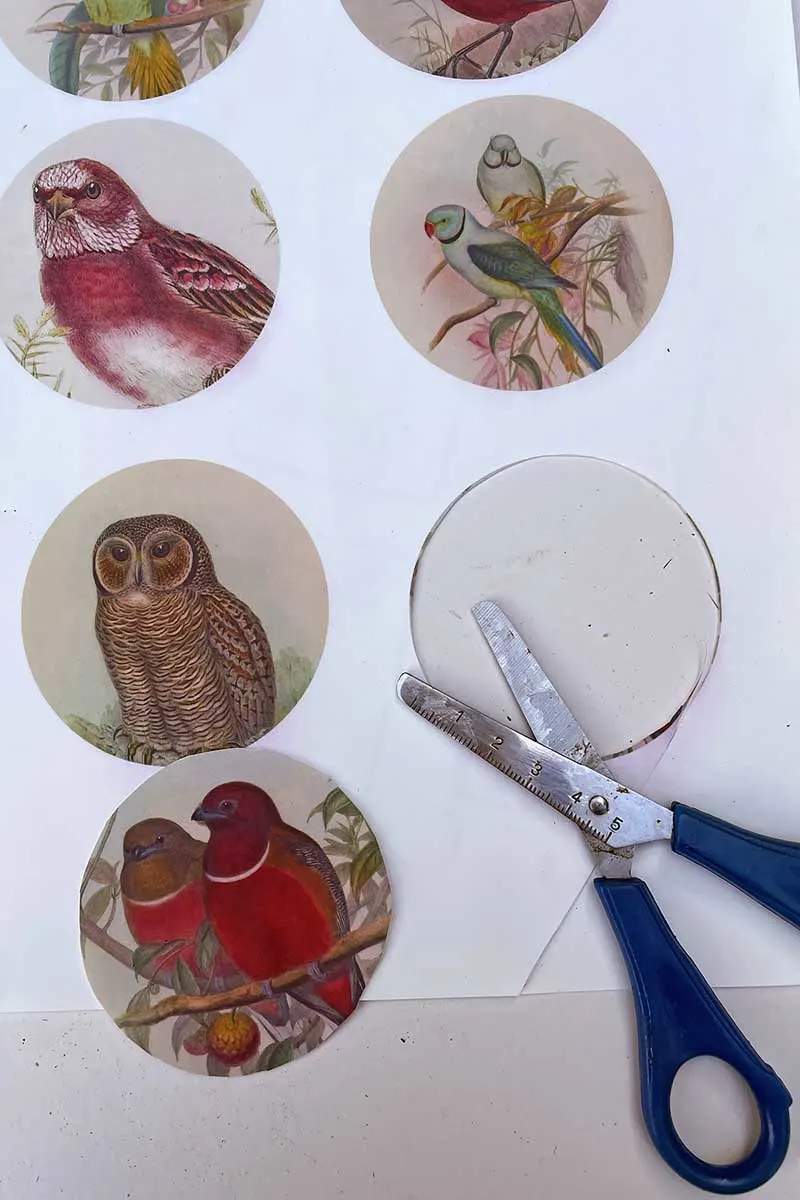
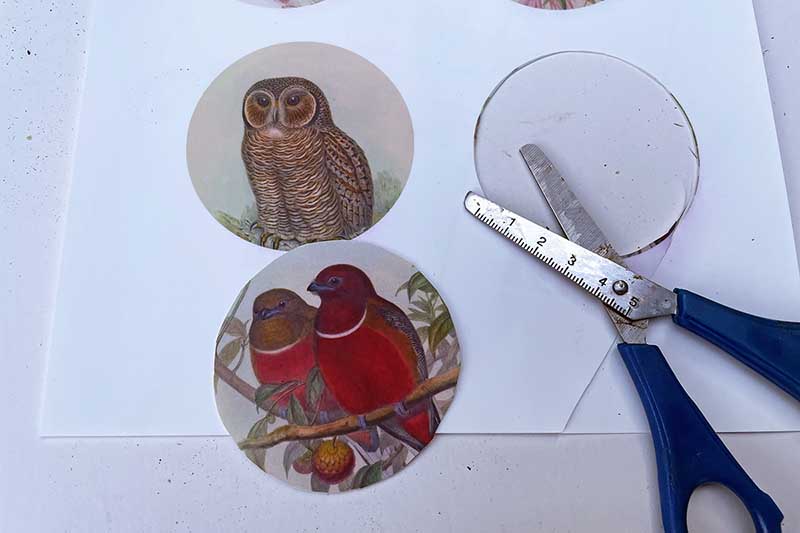
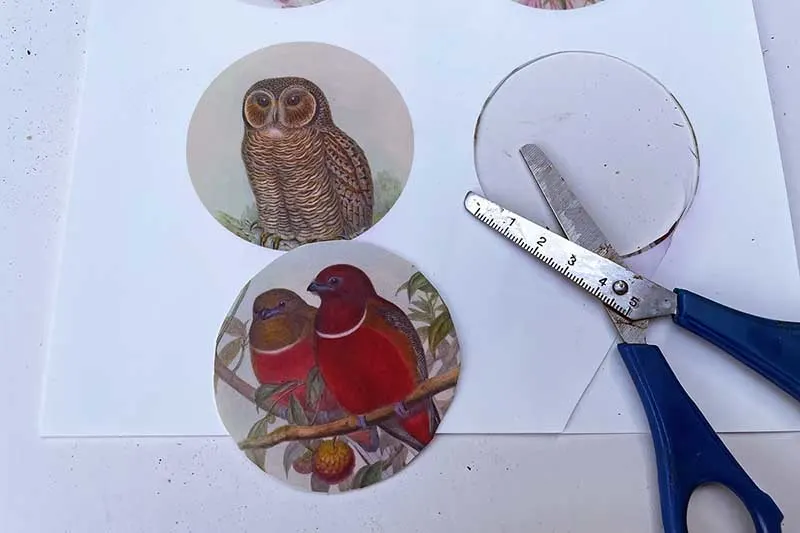
The Cropped Vintage Bird Images
I selected six images and cropped them to fit into the round faces of the wood slices. They all work on one sheet, and you can download them here.
The full original images and details of each bird from Gould’s book are available to download at the end of the post.

Wood Slice Printing
Step 1: Although my wood slices were relatively light, I wanted to ensure that the images were nice and creamy. As I was using light transfer paper, I painted the face of each wood slice. I just used a simple whitewash.

Step 2: Print the images on the transfer paper. Remember, when you put pictures on wood, they will be a reverse image. To counter this, select the option to print a mirror image in your printer’s menu. Leave the ink to dry for about five minutes, and then cut out each image.
( I forgot to mirror my print, but as there was no text on the pictures, it didn’t really matter)
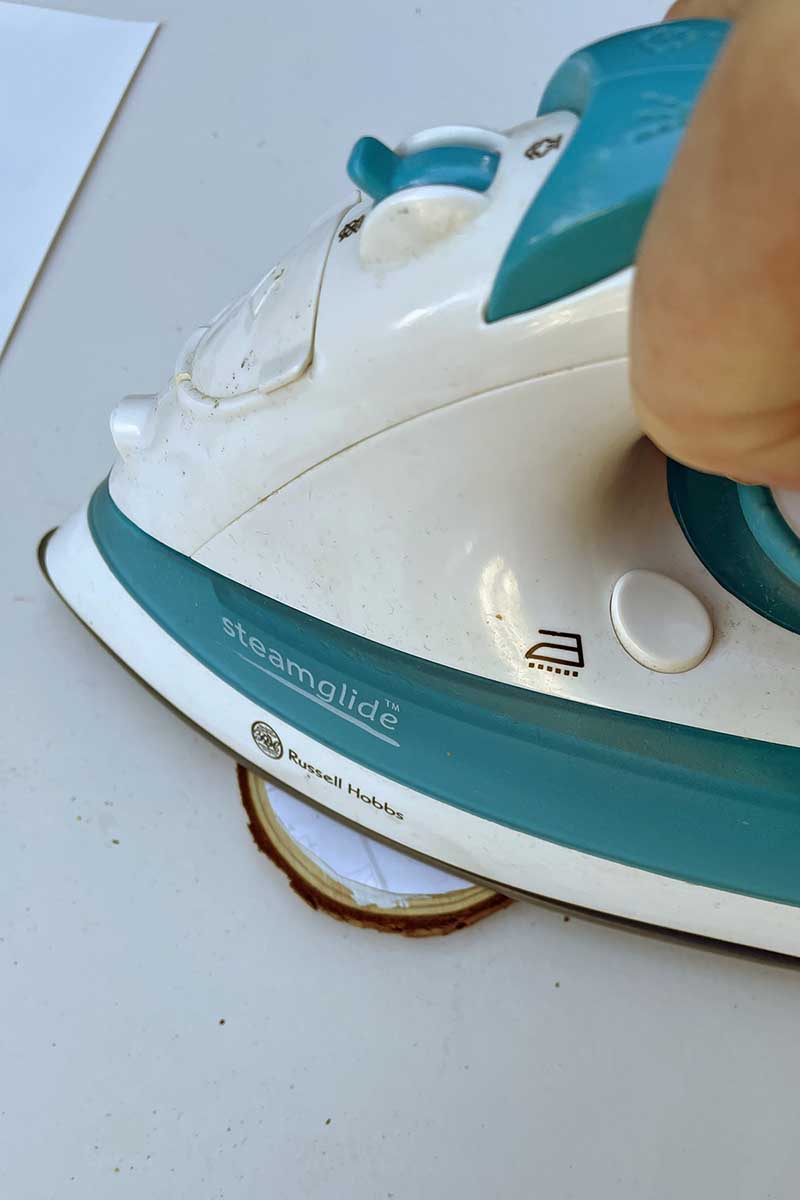
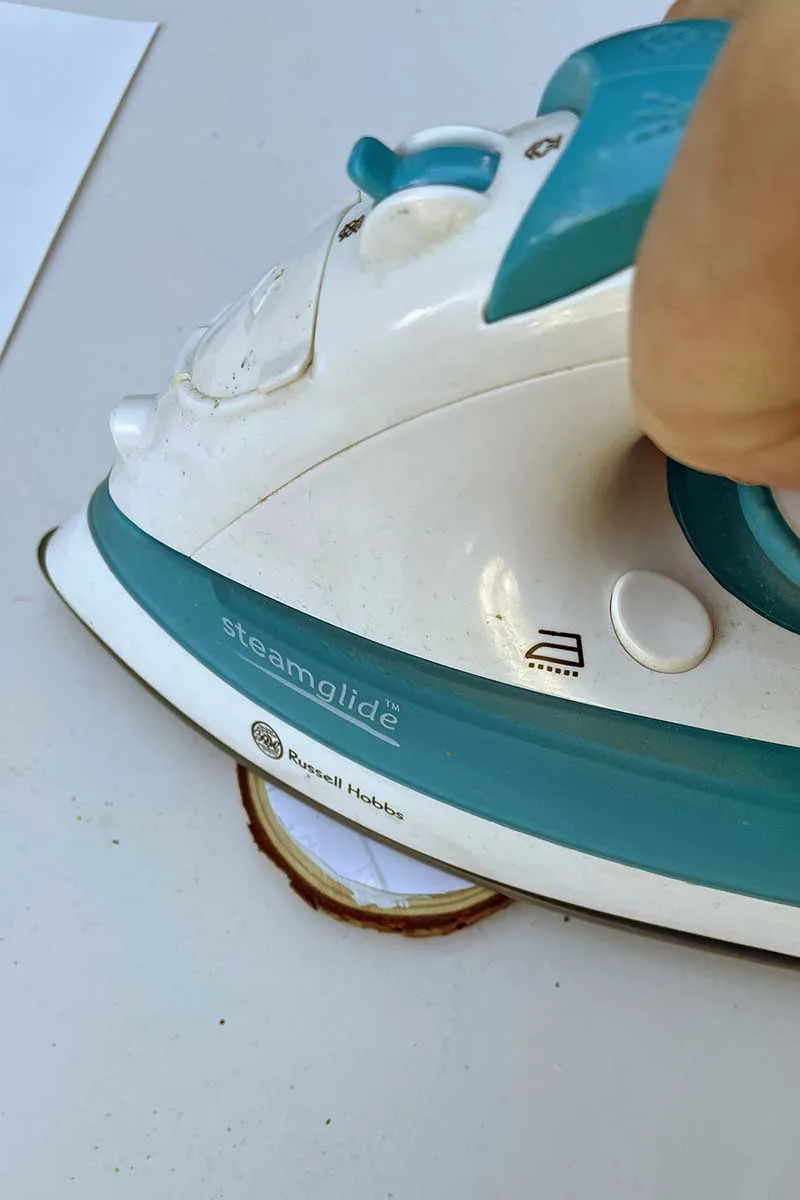
Step 3: Place the image face down onto the wood slice. Set your iron to its highest heat setting and turn off the steam function. Then press down firmly onto the back of the image with the hot iron for about 20-30 seconds.
Top tip: If using dark transfer paper with the image face up, use parchment paper between the iron and the image.
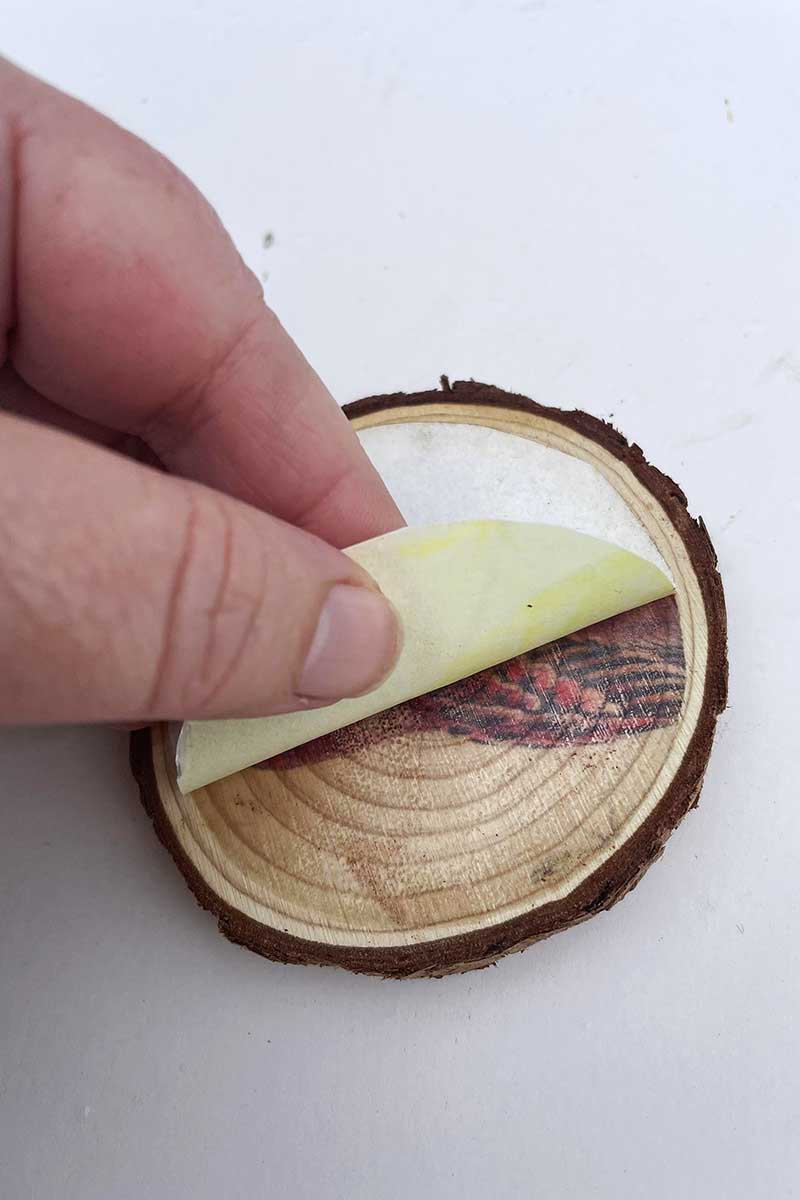
Step 4: Leave the wood slice to cool for a couple of minutes, then carefully peel back the paper to reveal the ink-printed wood.

Step 5: Drill a small hole into the top of the wood slice and thread the velvet ribbon through for hanging. A top tip for threading ribbon through tight holes is to wrap the end in tape first. The tape stiffens the end of the ribbon, making it easy to thread.
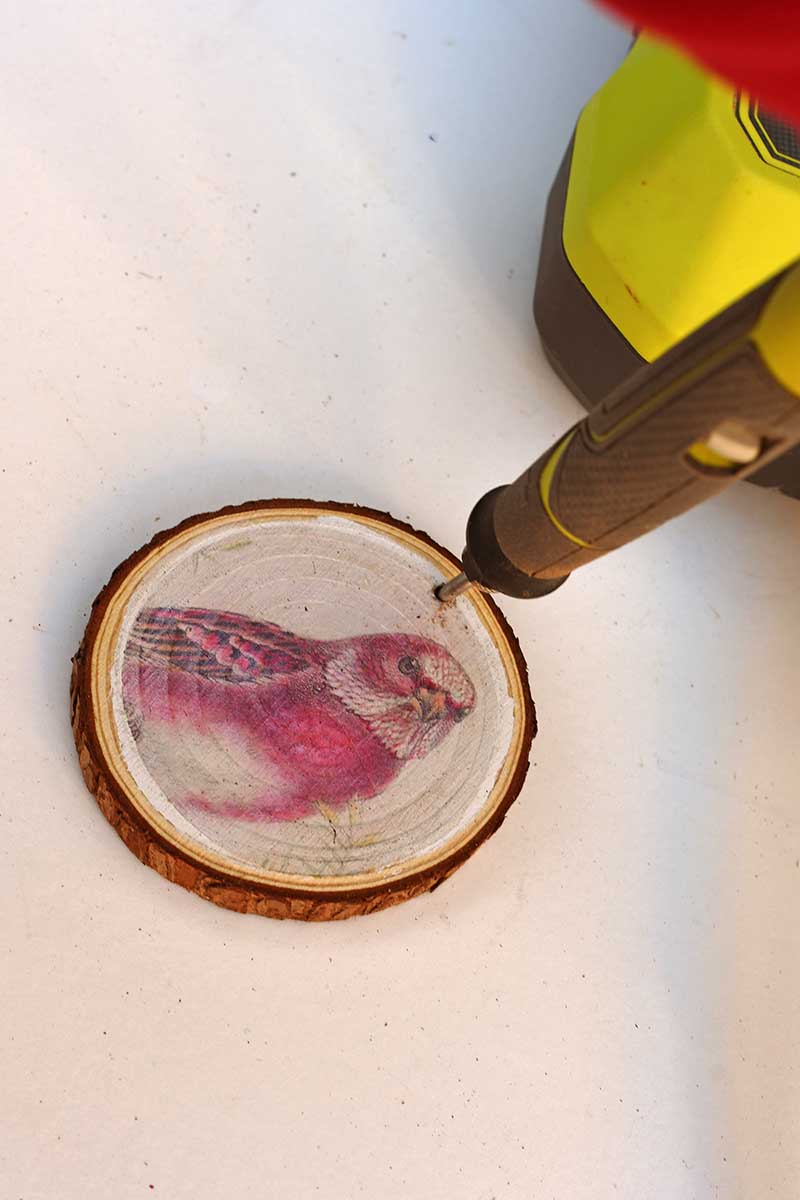

(Note: You can actually buy wood slices with pre-drilled holes)
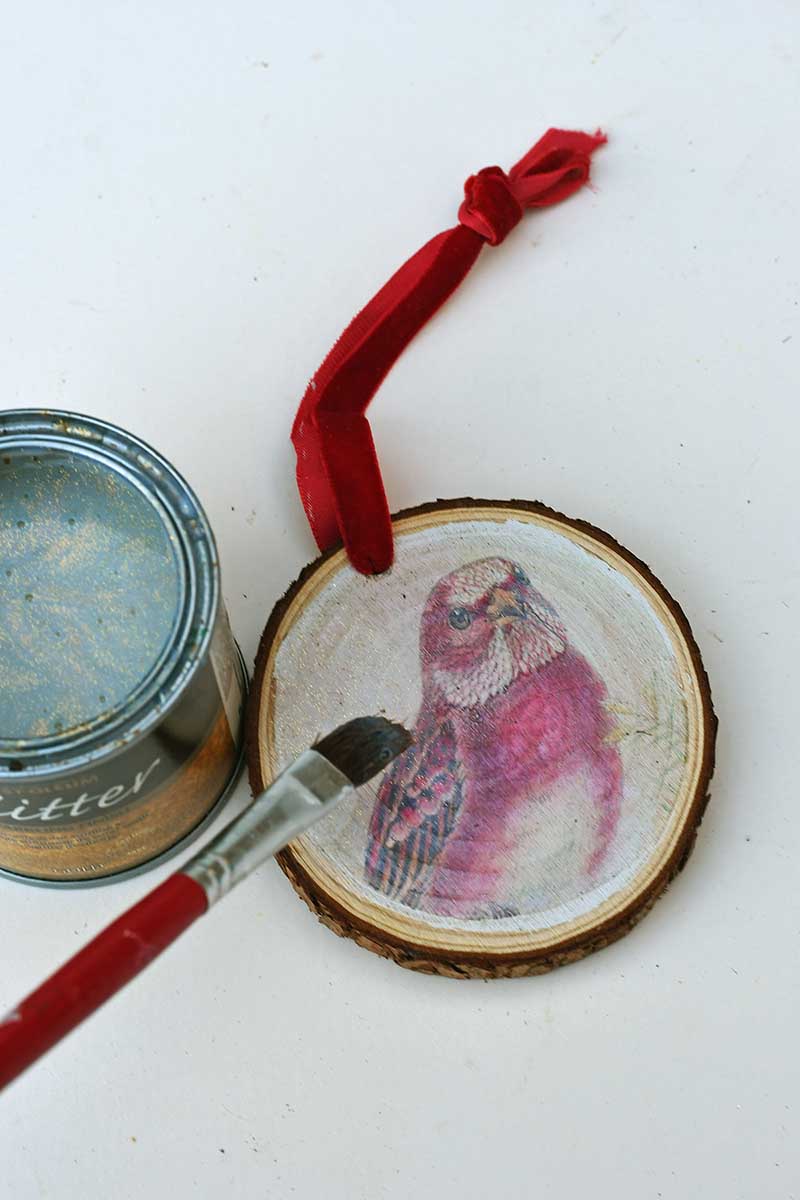
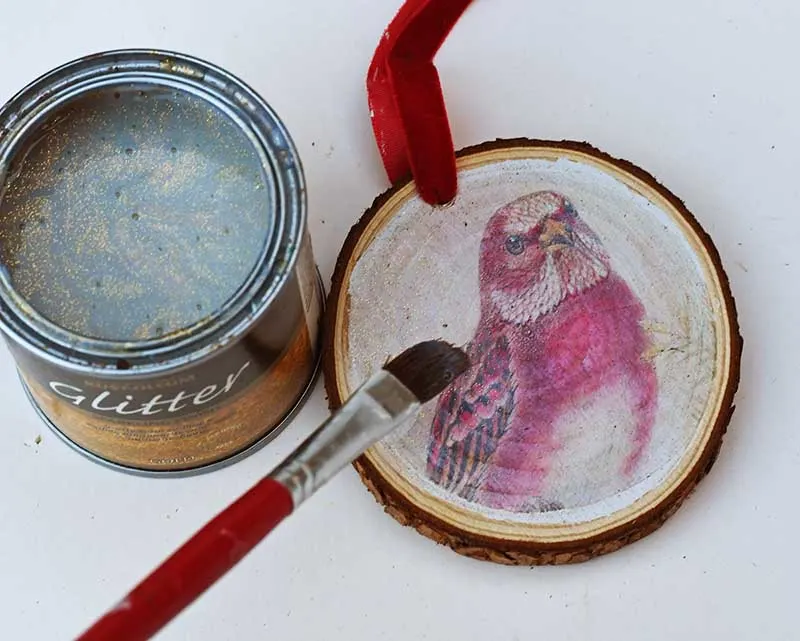
Step 6: Use an acrylic varnish sealer to seal the printed wood slices. If using them as coasters, make sure to use a water-resistant varnish.
As these wood slices were going to be Christmas ornaments, I used a glittery varnish sealer for a more festive look.


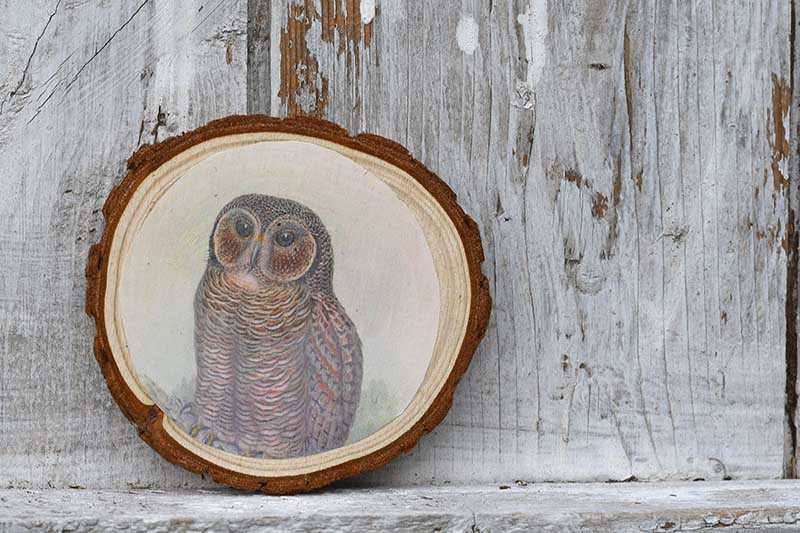
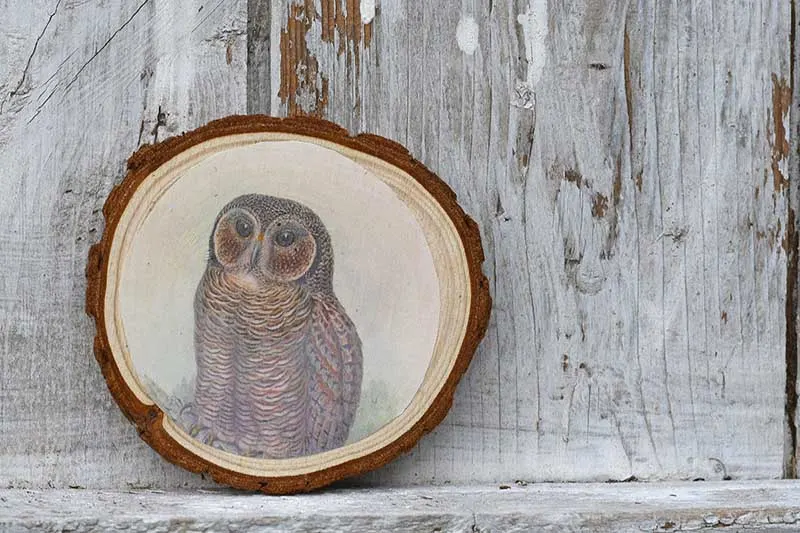
The Finished Wood Slice Picture Ornaments
It’s hard to convey in the pictures, but the glitter on these wood slice Christmas ornaments shimmers in the right lights. They look very festive on the Christmas tree.
I can’t wait for my dad to spot them and see if he can identify each one. I’m sure he’ll pass with flying colours, as he’s an expert on Asian birds!
Other suggested uses for printed wood slices include making coasters, placemats and nameplates, which would make lovely homemade gifts. There are plenty more vintage natural history images on the blog. From vintage flowers (particularly these poinsettia drawings) to holly illustrations and vintage butterflies, all would be fabulous pictures to put on wood.
Printed wood slices would make a great craft to sell.

You can use this technique to make these wooden zodiac ornaments. I’m going to use some of these images to make him bird paperweights following this tutorial on how to print onto stone.
For more free vintage Christmas images choices check out the antique Scandinavian Christmas cards
Use these vintage bird images to make other Christmas decorations, like these eyeglasses ornaments, decoupage baubles and jar lid ornaments.
You’ll find many more Christmas nautre craft ideas here.
How To Put Pictures On Wood


Learn the easy way to print images and photos onto to wood using iron on transfer paper. Then make gorgeous wood slice ornaments for your tree using free vintage bird illustrations.
Materials
- Iron on t-shirt transfer paper
- Wood slices 7-8 cm in diameter
- Red velvet ribbon
- Glitter varnish sealer
- Vintage bird images - free to download and print
Tools
- Iron
- Home office printer
- Scissors
Instructions
- In your printers advanced menu check the box for mirror image. Then print out the vintage bird images onto the t-shirt transfer paper.
- Cut out the round bird illustrations and place them face down onto the wood slices.
- Put your iron on it's hottest setting and turn off the steam function. Then press down onto the wood slice for about 20 seconds.
- Leave the wood slice to cool for a couple of miniutes.
- Next carefully peal away the backing paper from the wood slice to reveal the printed image.
- Drill a hole into the top of the wood slice and thread through some velvet ribbon for hanging.
- Seal the wood slice and add festive shimmer by brushing it with a glitter sealer.

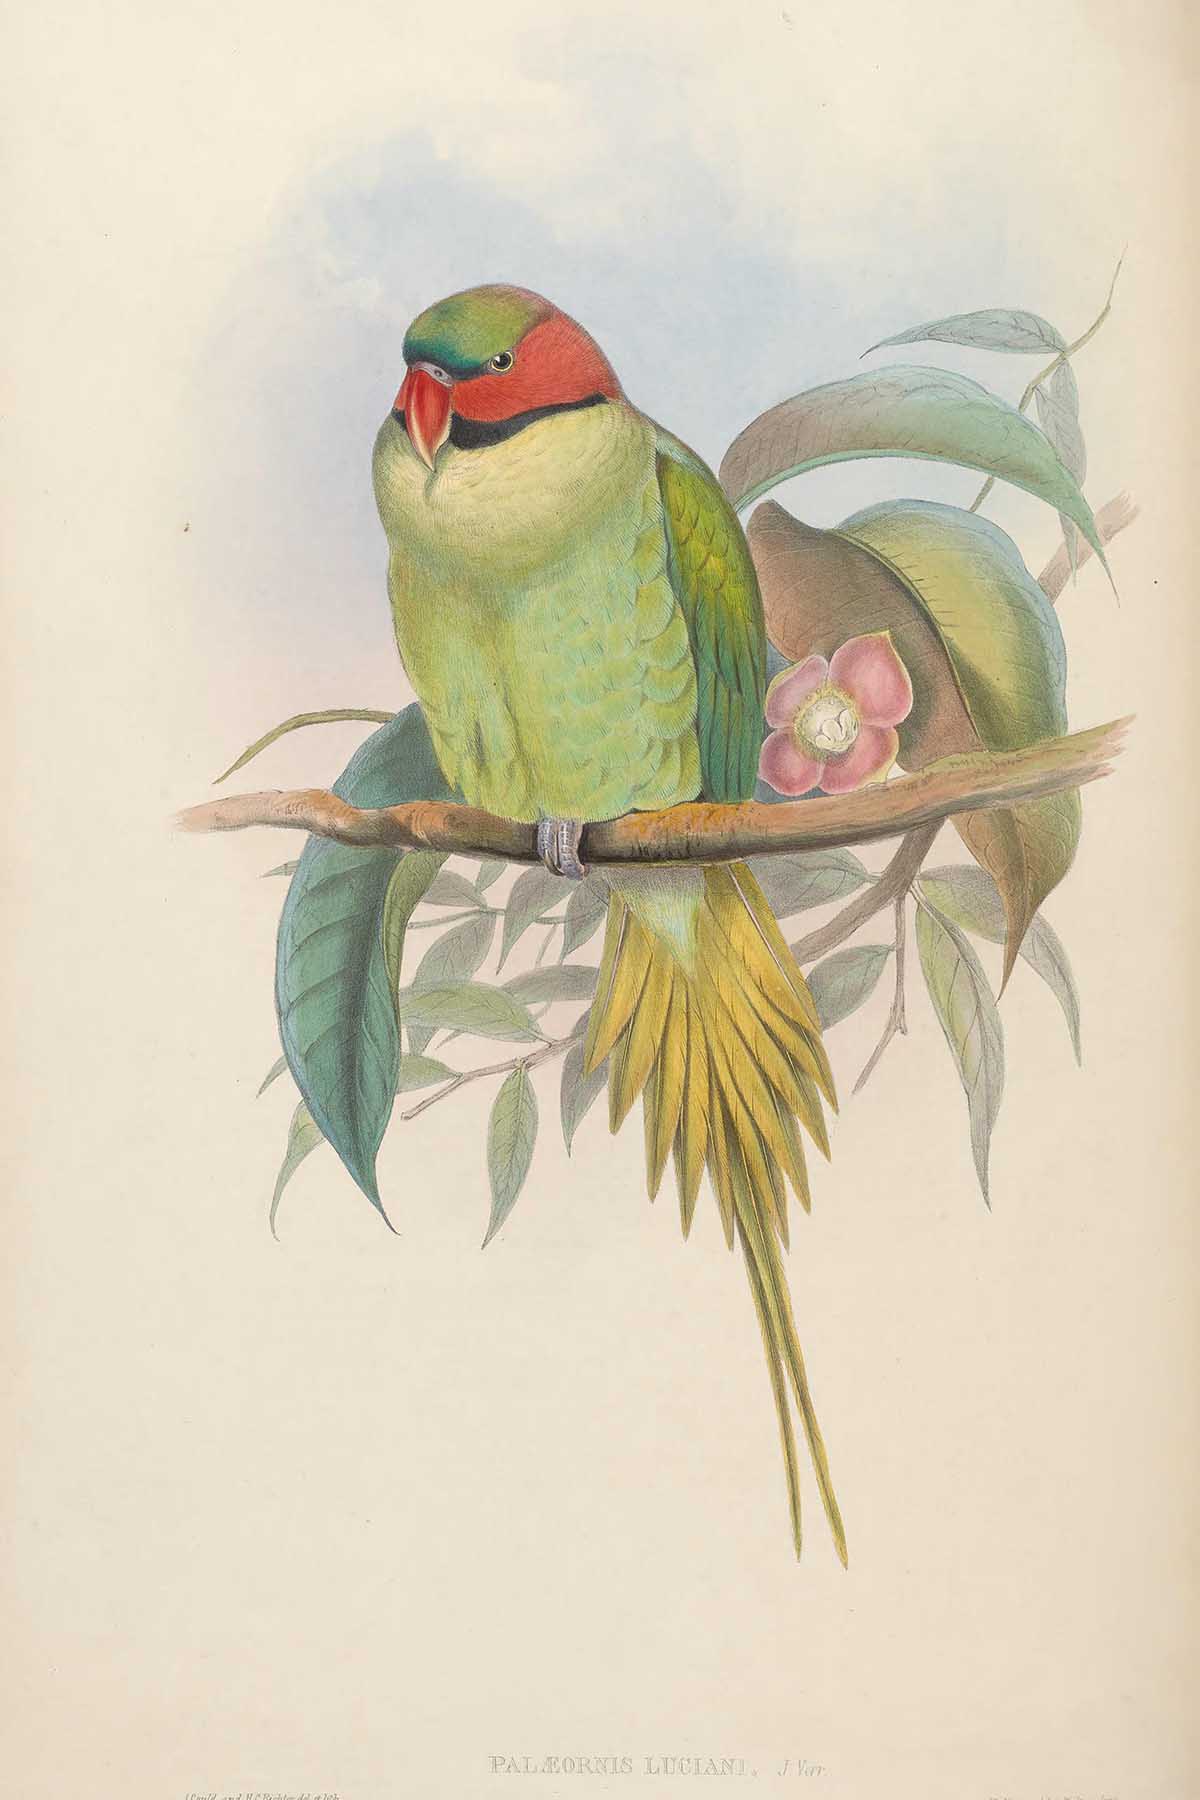
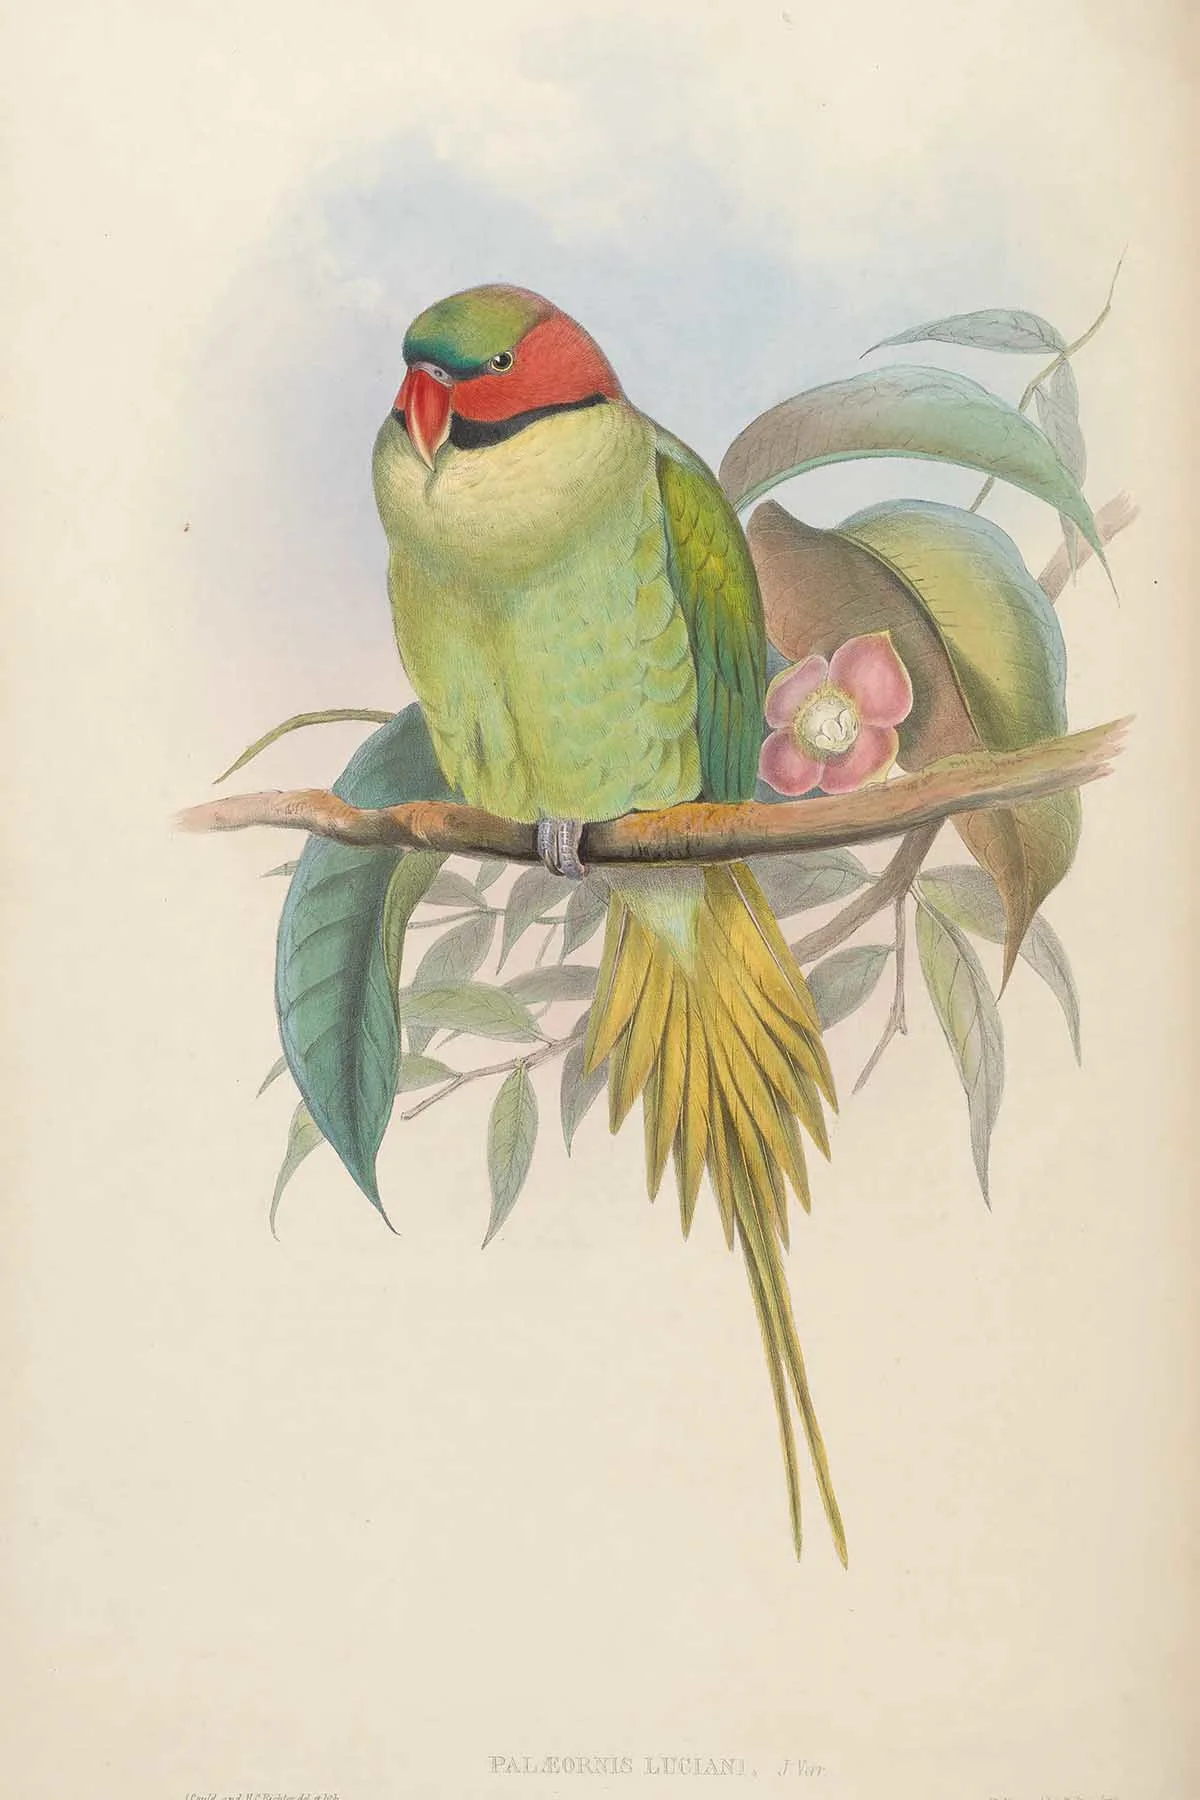
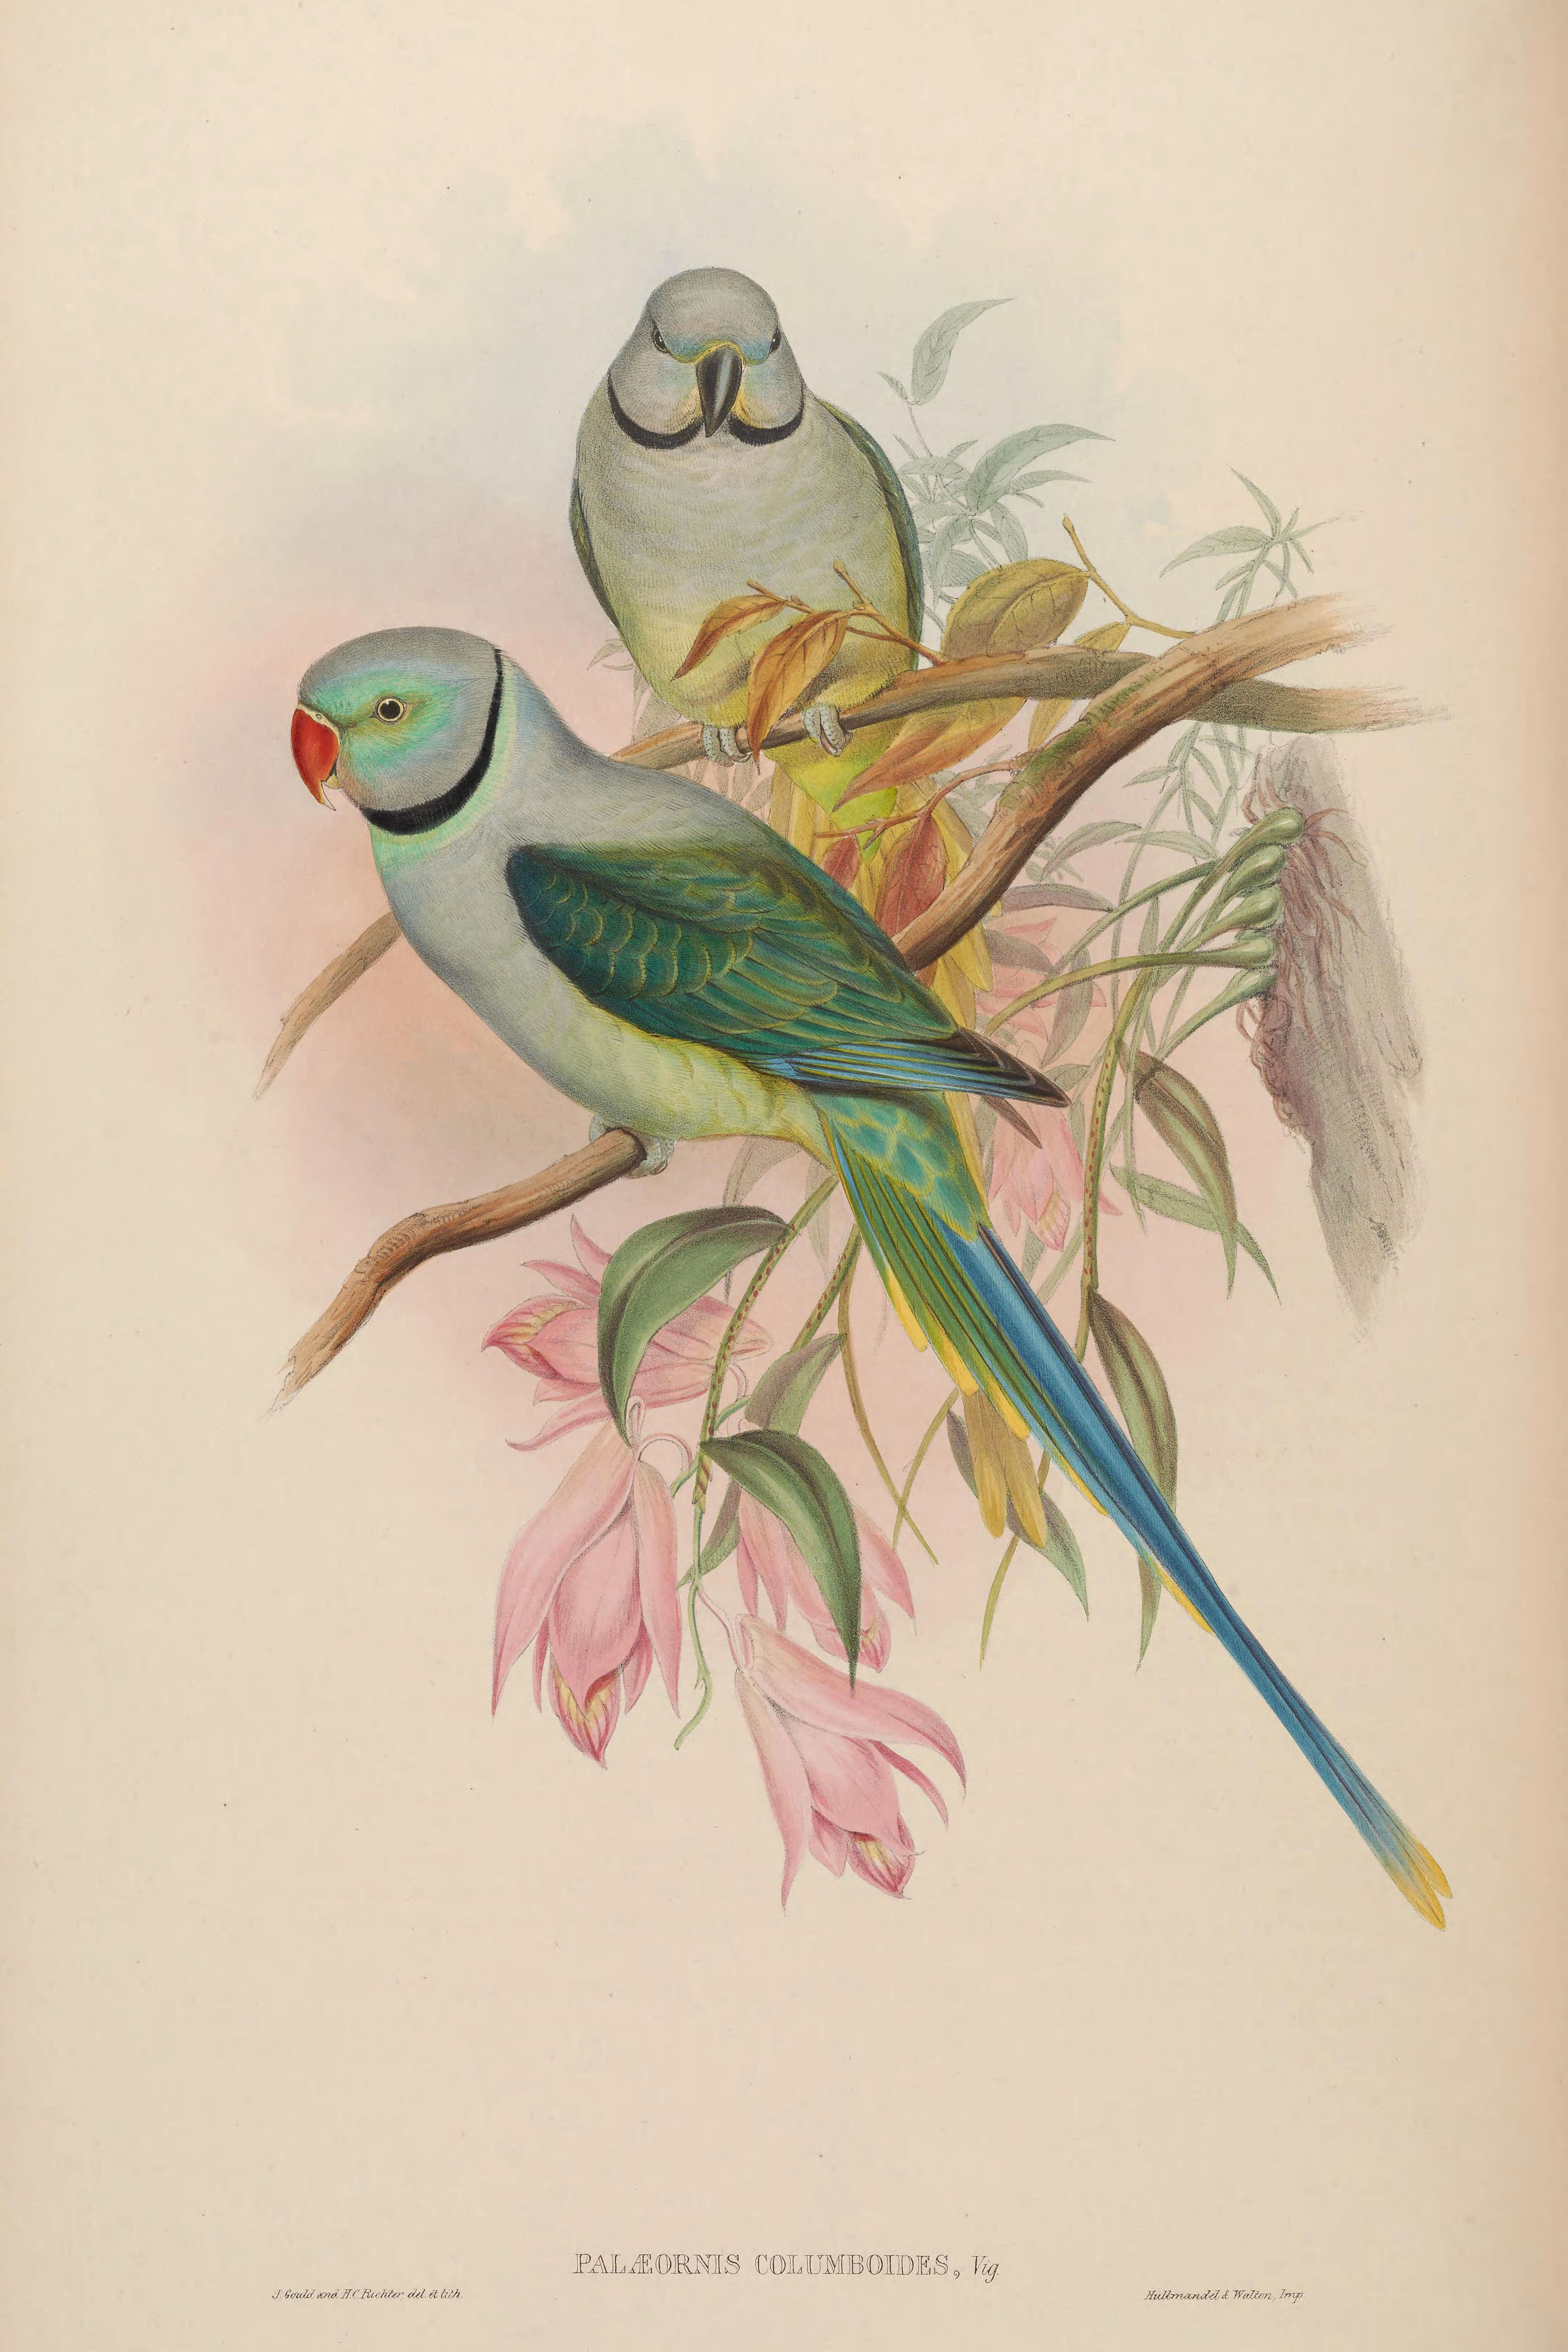
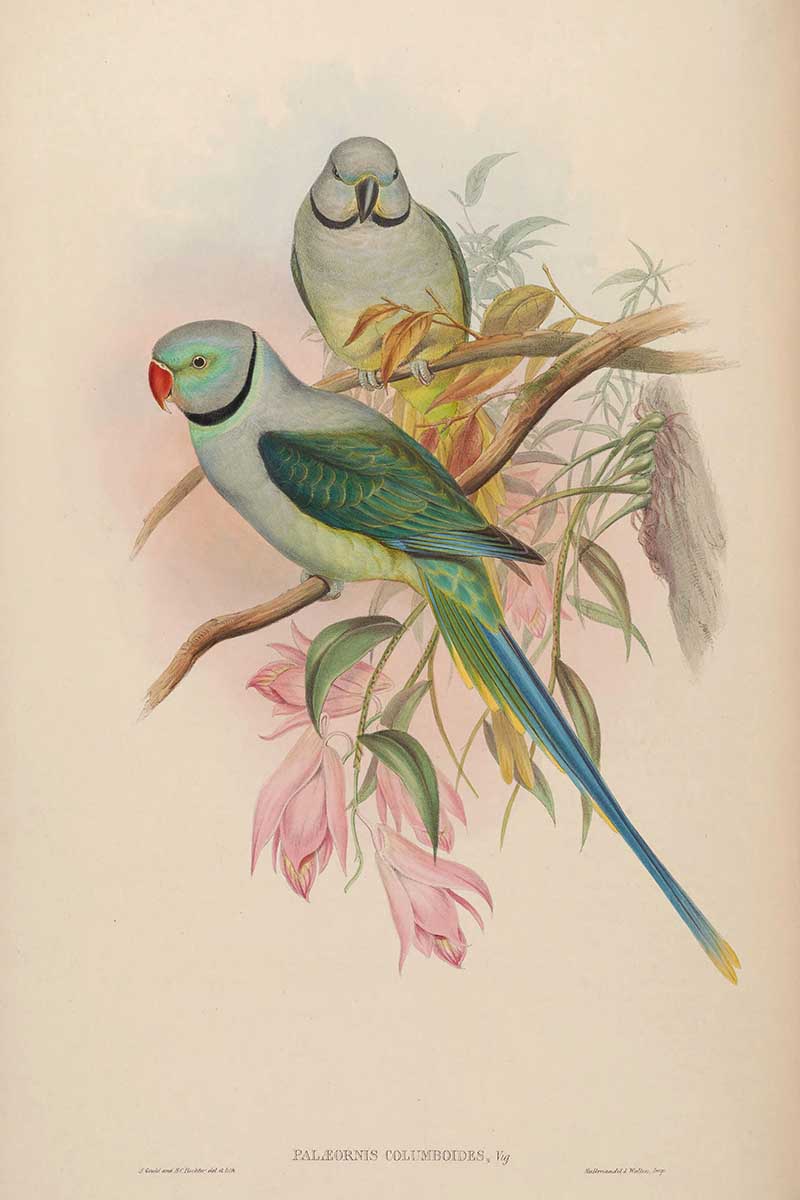
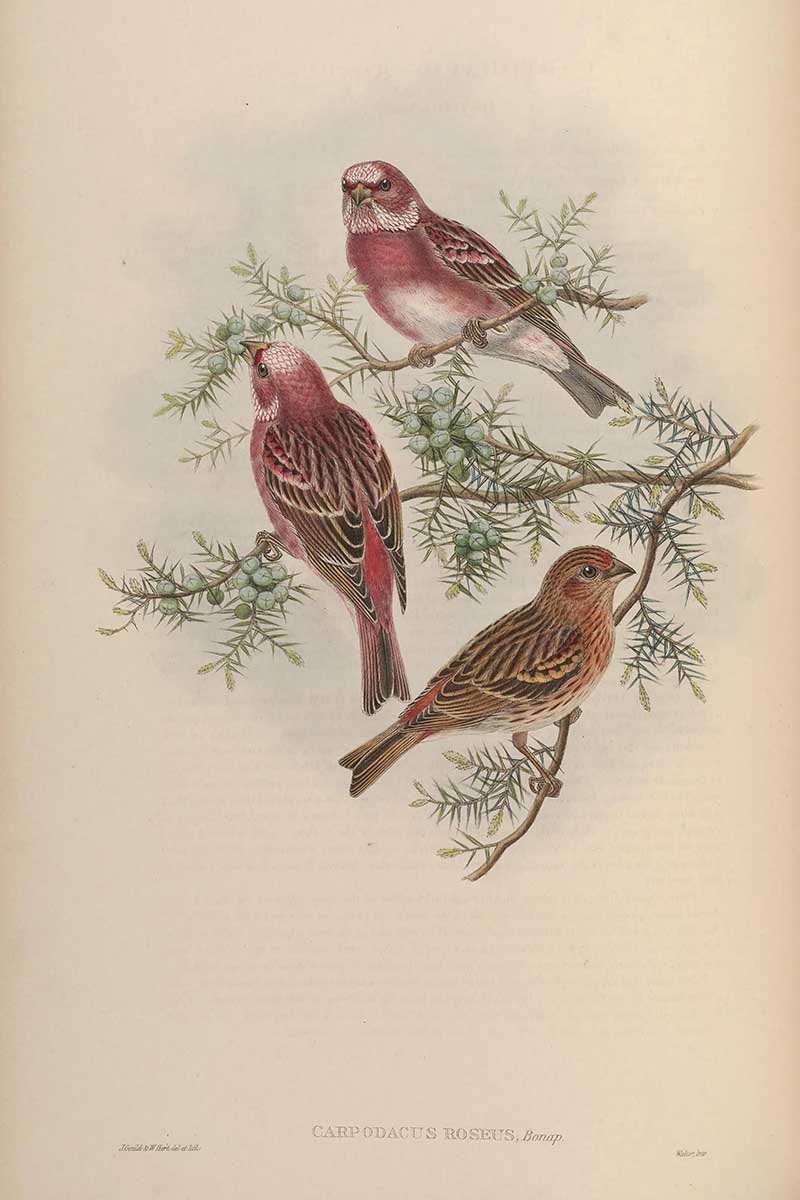
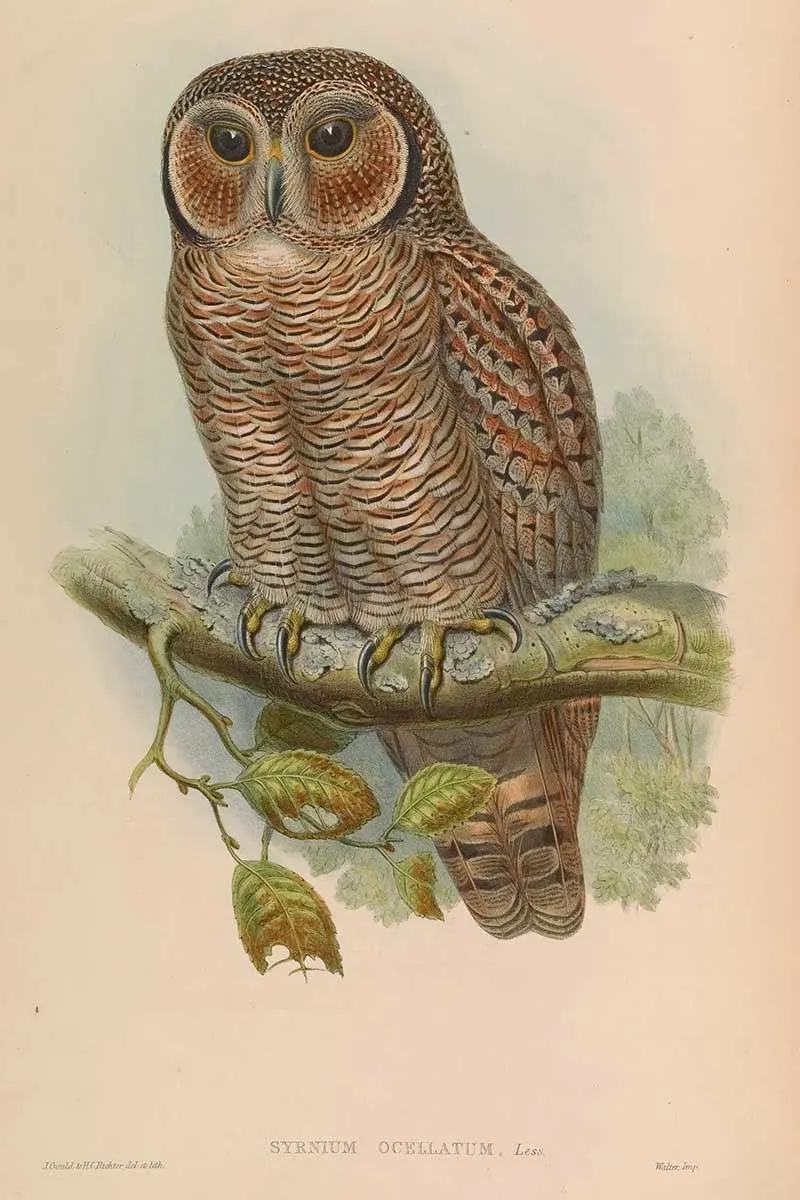
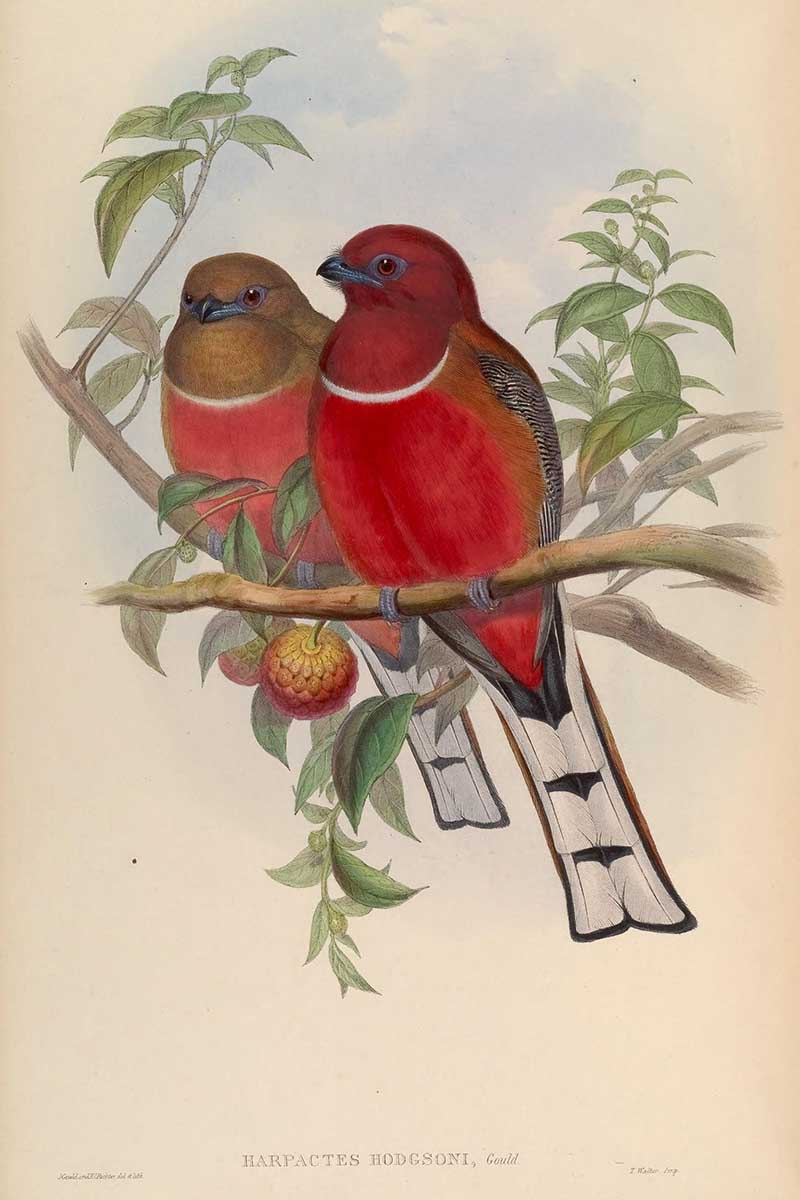
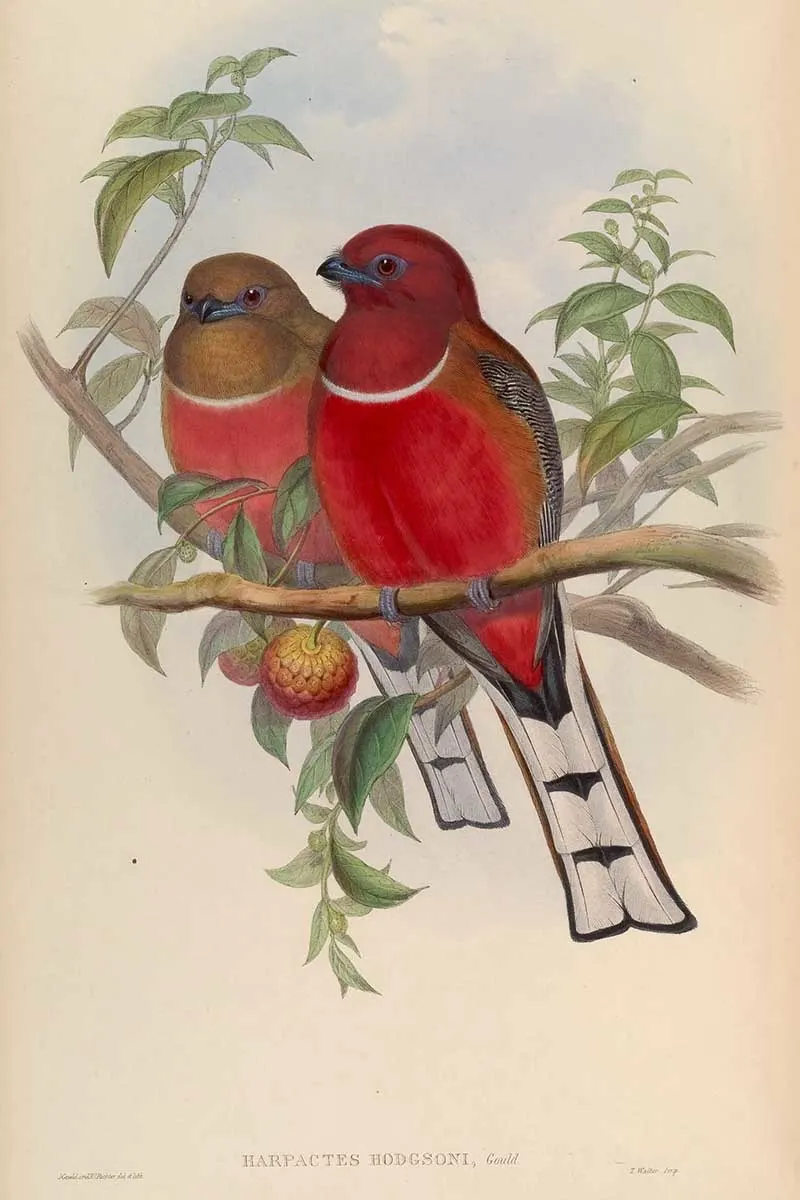
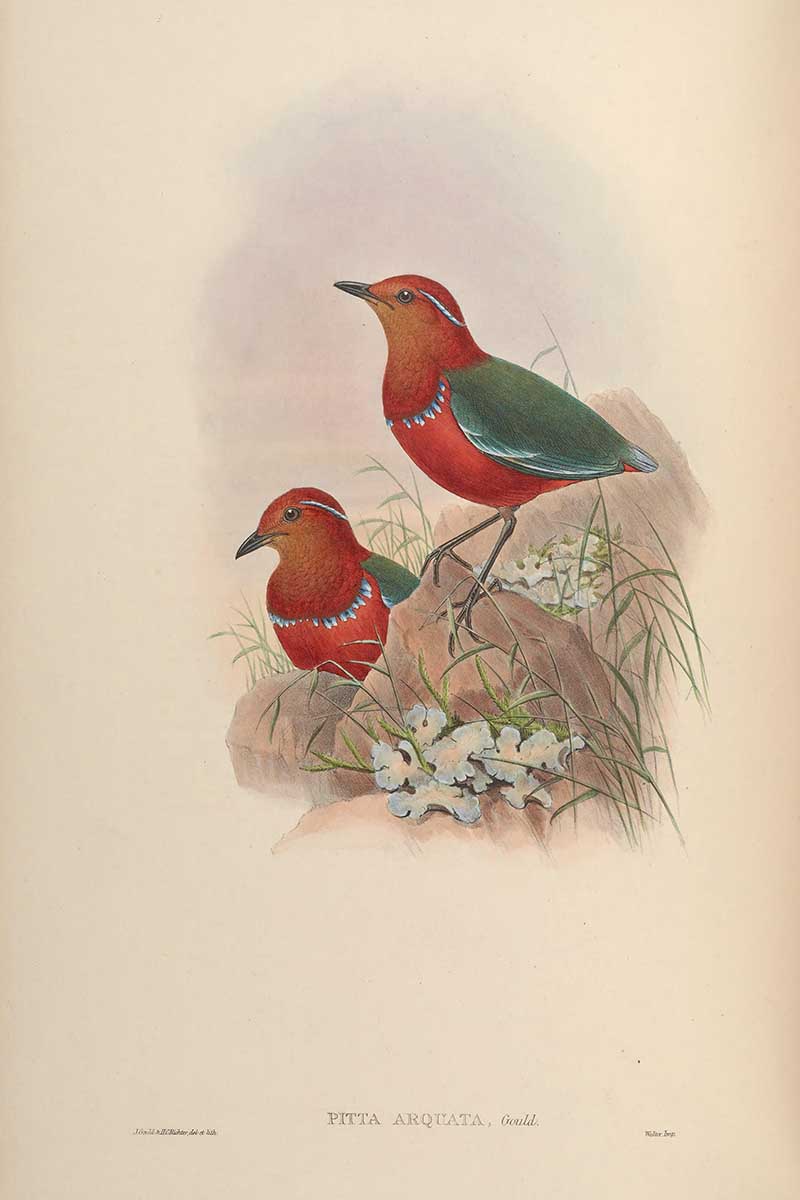
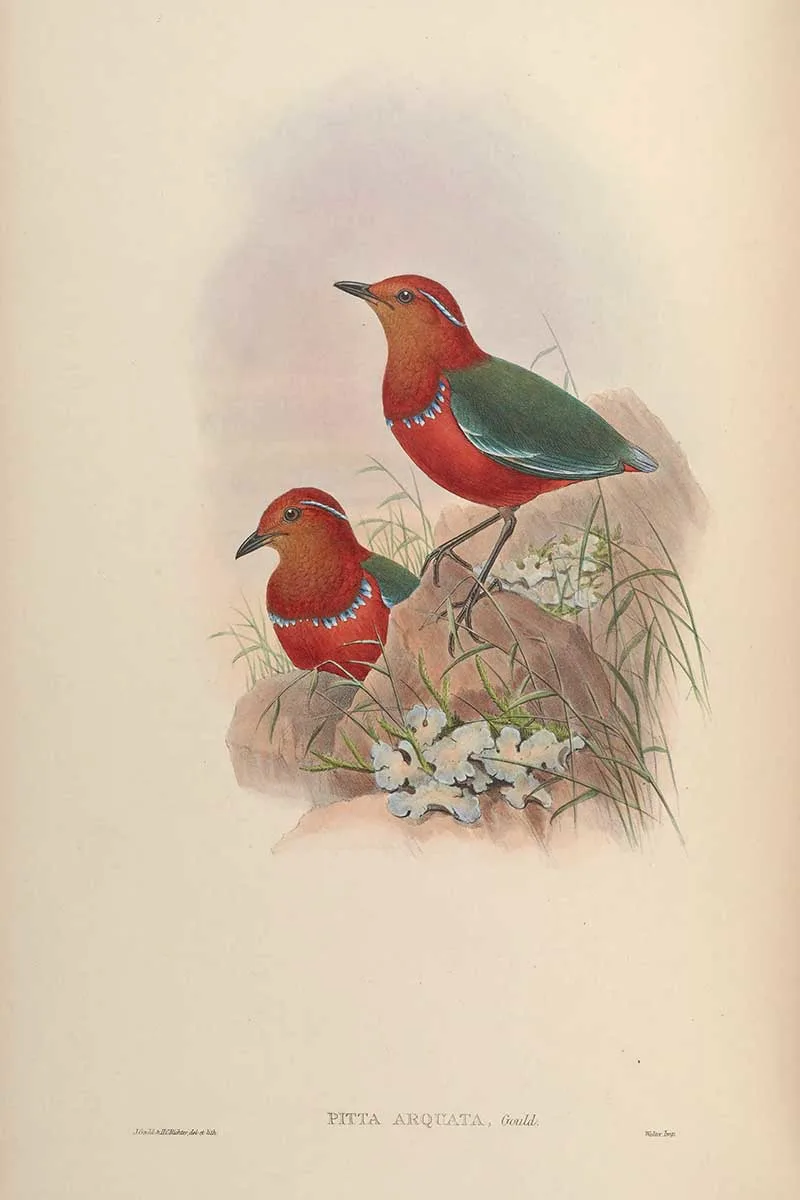
The Original Asian Bird Prints
These are the original vintage bird prints cropped and printed onto the wood slice ornaments. They are all by John Gould and from “The Birds of Asia“, 1850-1883.
To download the bird print you want, click on the title above it, and a high-resolution image will open in a new window.
The long-tailed parakeet is endemic to Malaysia (including Singapore).
You will find a lot more parakeet images with these parrot paints of Edward Lear.
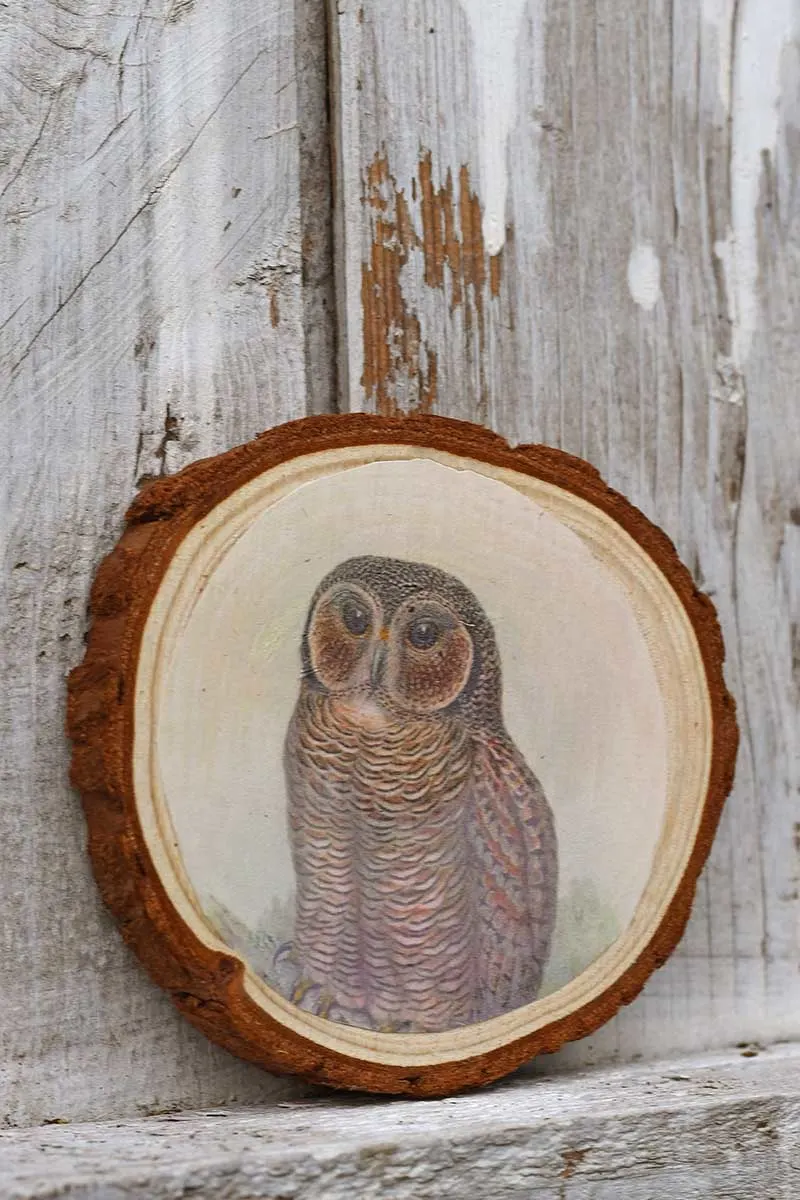
The Mottled wood owl is a sizeable Indian owl. They are found in gardens and thin deciduous forests adjacent to dry thorn forests or farmland. They have a distinctive tremulous eerie call at dawn and dusk.
There are more vintage owl drawings on the site.

Pin this post for later.

Mar
Sunday 29th of October 2023
Great idea to use transfers, I hand painted pictures of my horses on the same type of wood slices. You can buy the slices from Walmart, just be careful as many suppliers charge shipping fees.
claire
Sunday 29th of October 2023
I bet the horses looked fabulous. Thank you.
Julie
Sunday 30th of October 2022
I love these and will be looking out for transfer paper. I've tried the Mod Podge method with varied results so something quicker and more reliable would be good! I'm going to feature these at Handmade Monday this week :-)
claire
Sunday 30th of October 2022
Thank you, and thanks for the feature. The transfer paper works really well and is very quick and easy.
Sally in St Paul
Friday 21st of October 2022
These ornaments turned out beautifully - love them!
claire
Friday 21st of October 2022
Thank you so much. I hope my dad appreciates them!