
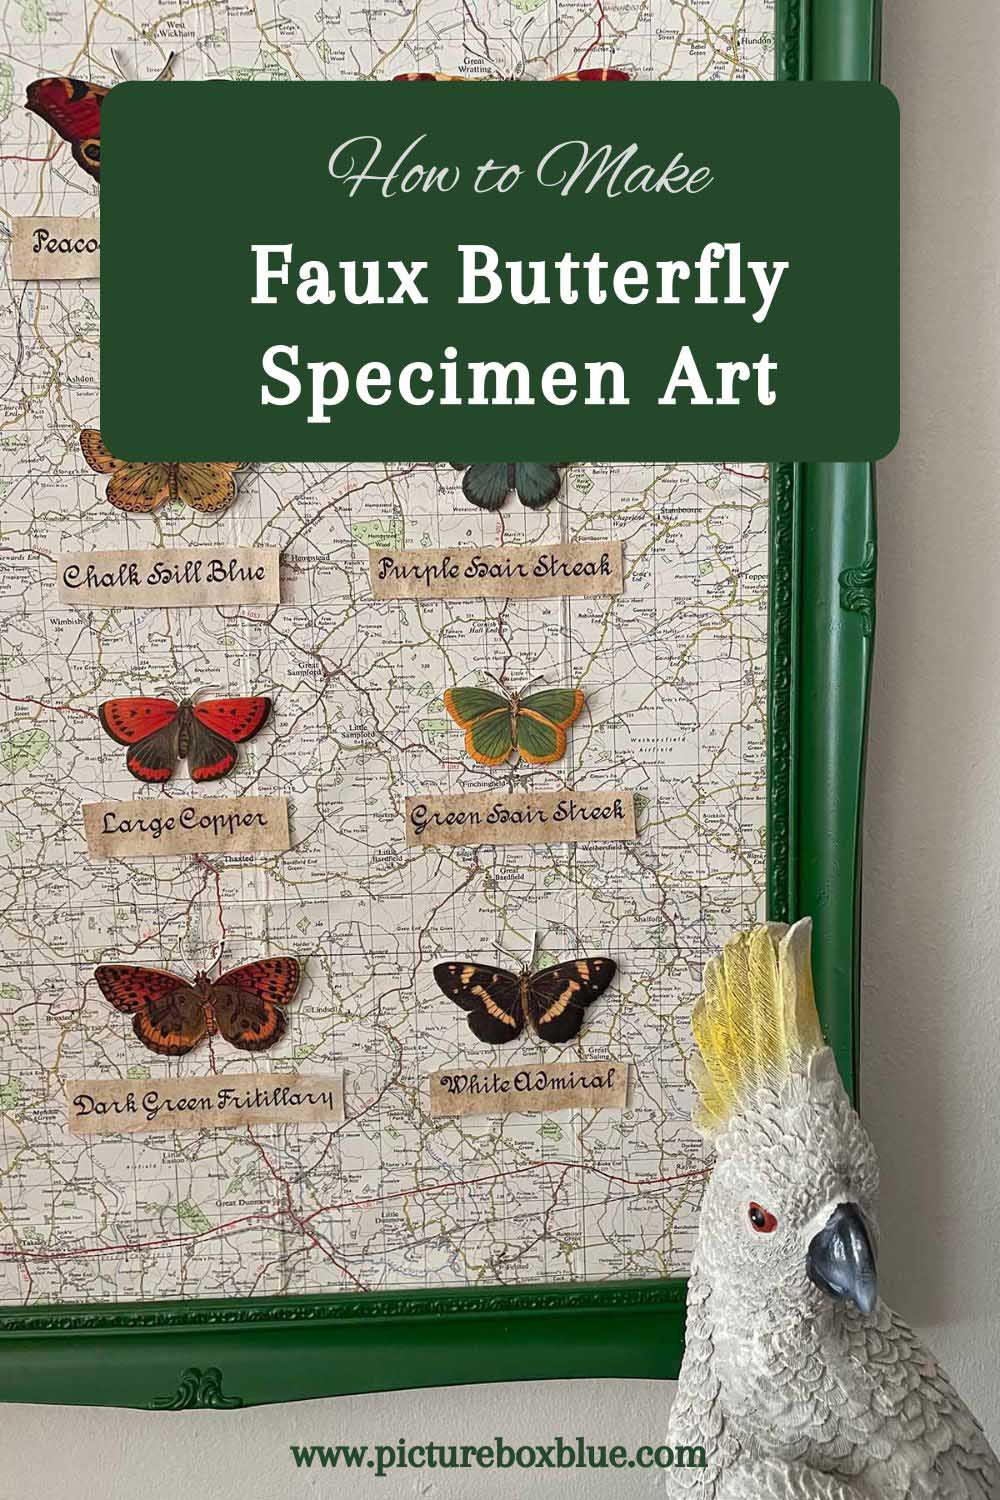
Inside: A tutorial to make a DIY butterfly wall decoration in the style of vintage specimen art.
One of my favourite things is to wander around flea and antique markets hunting for beautiful vintage maps and natural history prints—many of which I feature on this site.
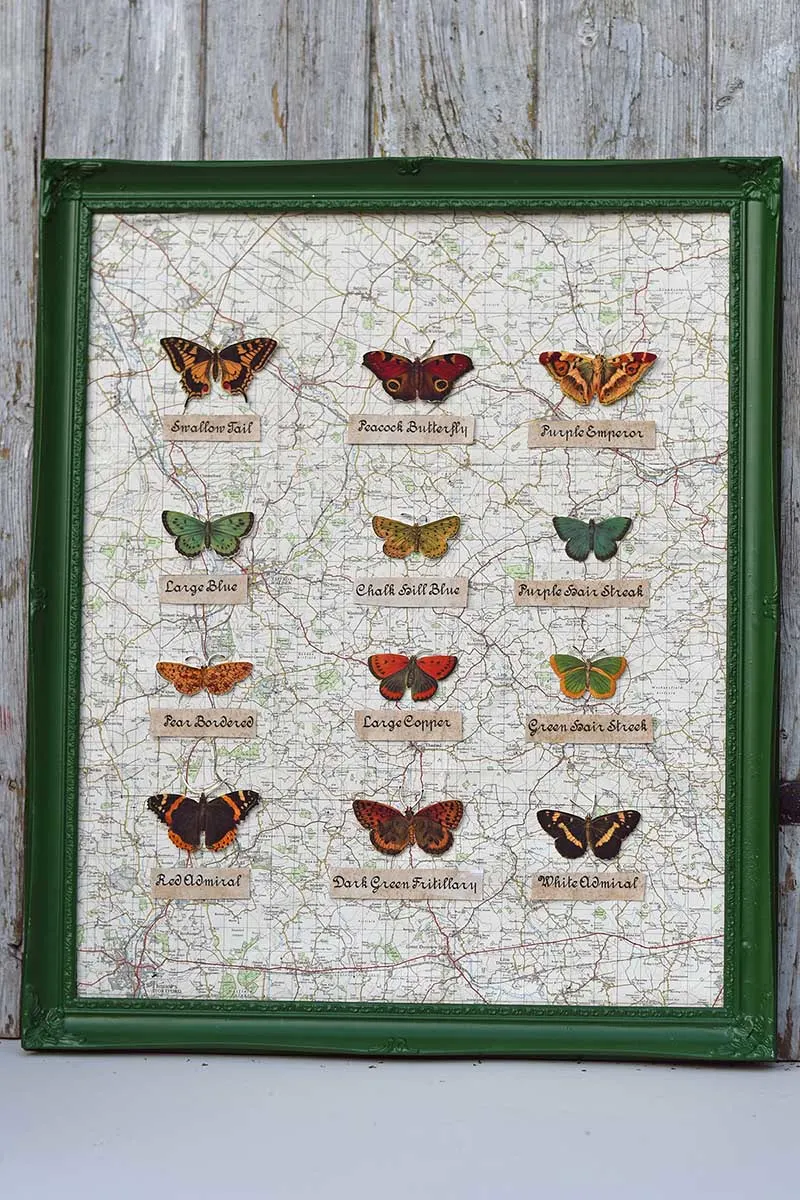
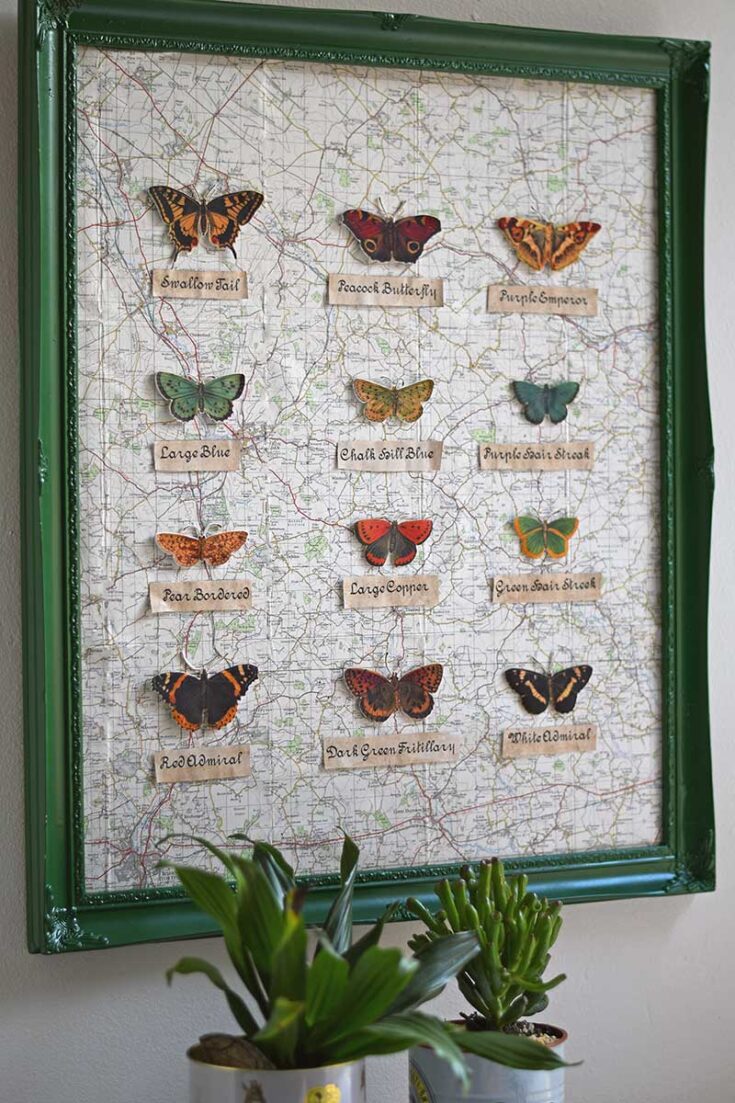
Every so often in my hunt, I come across vintage Victorian butterfly specimen art. These framed butterflies look stunning, as they are the beauty queens of the insect world. However, I’m hesitant to buy the displays, as it just doesn’t seem right to have real dead butterflies on the wall.
That’s when I thought of making my faux DIY butterfly wall decoration. Instead of real butterflies, I used vintage butterfly illustrations to create shrink-plastic replicas, which I then framed just like the Victorian originals.
I’ve used single butterflies before to make Christmas ornaments for the tree, but these were made of cardboard and not shrink plastic. Additionally, this wall decoration is suitable for use all year round.
We participate in the Amazon Services LLC Associates Program, an affiliate advertising program designed to provide a means for us to earn fees by linking to Amazon.com and affiliated sites. As an Amazon Associate, I earn from qualifying purchases.
What You Need To Make Faux Butterflies
- Printable Inkjet White Shrink Plastic Sheets
- Foam board
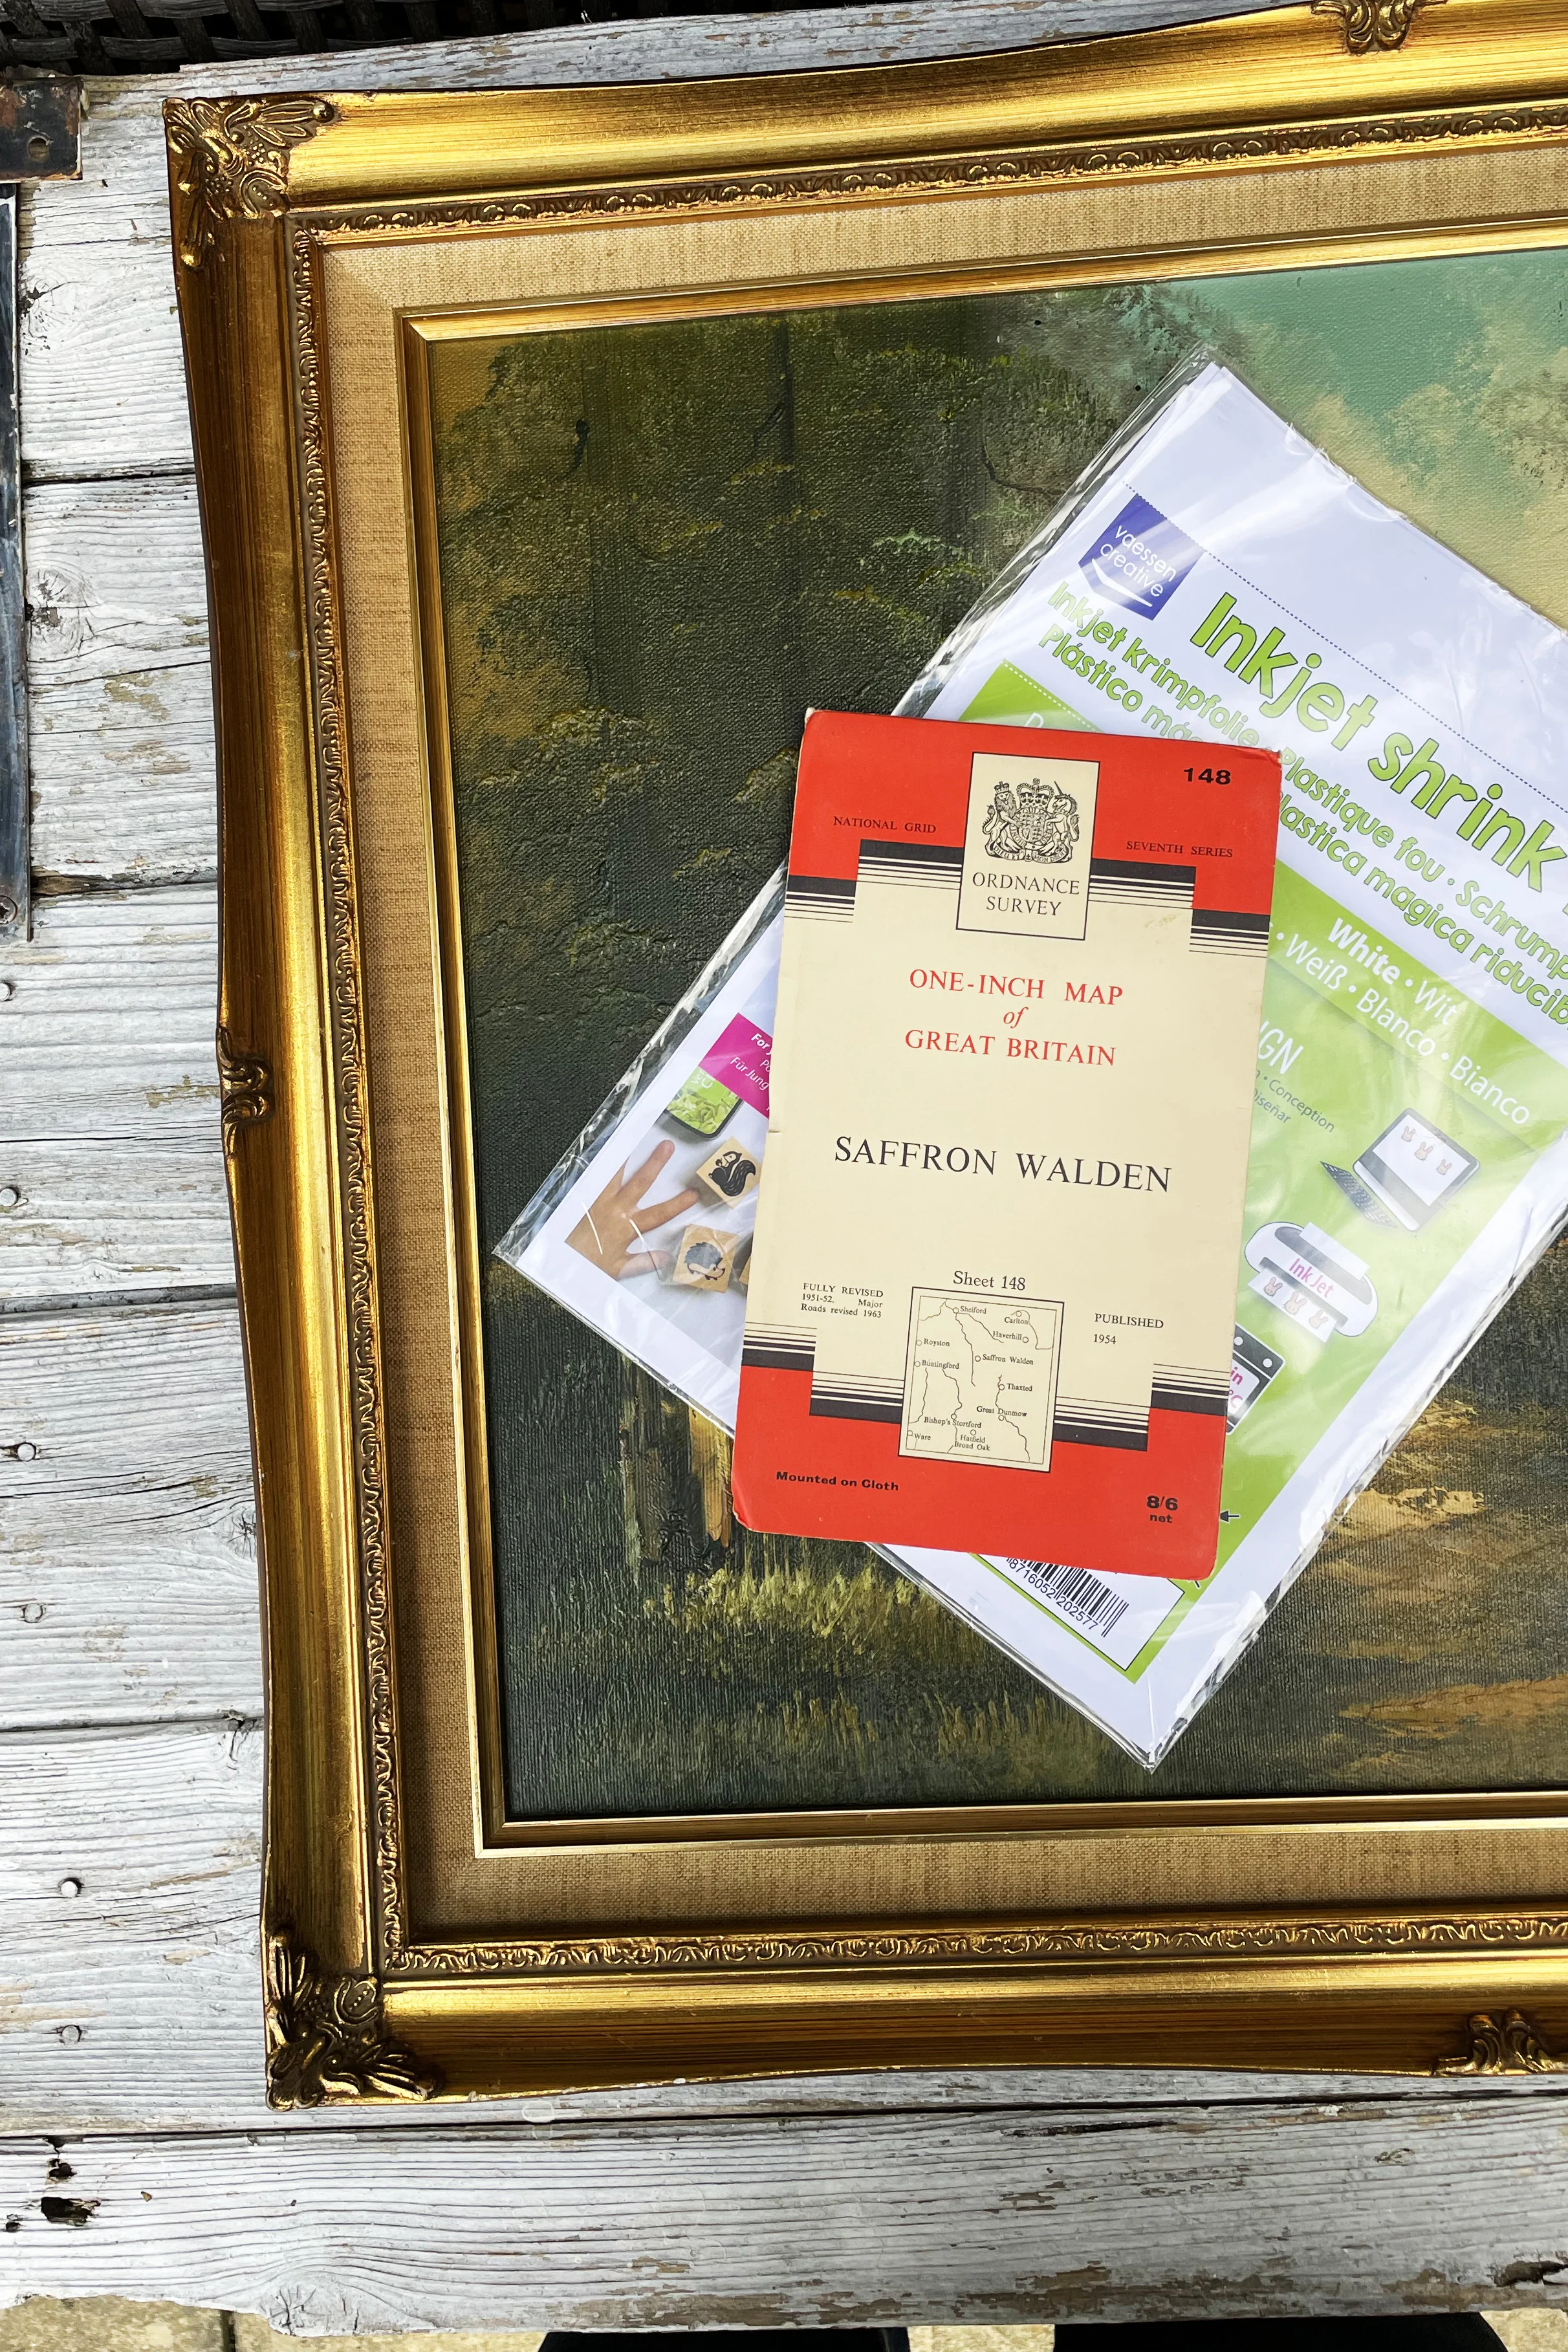
- An Old Picture Frame
- Old Road Map – Or print one of the many free vintage maps on the site.
- Double-sided foam pads
- A shot of espresso coffee or strong instant coffee
- Mod Podge

The Vintage Butterfly Images
There are many vintage butterfly prints on Pictureboxblue that you can use for this specimen art, including some art nouveau butterflies and with these vintage entomology plates.
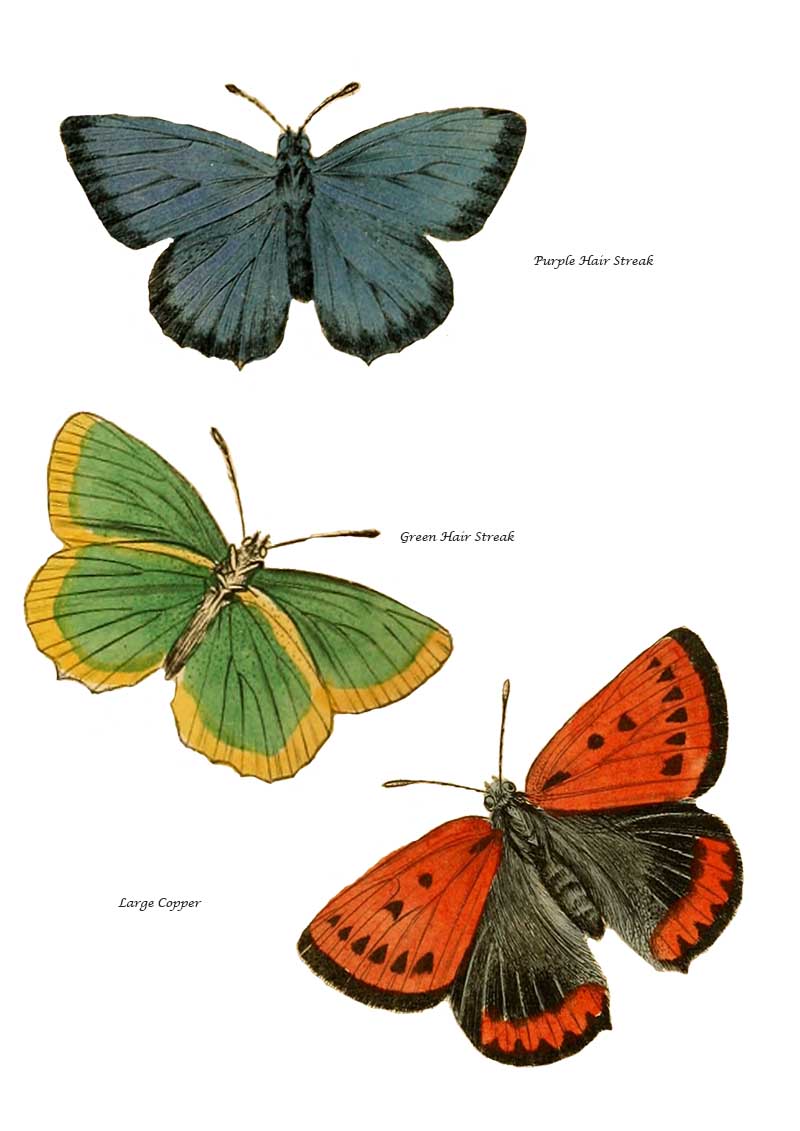
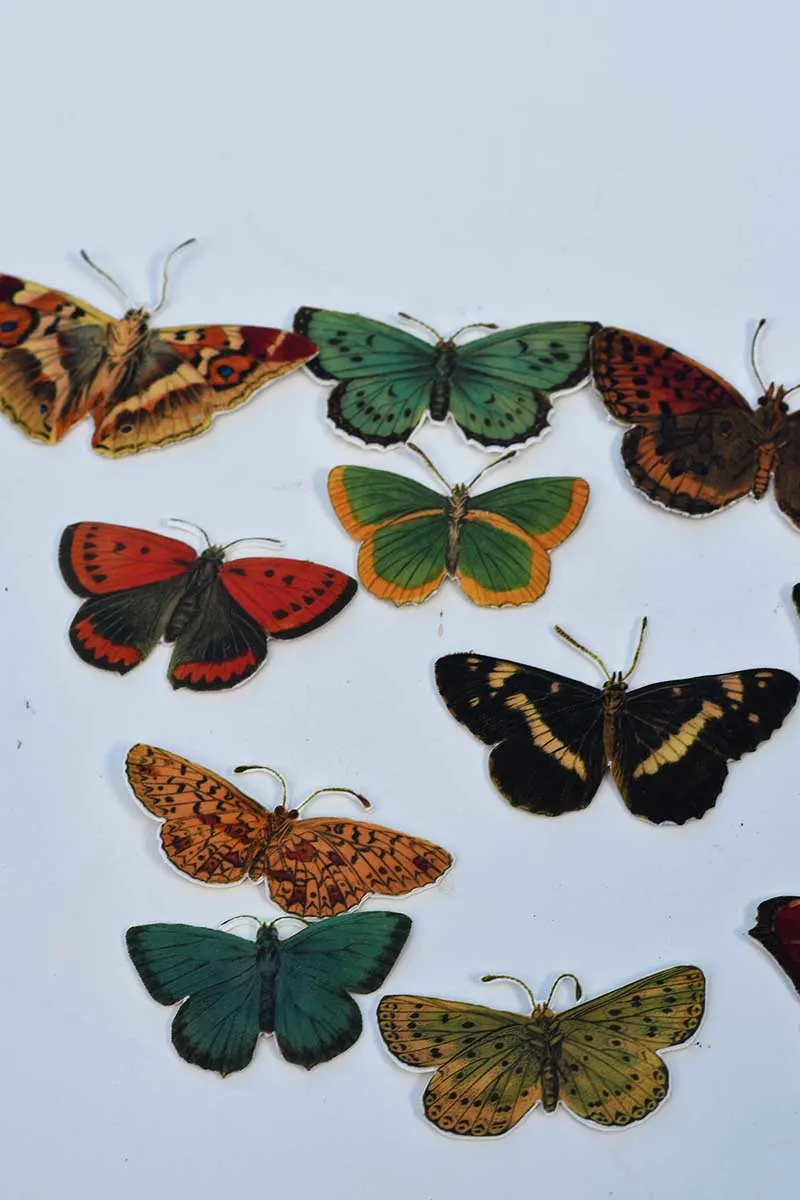
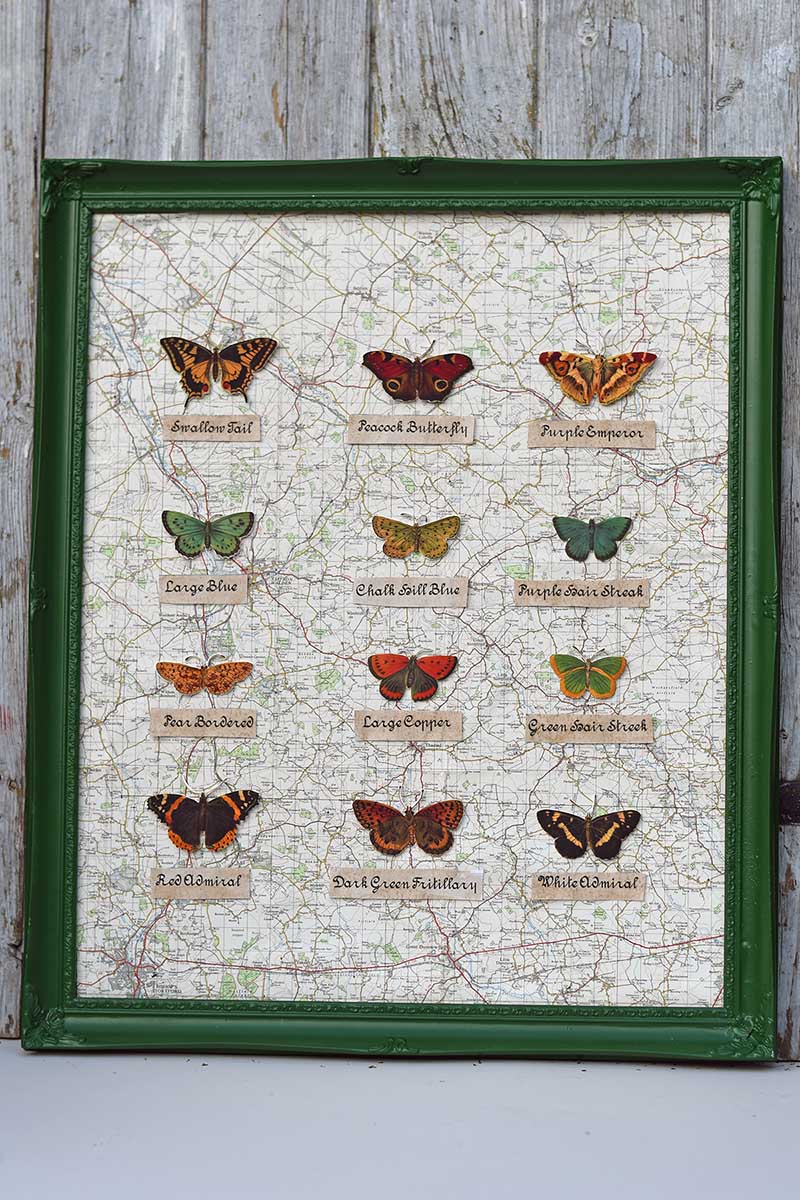
I wanted to use British butterflies for my wall decoration, so I collected illustrations from “The Natural History of British Butterflies” by James Duncan, published in 1840.
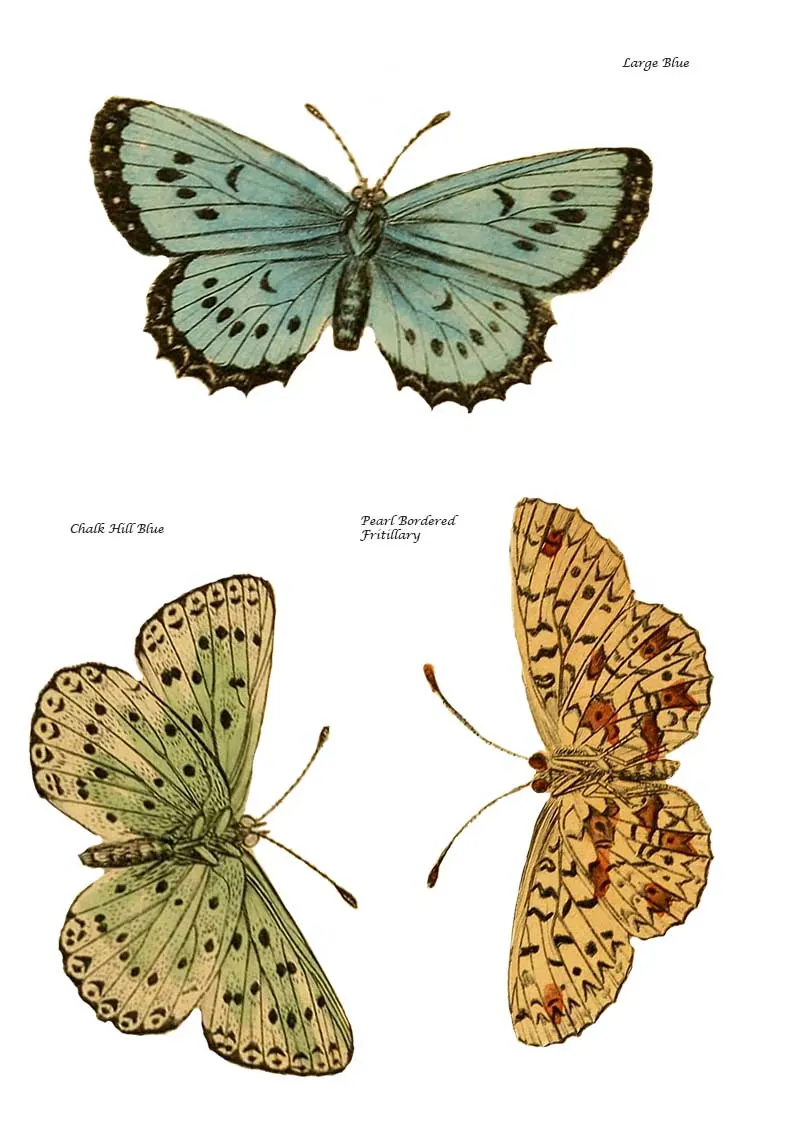
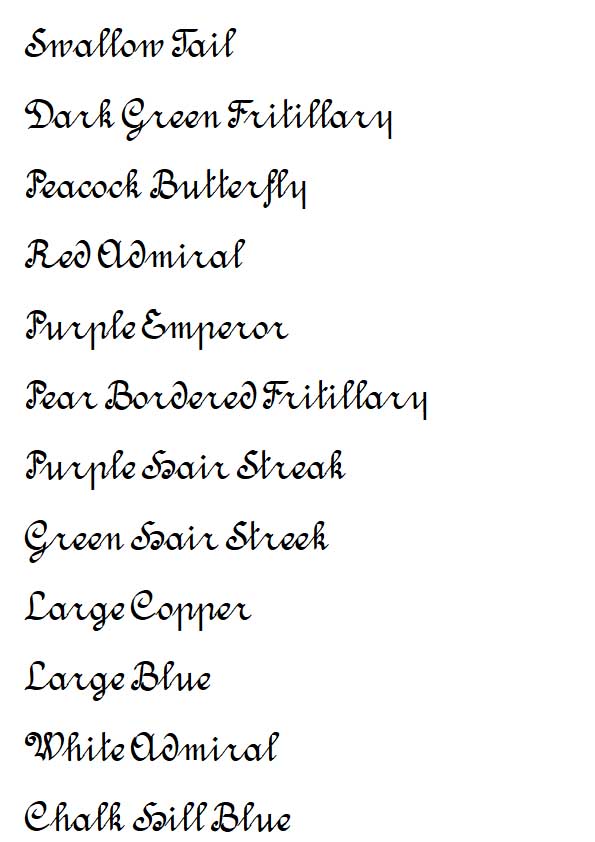
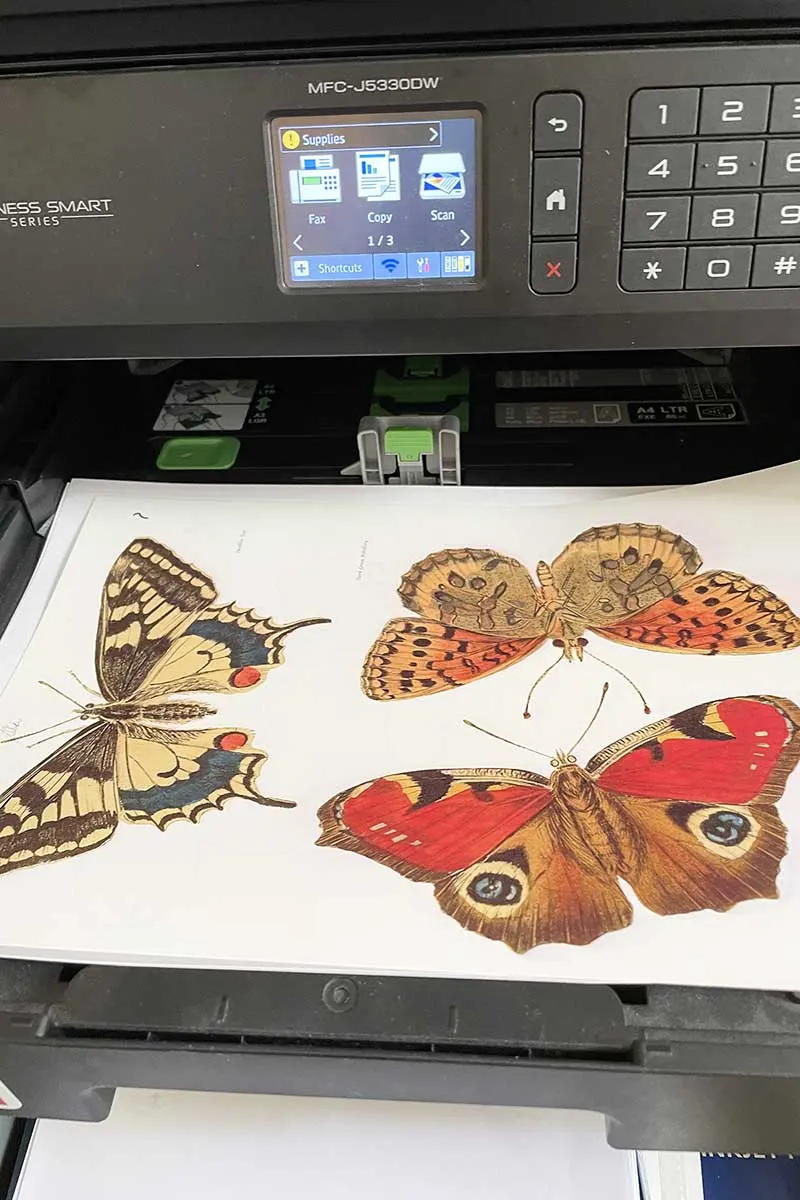
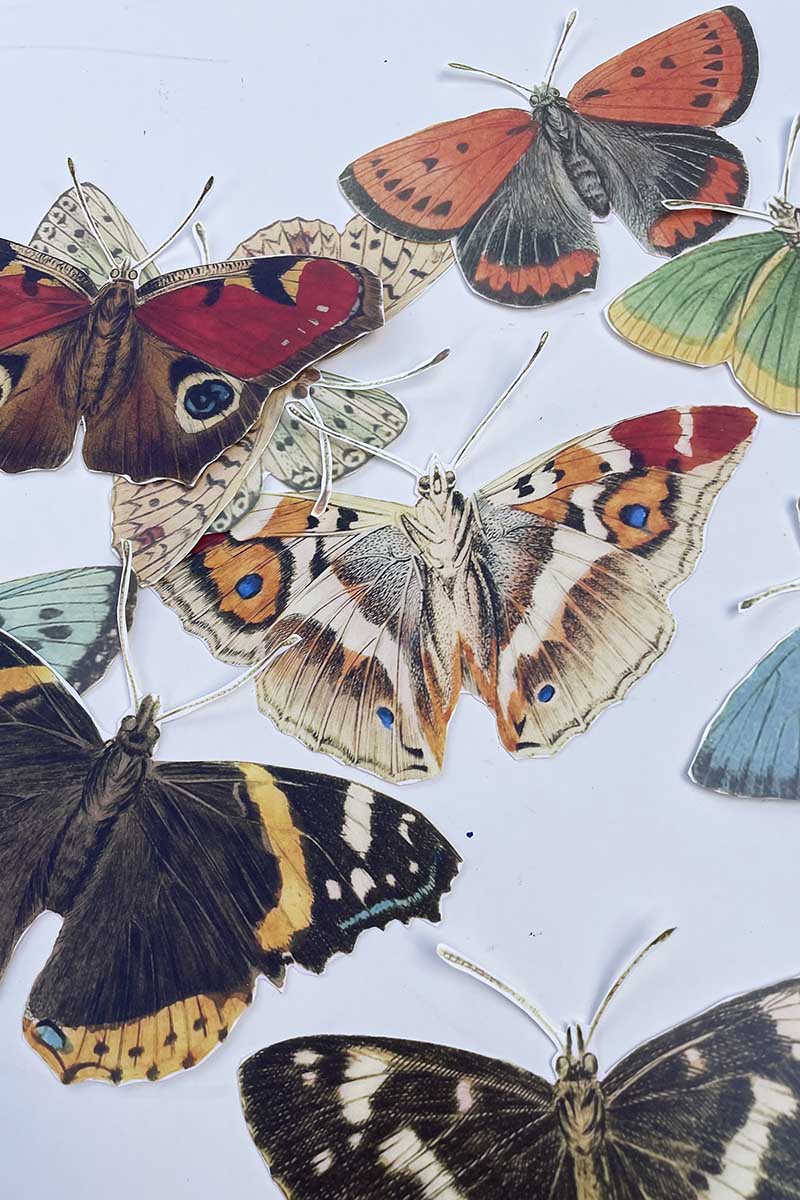
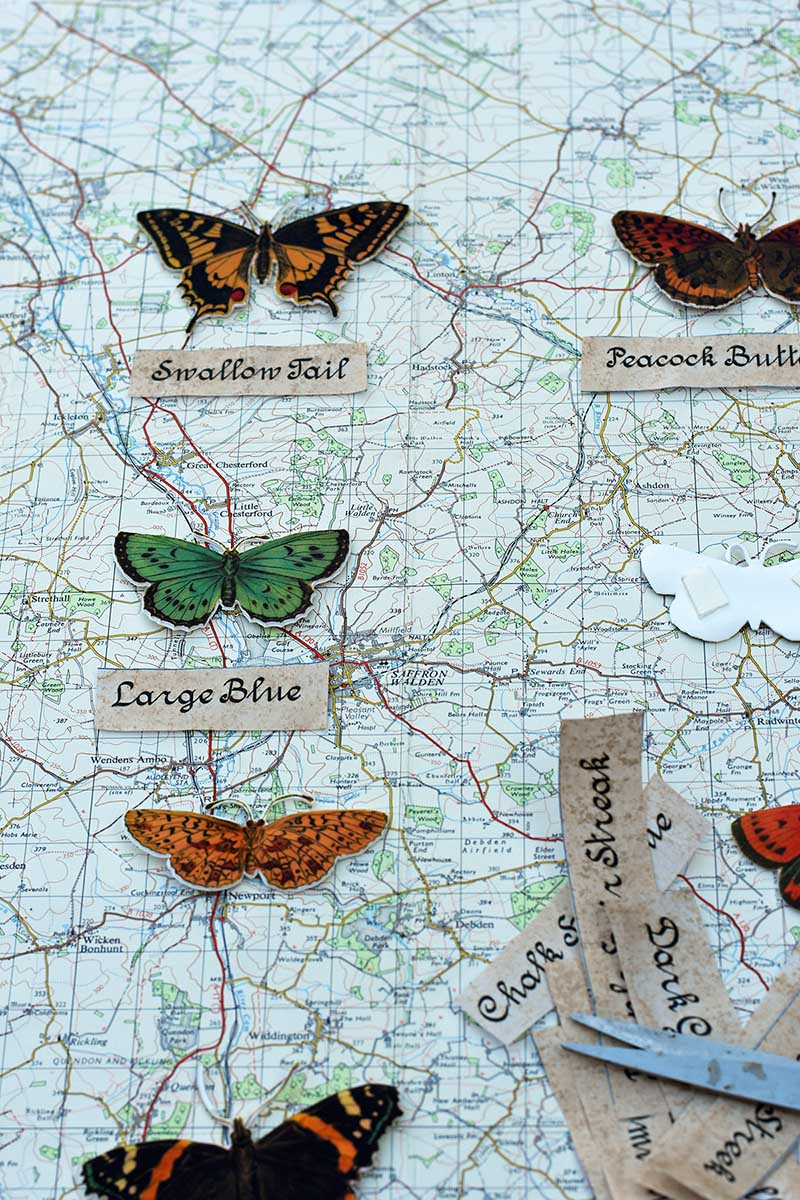
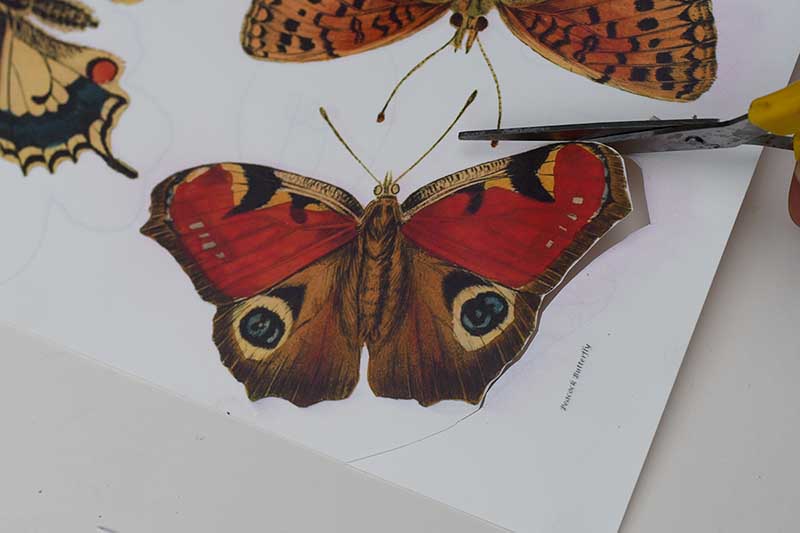
I converted these into clip art by removing the background and saving them in the required size for the shrink-plastic sheets. There are twelve butterflies in total, three per sheet. The names of each butterfly are printed next to them. There is also a separate name label sheet for the butterflies to download.
If you click on the title above the sheet of butterflies, a higher-resolution image will appear in a new window in your browser. Click on this image to save it or print directly onto the inkjet shrink plastic.

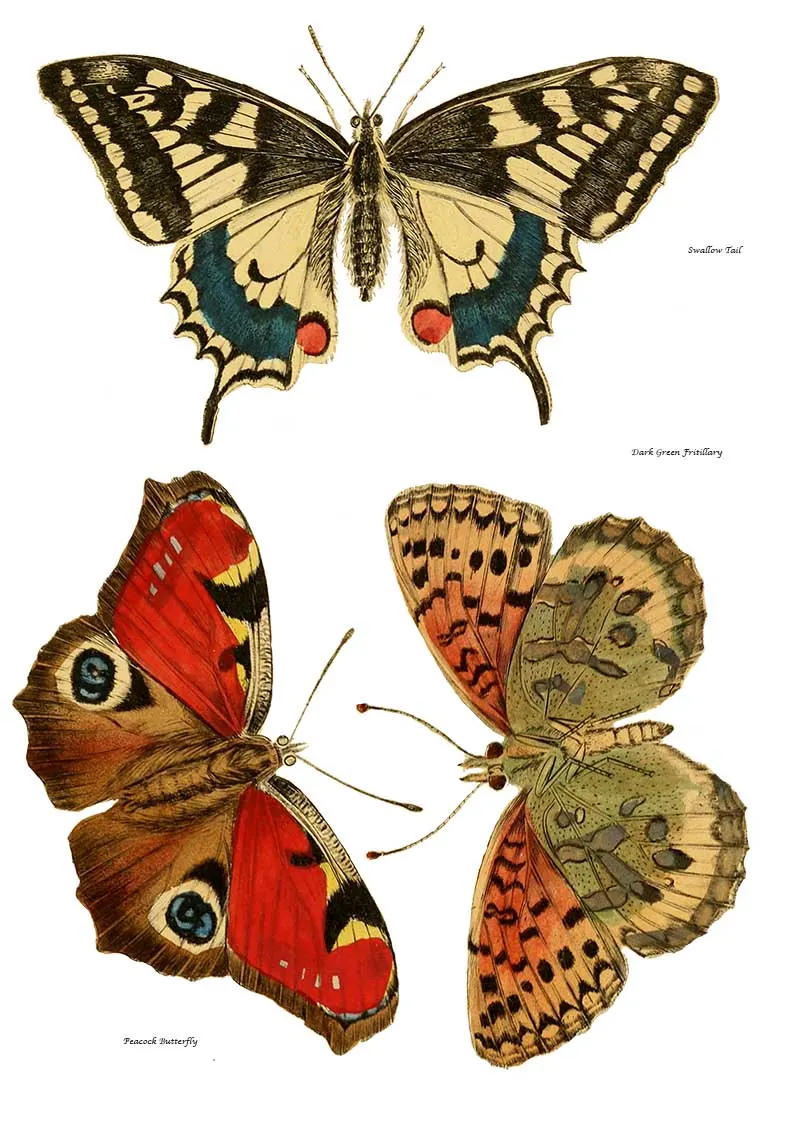
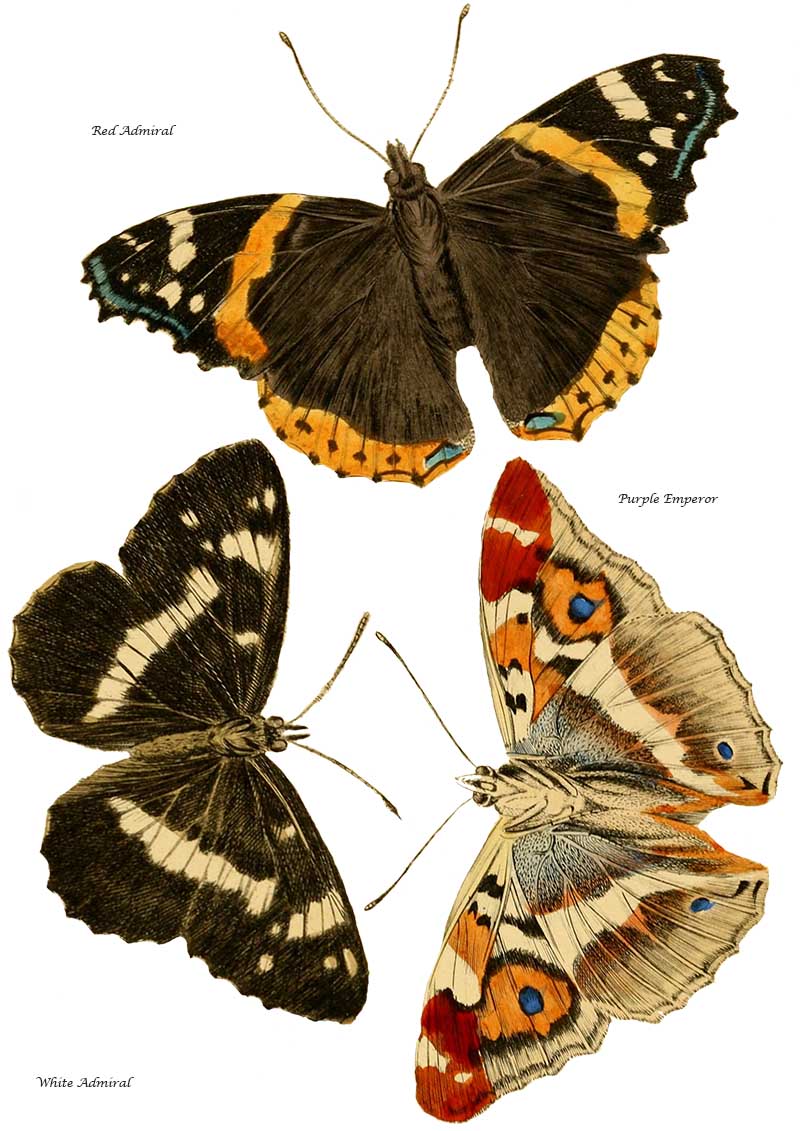

British Butterfly Collection 3


How To Make Shrink Plastic Butterflies
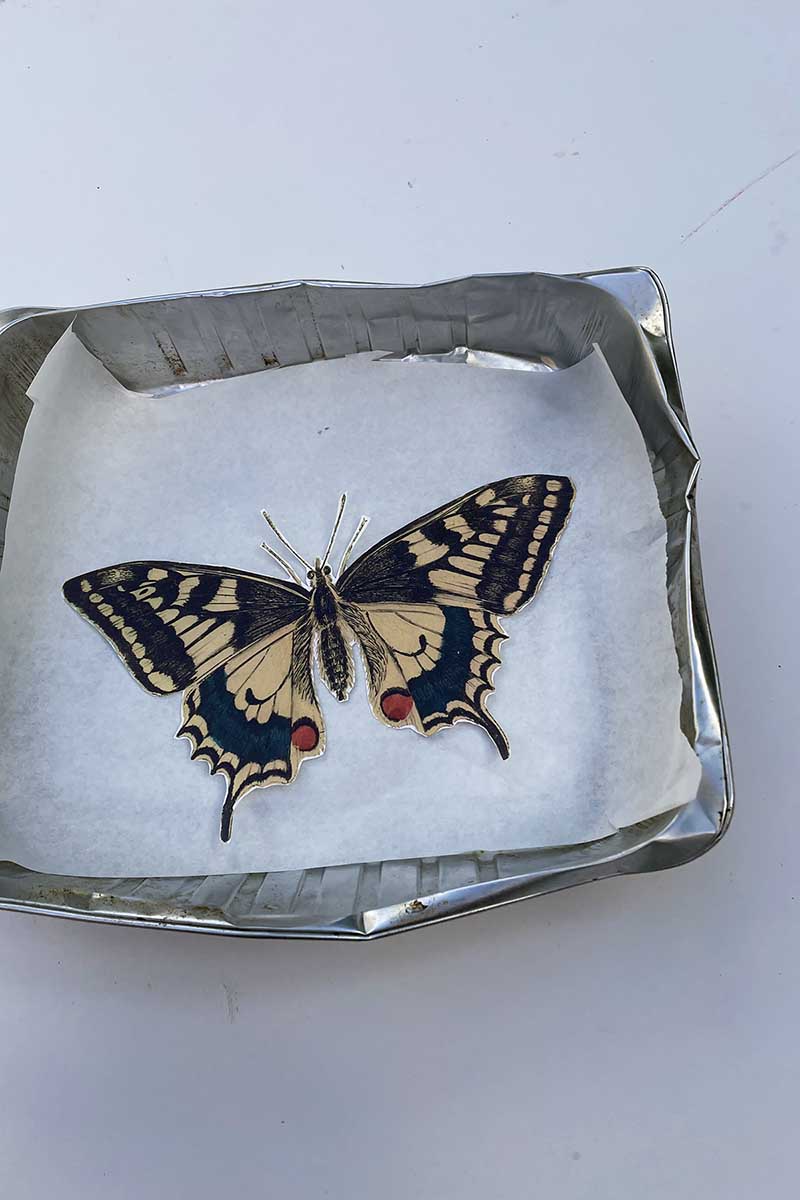
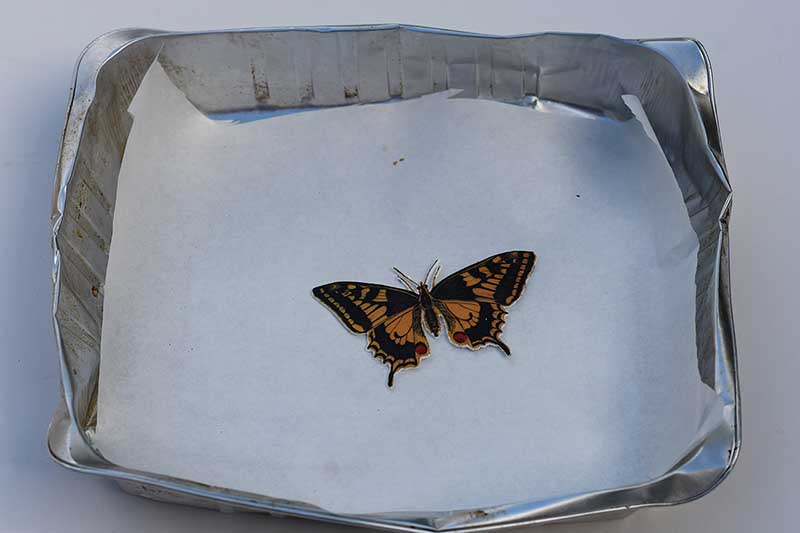
The shrink plastic butterflies will shrink to at least a third of their original size and will be much thicker. Due to this, the colours will intensify and darken.
So if you have the option with your printer or image software, you may want to make the butterflies more transparent before printing to counter this effect. I just left the images as they were, as this was a piece of decorative butterfly wall art, not scientific specimen art.
Step 1: Place the plastic sheets into the paper feeder of your inkjet printer one by one. In the print settings menu, choose the best quality print option.
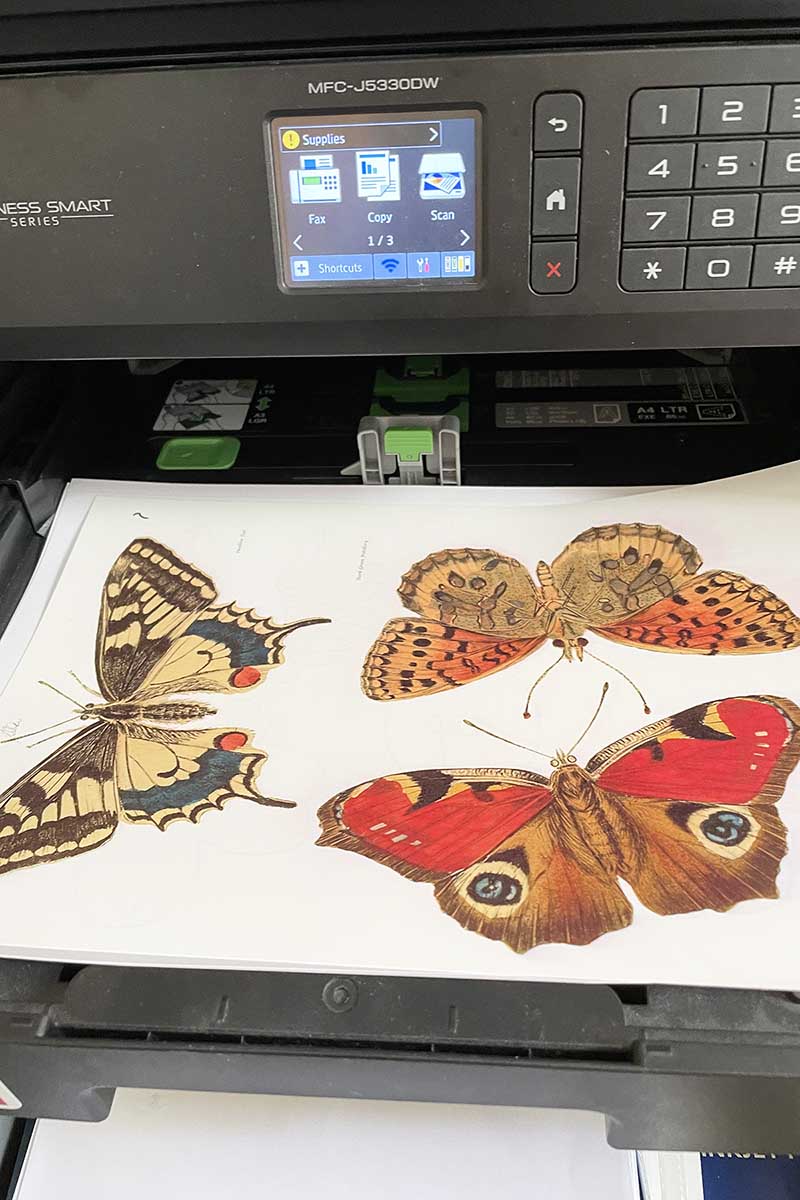
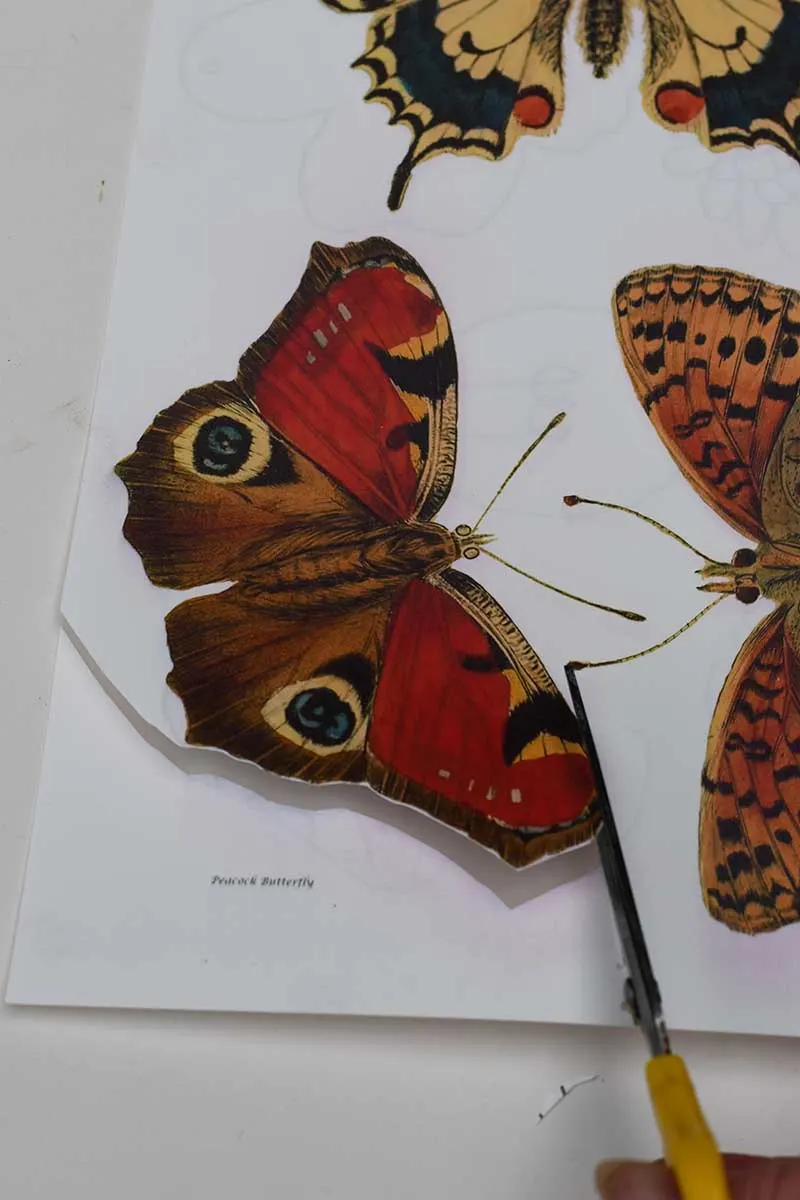
Step 2: Using scissors, carefully cut out the butterflies. Leave a small white border around the feelers. I used 12 different butterflies for a piece of wall art about 60cm by 40cm.


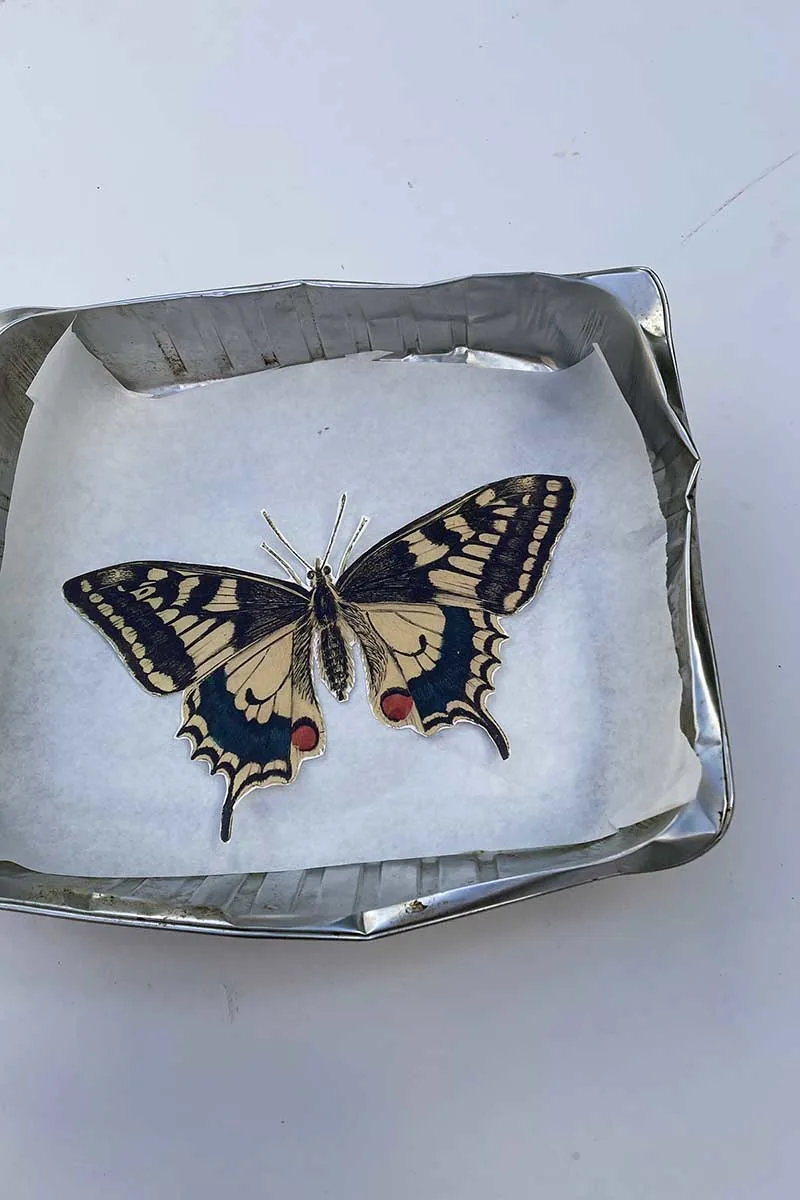
Step 3: Place the cutout butterfly on parchment paper in a baking tray. Set the oven temperature to 150 deg C (or according to the instructions on your plastic paper). Place the butterfly in the oven for about 1min 30 secs.
The plastic butterfly will shrink, curl and then uncurl. Then remove it from the oven. If it is still slightly bent, use a spatula to flatten it while it is still hot. I found that a thin foil baking tray worked better than my heavy steel ones.
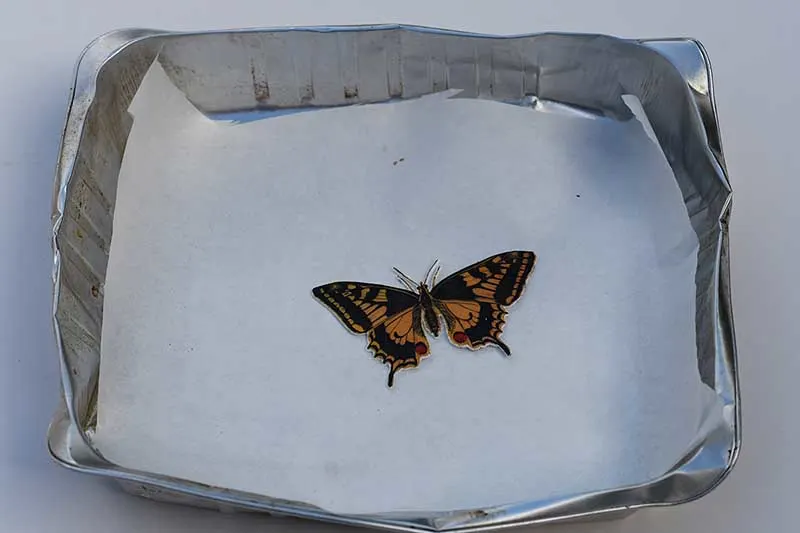
Step 4: I also found that the plastic butterflies shrank better if I put them in the oven only two at a time. As they only needed to be in there for a short time, it took under 10 mins to shrink all of them.

Making the Vintage Butterfly Lables
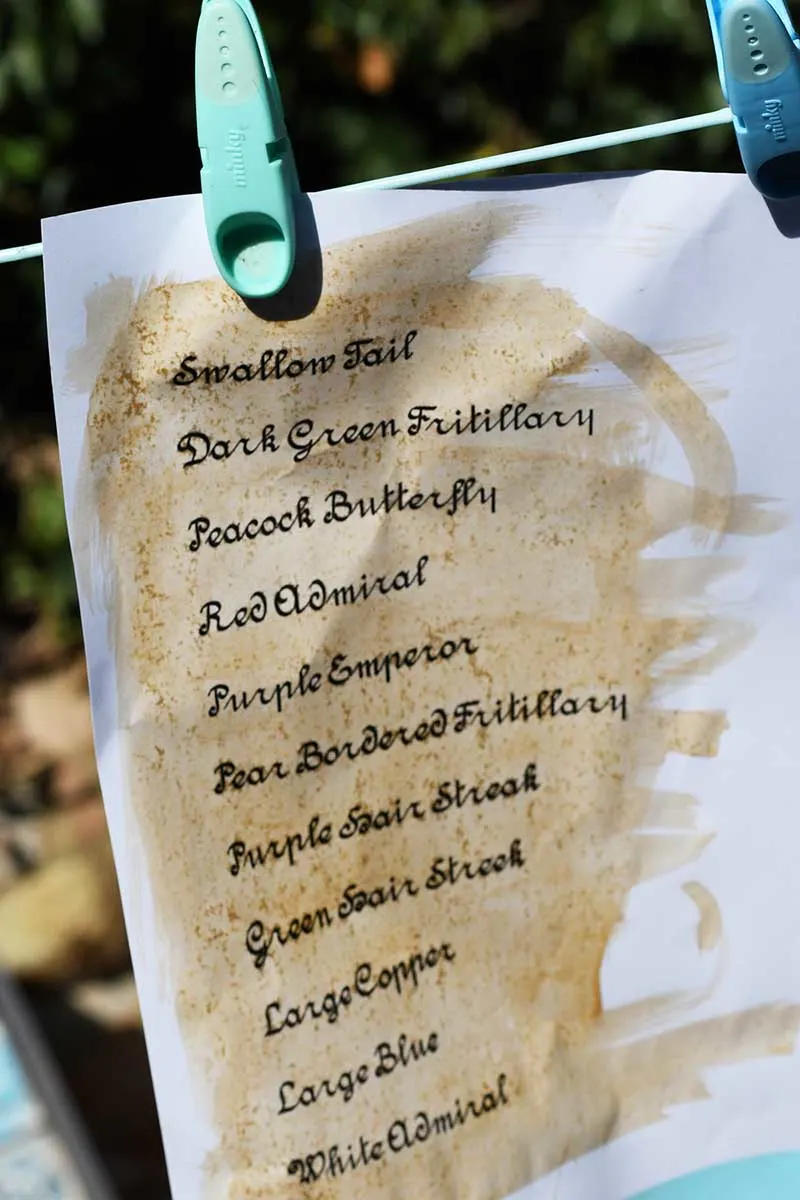
Step 5: To add authenticity to this butterfly specimen wall art, I made labels for each butterfly. I printed out the sheet of names above. I then aged it by painting the paper with a shot of espresso coffee (strong instant would work just as well).

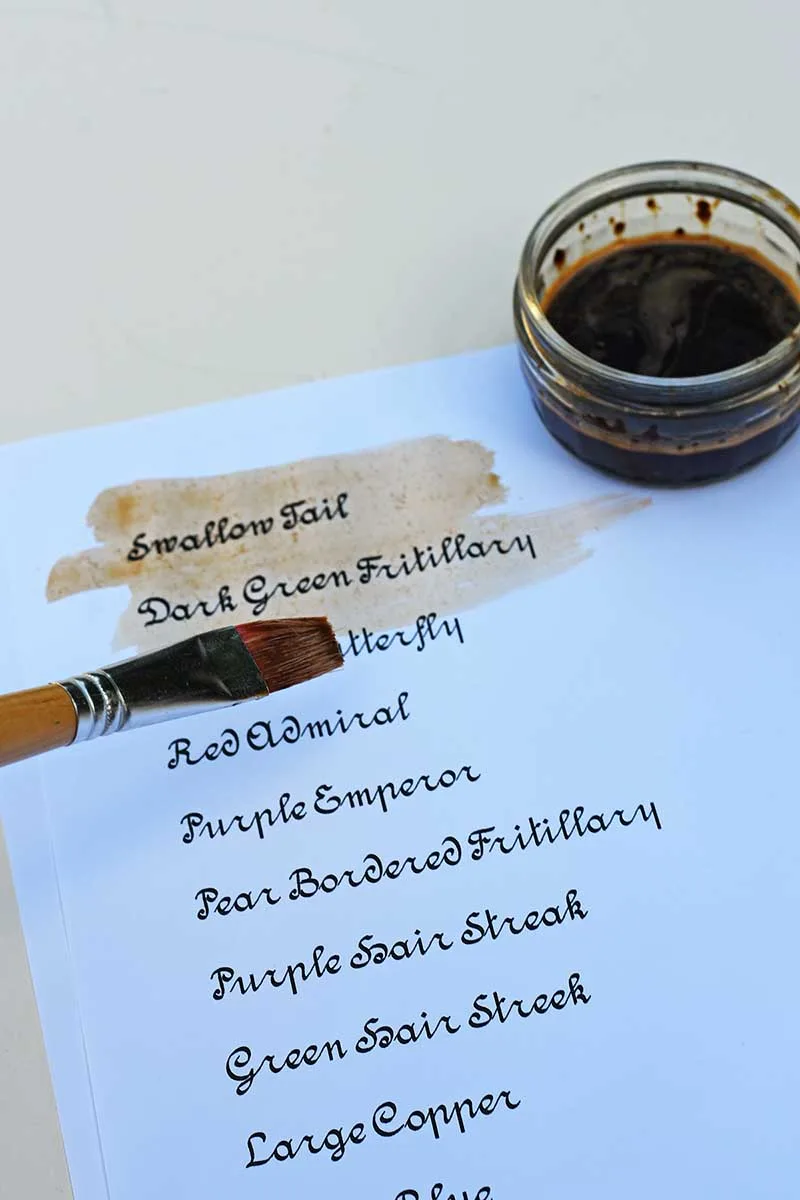
The coffee stained paper was left in the sun to dry before cutting out each individual name tag.

Preparing The Wall Art Frame
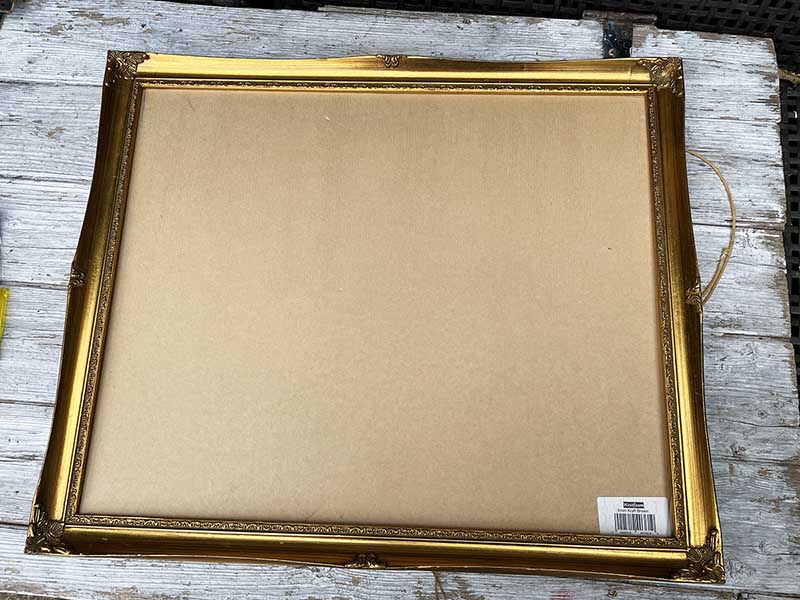
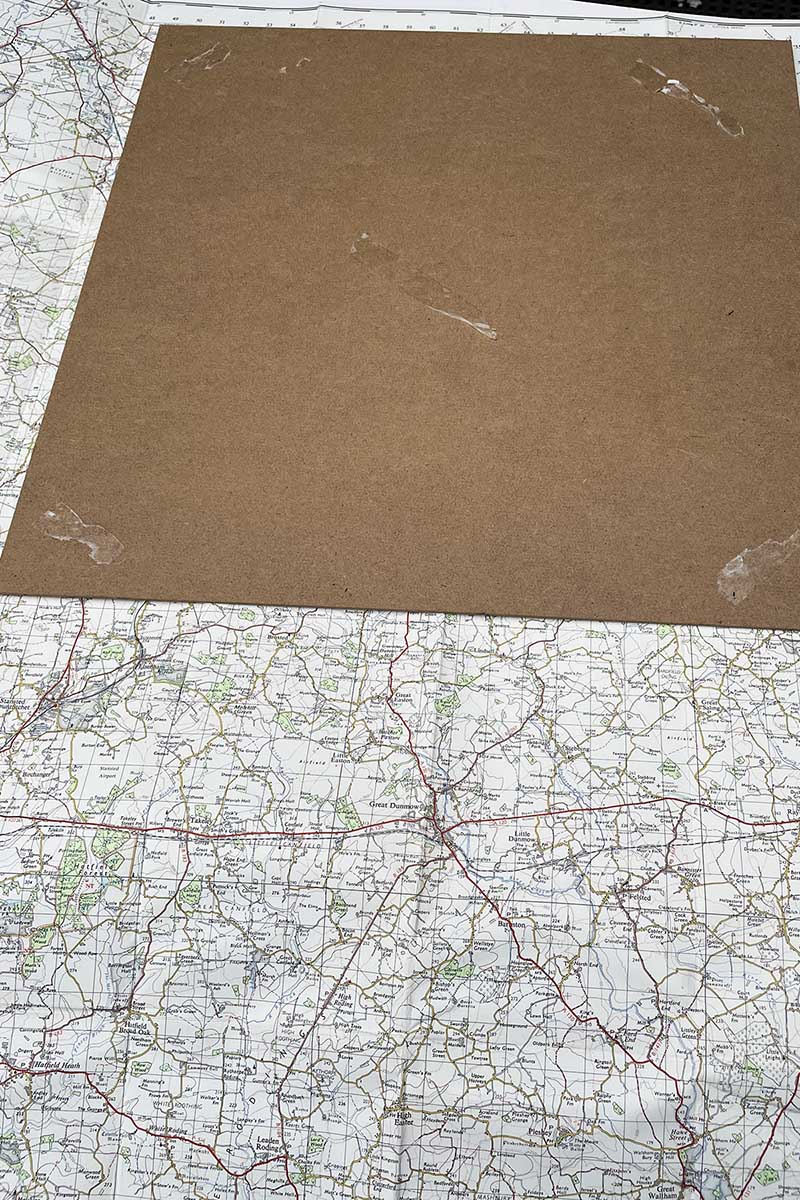
Step 6: I used an old picture frame for this DIY butterfly wall decoration. First, I removed the original picture from the old frame and cut the foam board to fit a new backing.
You can skip this step and buy a new shadow box frame instead.

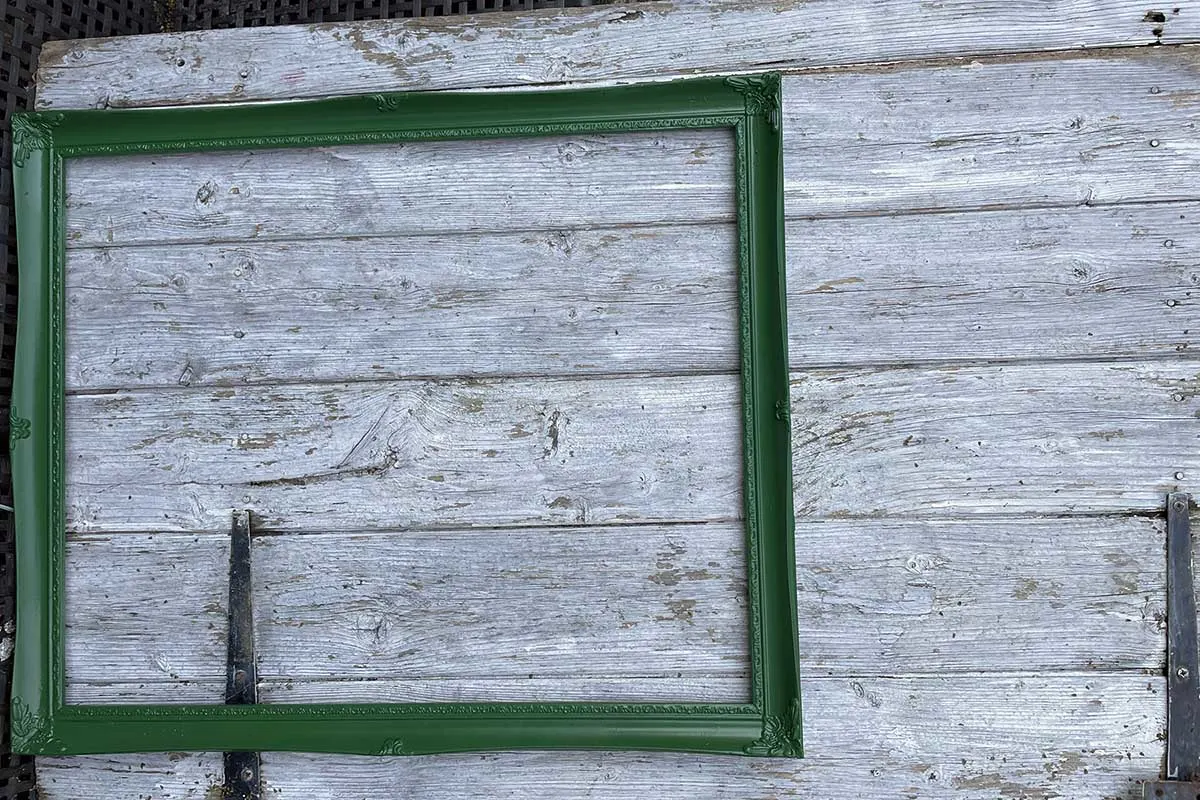
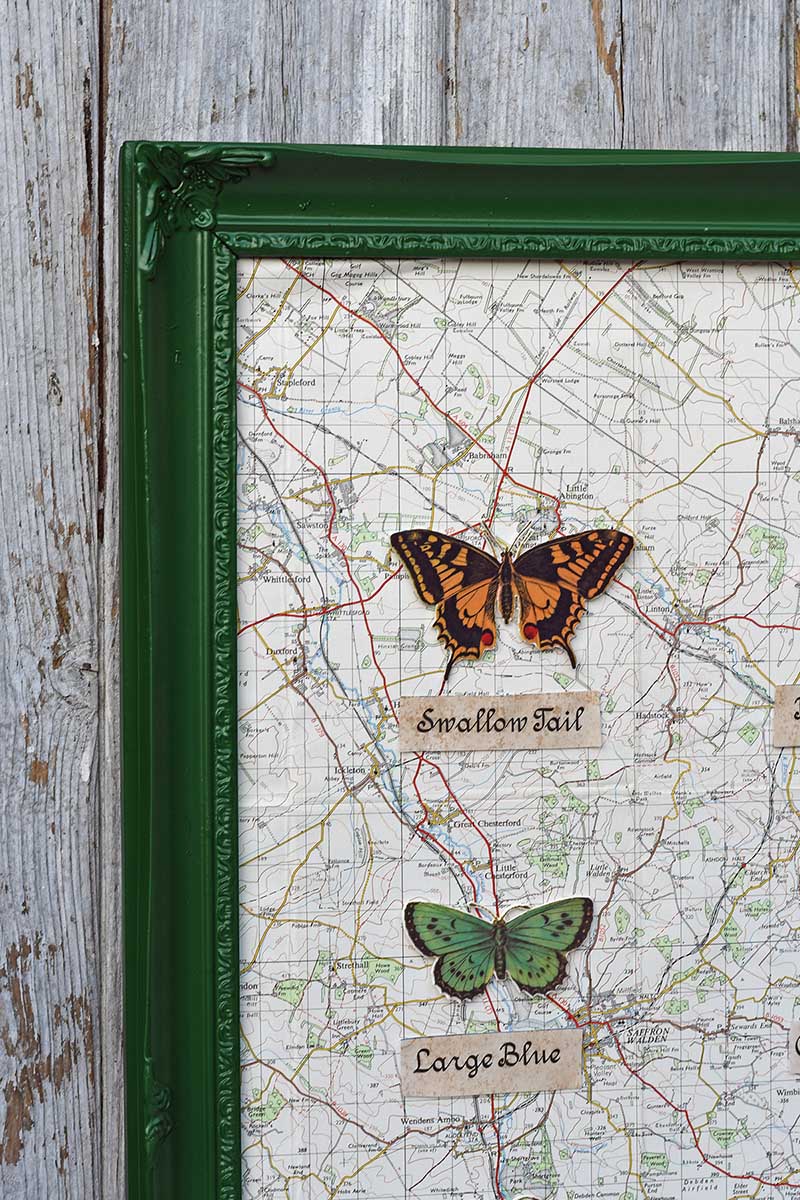
Step 7: I then spray painted the frame fern green to fit with my decor.

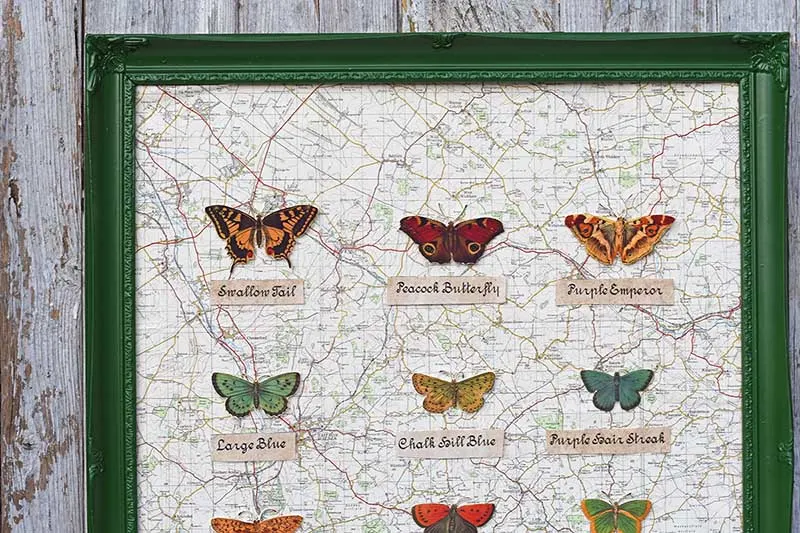
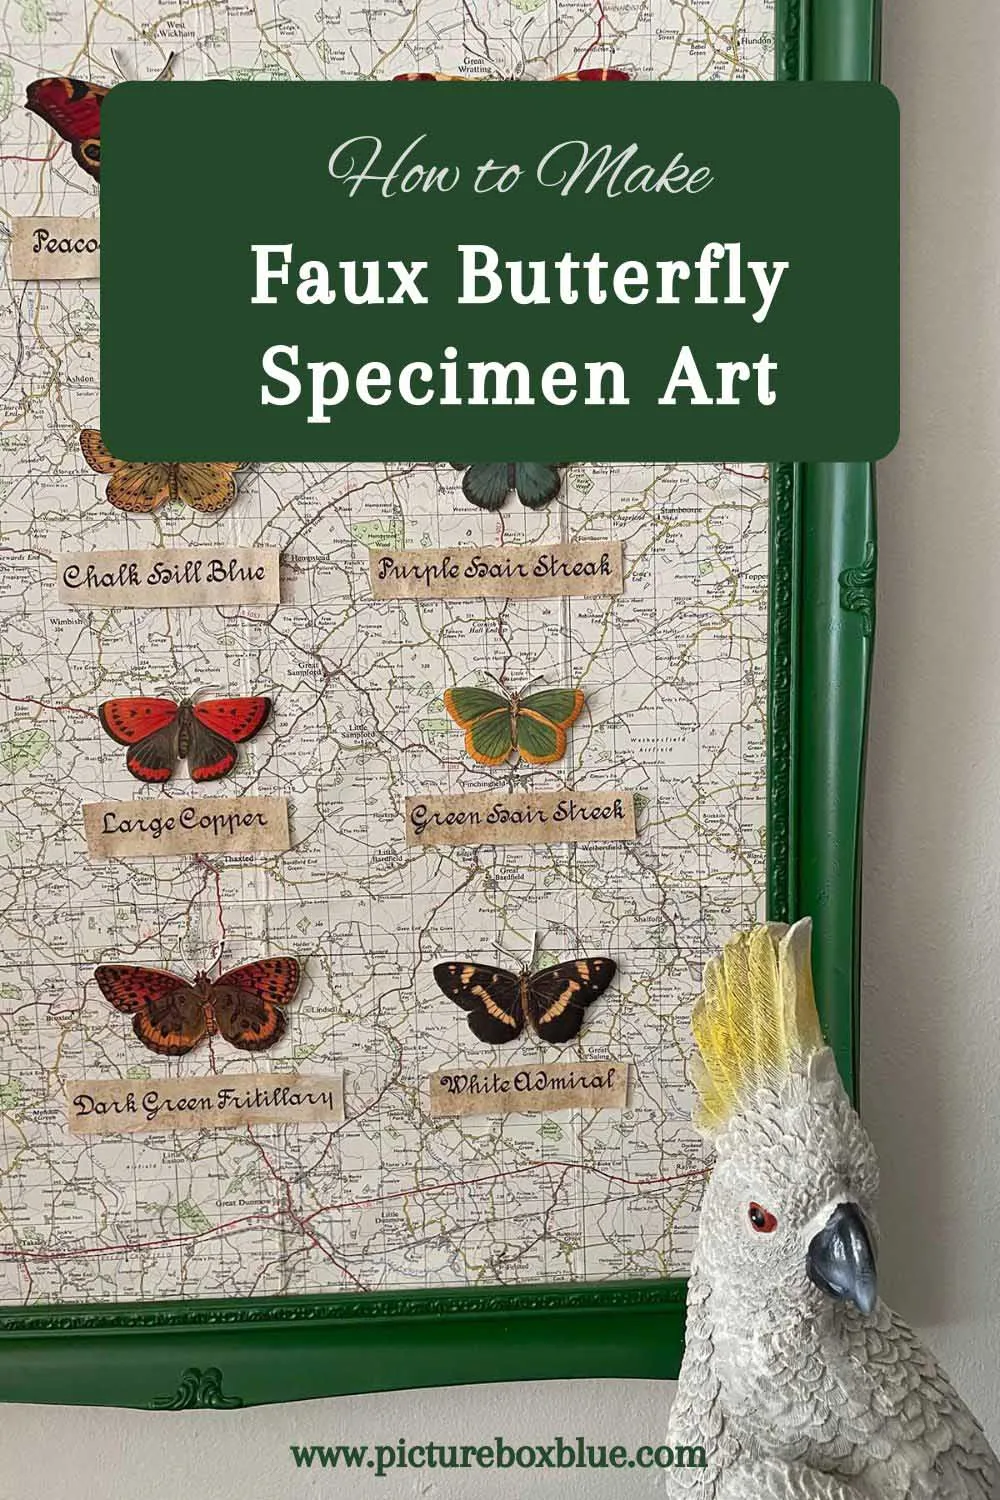
Step 8: This was a piece of wall art for the home; I thought it would look lovely if the butterflies were placed on a map background instead of a plain white one. As they were British butterflies, I used an old road map of England for the background. I have a lot of map decor in my home, which fits right in with it.
I placed the foam board backing on the old road map and drew around it. I then cut out the map and stuck it to the foam board with Mod Podge.

Putting The Butterfly Wall Art Together
Step 9: Once the map backing was in the picture frame, I was ready to add the shrunk plastic butterflies and labels. I used double-sided foam pads to stick them both to the map. The butterflies were uniformly spaced out; this was easy to do as the grid lines on the road map provided a guide.

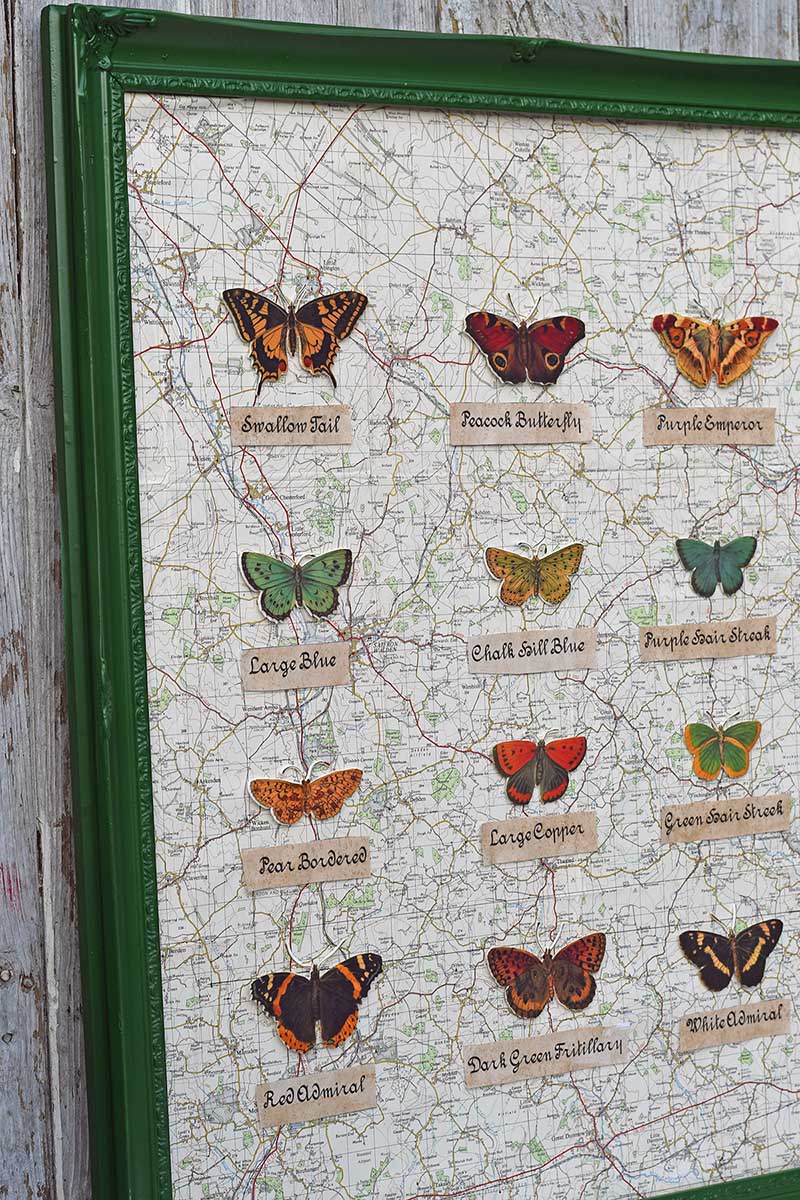
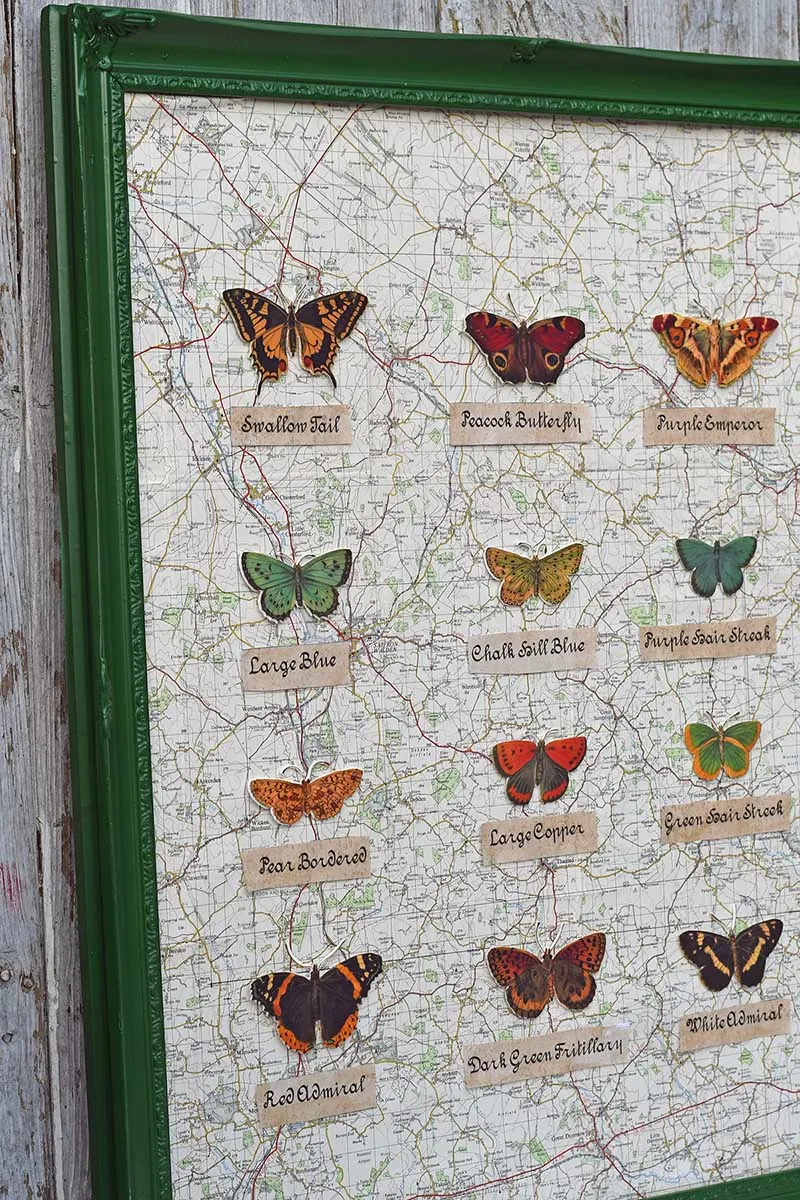

I love how this butterfly wall decoration turned out, and it fits in nicely with my quirky decor full of vintage natural history images. Also, no butterflies were harmed in making this specimen wall art!
Other Specimen Wall Art Ideas
On my other craft site, Pillarboxblue, I have created some quirky specimen wall art pieces that you might want to check out. For one, I made denim butterflies, and the other is map moths.
I think this craft would also work well with the vintage dragonfly drawings on the site. Recreating some of the beautiful Adolphe Millot posters in this 3D wall art style would also be fun.
Another fun way to display the shrink-plastic butterflies would be in a cloche, like with this paper parrot craft.
Butterfly Wall Decoration

How to make a quirky butterfly wall decoration, based on Victorian speciemen art and using old maps and shrink plastic. The tutorial also includes free vintage butterfly illustrations.
Materials
- Printable white inkjet shrink plastic sheets x 4
- Old road map - or any free printable map from the site
- Double-sided foam tape
- Old picture frame and craft foam board
- A shot of espresso coffee or strong instant coffee
Tools
- Scissors
- Pen and brush
Instructions
- Spray paint the frame to fit your decor and cut a foam board to fit the back of the frame.
- Cover the foam board with the road map using Mod Podge.
- Print the free butterfly clip art onto the shrink plastic sheets using an inkjet printer. There are tweleve butterflies to choose from.

- Cut out each butterfly shape and shrink them in the oven according to the instructions on the shrink art plastic. (Normally 150 deg C for 1-2 minutes).
- Print out the butterfly name sheet and paint it with espresso coffee to age it. Leave to dry, and then cut out each butterfly name.
- Arange the butterflies and name tags onto the map background, spacing them out evenly. Use double-sided foam tape to stick down each plastic butterfly and paper name tag.
Don’t forget to pin this craft for later!
Beth Wooten
Wednesday 27th of May 2026
Thank you for all the beautiful collections you have made and shared. Can you tell me how you removed the backgrounds from the prints?
claire
Thursday 28th of May 2026
Thank you. You can use free online graphic sites/apps like Canva to remove backgrounds from images easily.
Niki | Life as a LEO Wife
Thursday 20th of October 2022
What a cool project! Thanks for sharing on Crafty Creators!
claire
Friday 21st of October 2022
Thank you so much, and thanks for hositng.
Rebecca
Friday 14th of October 2022
I love this craft. Fabulous job.
claire
Wednesday 19th of October 2022
Thank you so much, I had fun making it.
jeanne
Thursday 13th of October 2022
This is simply beautiful. What a great idea. I'm going to try this while amazon has there sails
claire
Thursday 13th of October 2022
Thank you, and have fun making it. You can make smaller ones to give as gifts.
Virginia
Wednesday 12th of October 2022
I love this! Thanks for sharing the tutorial.
claire
Thursday 13th of October 2022
Thank you so much, you're welcome.