
Welcome to our drawing tutorial on one of nature’s most beautiful flowers – the hibiscus. Whether you are a beginner looking to improve your drawing skills or an experienced artist interested in exploring the intricate details of hibiscus plants, this step-by-step guide is designed to help you create stunning hibiscus drawings.
Getting Started: The Basics of Hibiscus
Hibiscus flowers are known for their large, colourful petals and distinct centre. Before we dive into the drawing process, let’s understand the basic structure of a hibiscus flower.
Typically, a hibiscus flower comprises five to six petals that emerge from a central point. The centre of the flower is often more intricate, with a stamen that stands out. Here, you can see some great examples of botanical illustrations of beautiful hibiscus on Pictureboxblue.
Hibiscus flowers come in two primary categories: tropical and hardy, with over 200 varieties found across the globe, offering a vast wellspring of inspiration for artists.
My personal favourite is the tropical hibiscus, perhaps because I spent my childhood in Southeast Asia, a region known for its love of vibrant, tropical beauty.
These flowers stand out for their showy and eye-catching appearance, embodying the opposite of shyness. With their stunning trumpet-shaped form and five distinct petals, hibiscus blooms are available in various colours, including red, orange, yellow, pink, and purple, making them a delightful subject for drawing.
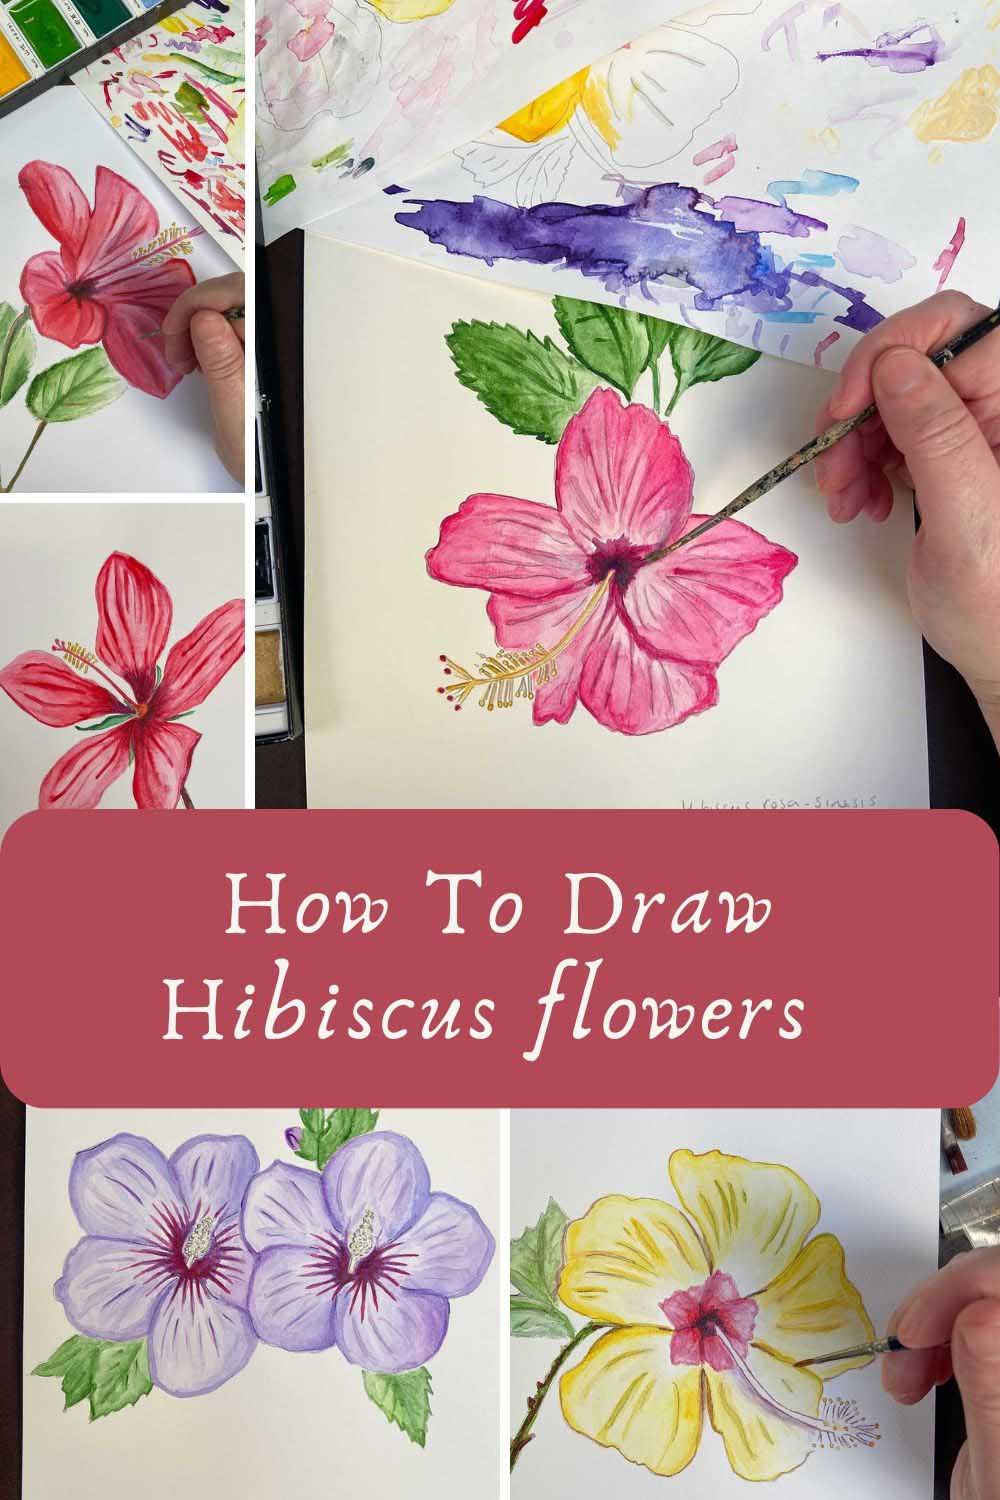
6 Hibiscus How To Draw Guides
The following six hibiscus drawing tutorials will show you how to draw a simple hibiscus flower in simple steps easily.
1. Hawaiian hibiscus/ Yellow hibiscus/ hibiscus brackenridgei
Numerous species of Hawaiian hibiscus exist, but the yellow hibiscus holds the distinguished title of Hawaii’s official state flower. Prevalent throughout the islands, these flowers are commonly utilized in crafting traditional leis.
The hibiscus symbolises joy, beauty, royalty, and respect in Hawaiian culture. A fascinating cultural tidbit regarding flower adornment in Hawaii: placing a flower behind your left ear signifies that you are in a relationship, whereas wearing one behind your right ear indicates that you are single.
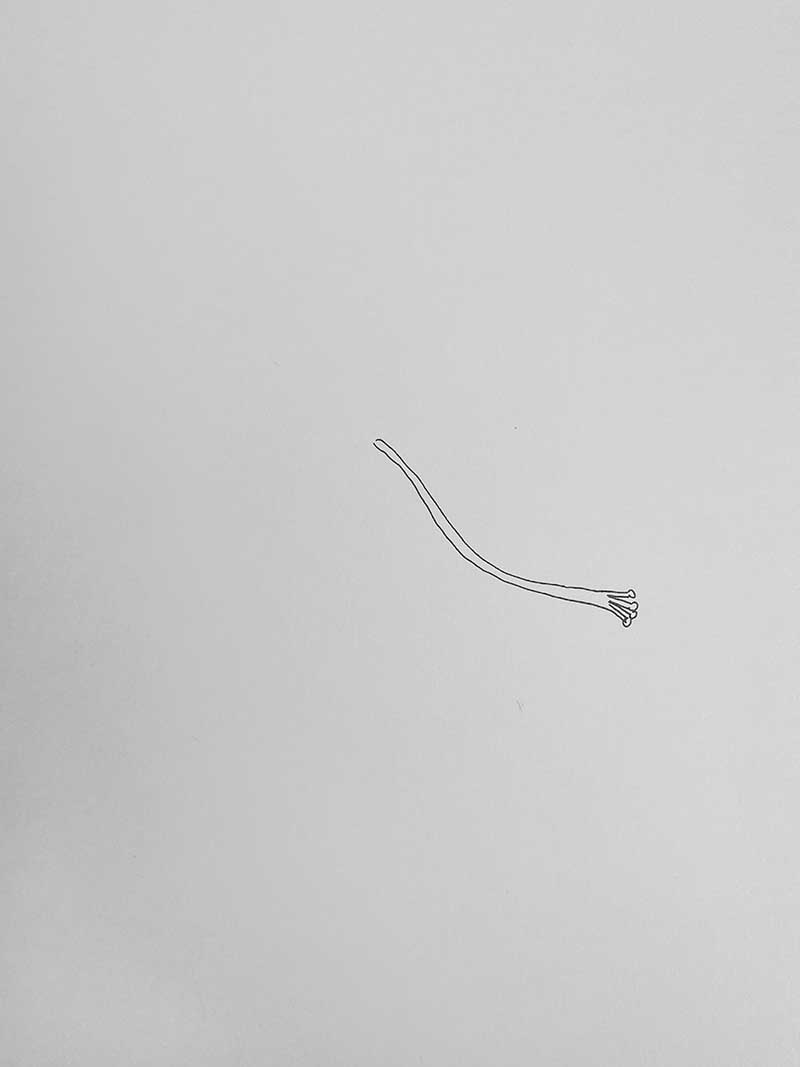
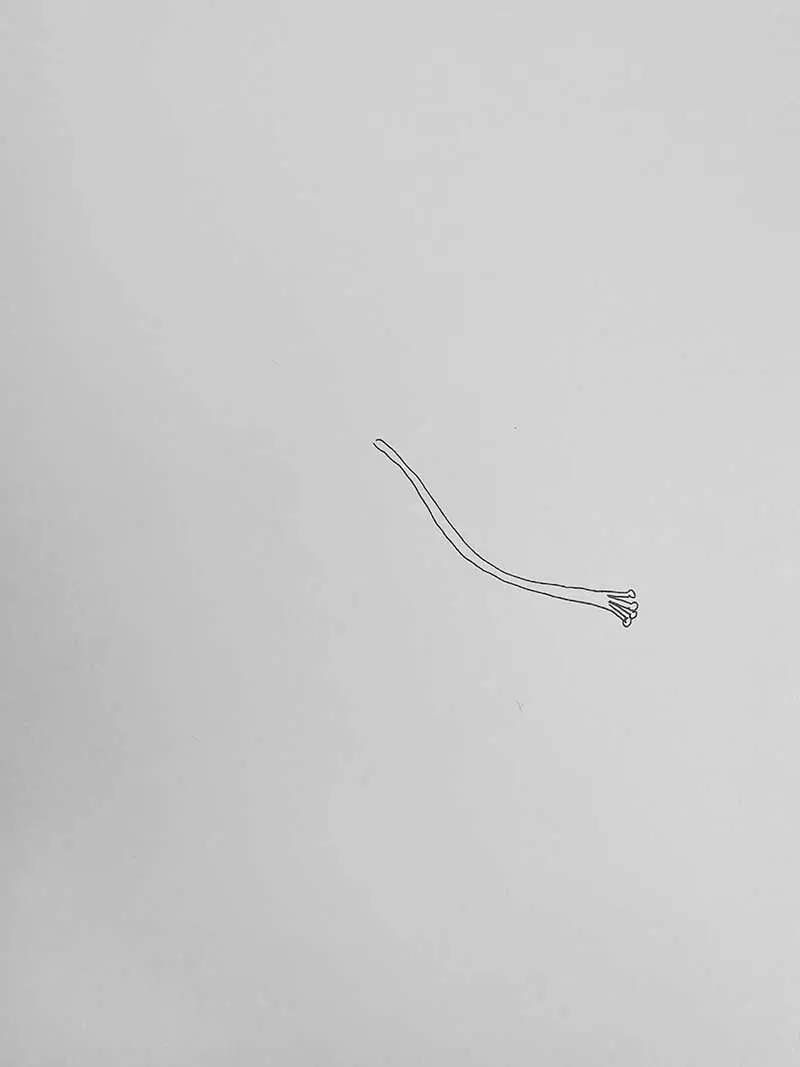
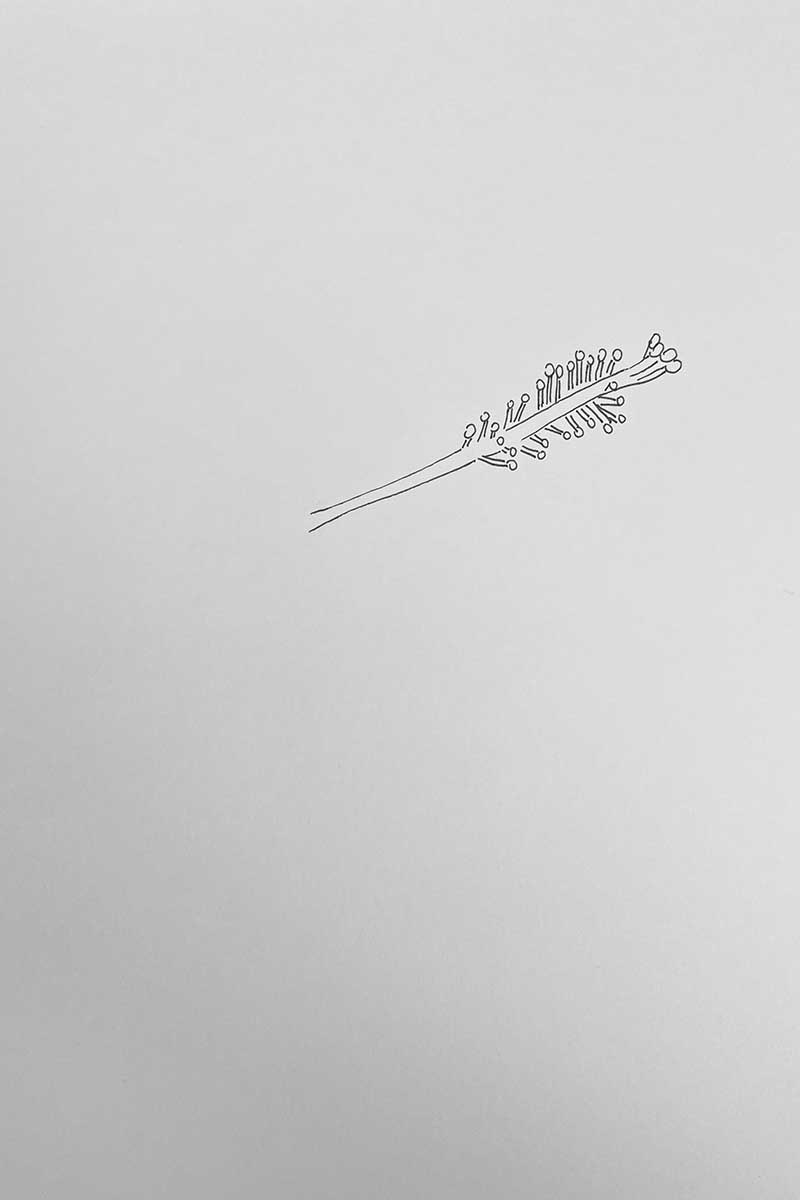
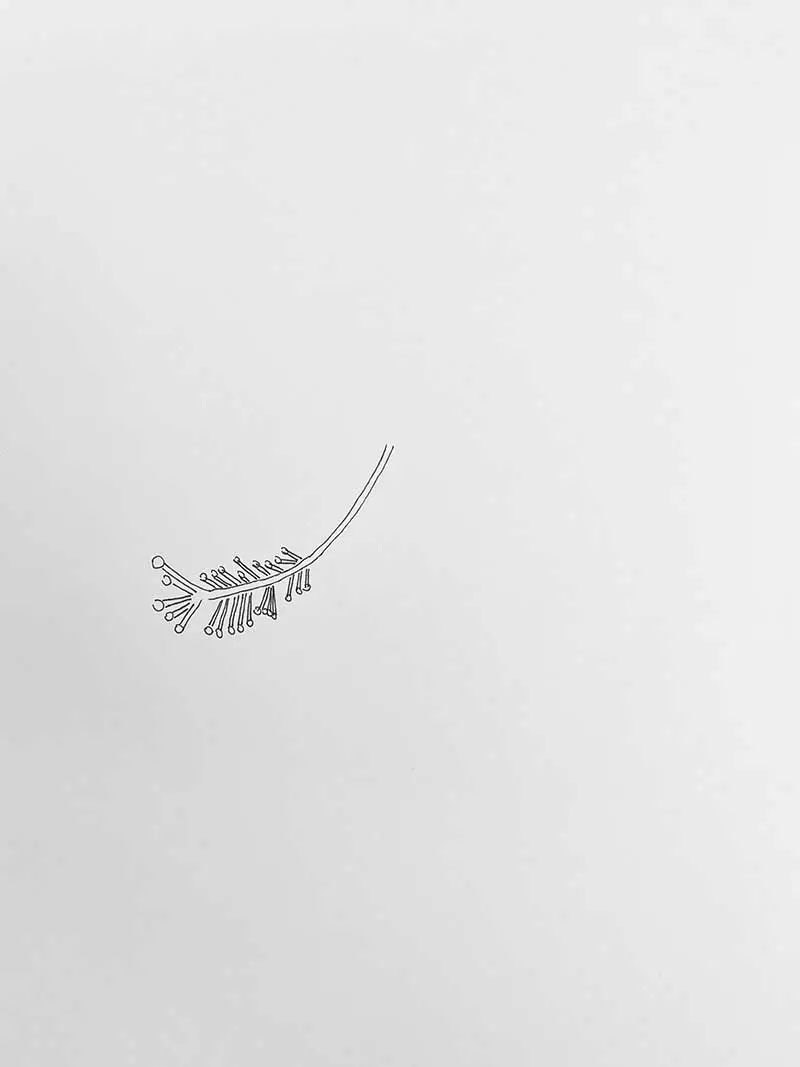
Step 1: Start with the distinct centre of the hibiscus flower. Each hibiscus flower has male and female parts. The female part (pistil) is long and tubular. The five hairy spots at the top of the pistil make up the stigma where pollen is collected.
On the sides are the male parts (the stamen), which consist of thin filaments topped with the anther. Starting with the flower’s centre helps determine your flower’s size and ensures you are not drawing the petals in front of it. Here, I have gone for a long, curved tubular shape.
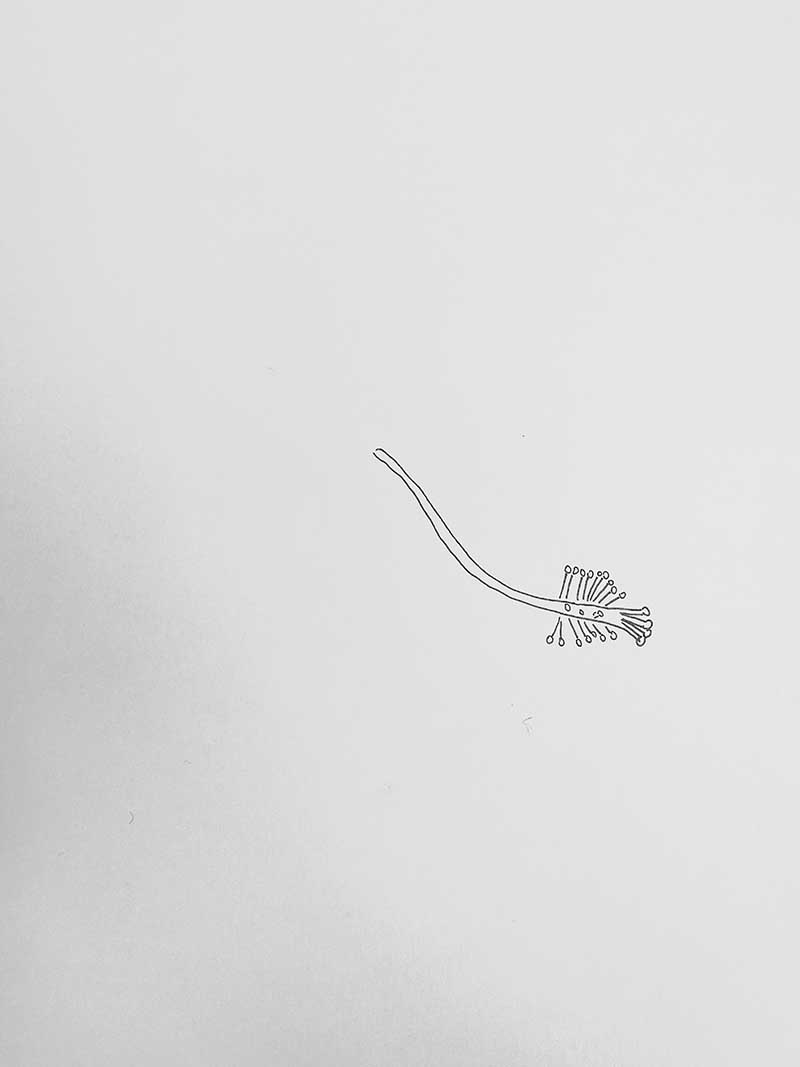
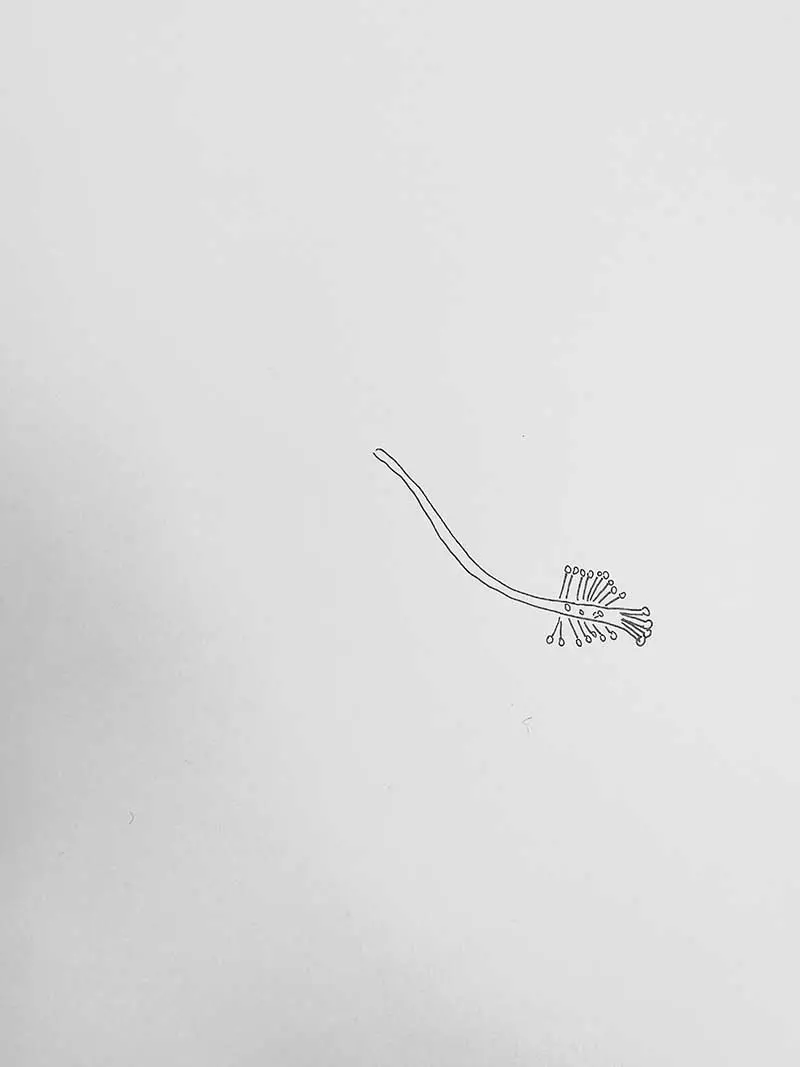
Step 2: Draw the stamen details, which are the parts of the flower that include the thin filaments and the small anthers at their tips, surrounding the central pistil.
Unlike some flowers with only a few stamens, hibiscus flowers are known for having many, usually in yellow but sometimes in other colours. To illustrate them, sketch tiny lines with little circles on top, starting from the tube-like shape you’ve already drawn. While there are many of these, you don’t need to draw every single one; just enough to make it look full.
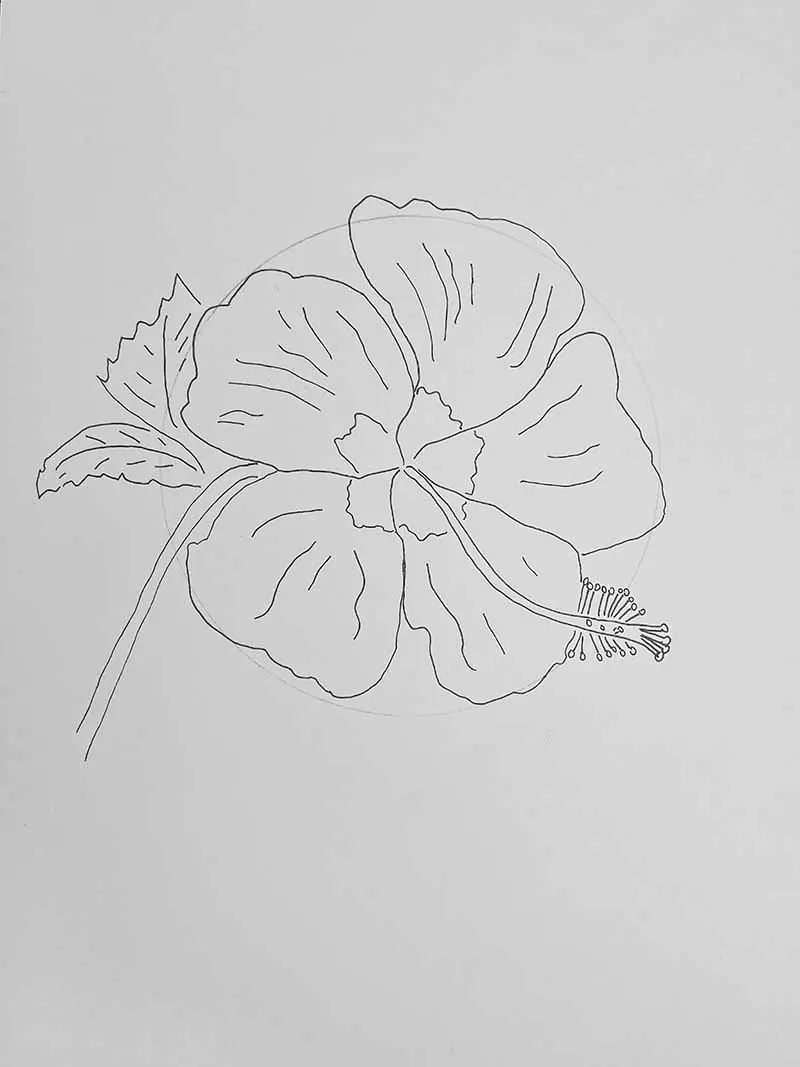
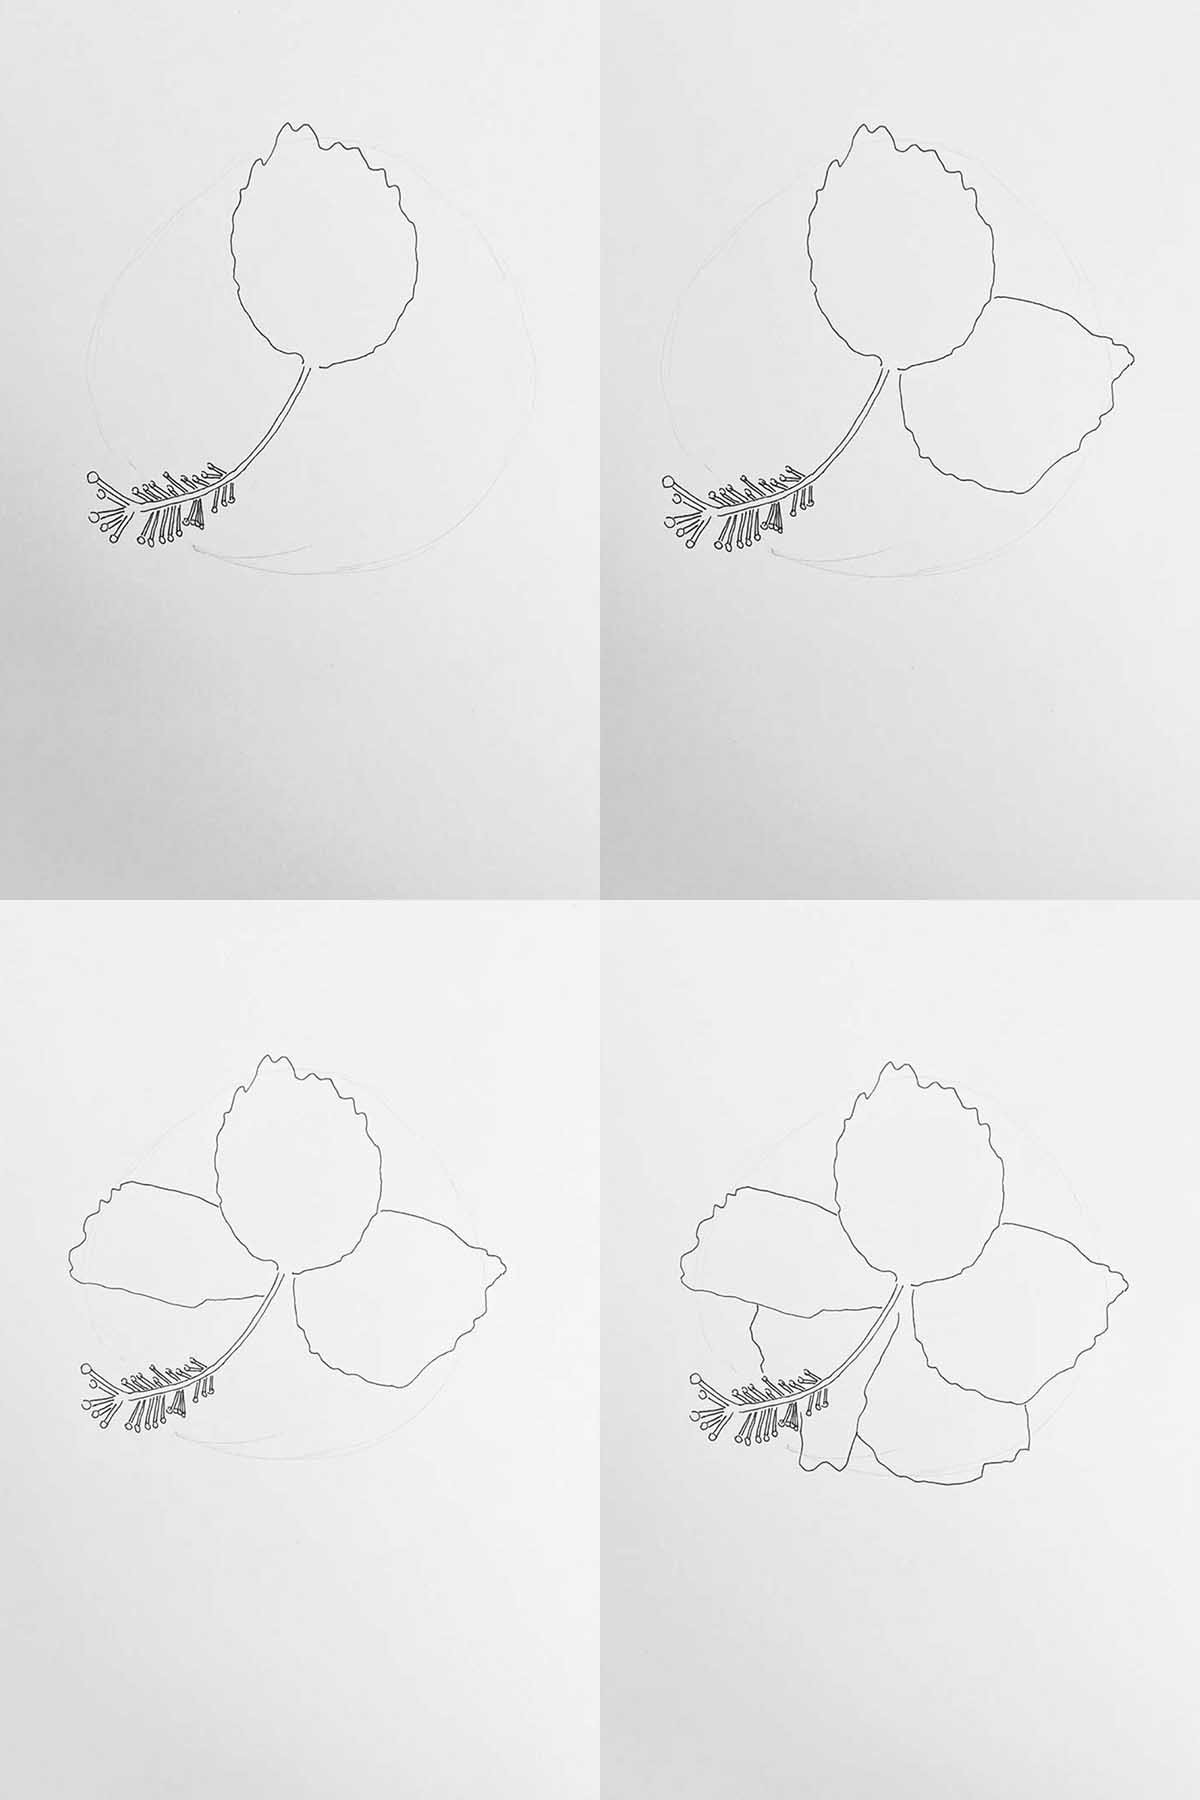
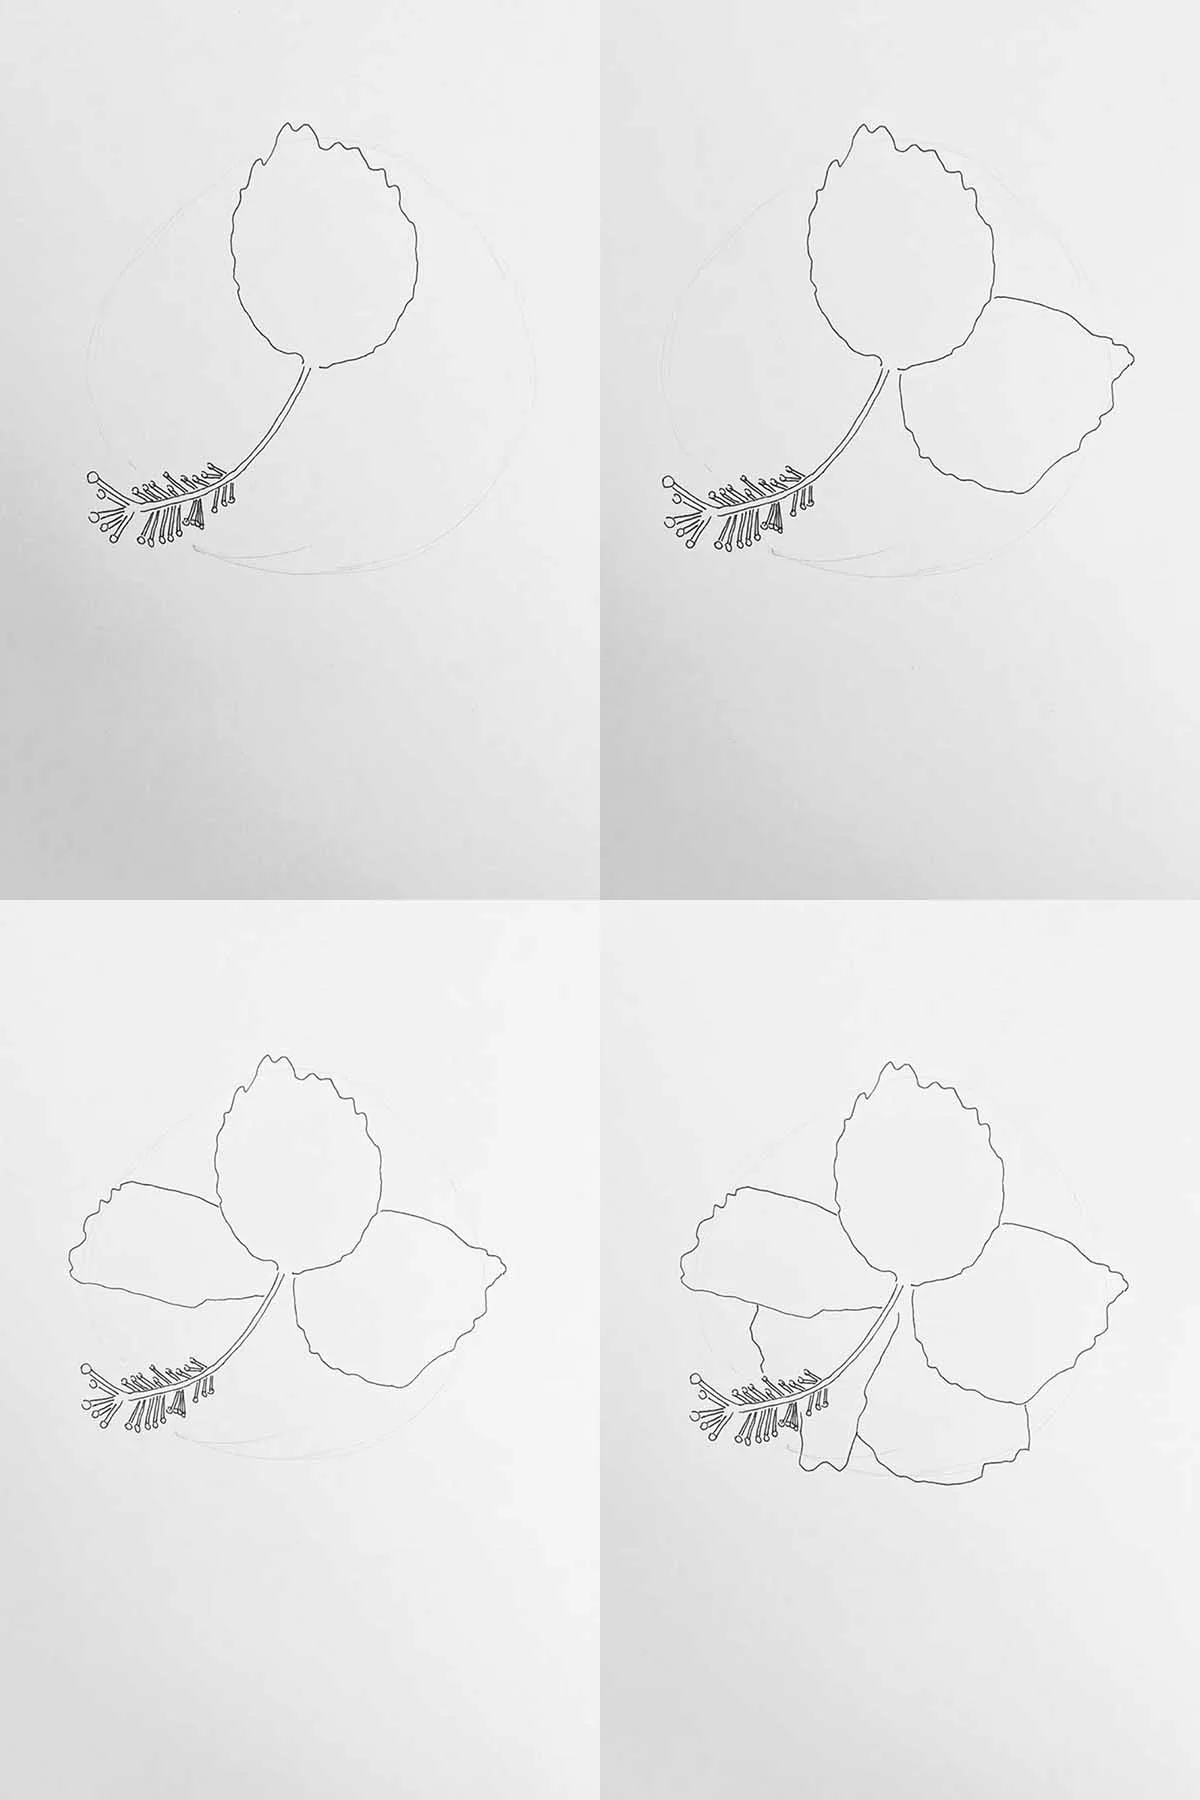
Step 3: To help position the five petals, start by lightly sketching a circle or oval with a pencil. This helps to figure out how big the petals should be. To make the flower’s centre part stand out, draw a circle where the top of the pistil hangs over the petals.
Each of the five petals attaches to the base, and their edges should look wavy. The petals might overlap, depending on how open the flower is. They’re shaped like a trumpet that gets wider as it opens up. Aim for a natural, free-flowing shape for the petals.
Step 4: Outline the centre of the flower to prepare for a Hawaiian hibiscus with a dark, contrasting centre during the colouring phase. It’s worth noting that among the seven varieties of Hawaiian hibiscus, not all feature a contrasting centre. Depending on the desired outcome, this step may be omitted.

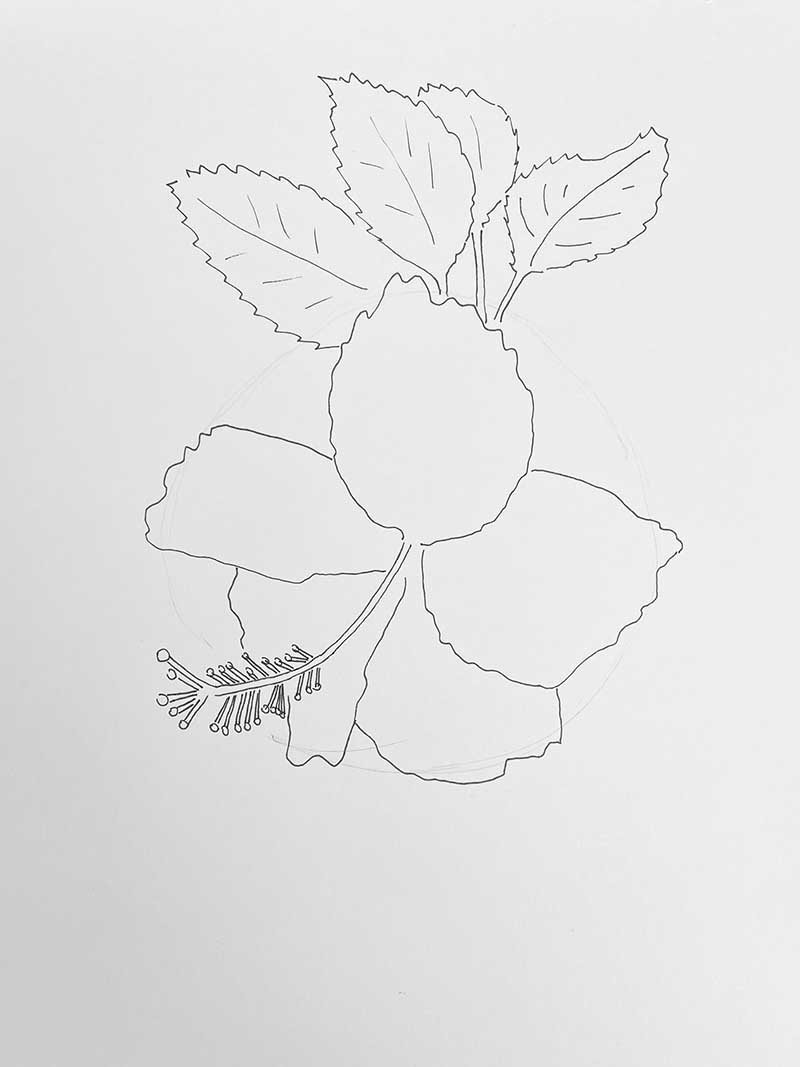
Step 5: Add a leaf and stem to your hibiscus drawing at this step if you’d like to include them.
Step 6: Add lines to the petals. This is important as it adds texture to the petals and aids when adding colour. Think of them as veins on the petals.
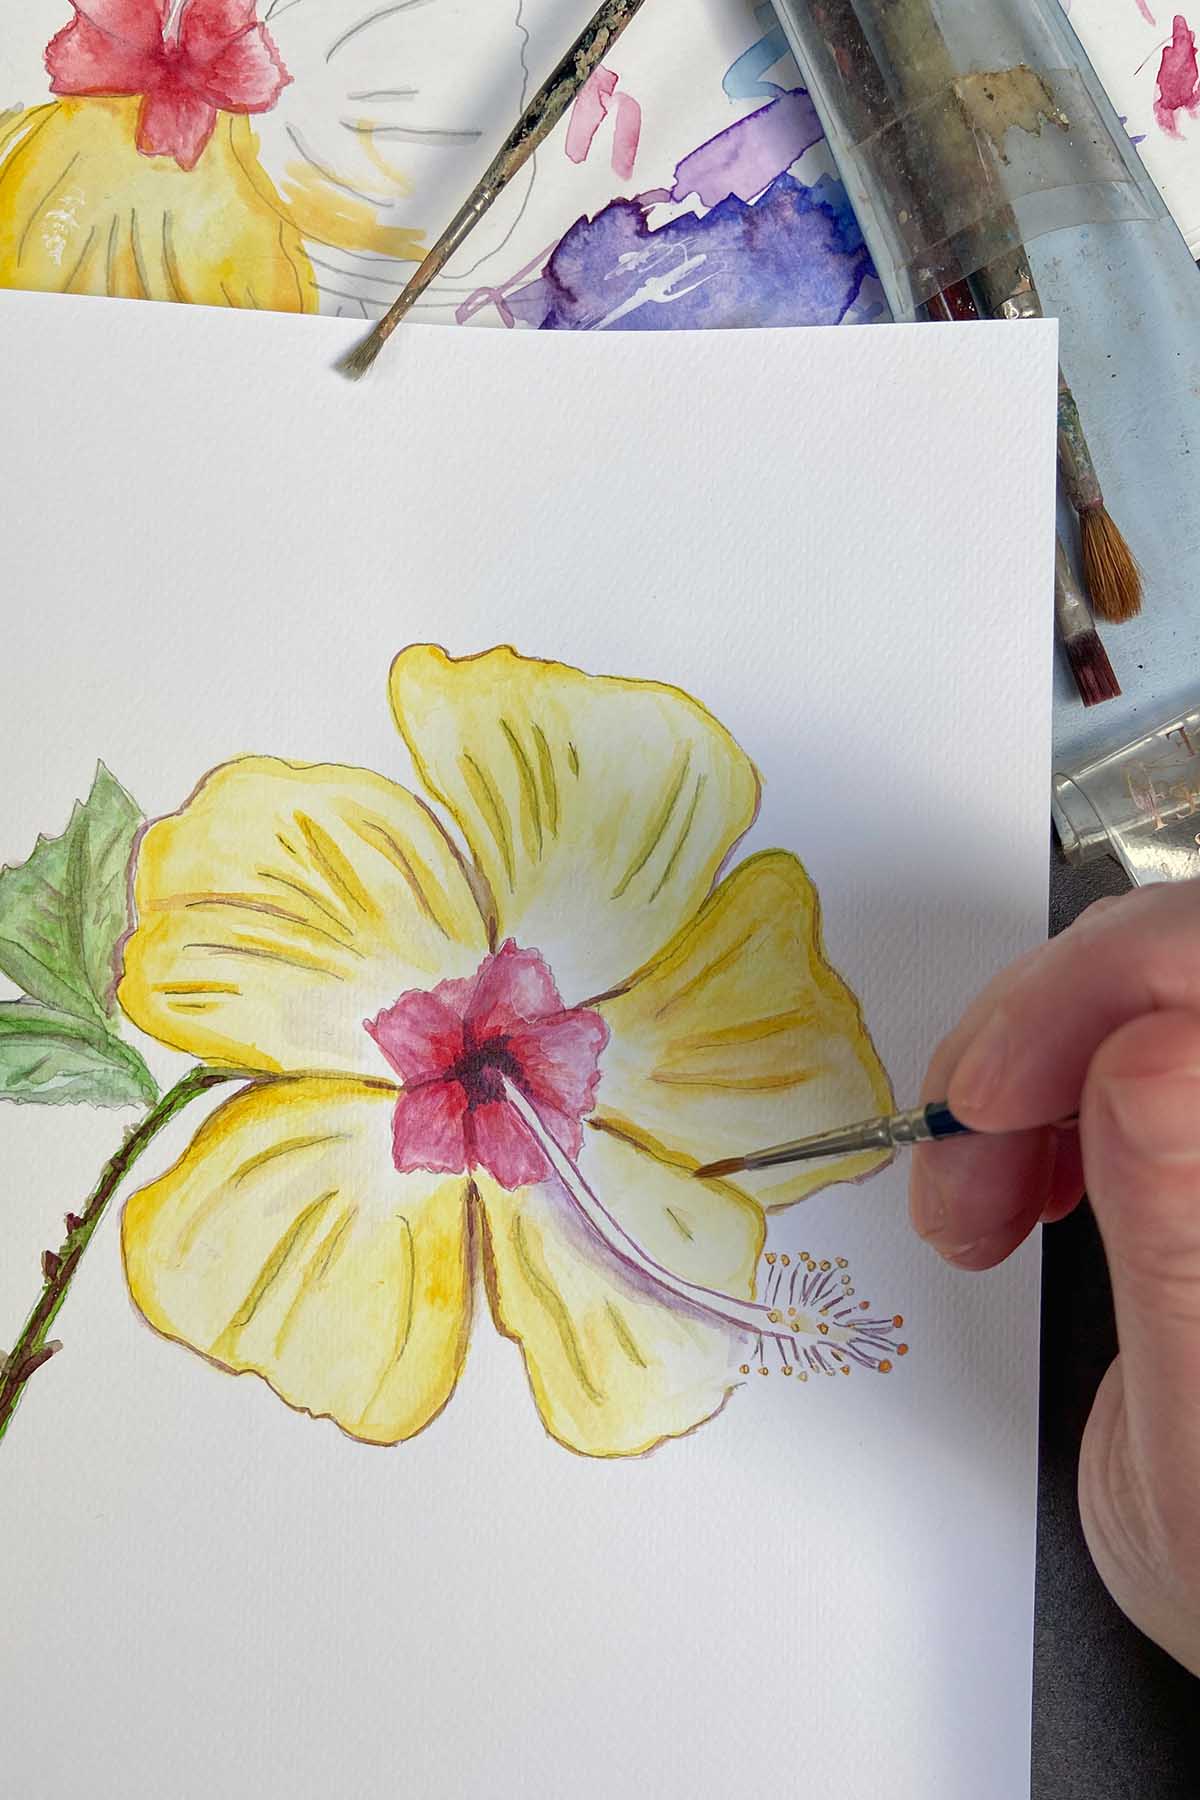
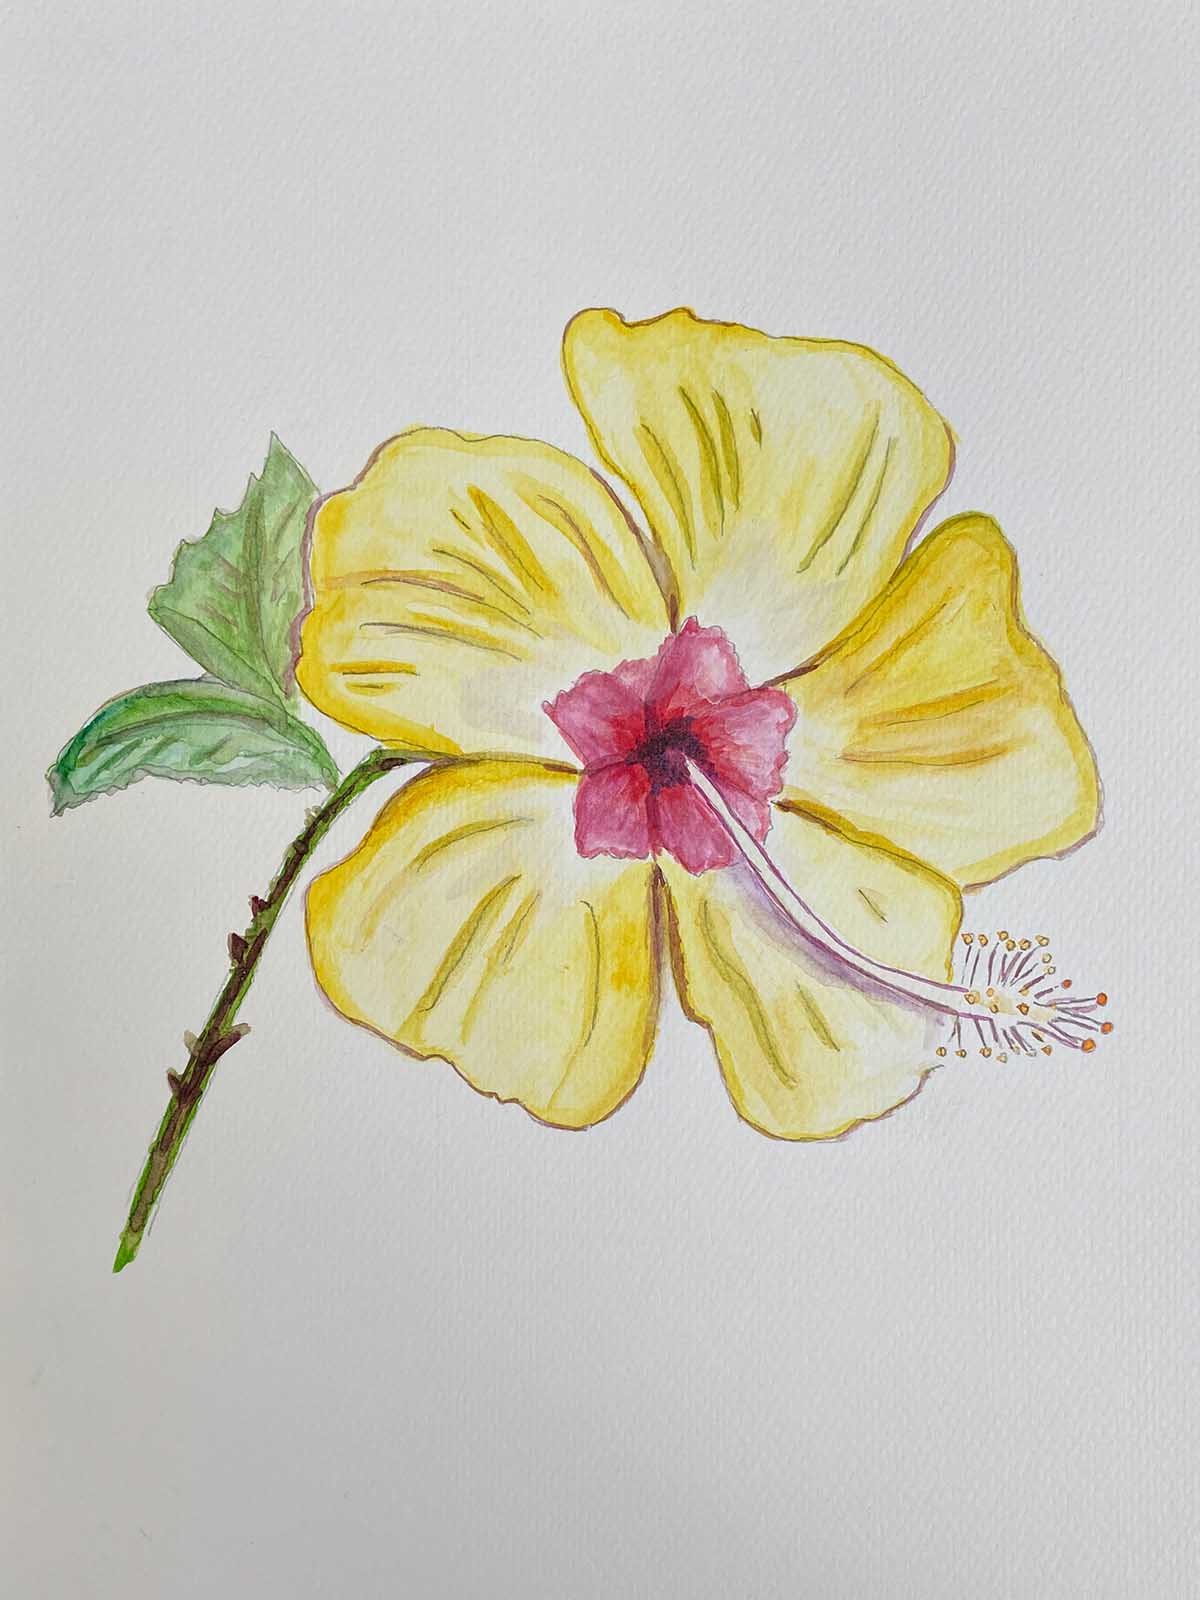
Step 7: Last, I add colour. I like using watercolours for hibiscus. If you use watercolours, draw lightly with a hard pencil so the colours look bright when you paint. I chose yellow with a red centre for this Hawaiian hibiscus because I like it.


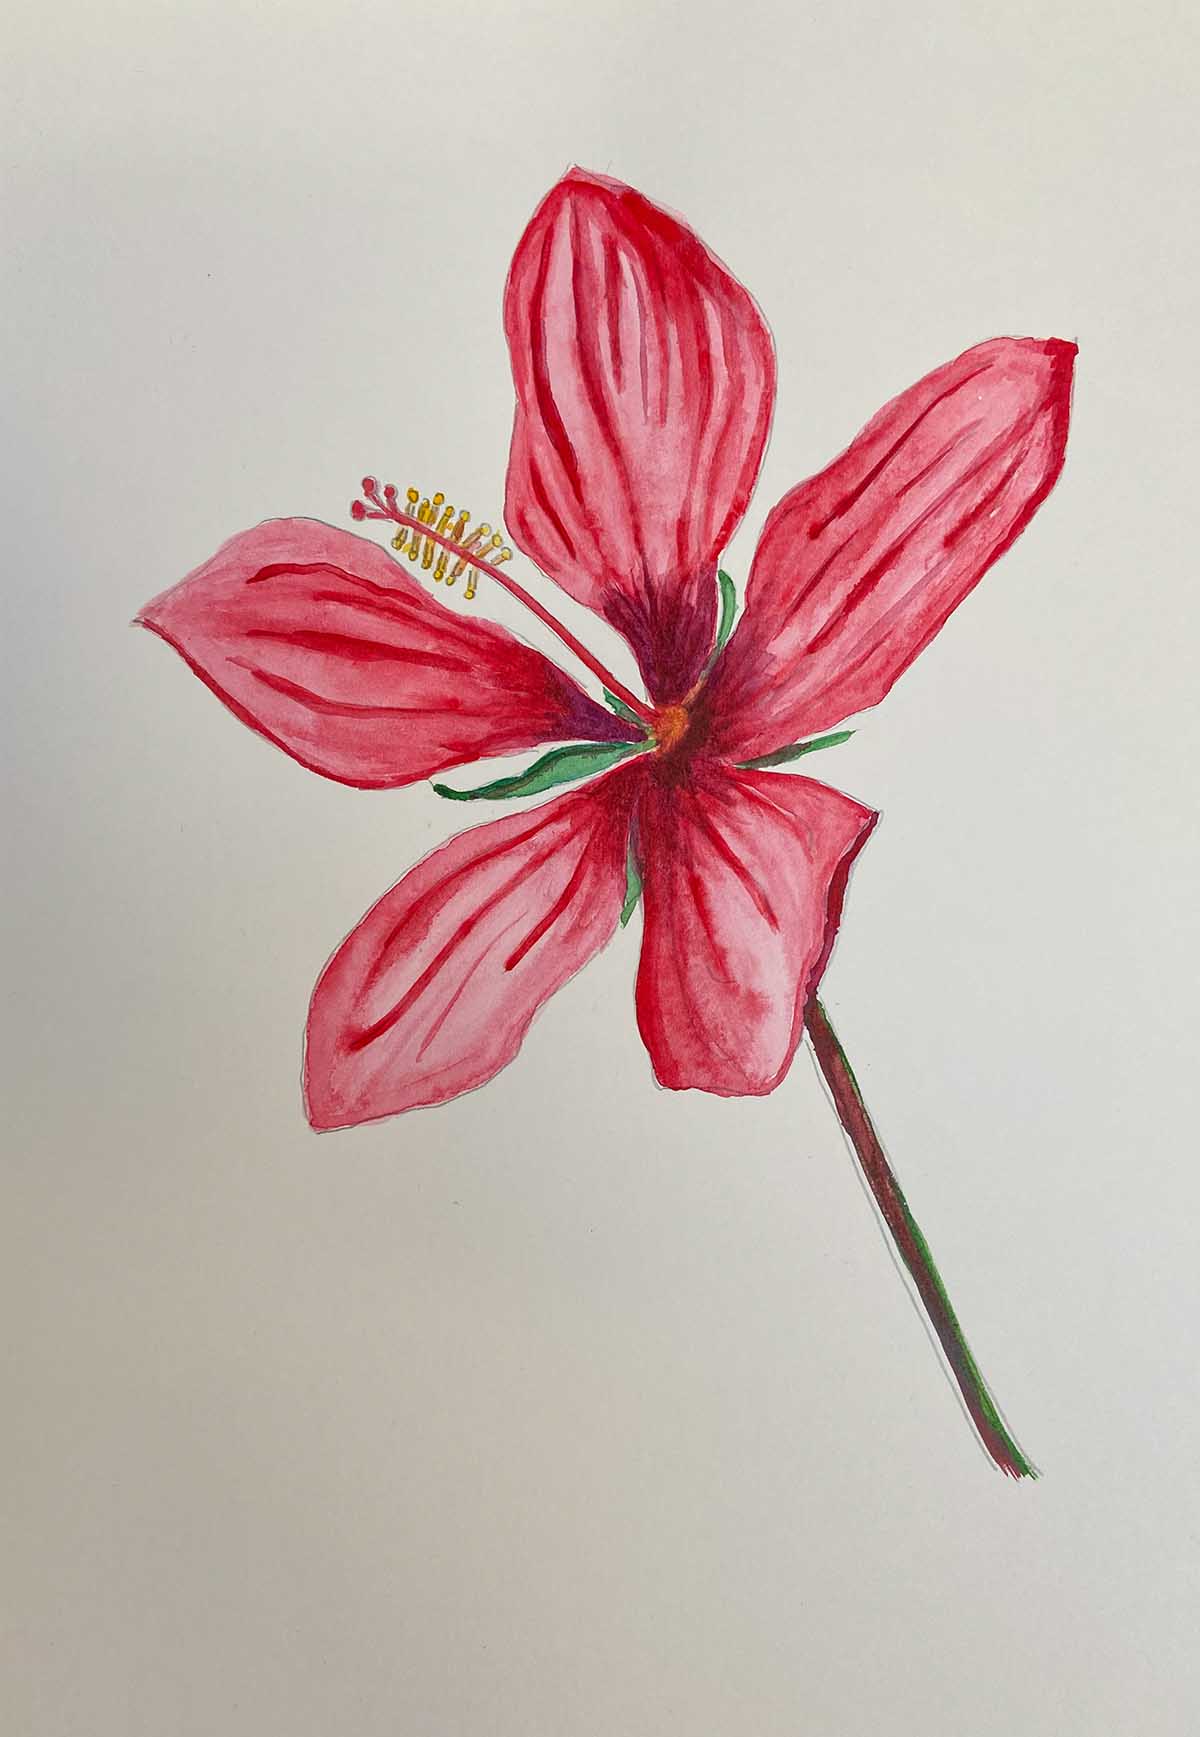
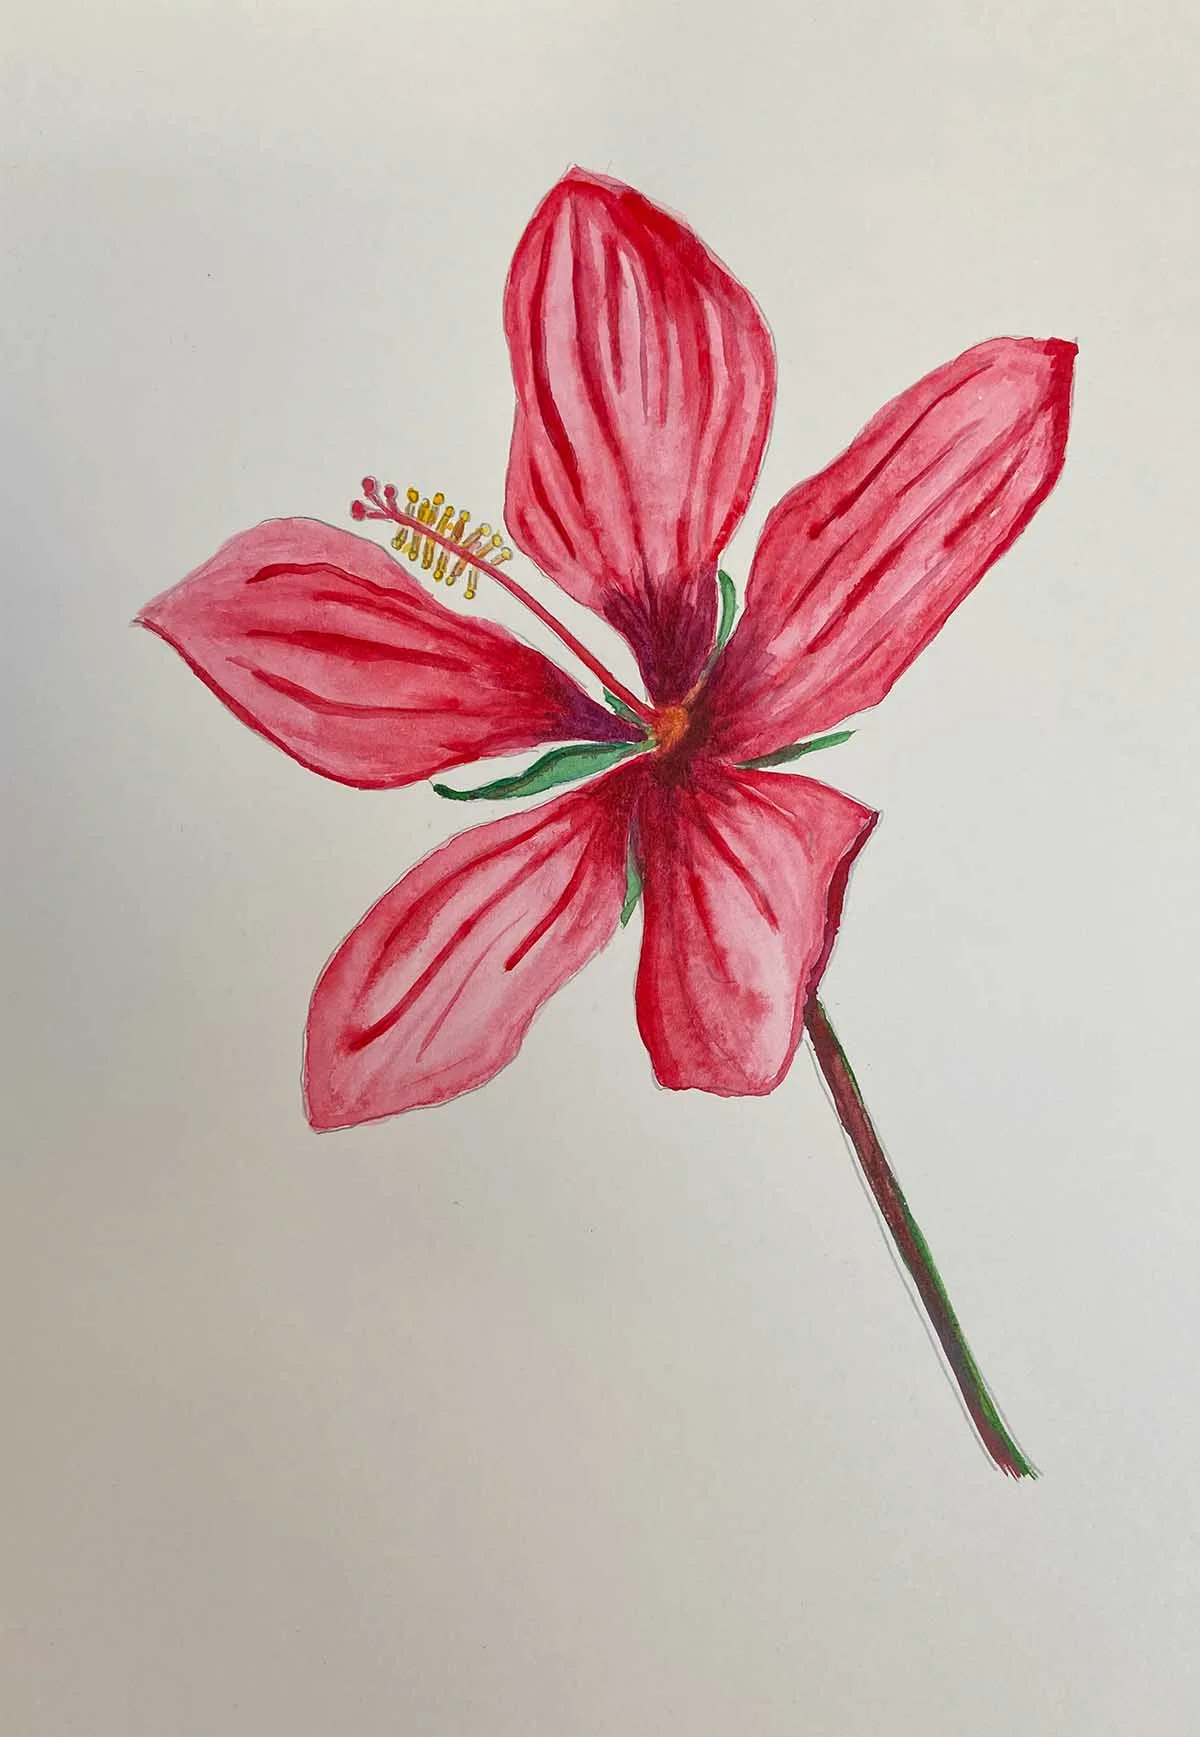
2 Hibiscus How To Draw: Chinese Hibiscus / Red Hibiscus
This is a kind of tropical hibiscus I remember well from my time in Hong Kong. Though its Latin name means “rose of China,” it’s not a rose or originally from China, but it grows a lot there.
Some cool things about it:
- People eat it in salads in the Pacific islands
- They use it to polish shoes in India (which is why it’s sometimes called the shoeblack plant), and in China, it’s used for black shoe polish and hair dye.
- The bright red hibiscus, known as Bunga Raya in Malaysia, is the country’s national flower. It stands for bravery, life, and togetherness there.
- Red hibiscus flowers are also important in Hindu worship.
- They are healthy for you!
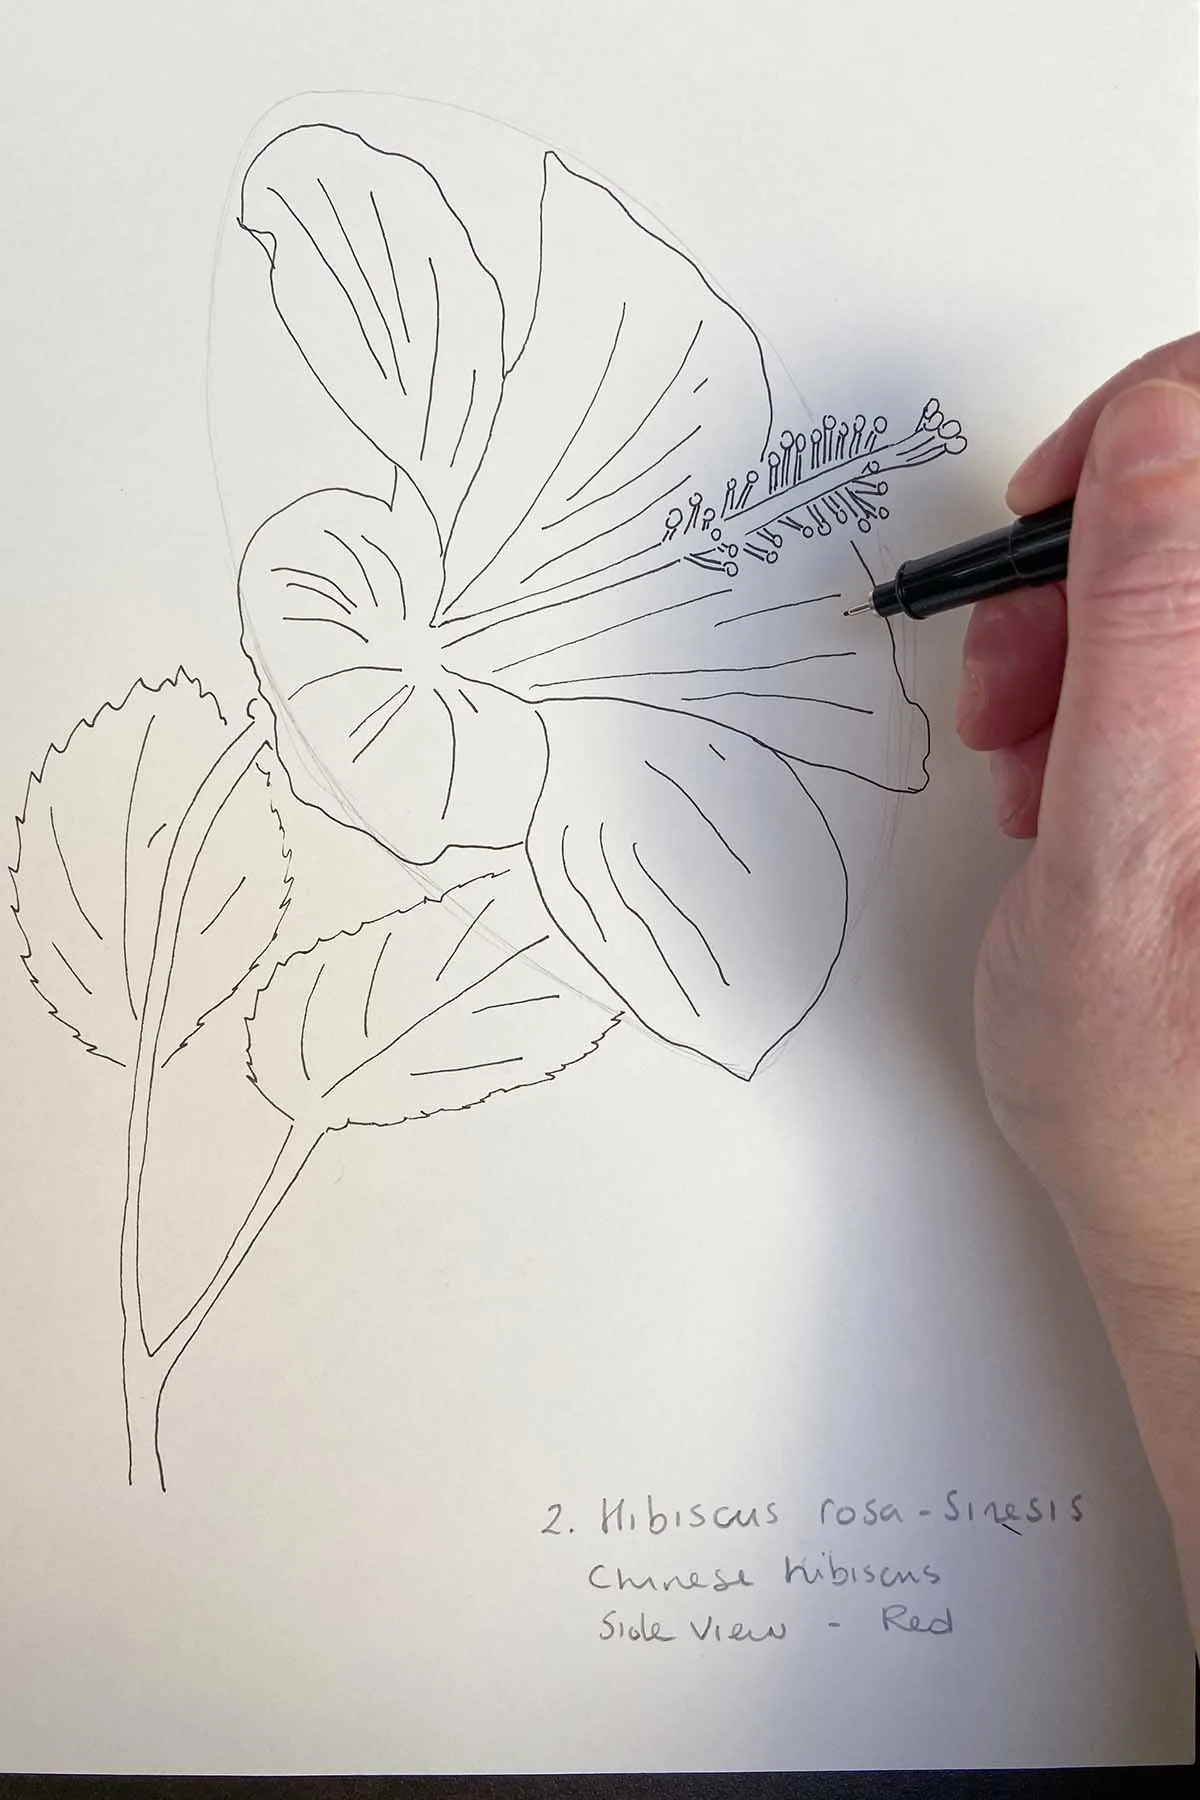
I chose to draw the red hibiscus from the side to show off its beautiful trumpet shape.
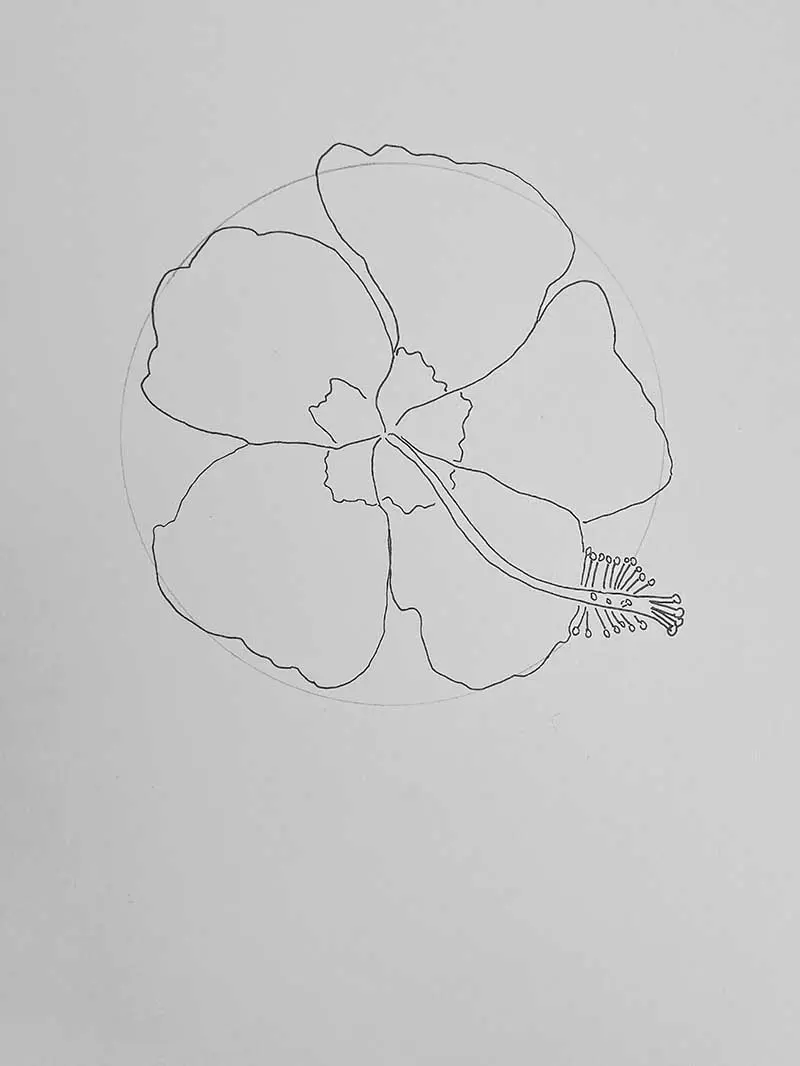
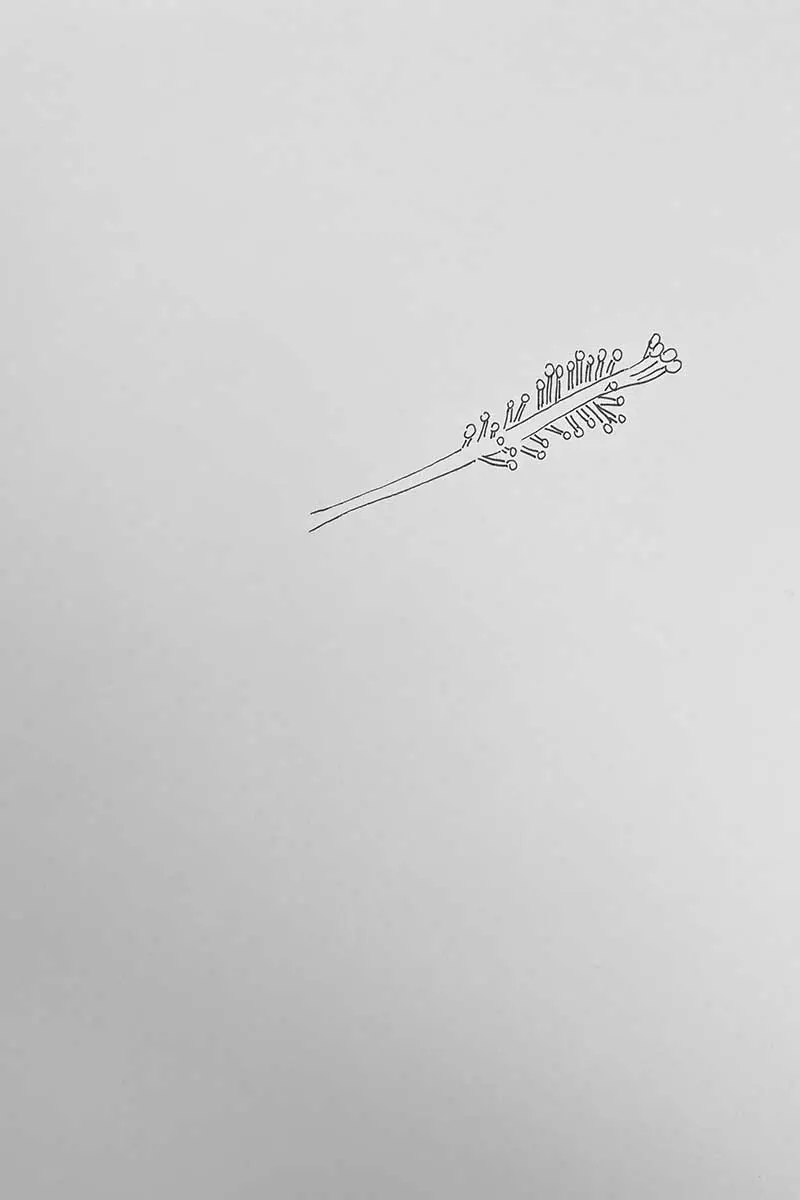
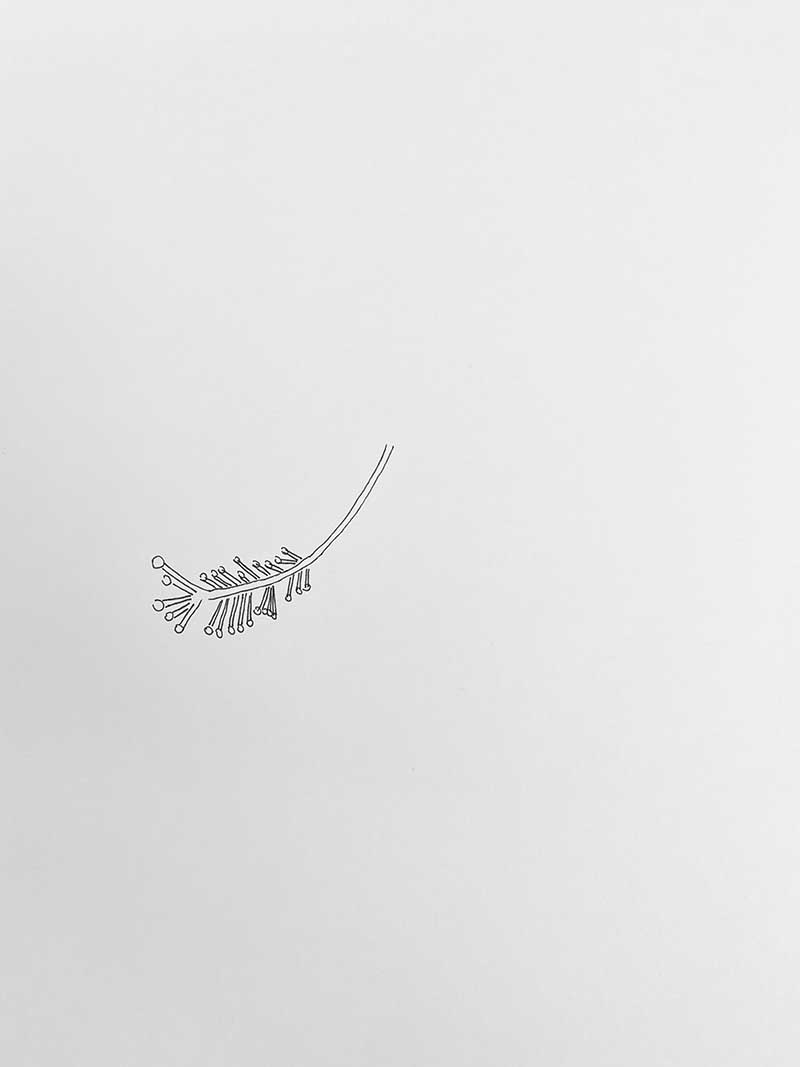
Step 1: As with steps one and two in the first hibiscus plant tutorial, start with the centre of the flower and draw the long tubular shape. But this time, in a straight upward diagonal, to draw a side view of the flower.
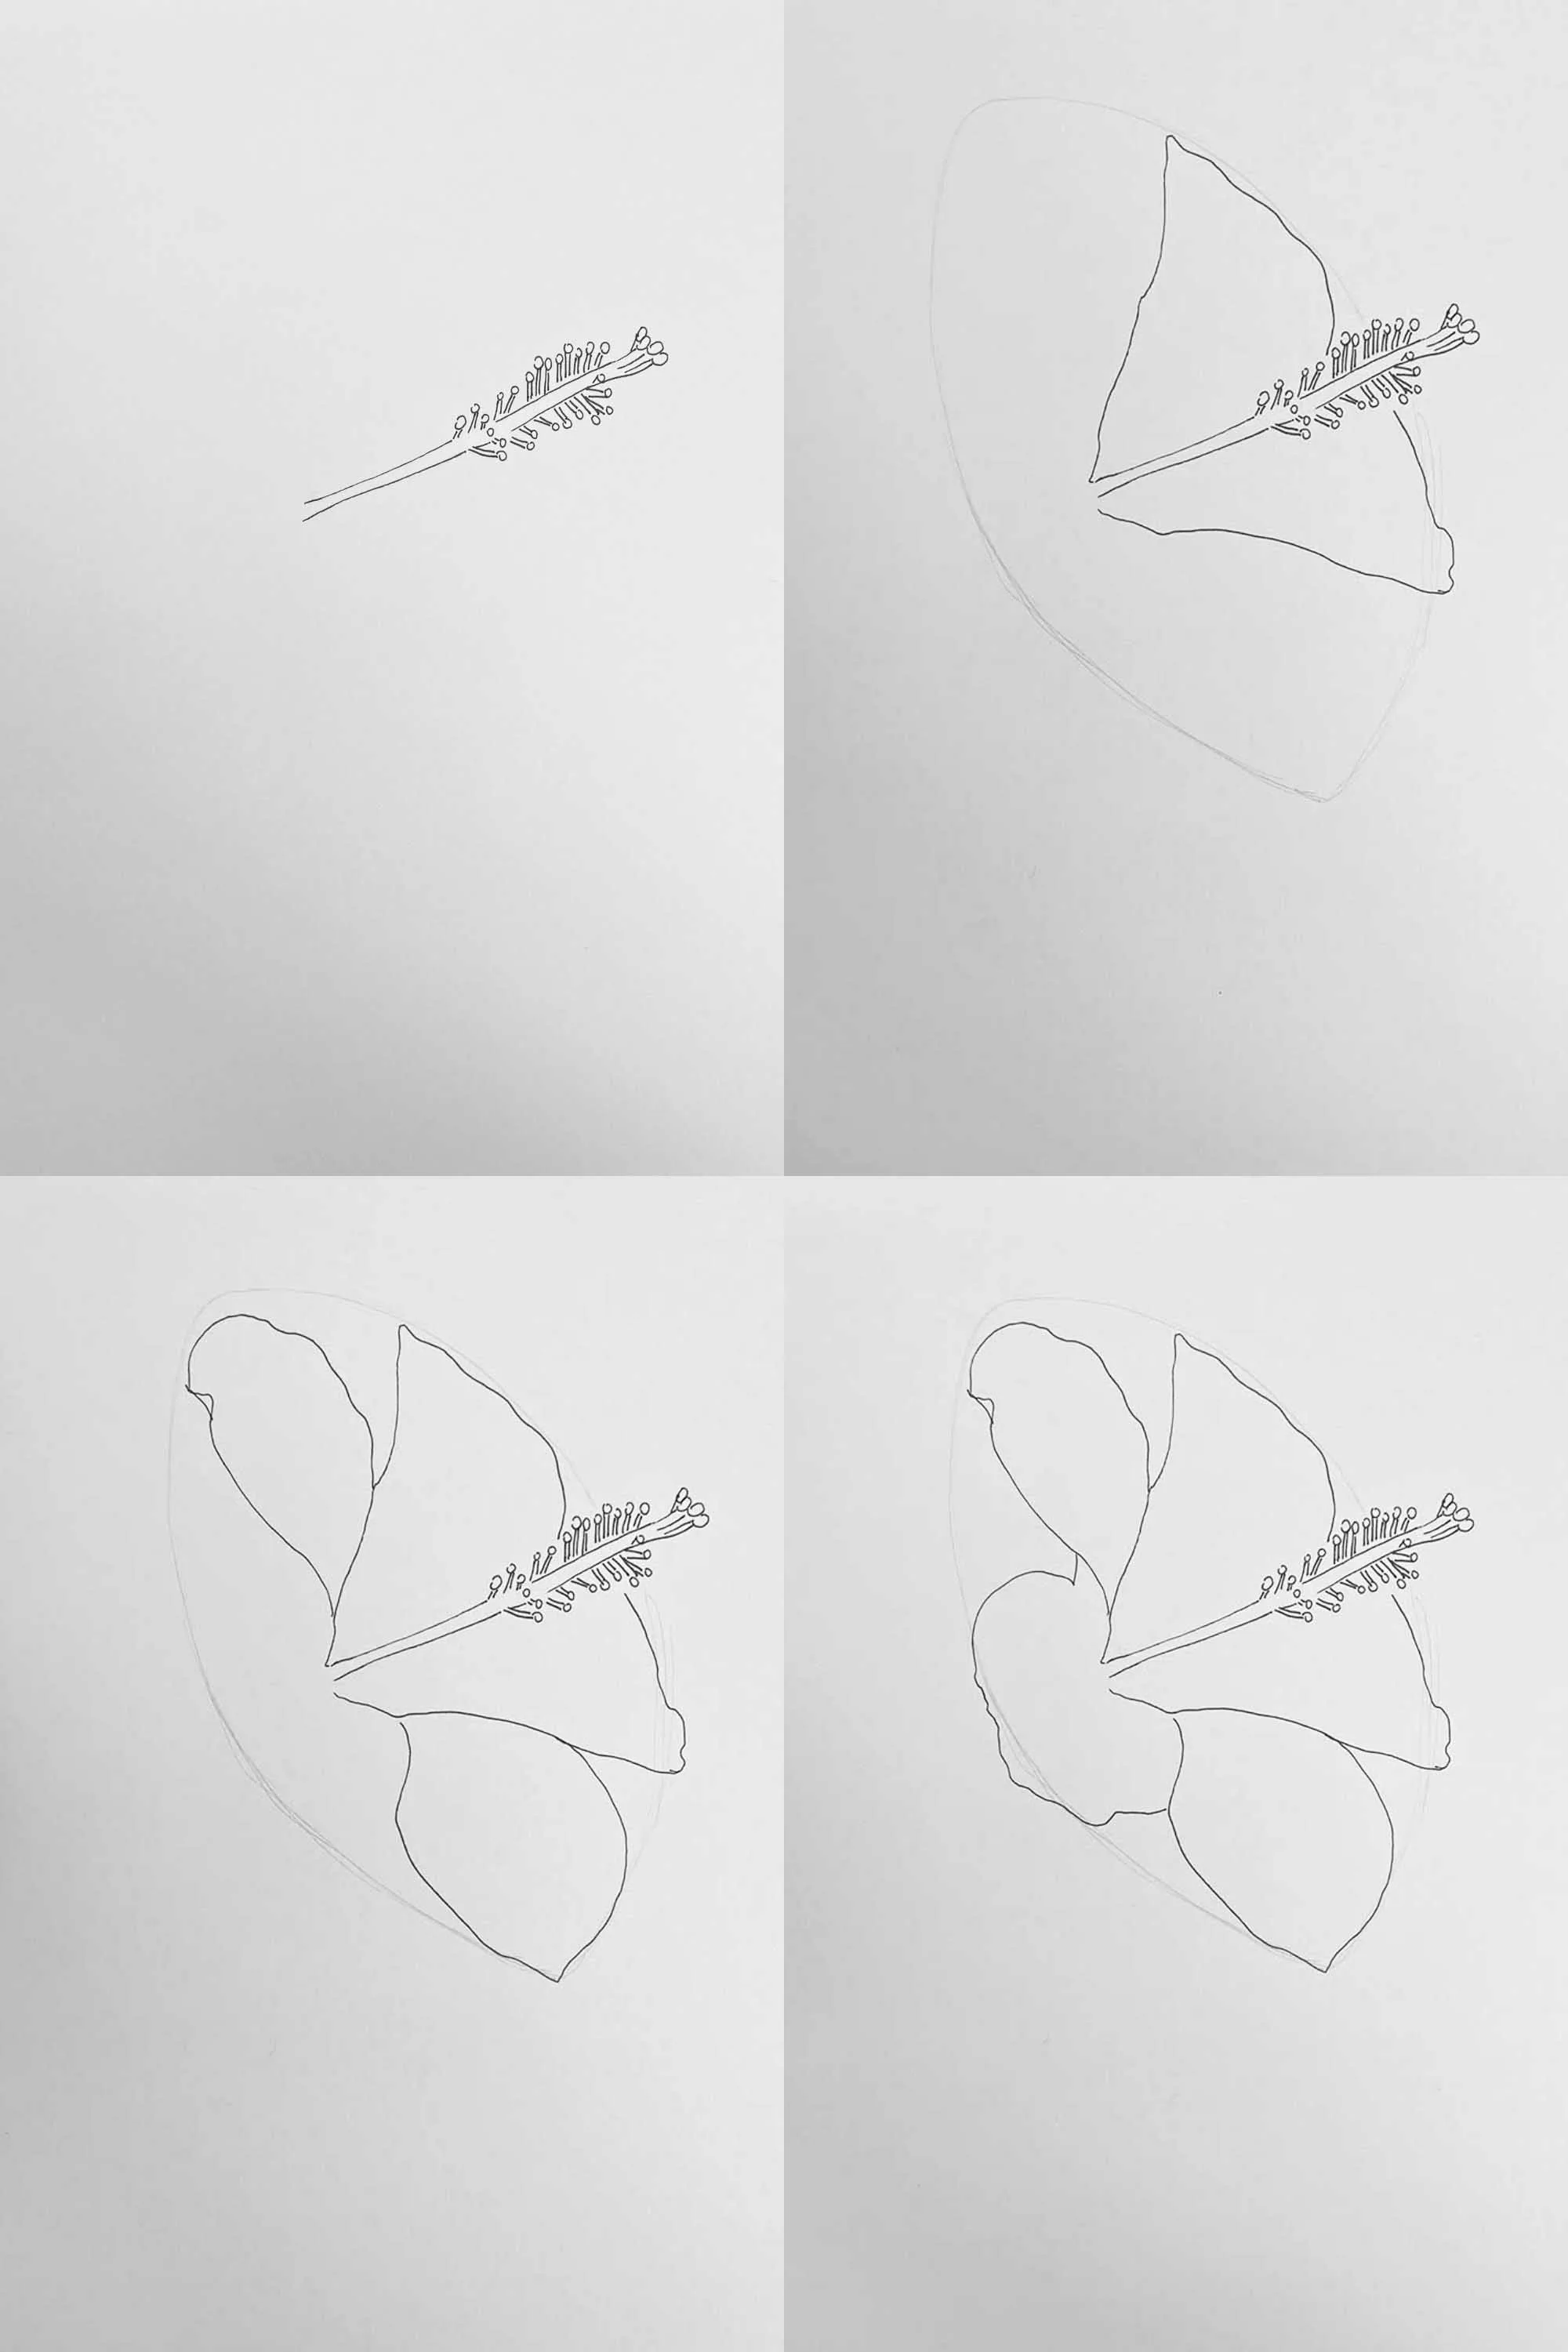
Step 2: In pencil lightly draw an oval shape to help guide where to draw your petals. Add your five petals step-by-step, as shown.

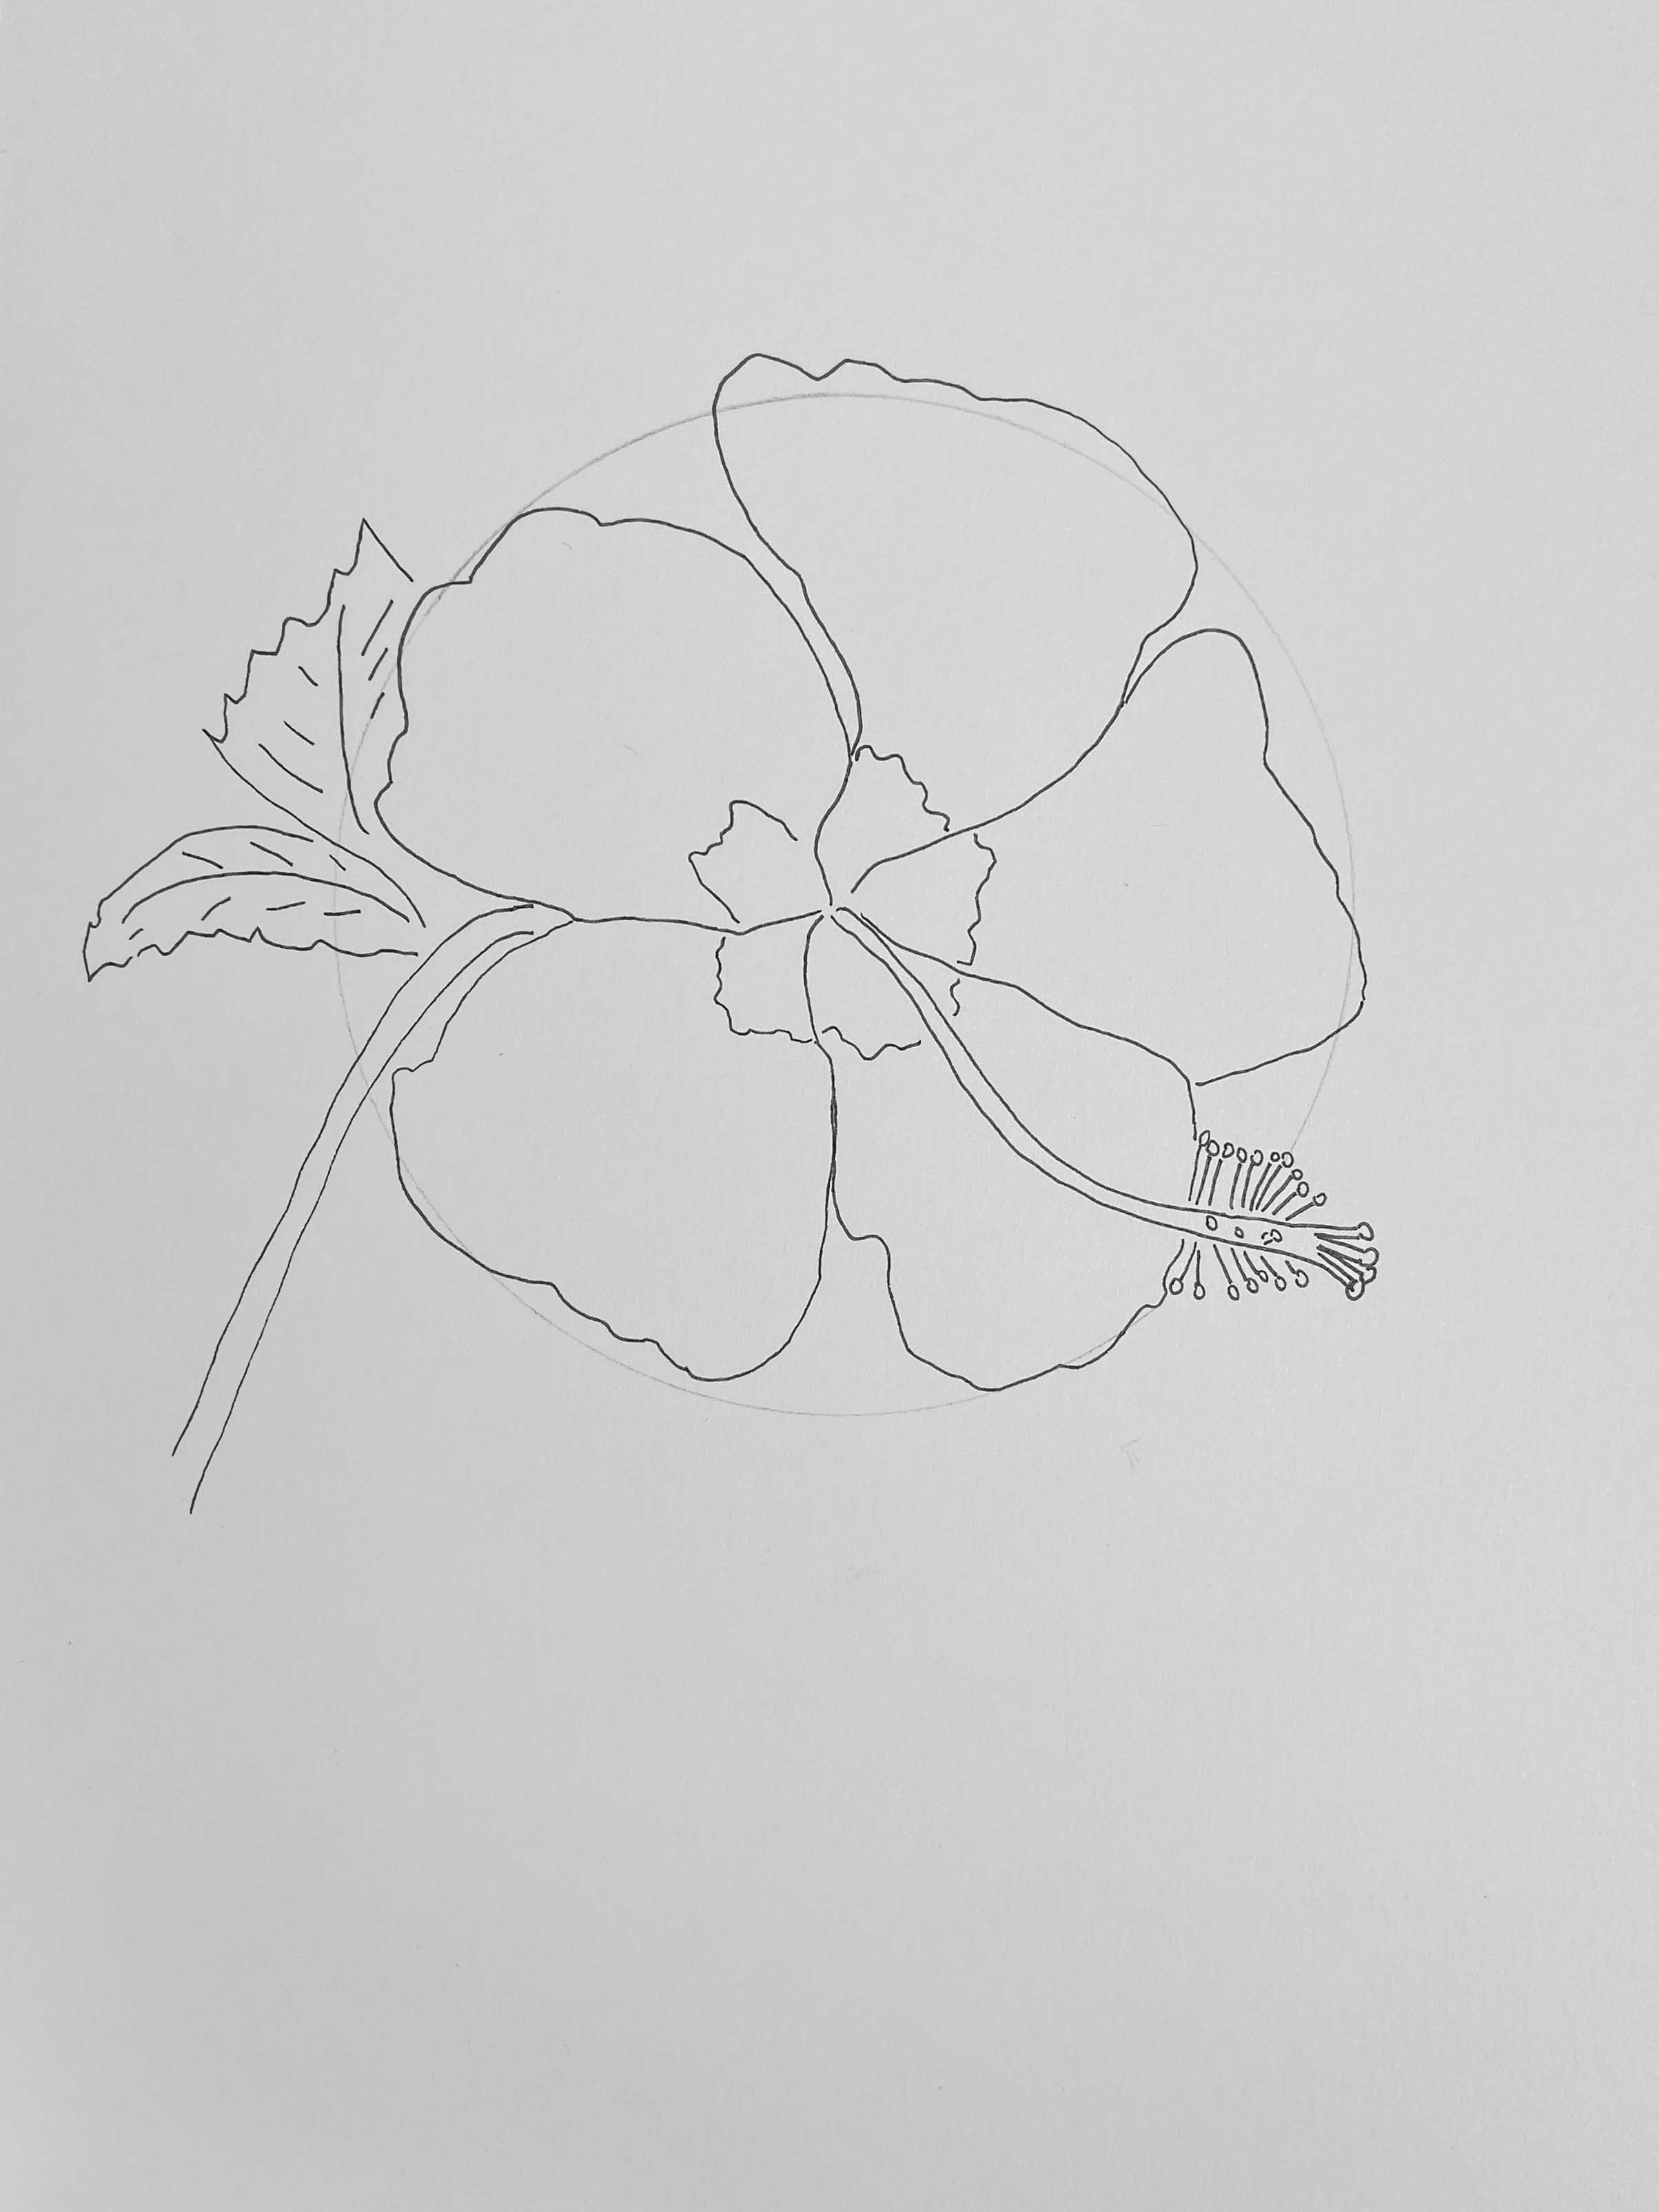
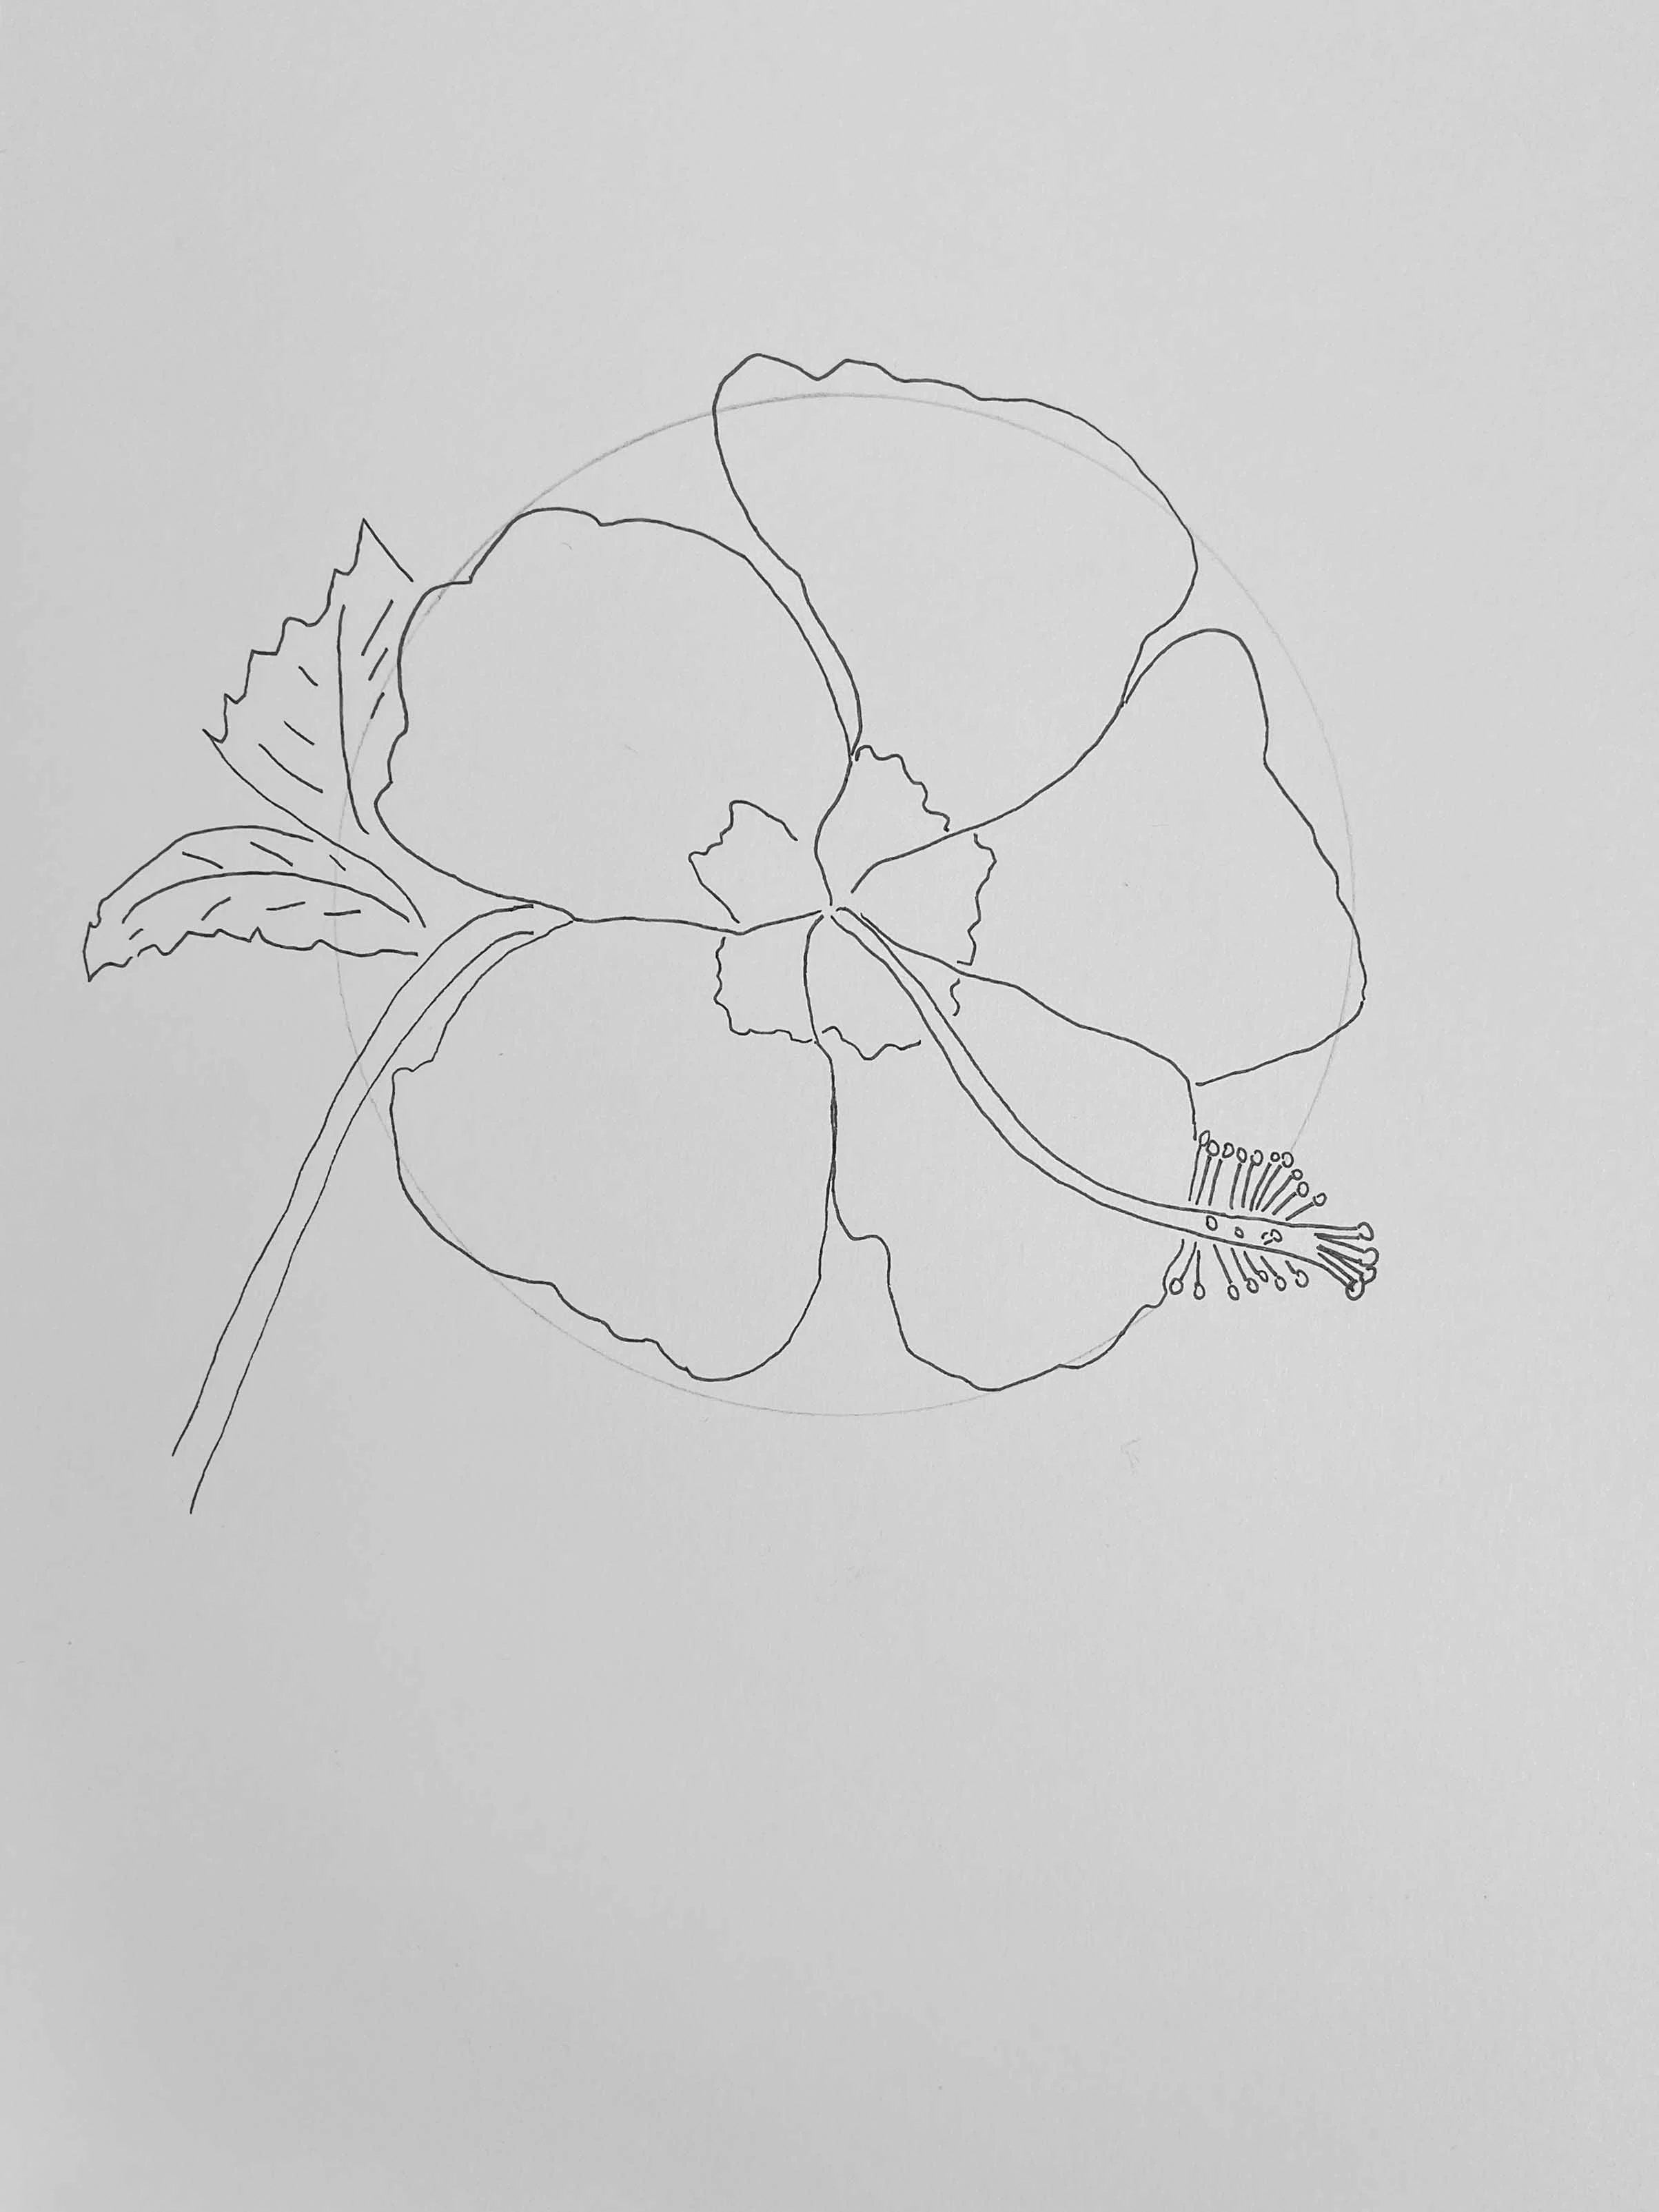
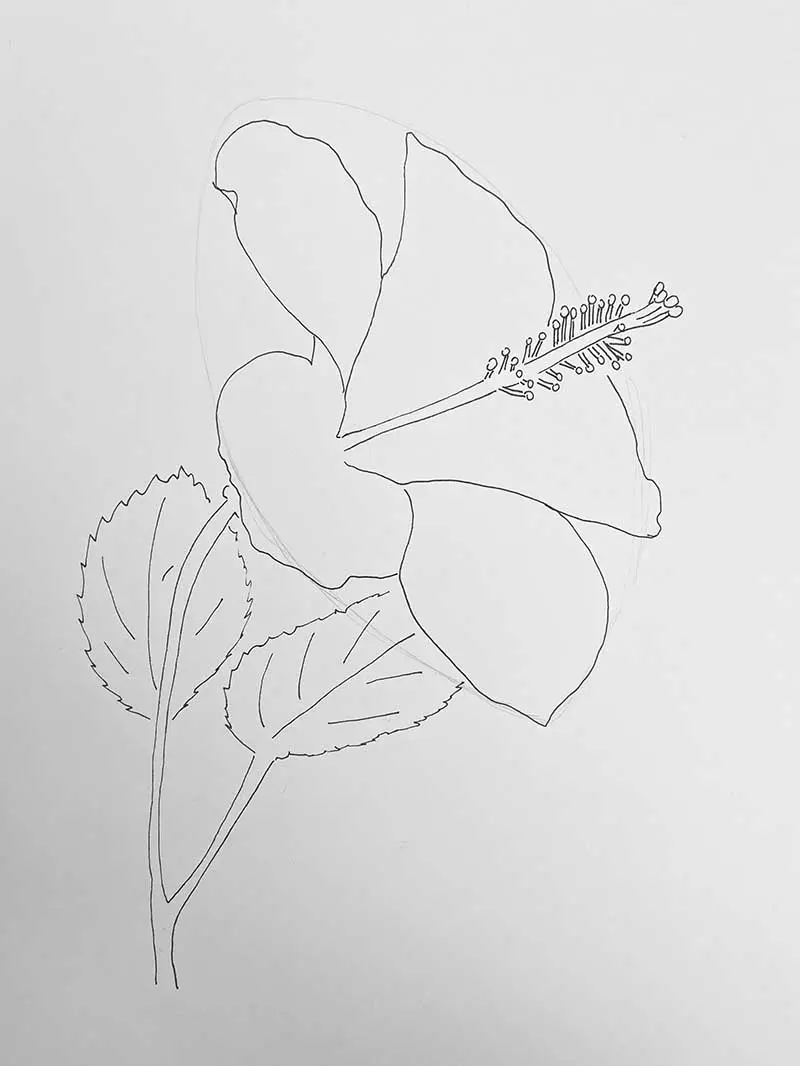
Step 3: Add a stem and leaves with serrated edges.

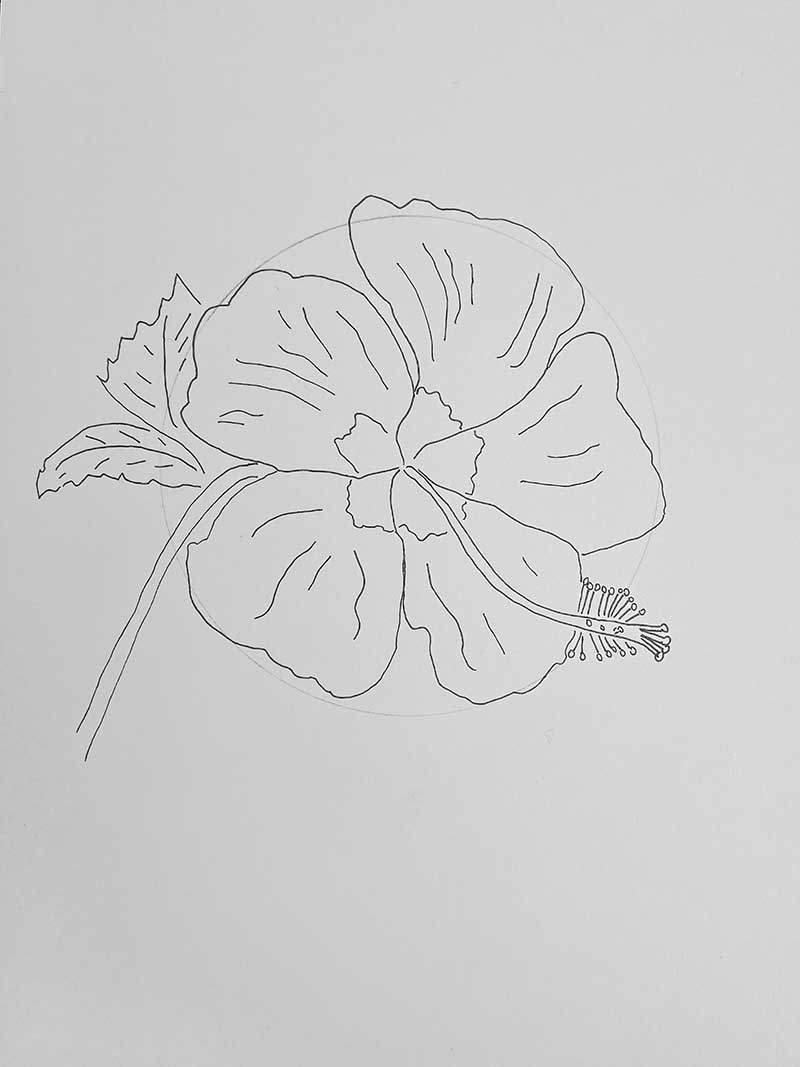
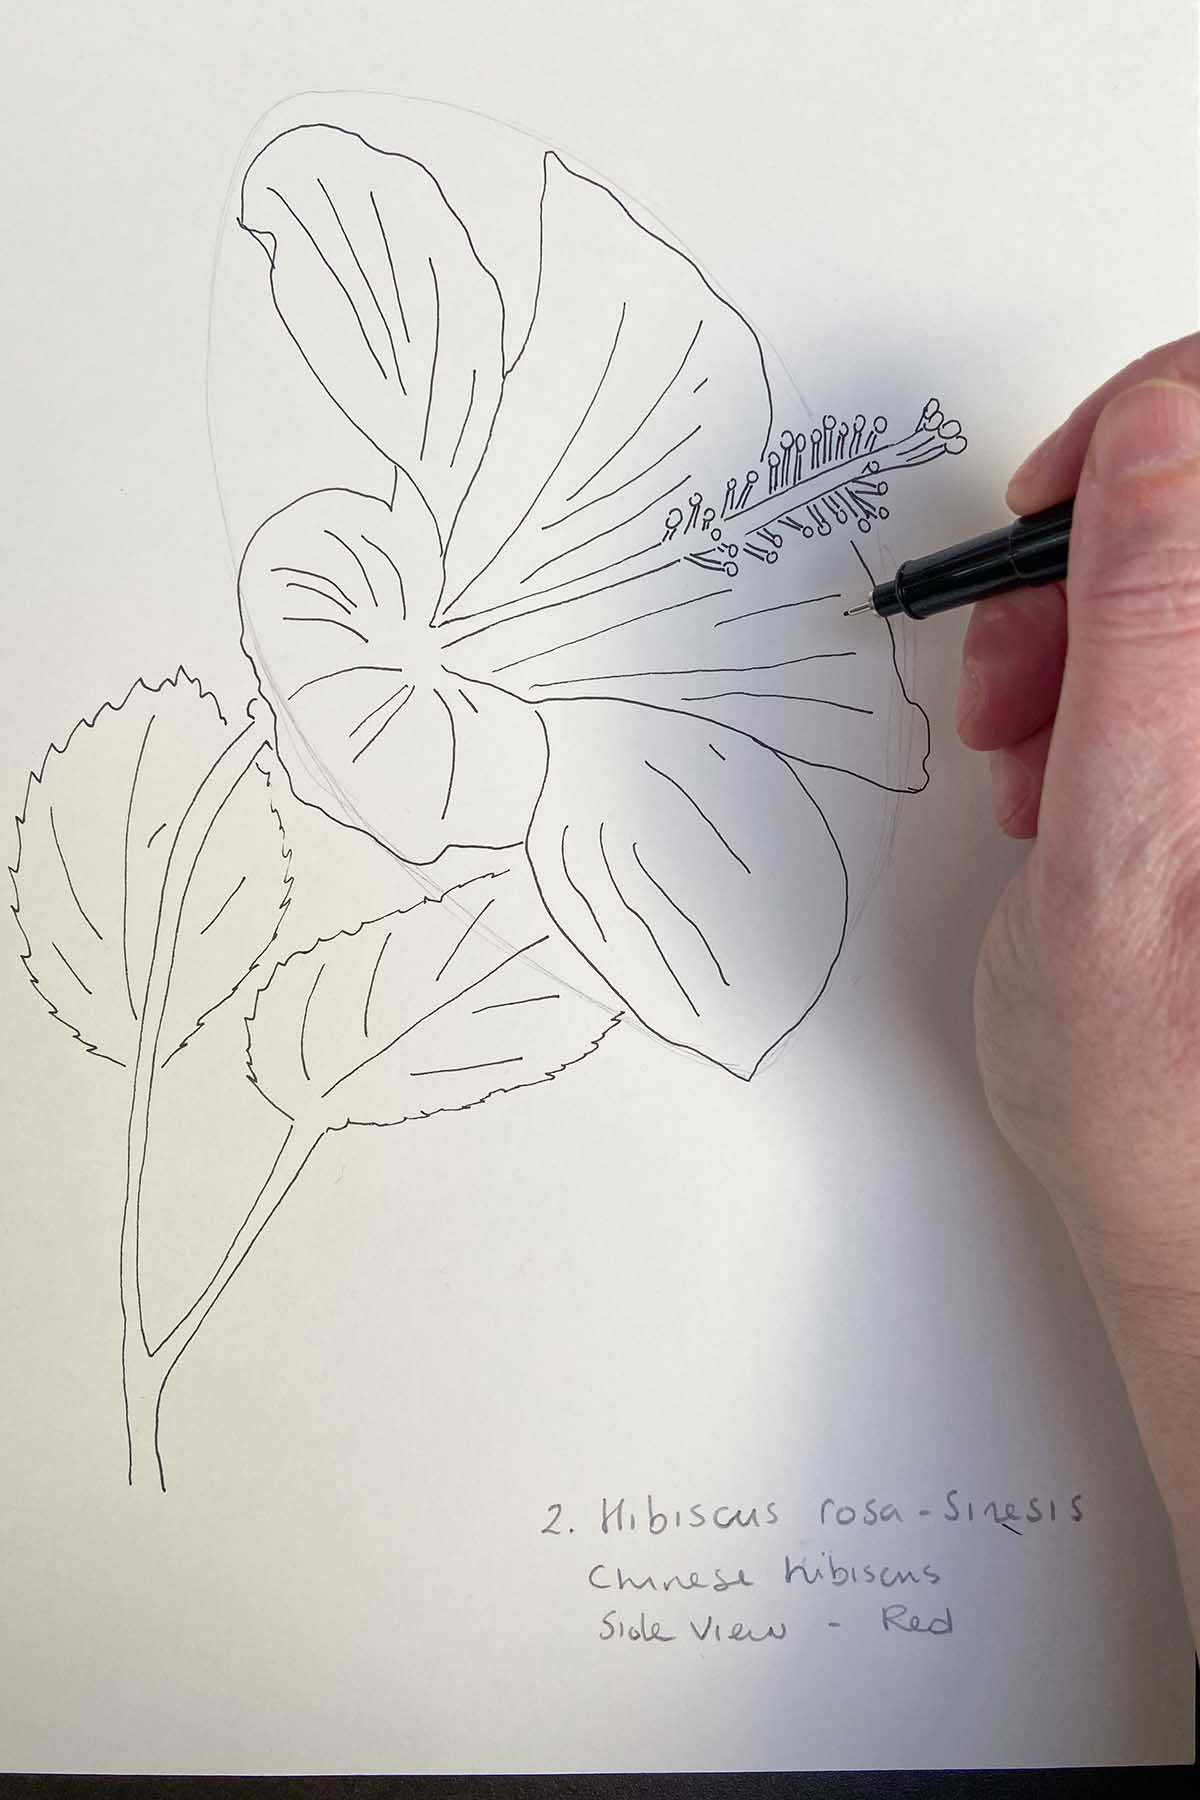
Step 4: To make your hibiscus drawing more realistic, add lines to the petals to create texture. These lines imitate the natural veins in the petals, adding depth and detail.
Adjust the thickness and spacing of the lines to capture the unique look of each petal, enhancing the overall realism and beauty of your flower.
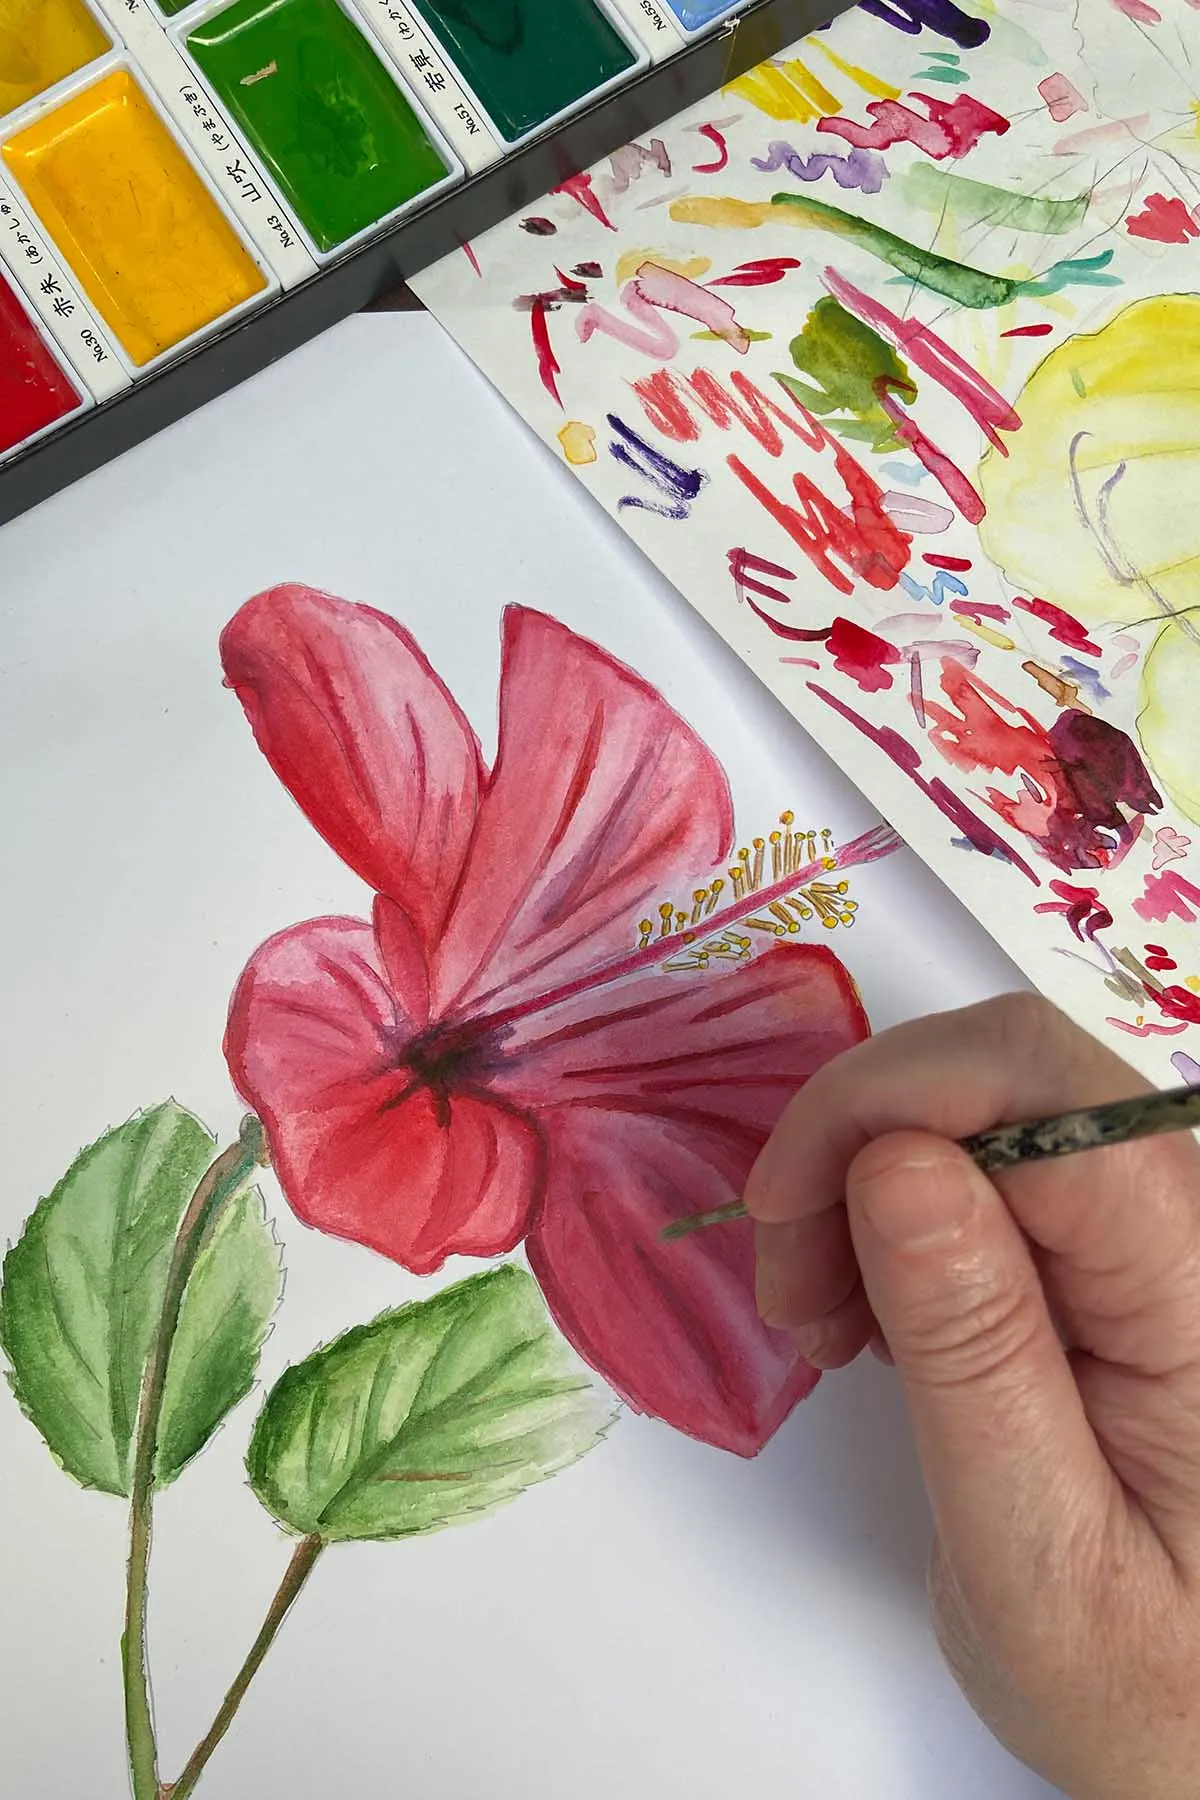
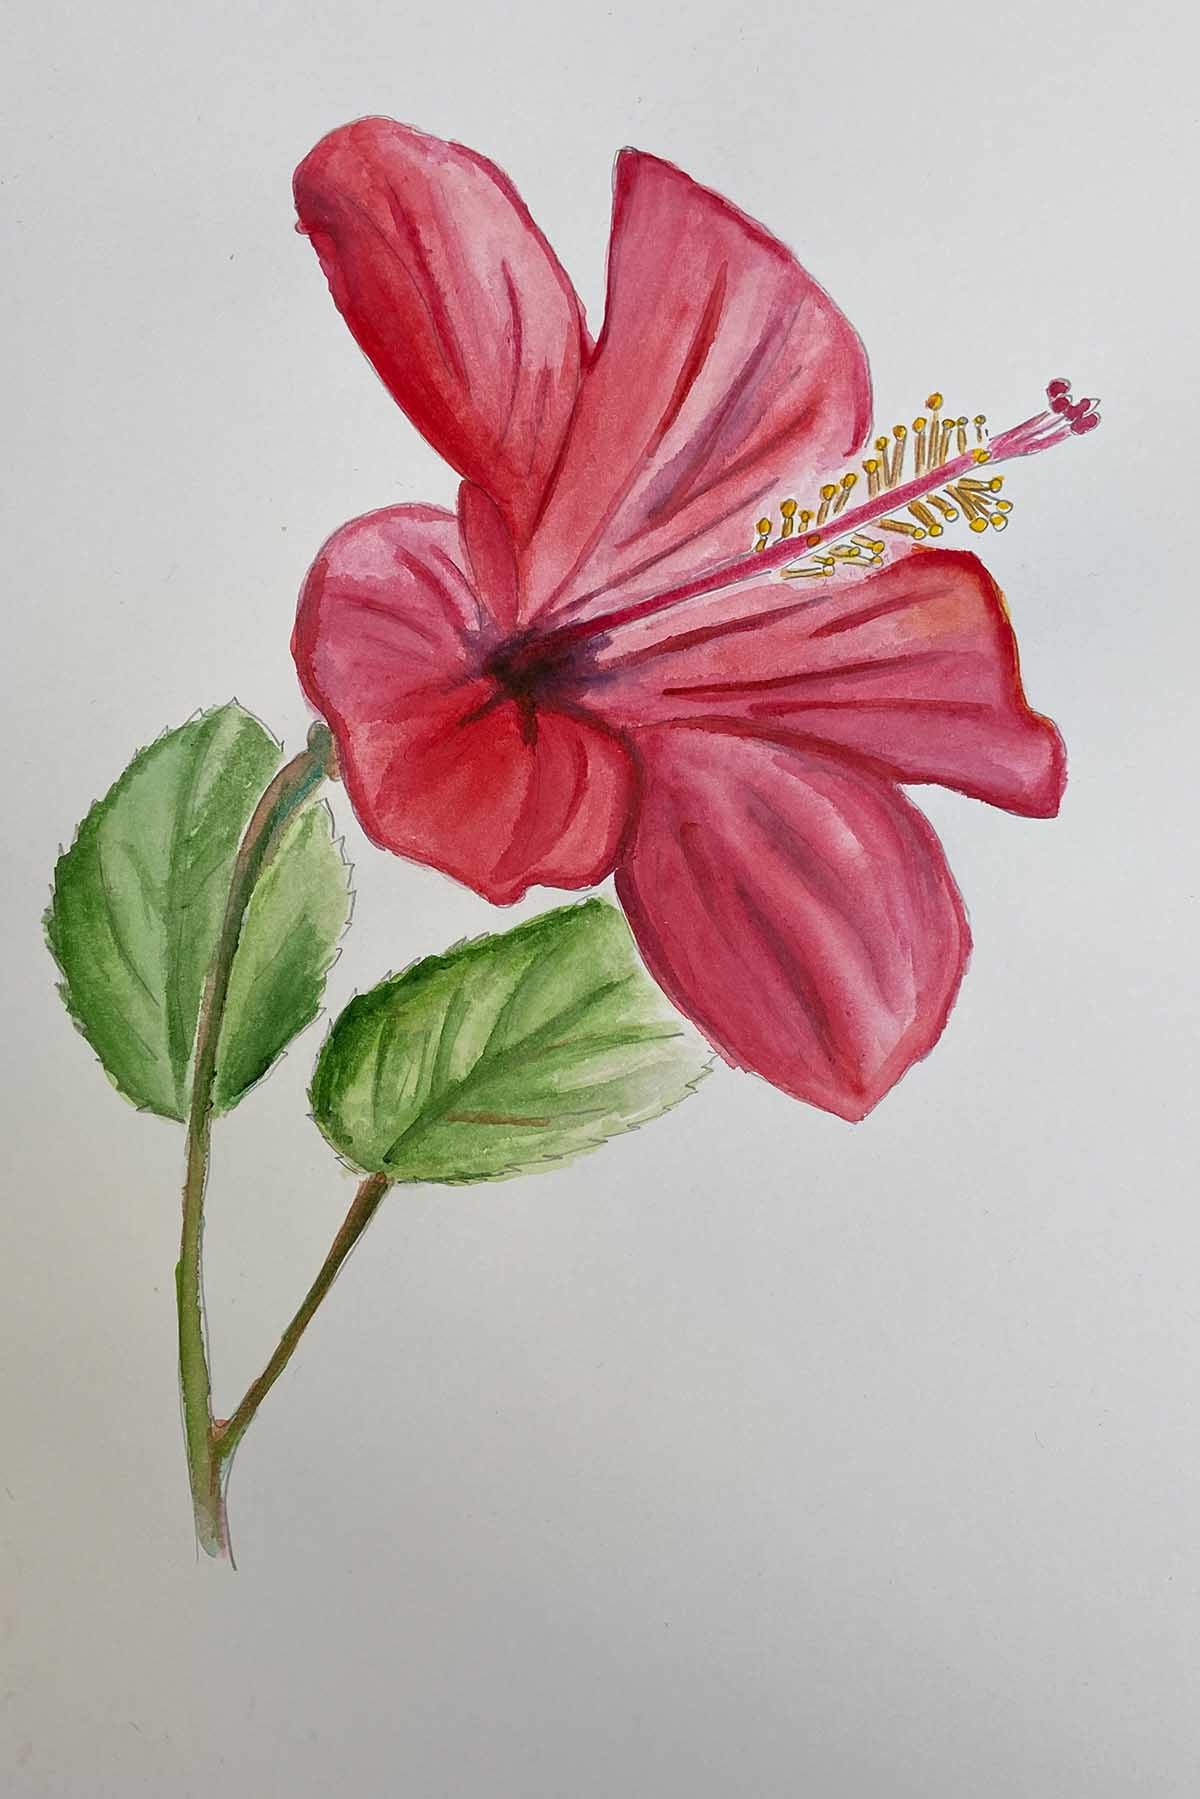
Step 5: Add colour to your drawing. In this case, I’ve selected red, the traditional colour for the Chinese Hibiscus.
However, this flower has been bred in a variety of colours, such as white, pink, orange, peach, yellow, blue, and purple. Feel free to choose any of these colours to make your drawing stand out.


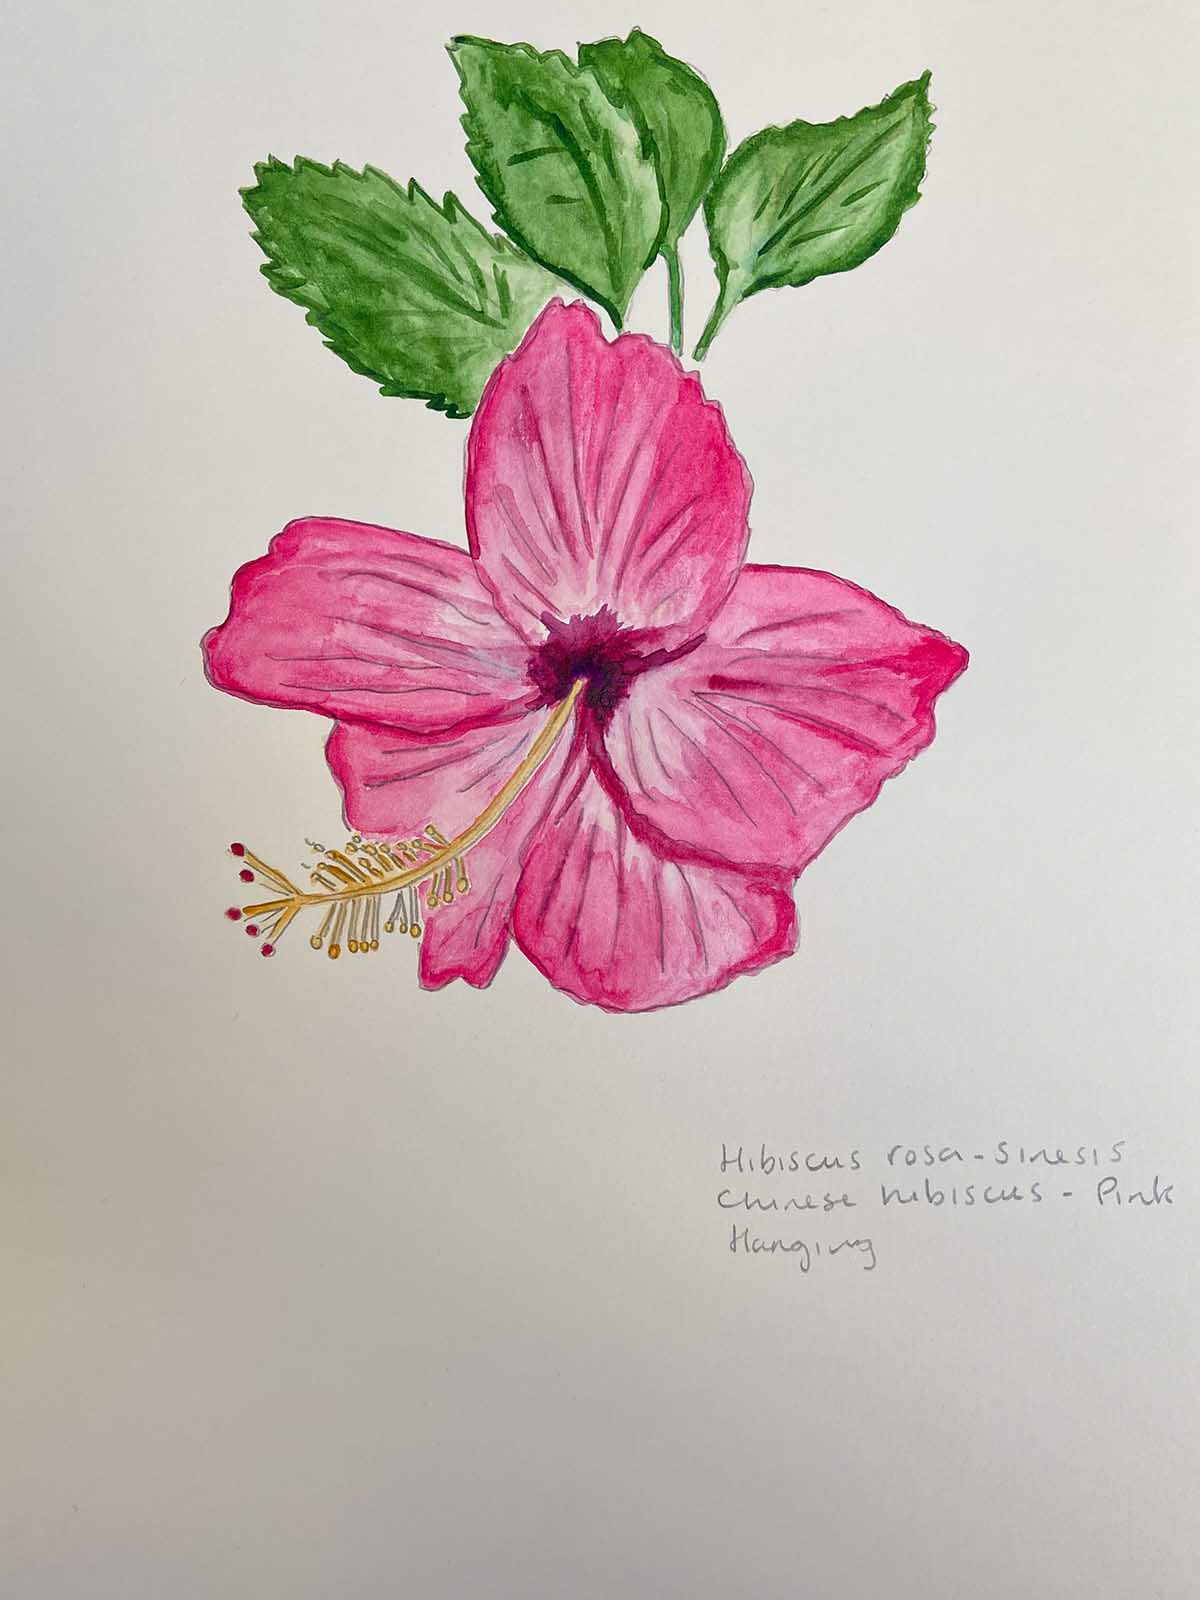
3. How To Drawing Hanging Chinese Hibiscus
This time, I’m drawing a Chinese hibiscus, also known as Hibiscus rosa-sinensis, but I’ve chosen pink and depicted it from a hanging perspective.
Capturing the various stages of blooming is an enjoyable challenge, especially since these flowers bloom on shrubs and small trees, where they are frequently seen dangling.
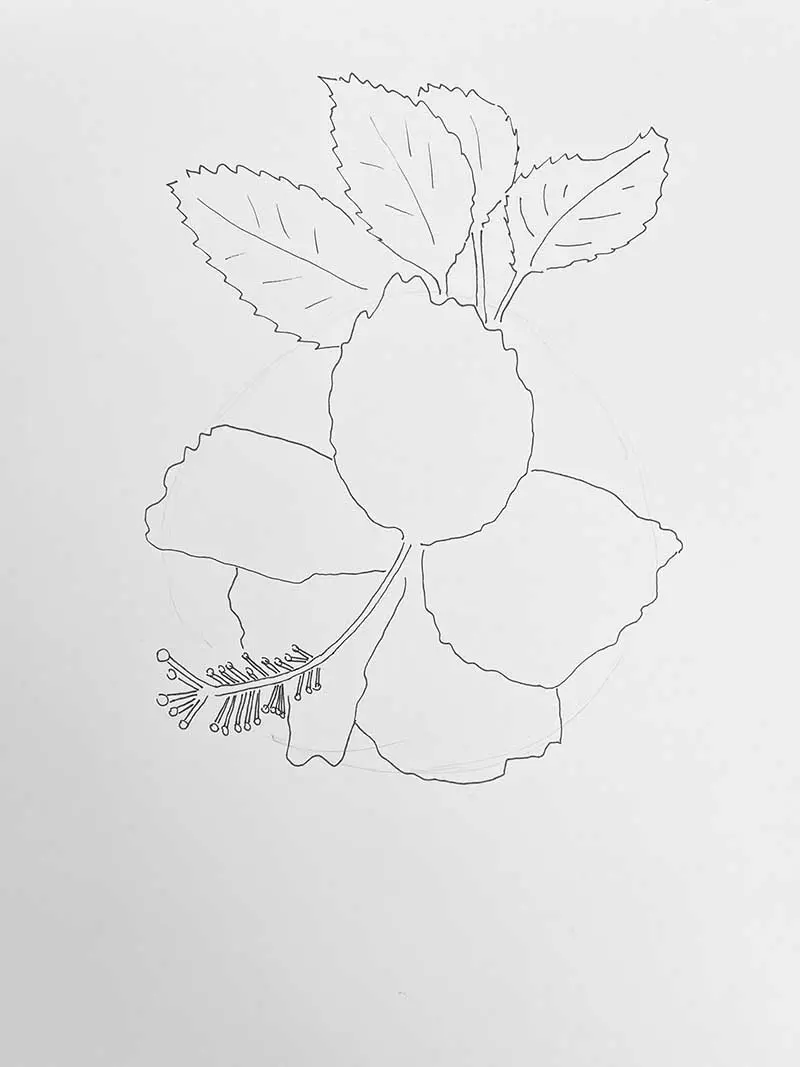
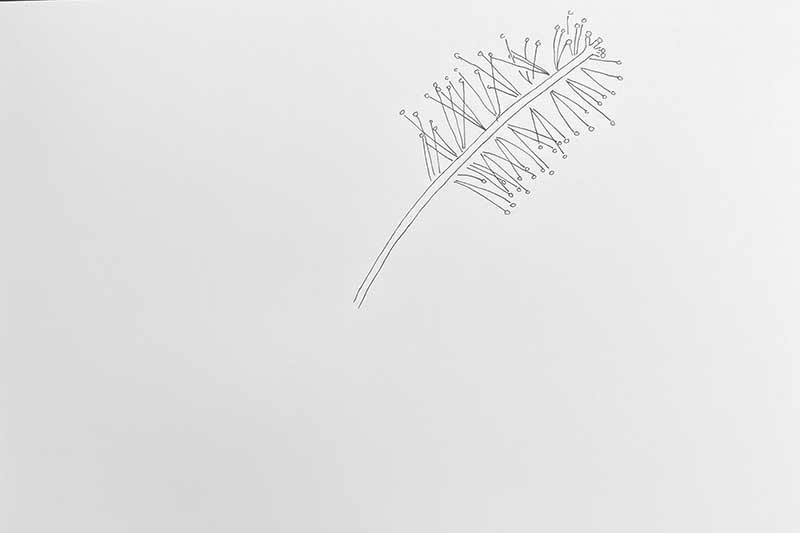
Step 1: As in the previous hibiscus flower tutorials, start by drawing the prominent centre of the flower. I have drawn a curved tubular shape with the attached stigma, filaments, and anther this time.
Step 2: Lightly draw a circle/oval shape in pencil to guide the placement of your petals. One by one add your five petals here I have decided to have them overlapping.
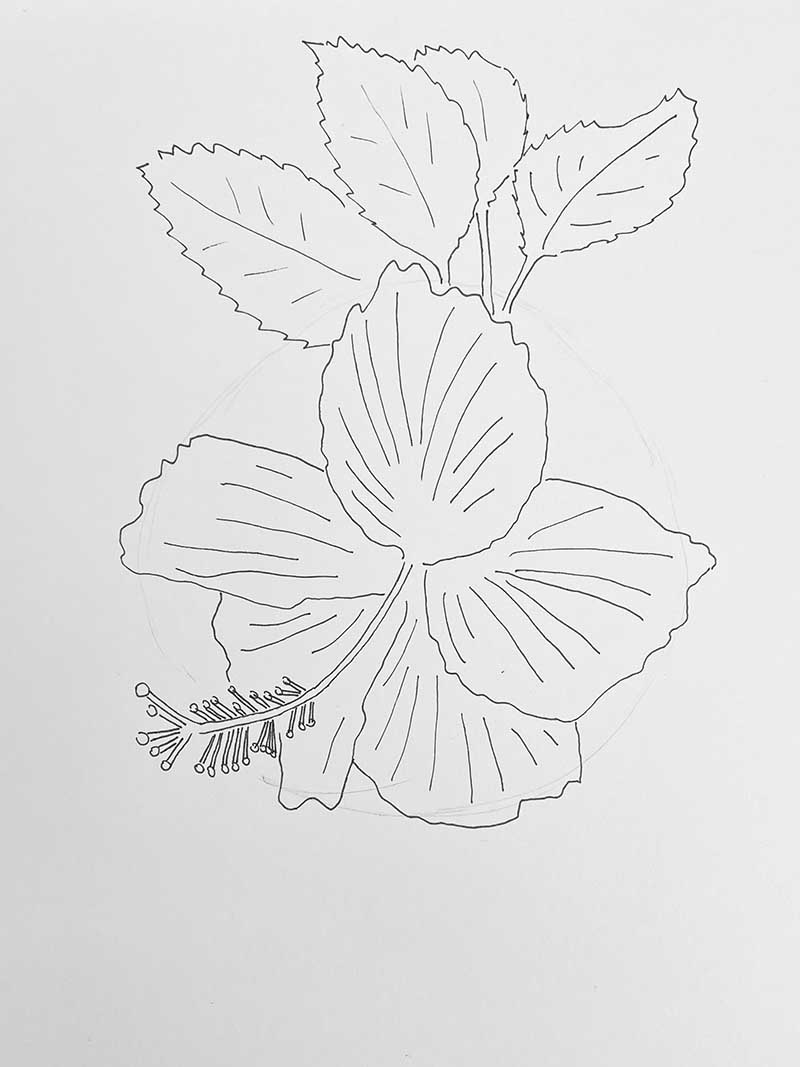
Step 3: Add serrated leaves above your hibiscus flower. Draw them as if it is hanging from a tree.
Step 4: Draw lines on the petals for texture and details.

Step 5: Now, add colour. I’ve opted for pink watercolour paint with a darker pink center to highlight the contrasts, though any colour you choose will look wonderful.

4. White Hibiscus (hibiscus waimeae) Drawing Tutorial
I really like this variety of the flower because it has an amazing center and smells nice, which is rare for hibiscus. It’s special to Hawaii and is the only Hawaiian hibiscus that has white flowers.
These flowers smell sweet but only last for one day, turning from white in the morning to pink by the afternoon. Even though each flower only lasts a day, the plant keeps blooming for up to five years. People often use these flowers in leis or wear them behind the ear.
There’s also a beautiful old picture of this hibiscus in a Curtis’s botanical magazine (1914) from my post on vintage hibiscus illustrations mentioned in the introduction, which is a useful reference and would make a lovely print.
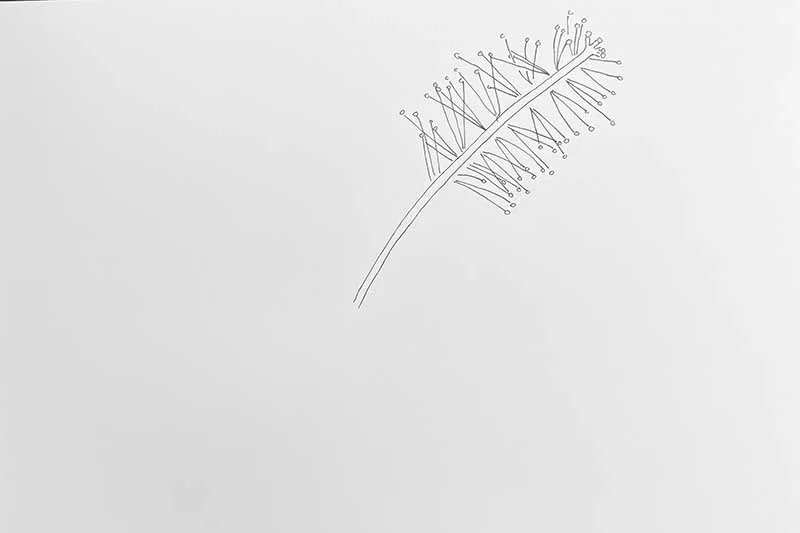
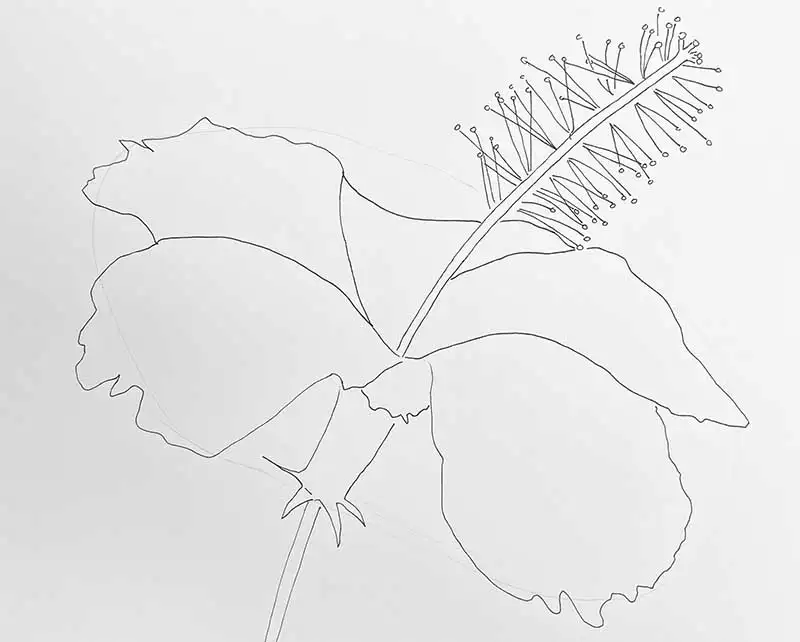
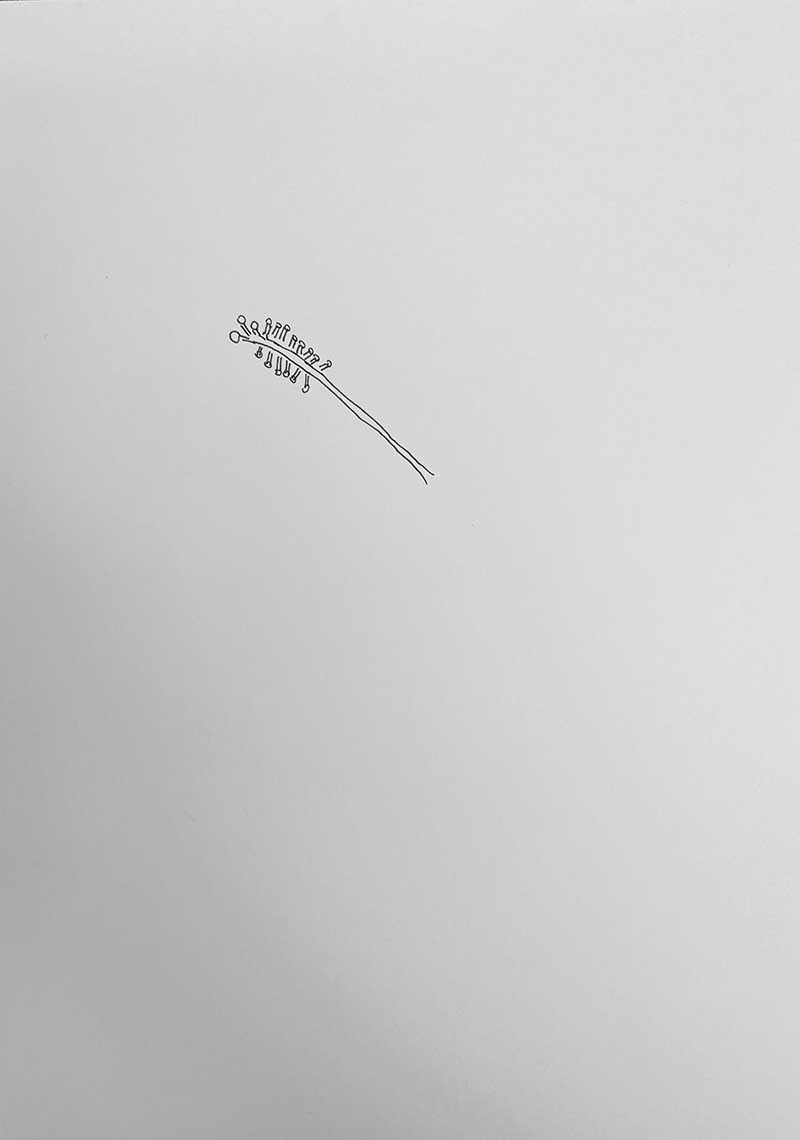
Step 1: As in the previous tutorials start with the spectacular centre of the flower. Note as I want to show the flower in full bloom with the centre style prominent I have decided to draw the flower on the paper in landscape orientation to really fill the page.
I have drawn the pistil in a strong straight upwards diagonal. When adding the filament and the anther note that the filament crisscross a bit and tend to branch in groups of three.
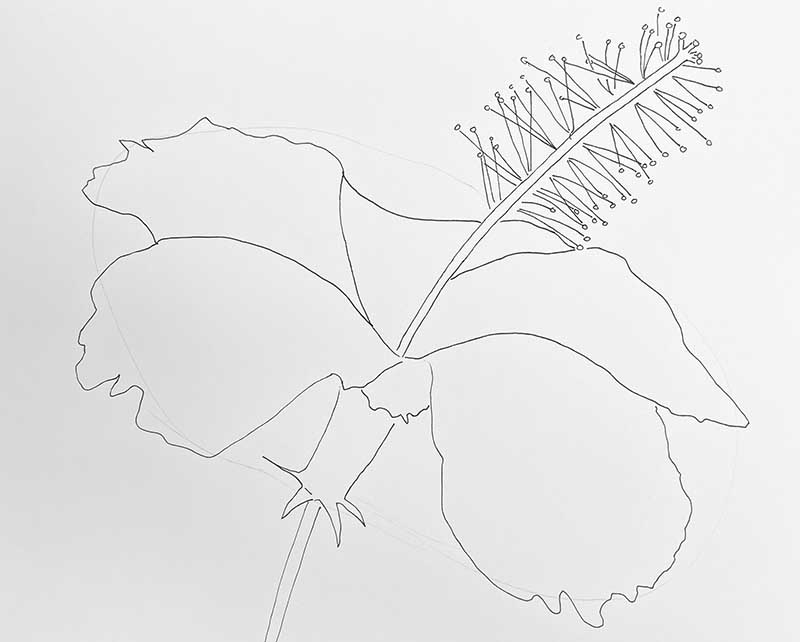
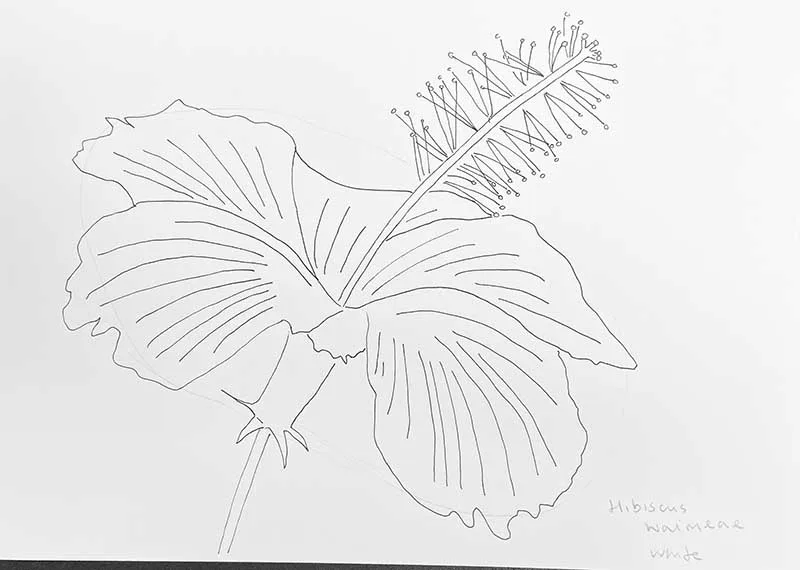
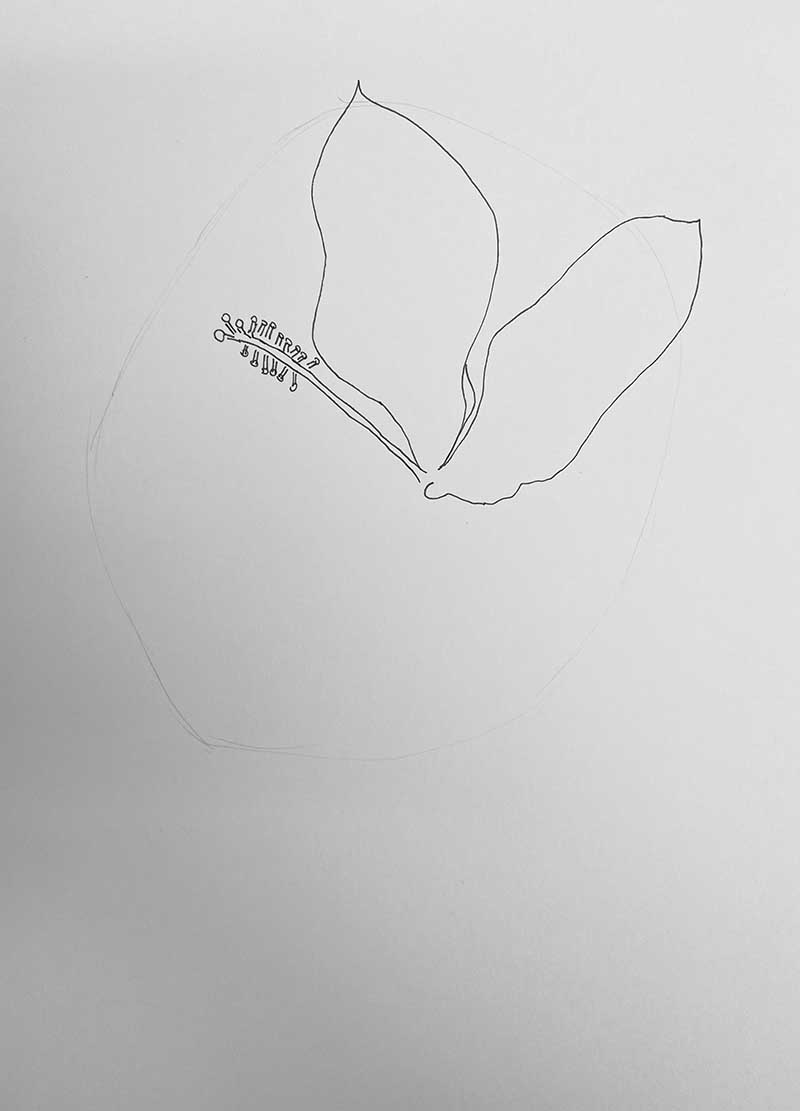
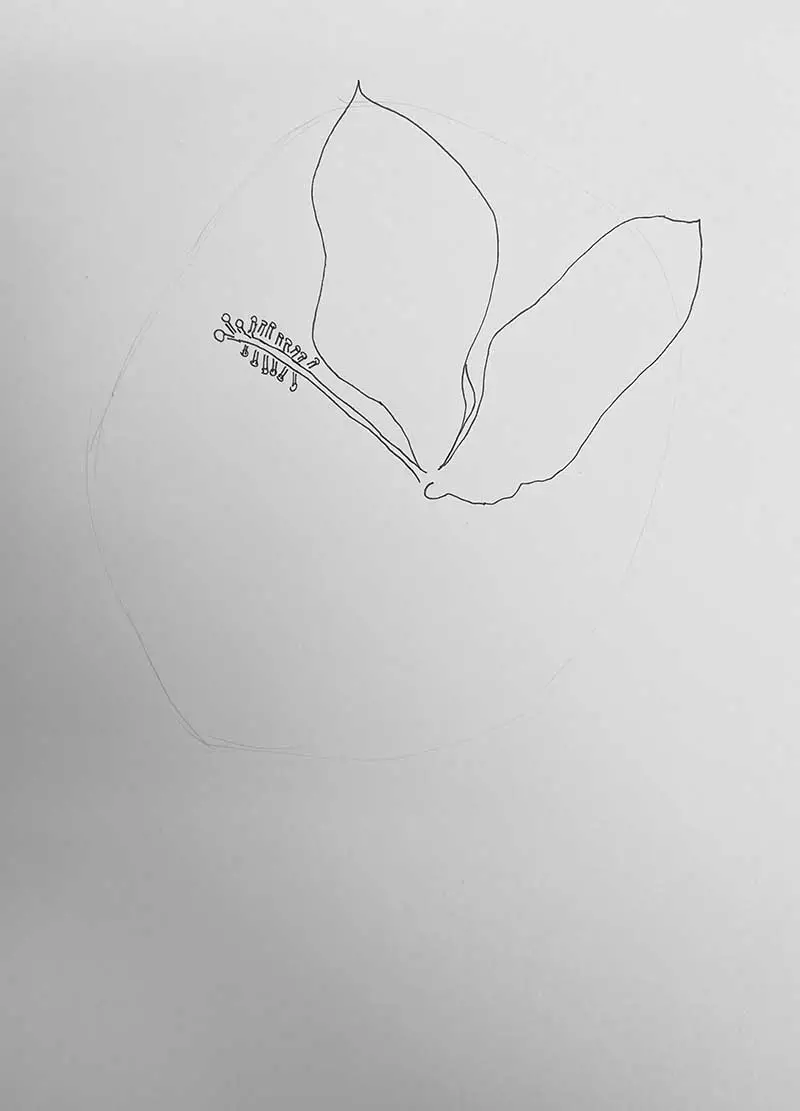
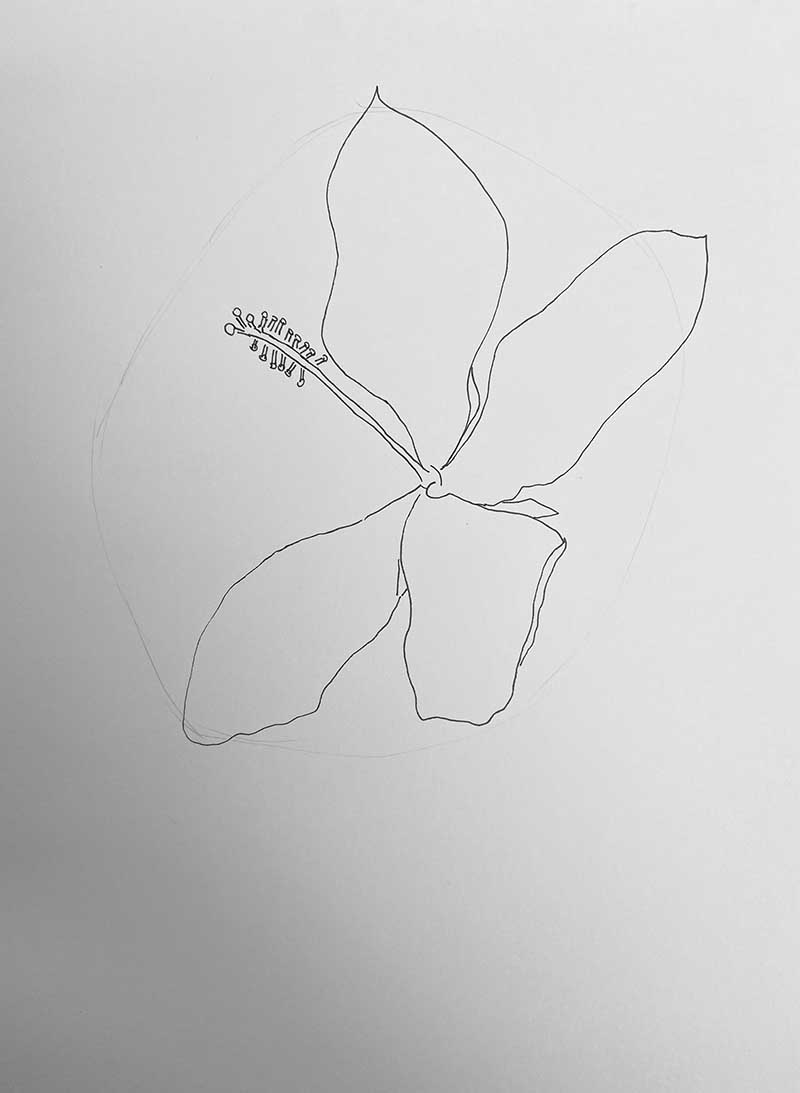
Step 2: Lightly draw an oval in pencil to help guide the placement of the petals and add the petals one by one. Here I have gone for a very open shape to showcase the dramatic centre.
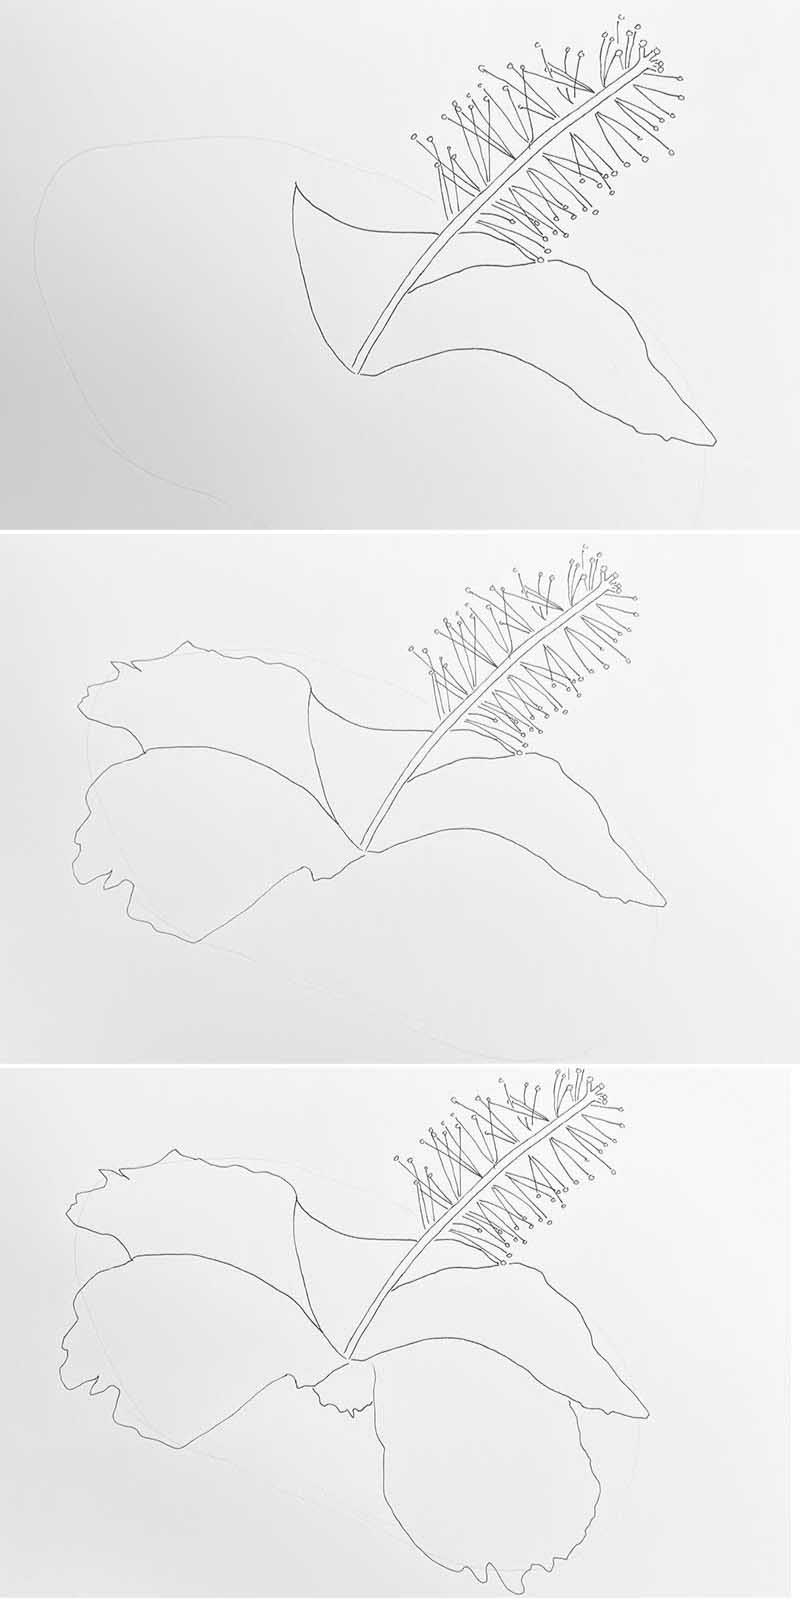
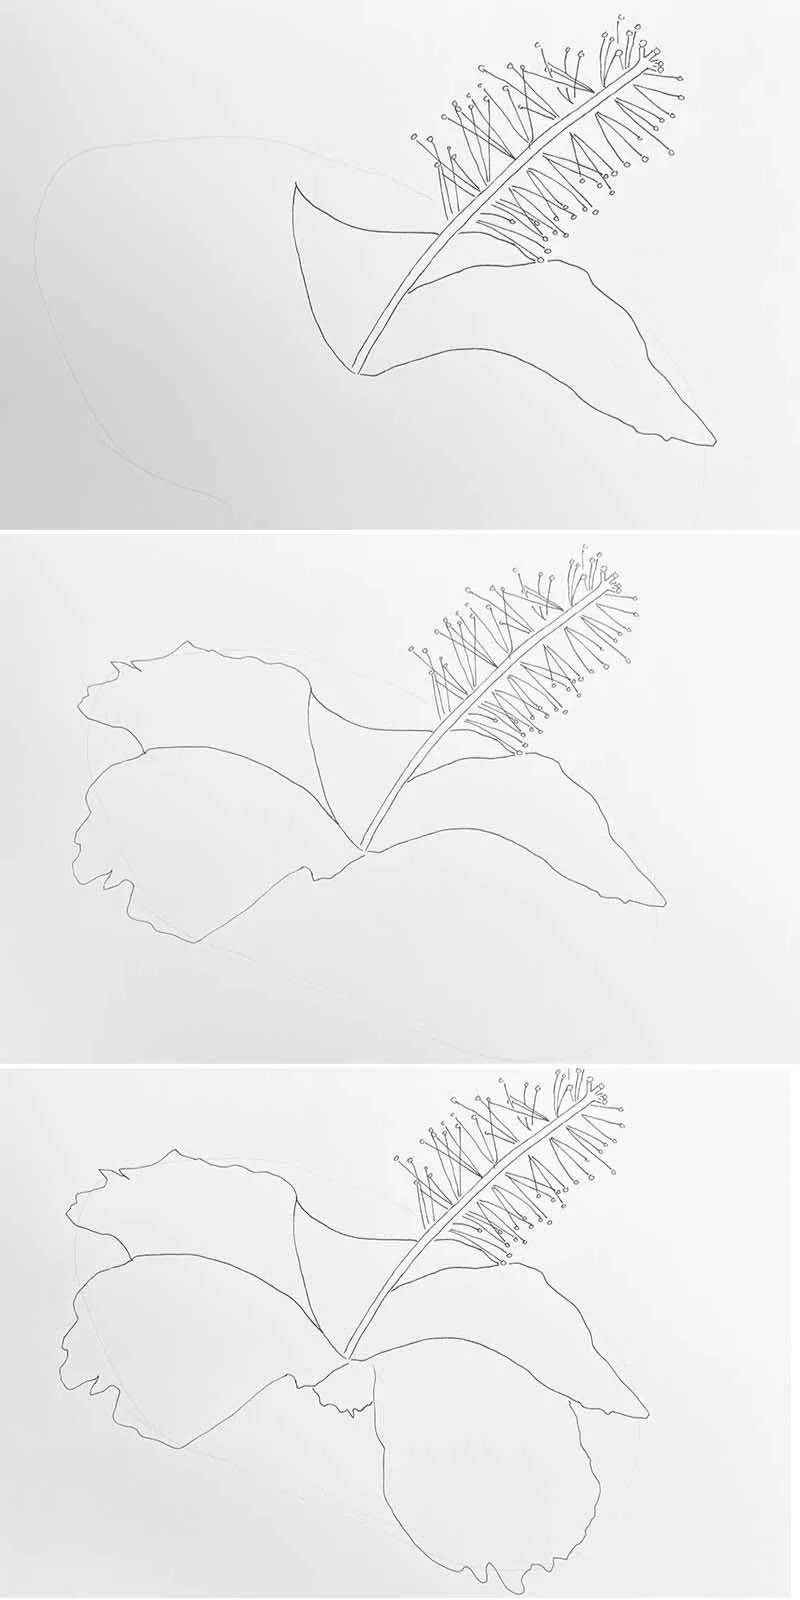
Step 3: Draw in the stem.
Step 4: Add lines to the petals. This is to help with definition and texture.

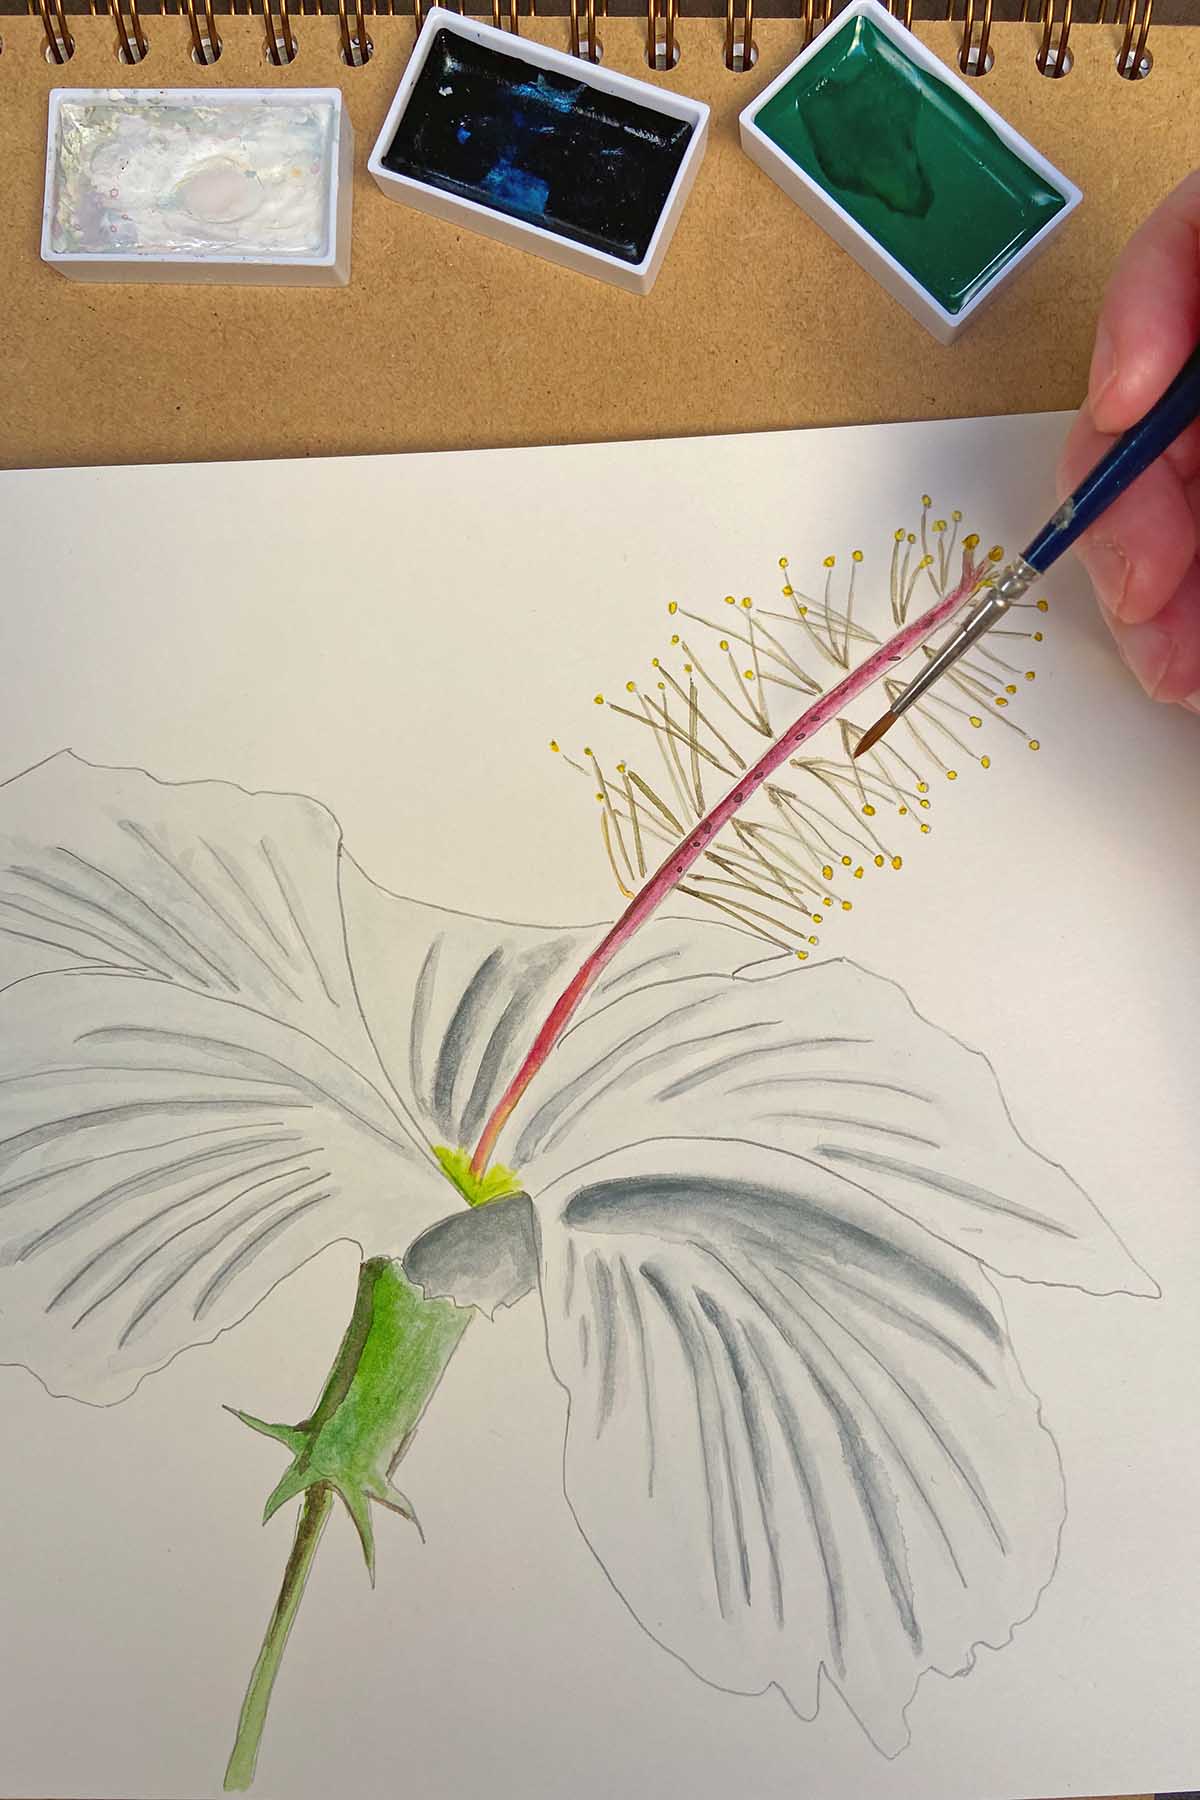
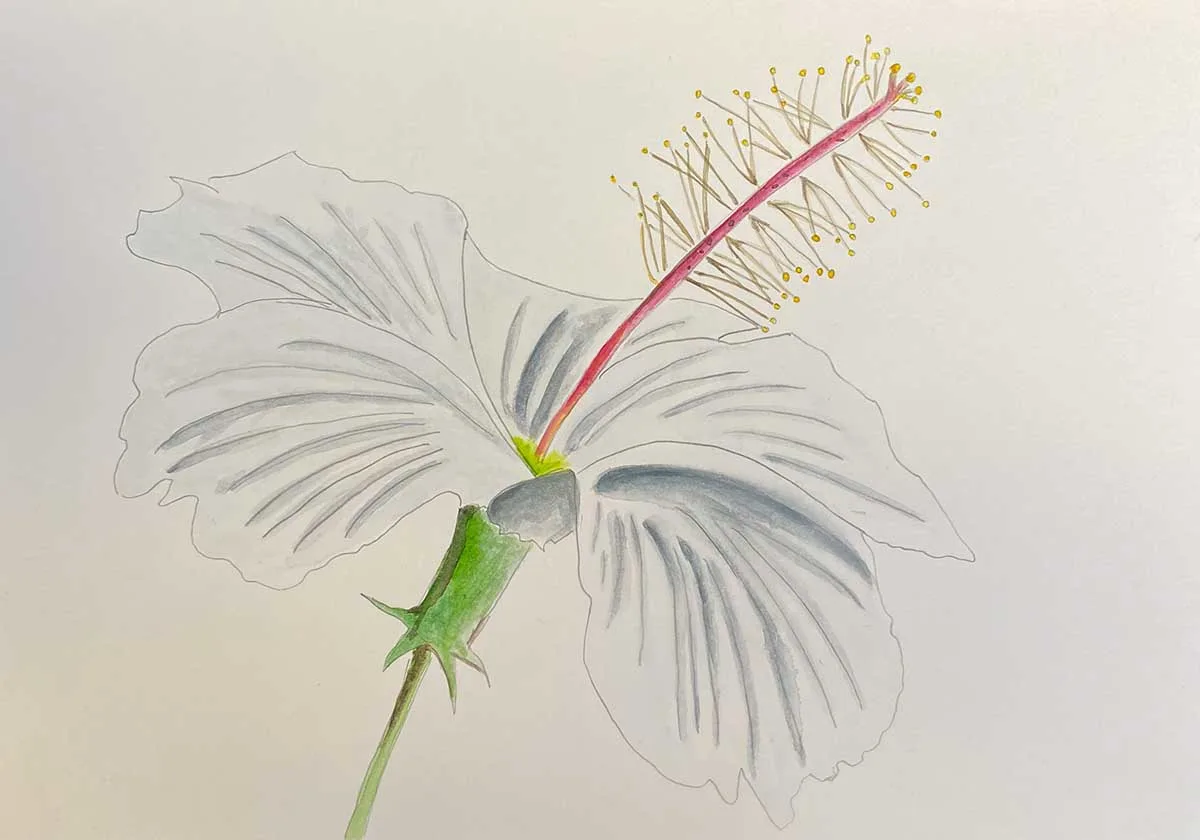
Step 5: Colouring – Since we’re working with a white flower, applying watercolours can be challenging. Usually, I avoid using grey for shadows or shading, preferring to use a darker shade of the main colour.
However, with white, grey becomes a natural choice for shadows. I didn’t use it in this case, but I recommend trying out white acrylic paints. They’re less transparent than watercolours and could provide a stronger visual effect.


5 -Hibiscus Syriacus ‘Oiseau Bleu’ Drawing
So many varieties of Hibiscus have so much cultural significance, and none more so than Hibiscus Syriacus, also known as the Korean Rose, as it is the national flower of South Korea and even appears in the national anthem.
The flower’s name in Korean is mugunghwa. The flower’s symbolic significance stems from the Korean word mugung, which means ‘eternity’ or ‘inexhaustible abundance’. Various state emblems of South Korea contain Hibiscus Syriacus, which is said to be the traditional symbol of Korean people and culture that embodies the spirit of resilience and struggle.
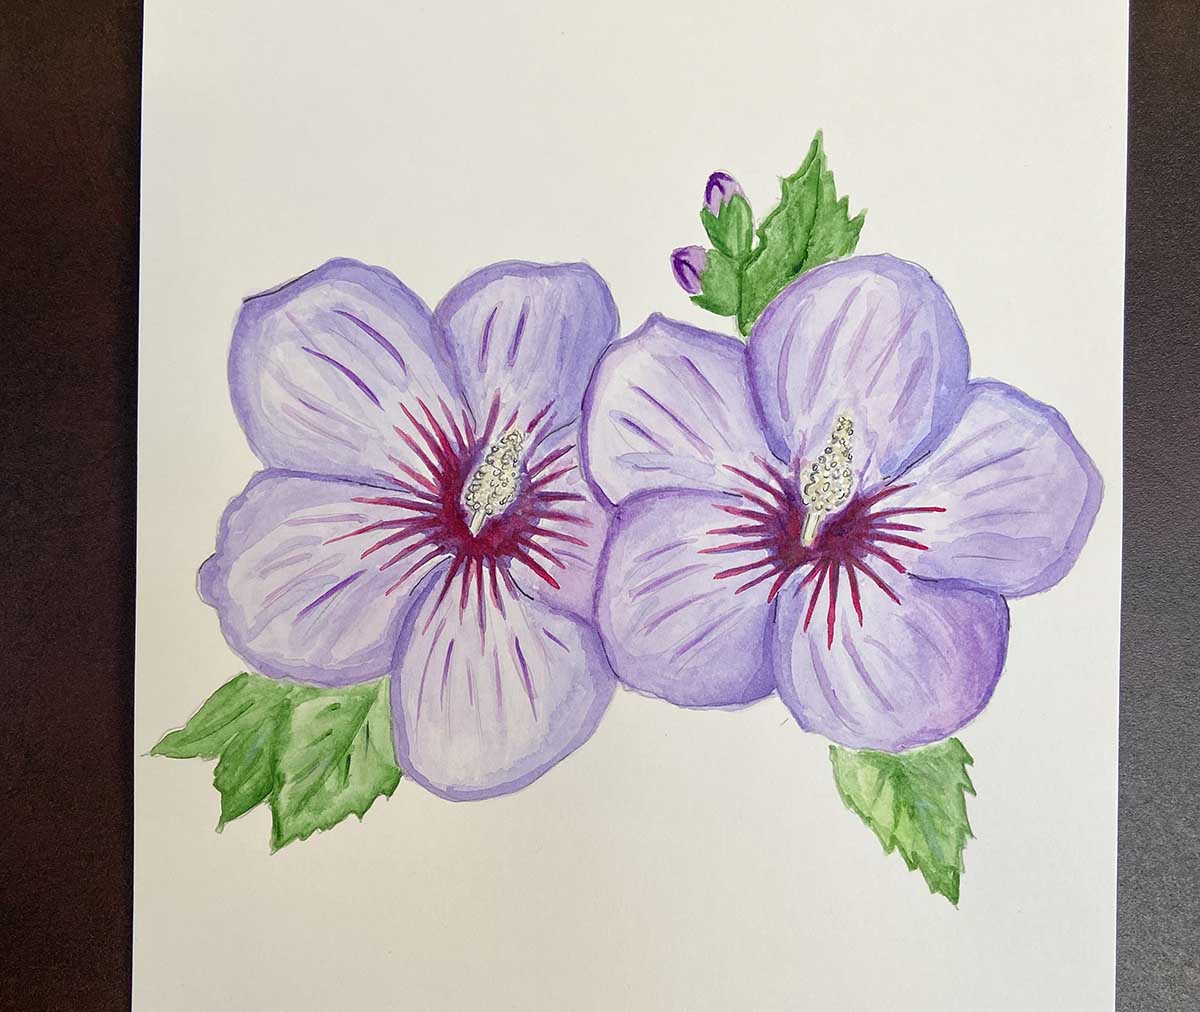
This variety of hibiscus is hardy, which means although initially native to East Asia, it has been widely introduced and cultivated in Europe and North America as it tolerates poor conditions, including urban pollution. It can even grow in my English garden. There are many variations, but a favourite of mine is ‘Oiseau Bleu ’, which is more of a lilac colour than blue but has a deep coloured contrasting throat that seems to burst from the centre.
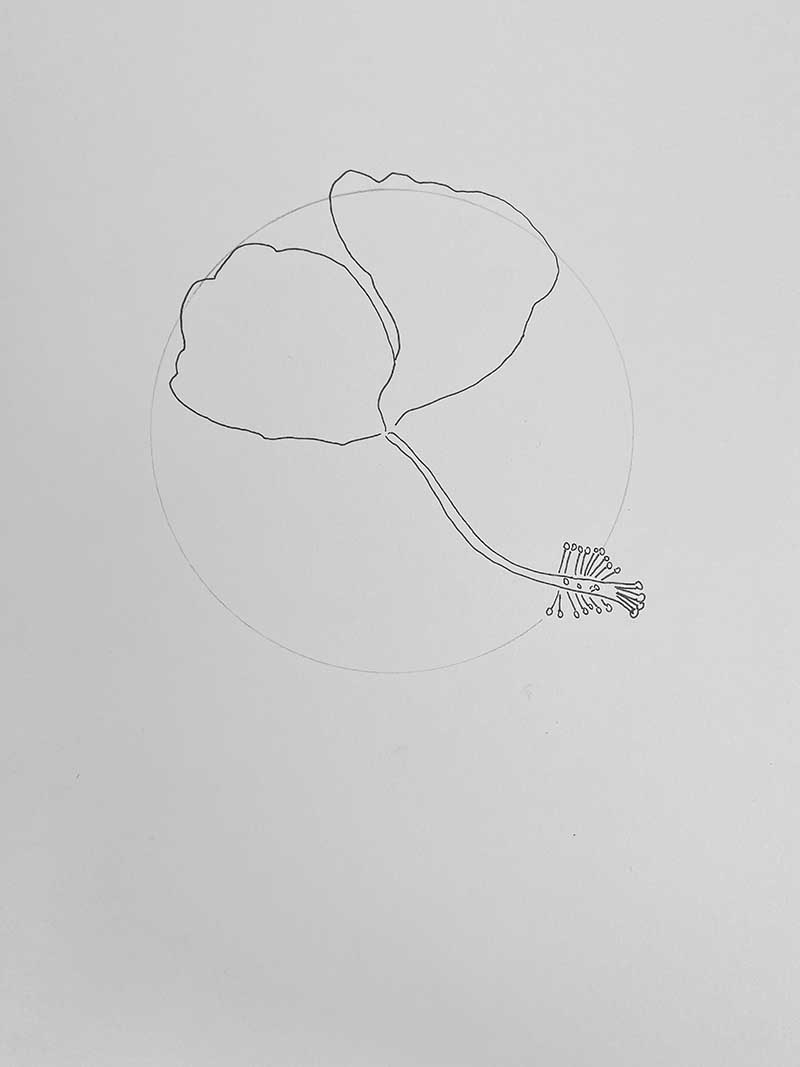
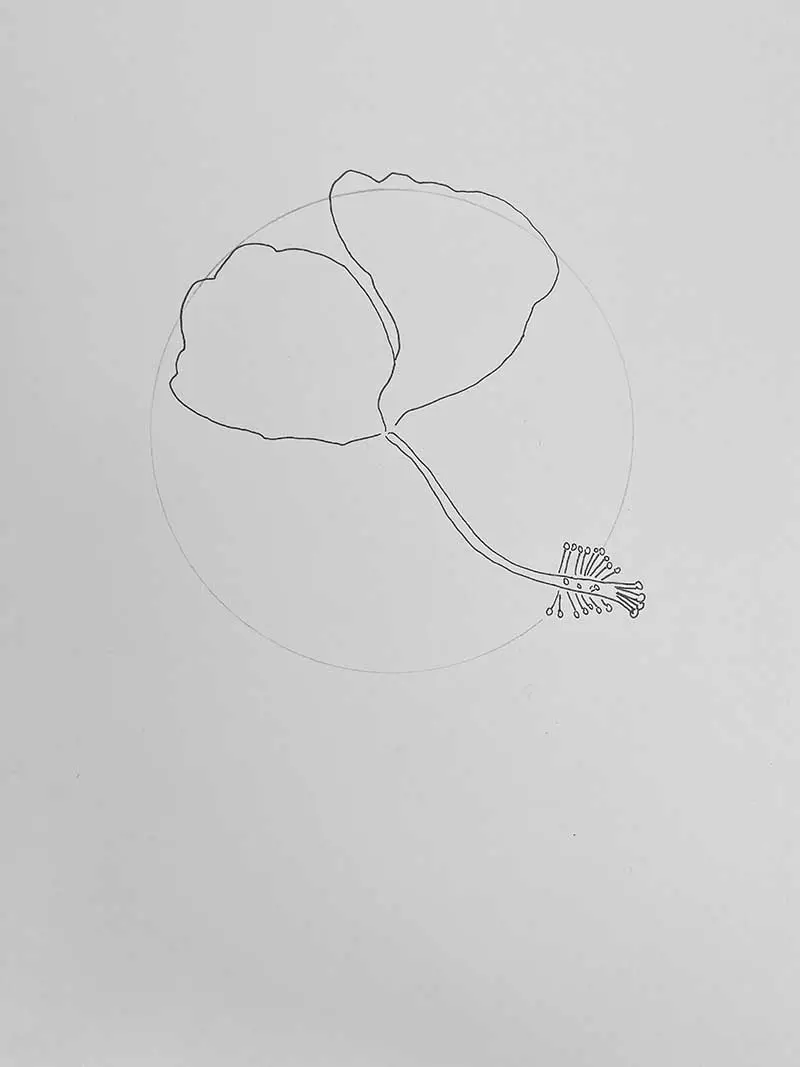
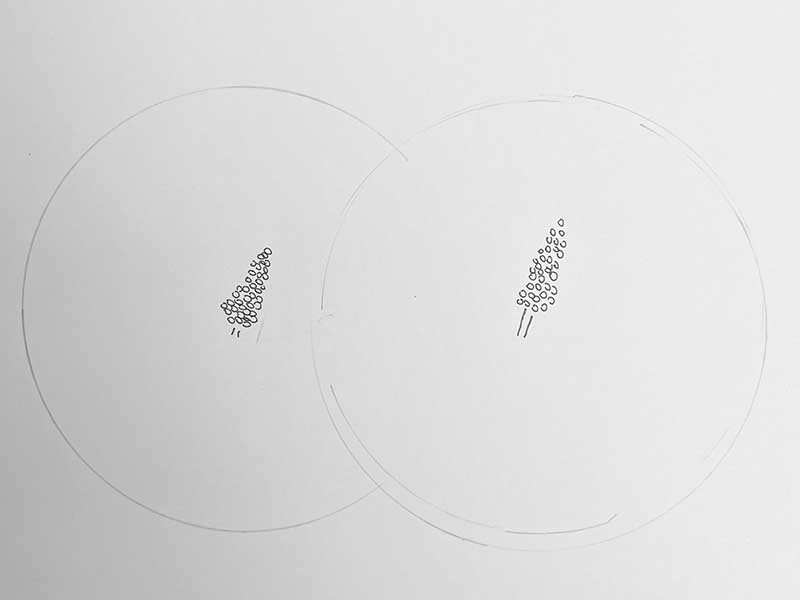
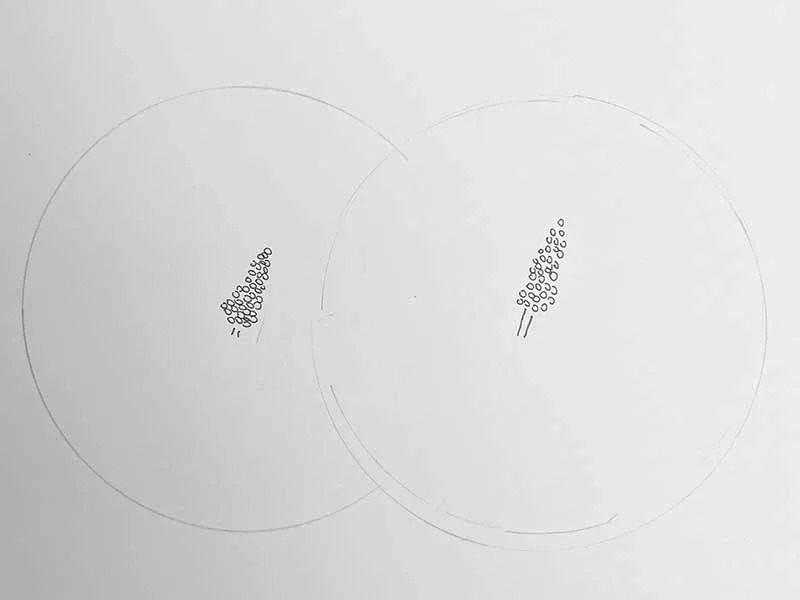
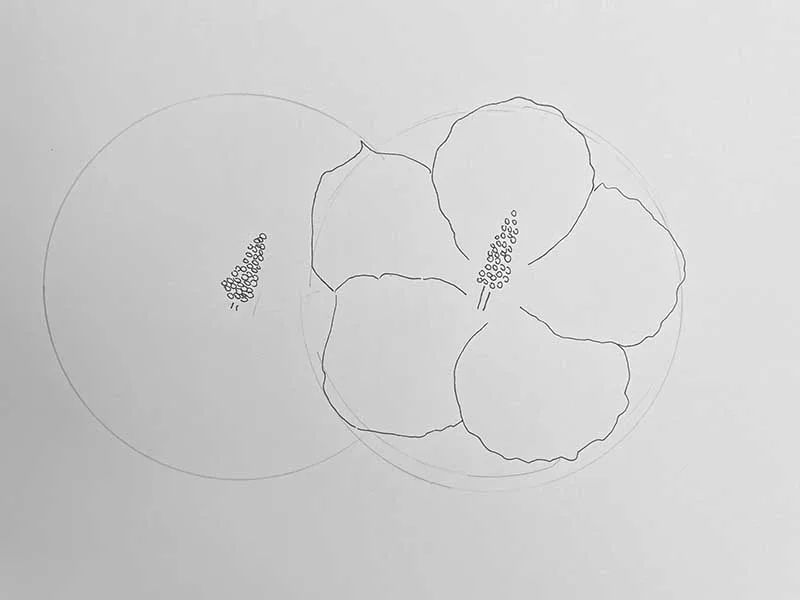
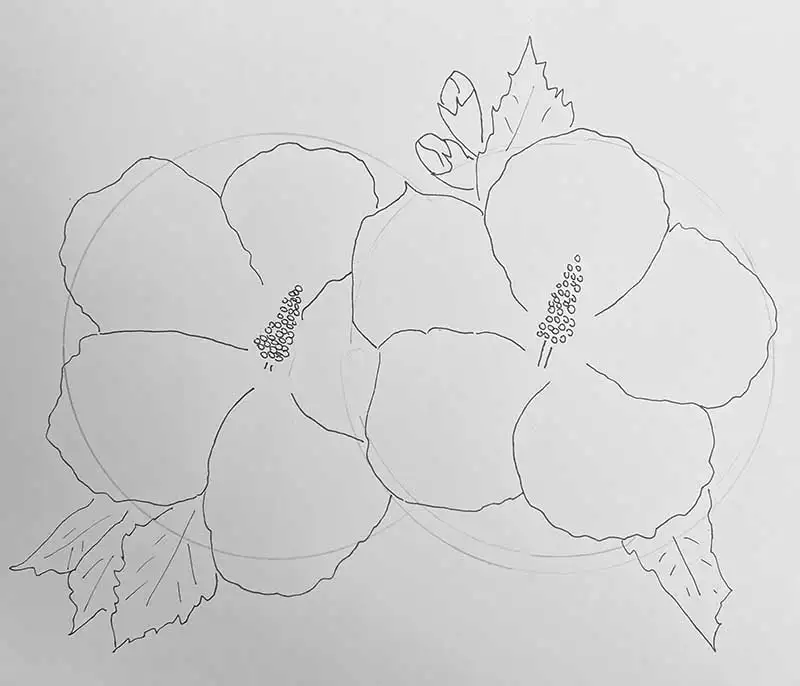
Step 1: In pencil, lightly draw two overlapping circles to draw two flowers, one overlapping the other. Draw the centre of the flowers in the centre of your circles. Note that the centre of this variety of hibiscus is more like a cone shape consisting of small circles where the filament lines are not visible.
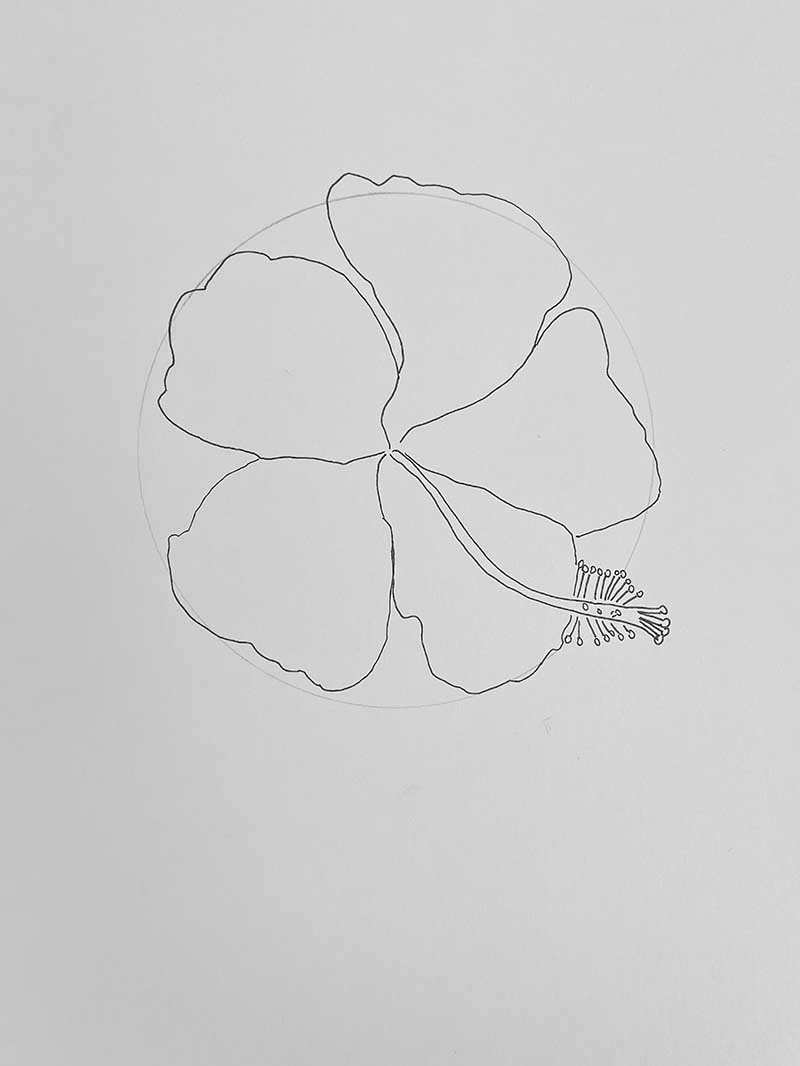
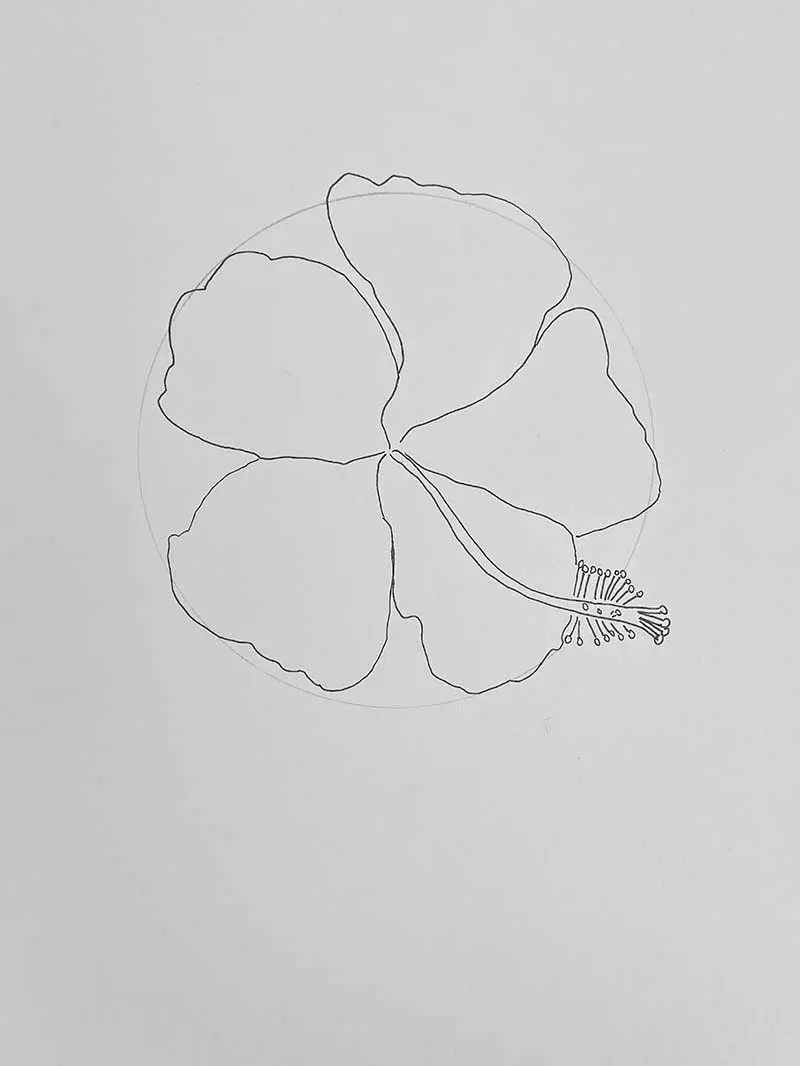
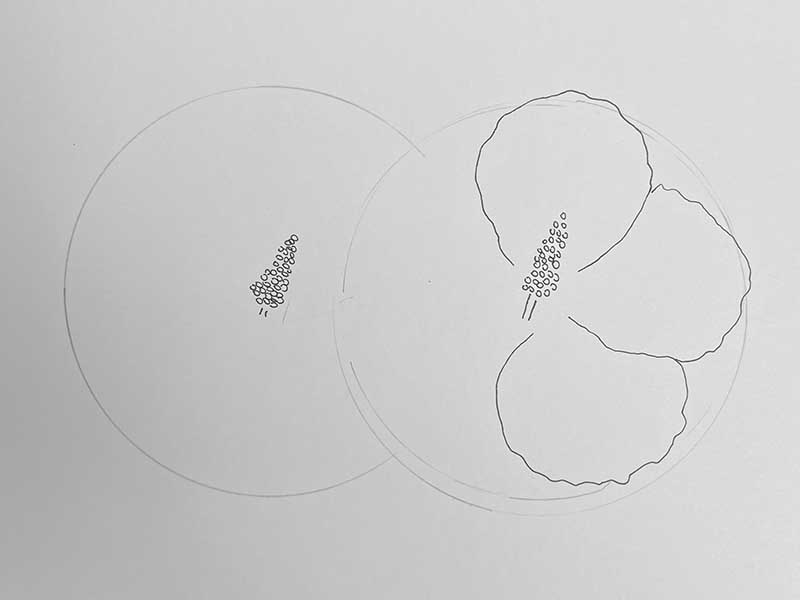
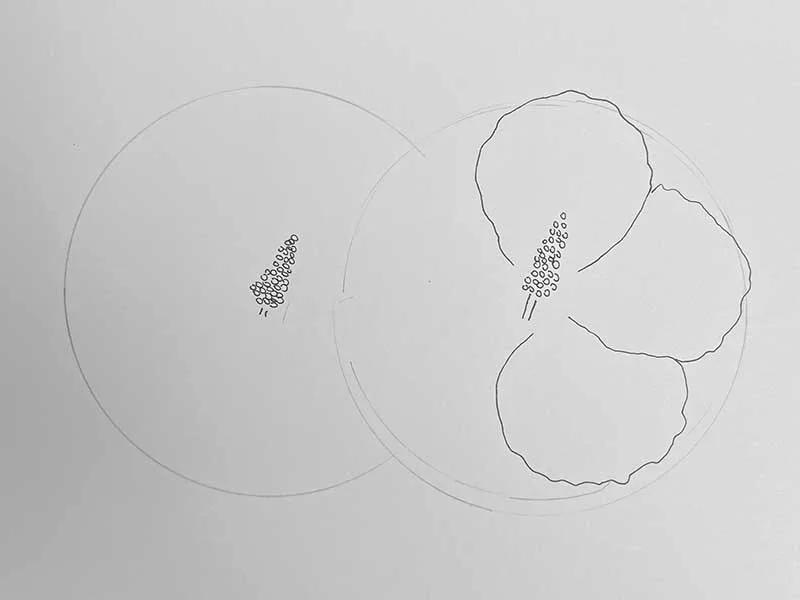
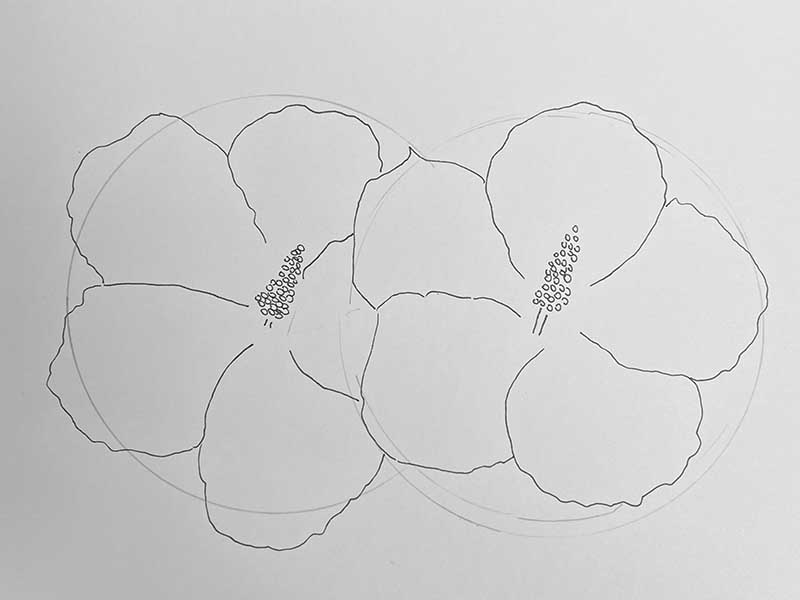
Step 2: Add in the petals of your first flower step by step. Use the circle you have drawn to guide you.

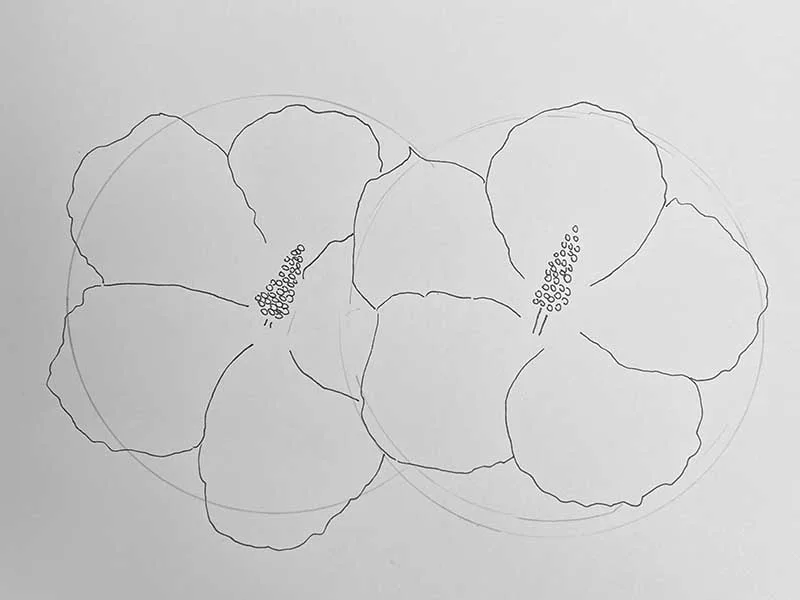
Step 3: Continue to add the petals to the second flower. This is the one behind your first flower.
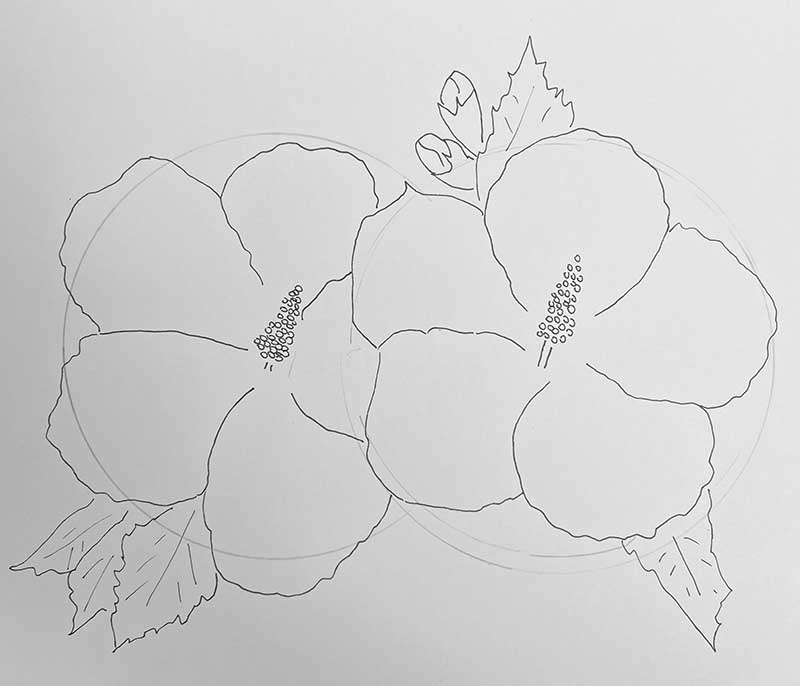
Step 4: Incorporate as many serrated leaves and buds as you prefer into your drawing.
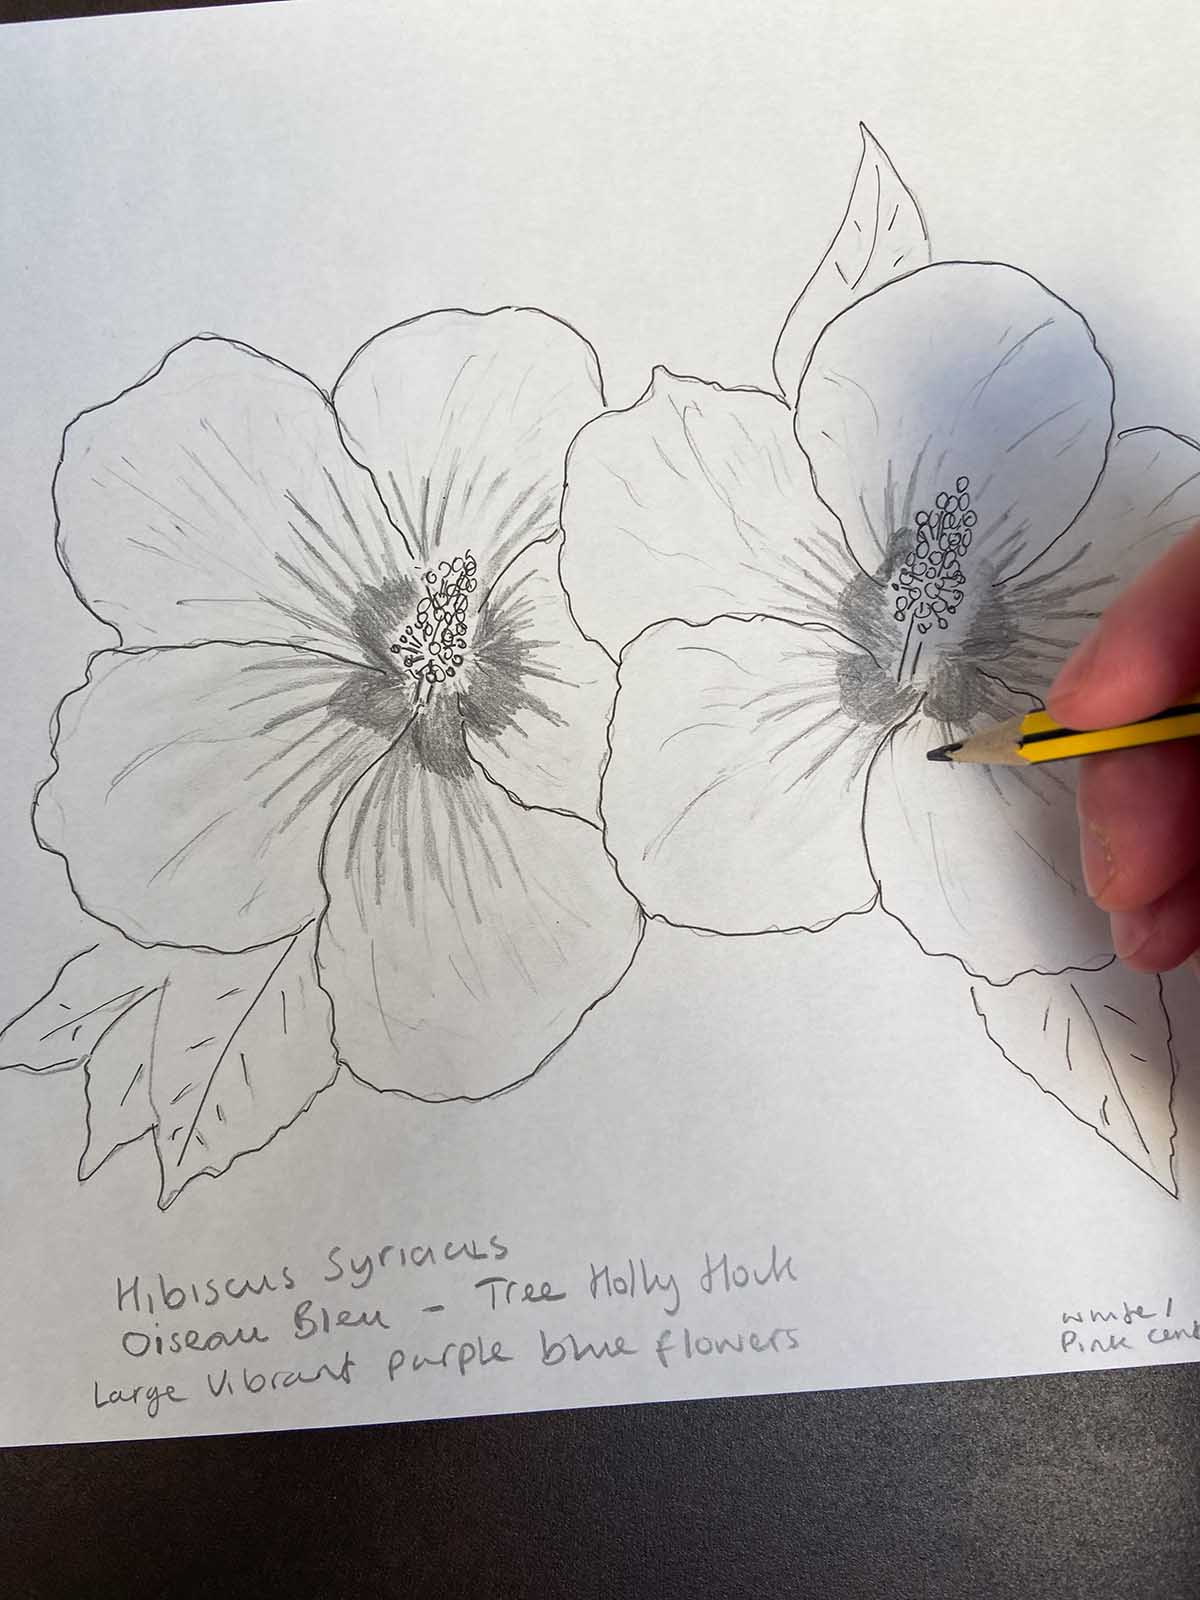
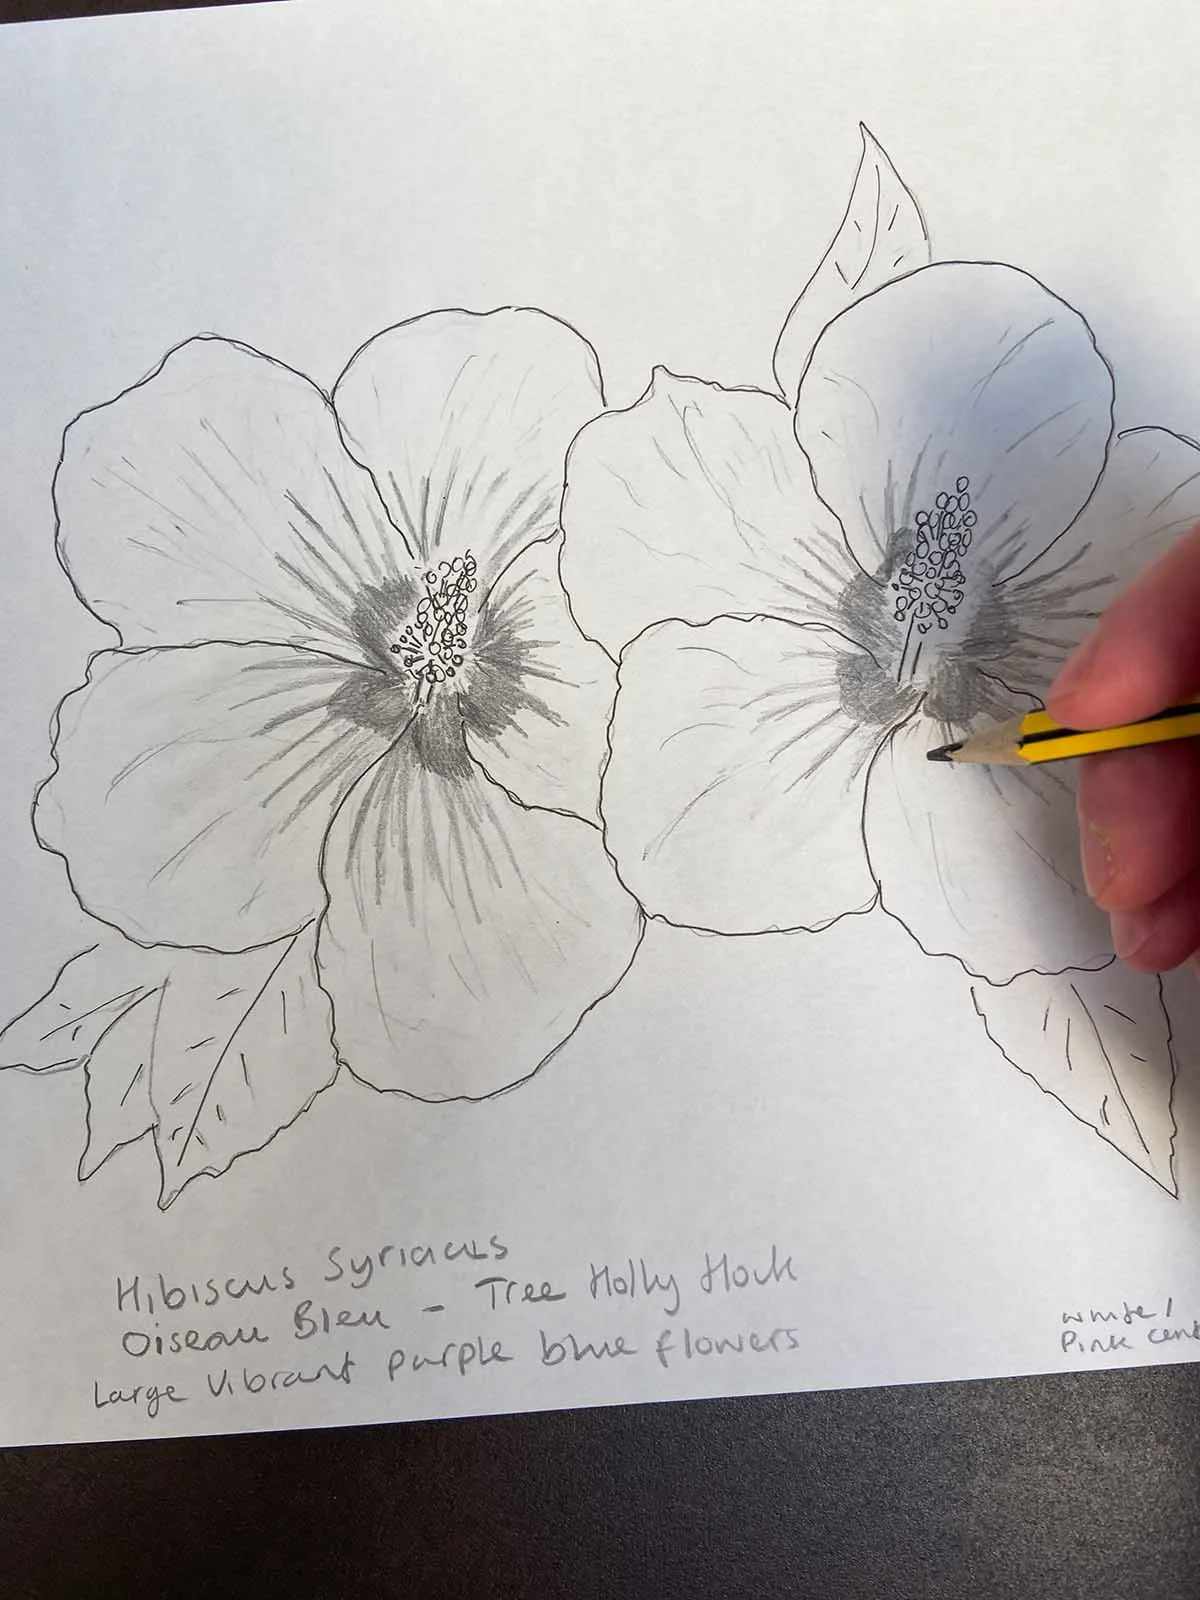
Step 5: Include detailed lines on your petals. And, if you’re depicting the same variety, add the deep-coloured, contrasting throat that appears to emerge from the centre. If you plan to paint your drawing, you might want to wait and add this feature during the painting phase.
Step 6: Add colour here. I have chosen ‘Oiseau Bleu’ as my variety, but there are several colours, from white to pink, and all would look great.

6 Hibiscus How To Draw: Hibiscus coccineus
The Hibiscus coccineus, commonly called the Texas Star, is a resilient species of Hibiscus native to the swamps and marshlands of the southeastern United States. A white variant exists, known as the Lone Star Hibiscus. Its leaves bear a striking resemblance to those of the hemp plant.
What captivates me most about this plant is its unique star-shaped flower, setting it apart from other hibiscus varieties.
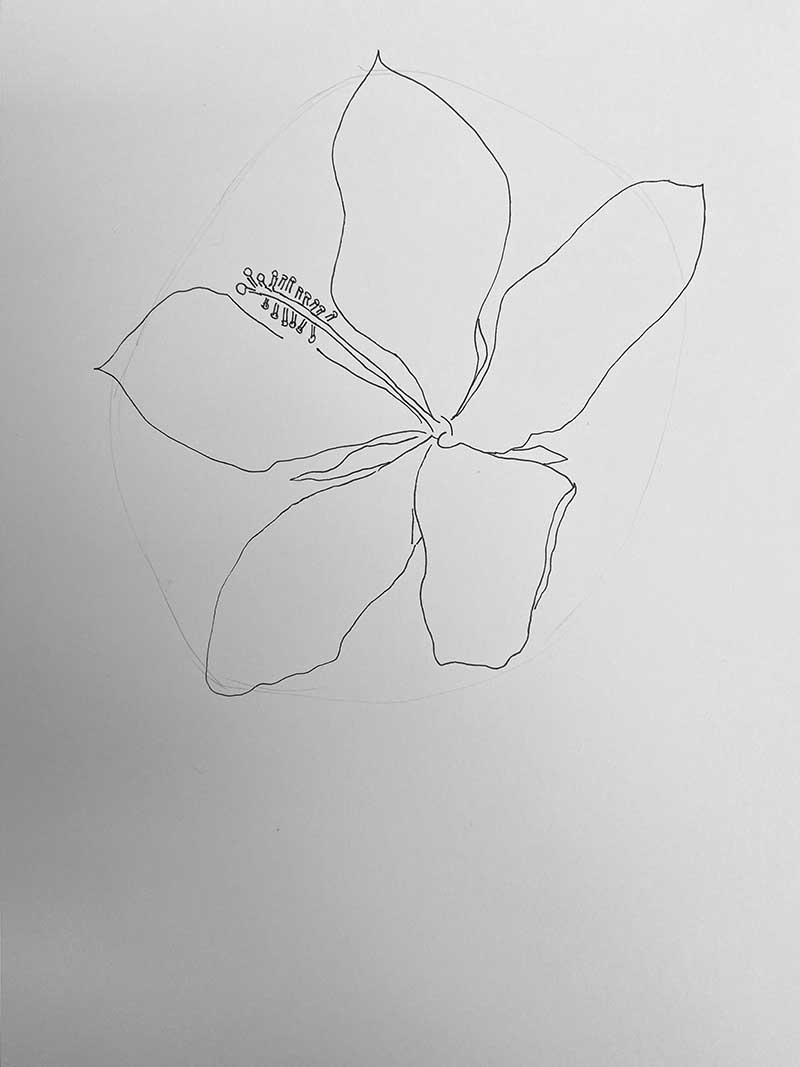
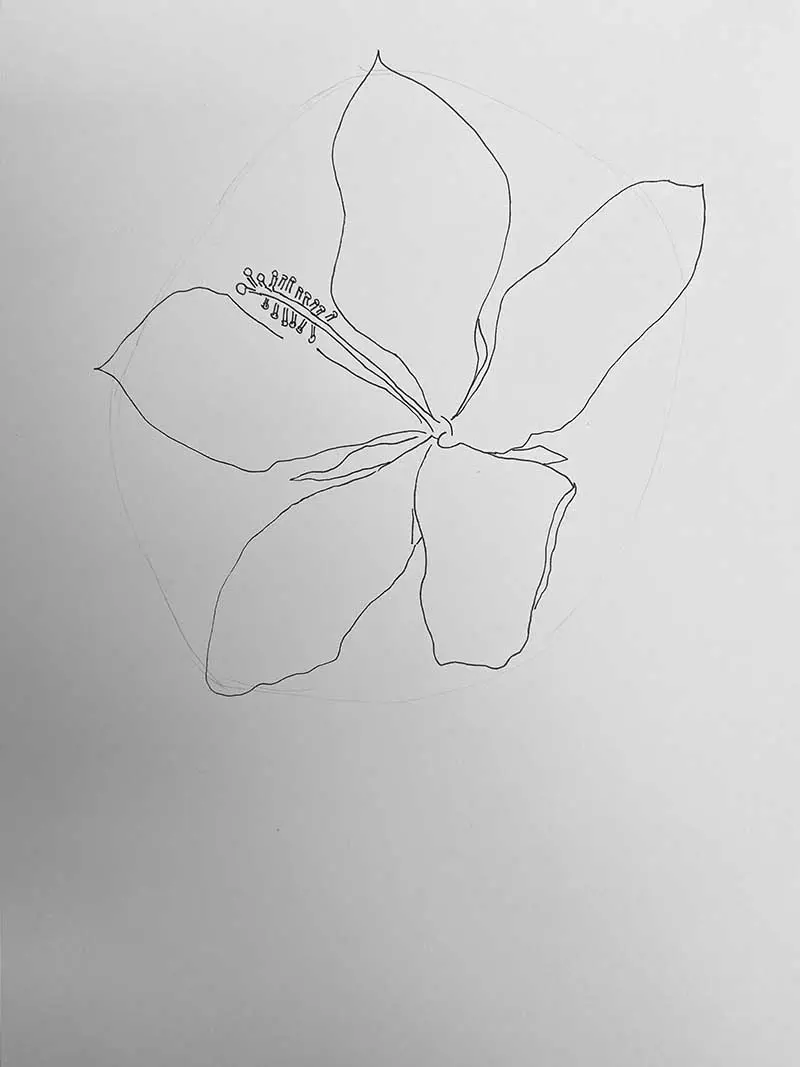
Step 1: As in previous tutorials begin by drawing the centre of the flower the pistil.

Step 2: In pencil lightly draw a circle/ oval to guide the placement of your petals. One by one add your petals note their star shape. Also visible in-between the petals are the five-lobed green calyxes that you can add in between each petal.

Step 4: Add a simple stem and lines to your petals for realism.
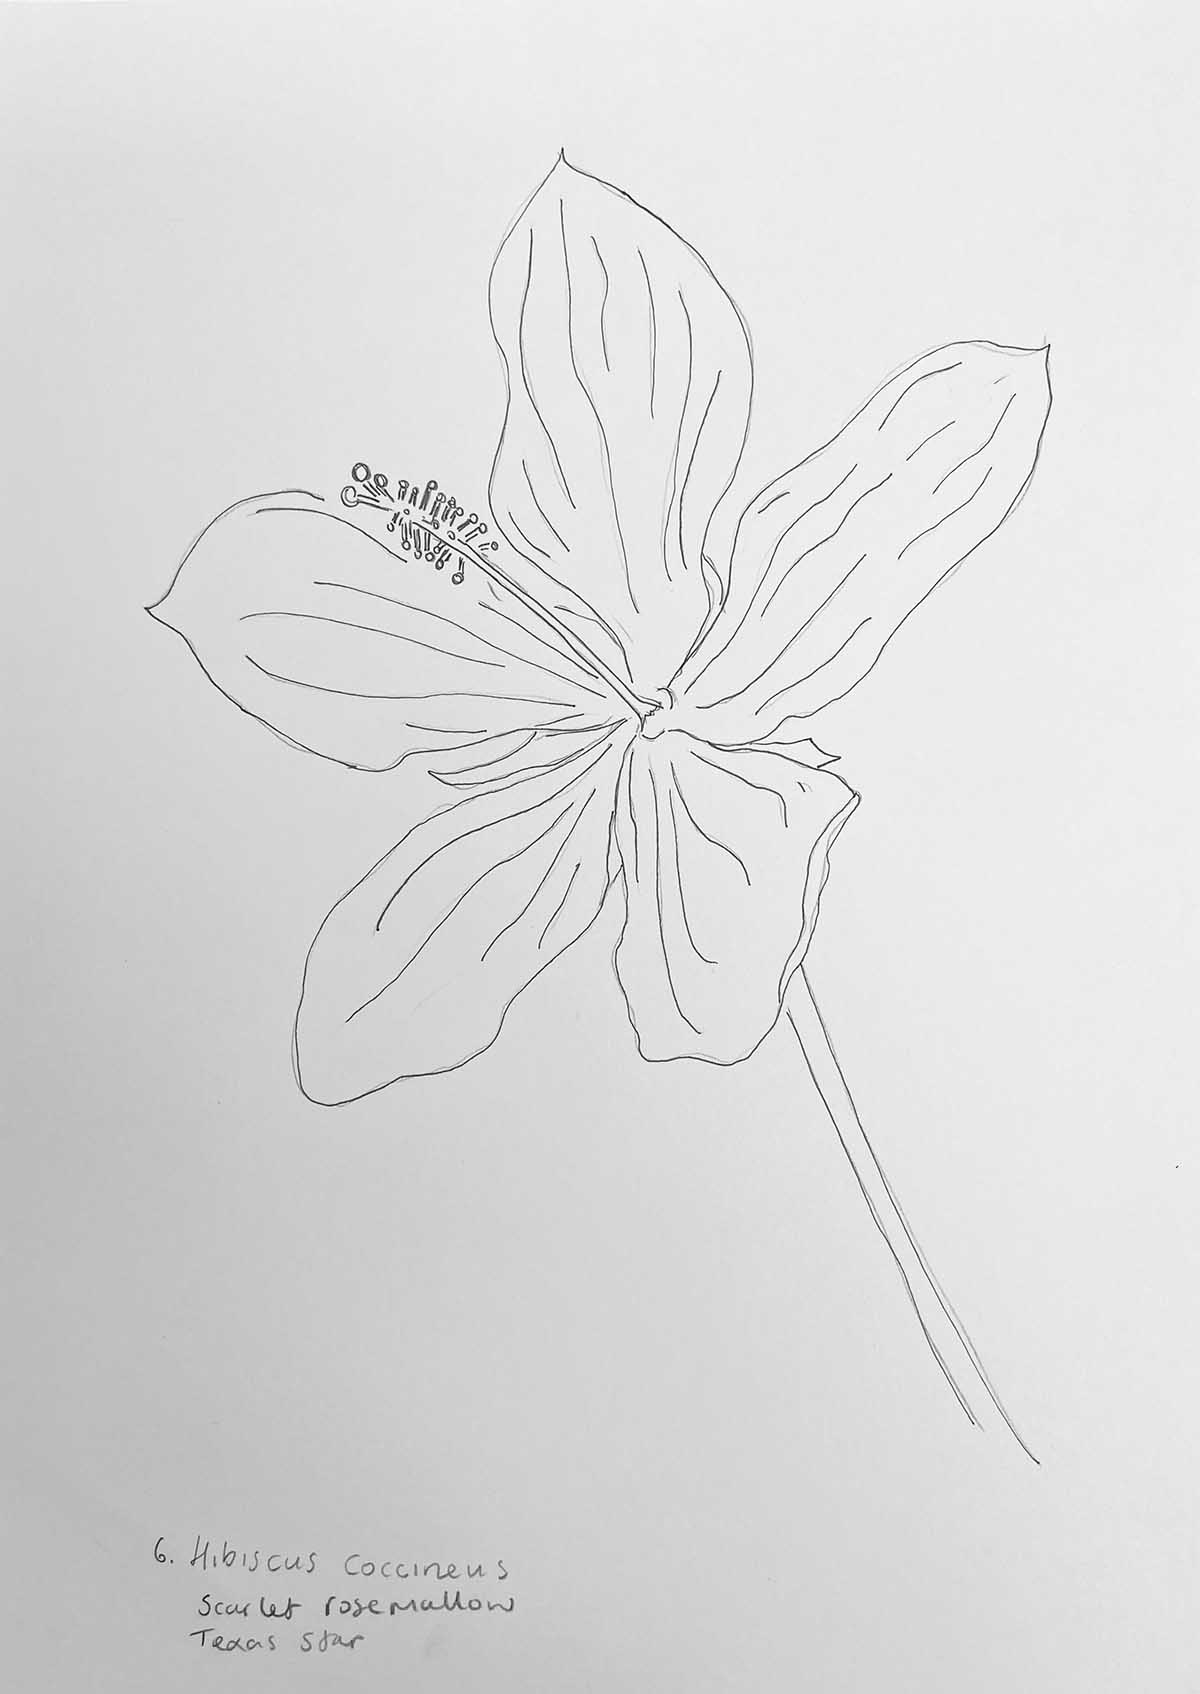
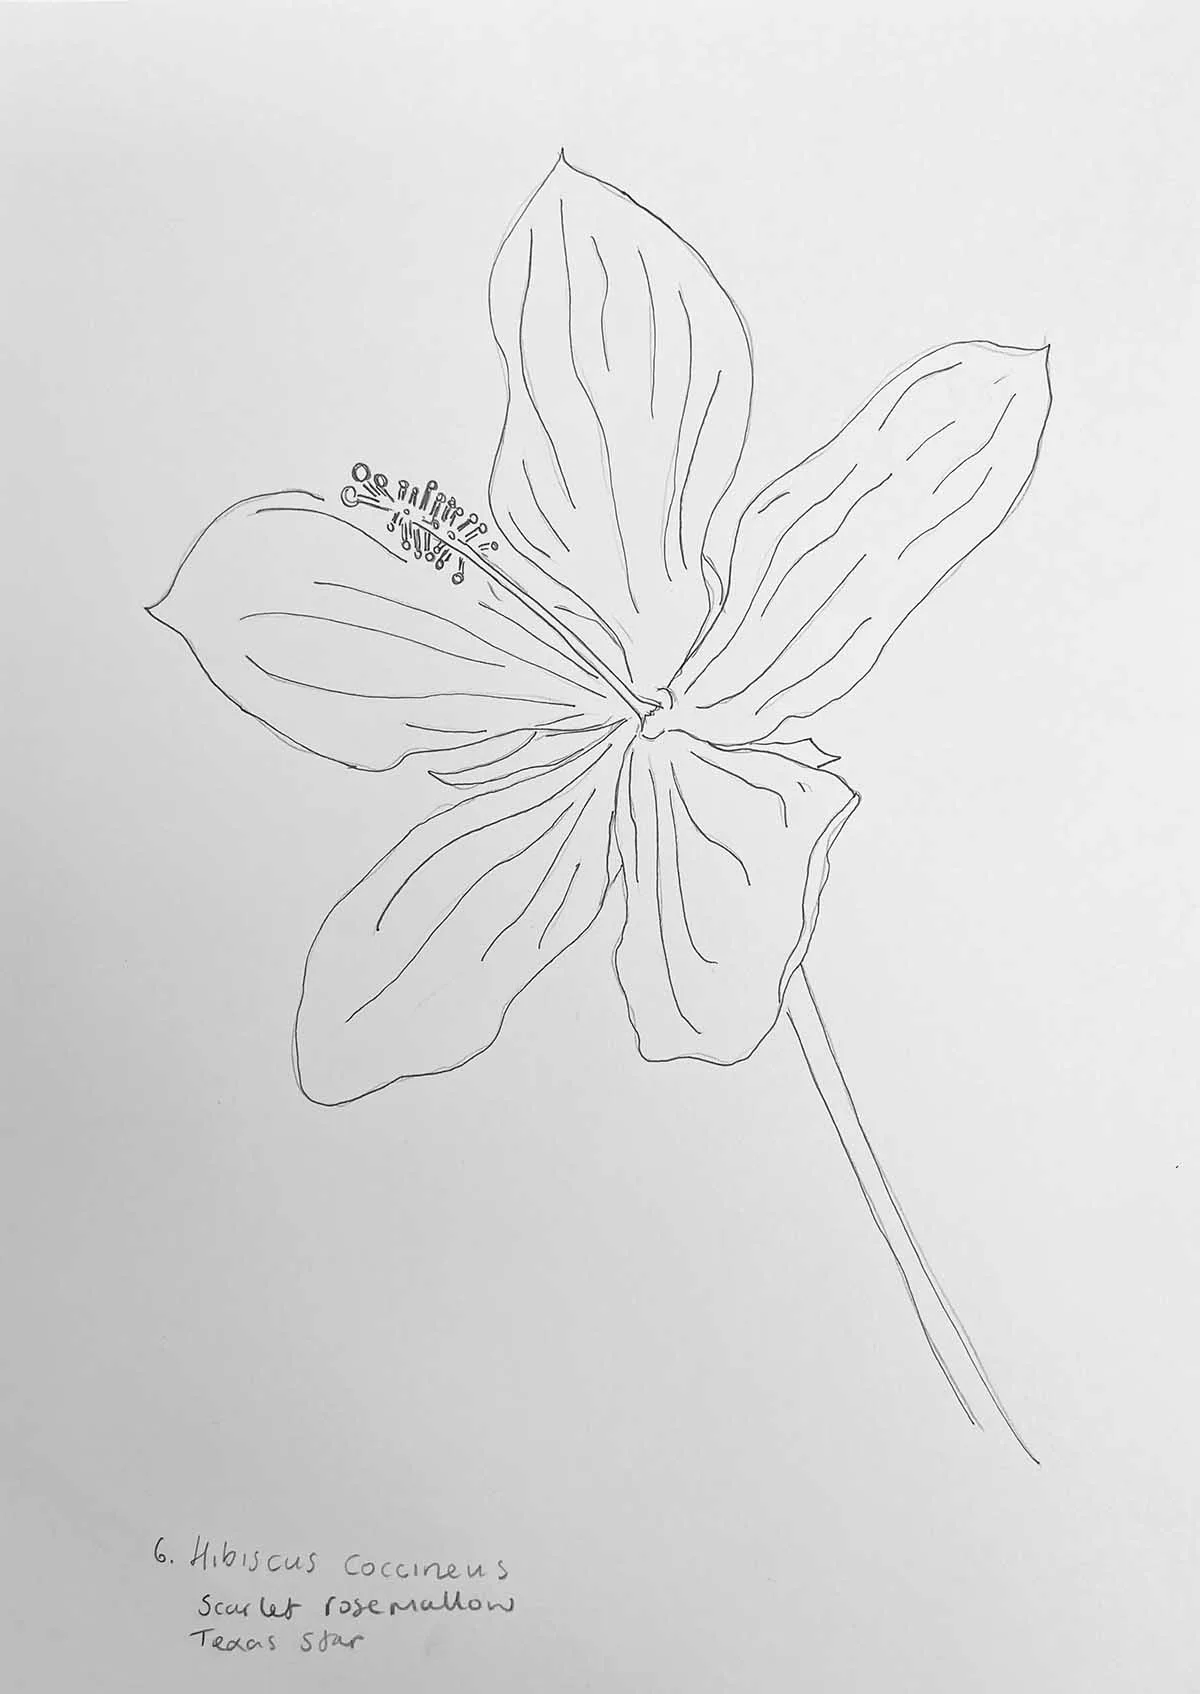
Step 5: Add a vibrant red colour or white if you prefer either will work great. When painting with watercolour use a darker shade of red for the lines and the centre of the flower to create depth and shadow.
Conclusion and Other Related Posts
Drawing hibiscus flowers can be a rewarding experience as you learn to capture the beauty of these tropical blooms on paper. Following these simple steps, you can create beautiful hibiscus drawings. Remember, the key to mastering any art form is practice. So, grab your pencils, and let’s bring the vibrant world of hibiscus flowers to life!
Don’t forget to check out the other botanical drawing tutorials on Pictureboxblue. These include:
- How to draw cherry blossom
- How to draw a sunflower
- Easy How to Draw Tulips
- How to draw ferns
- Mushroom drawing easy
- How to Draw A Daffodil
For more floral inspiration check out all the wonderful free botanical prints including many different vintage flower illustrations.

Michele Graham
Monday 5th of February 2024
I enjoyed this tutorial and really feel like I can draw hibiscus now. I actually grew a 10ft Texas Star this year. I rcvd a 3 " seedling at a plant swap.
Carolyn
Saturday 23rd of March 2024
@Michele Graham,
I received some dried Texas Star Hibiscus seeds from a friend. They have quickly germinated into about 1 inch high now. I have them in a seed starter container. Did you plant yours in the ground or pot? Any suggestions for successfully growing my first Texas Star? I live in Mobile, AL. where it's hot and humid in the summer. I fell in love with the flower at glance. Any tips would be appreciated. Thanks, Carolyn