
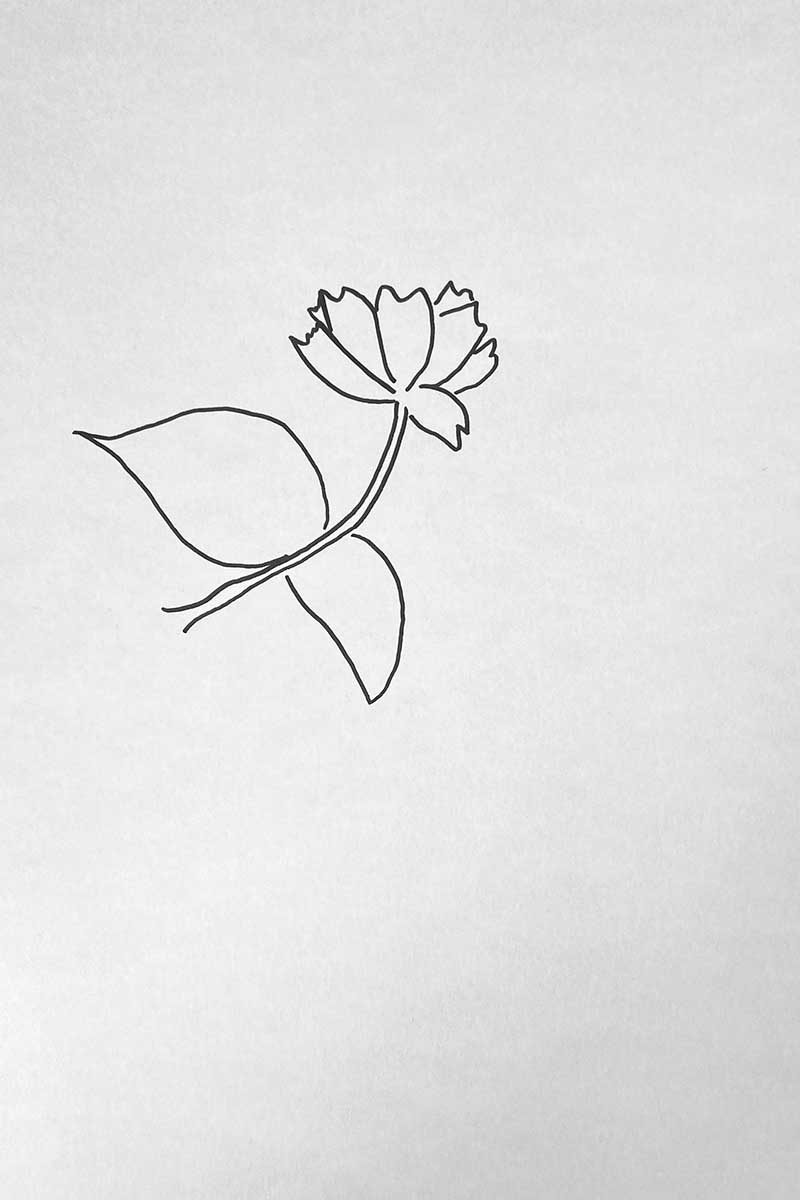
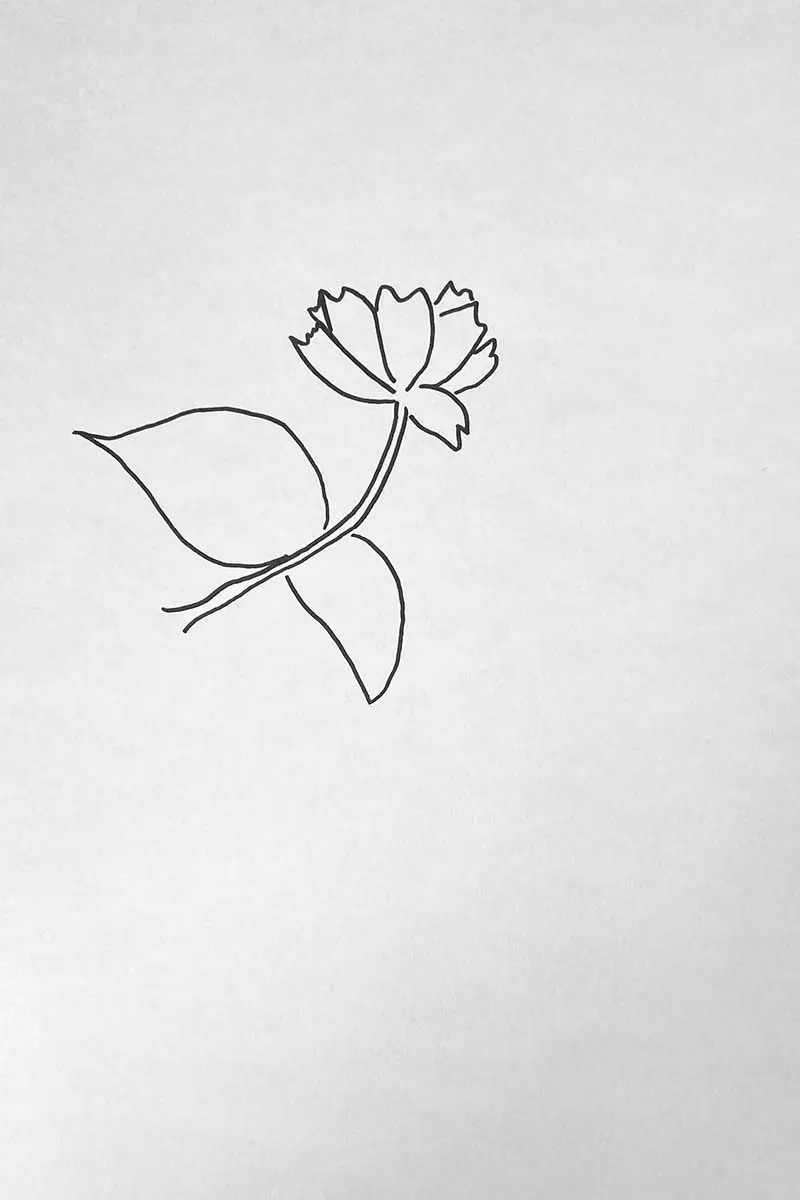
Eight easy to follow cherry blossom drawing tutorials. Learn to capture the essence of these pink flowers, from the flower outline to the intricate side branches, in an easy-to-follow, step-by-step format.
With their soft pink petals, cherry blossoms are not just beautiful; they hold a deep meaning, especially in Japan. The cherry blossom, or ‘sakura flower’, represents the fleeting beauty of life. People in Japan celebrate these flowers yearly with cherry blossom festivals, where they enjoy the beautiful blooms together.
At Pictureboxblue, we have a unique collection of vintage cherry blossom flower illustrations. These old artworks show the long-standing love for these flowers. They are perfect for anyone wanting to draw cherry blossoms, offering inspiration and a guide to their timeless beauty.
Why draw cherry blossoms? They’re perfect for all kinds of art projects. Whether you’re into crafts, decorating, journaling, or just looking for a fun and relaxing activity, drawing cherry blossoms can be an excellent choice.
They bring a sense of peace and the beauty of spring into your work. these step-by-step guides to drawing and painting these lovely blossoms, drew inspiration from our collection of vintage illustrations.
The Step-By-Step Drawing Tutorials
There is a wide range of these gorgeous flowers, each with unique charm and different ways to illustrate them.
I’ve put together eight varied cherry blossom sketching tutorials in this collection, ranging from a simple petal flower blossom to an intricate cherry blossom tree drawing. You will find the ideal tutorial that suits your artistic goals and preferences.
Drawing 1 Classic Cherry Blossom Shape
This first flower is a classic Japanese style drawing of these small flowers. With this tutorial it is easy to draw blossoms of different sizes.
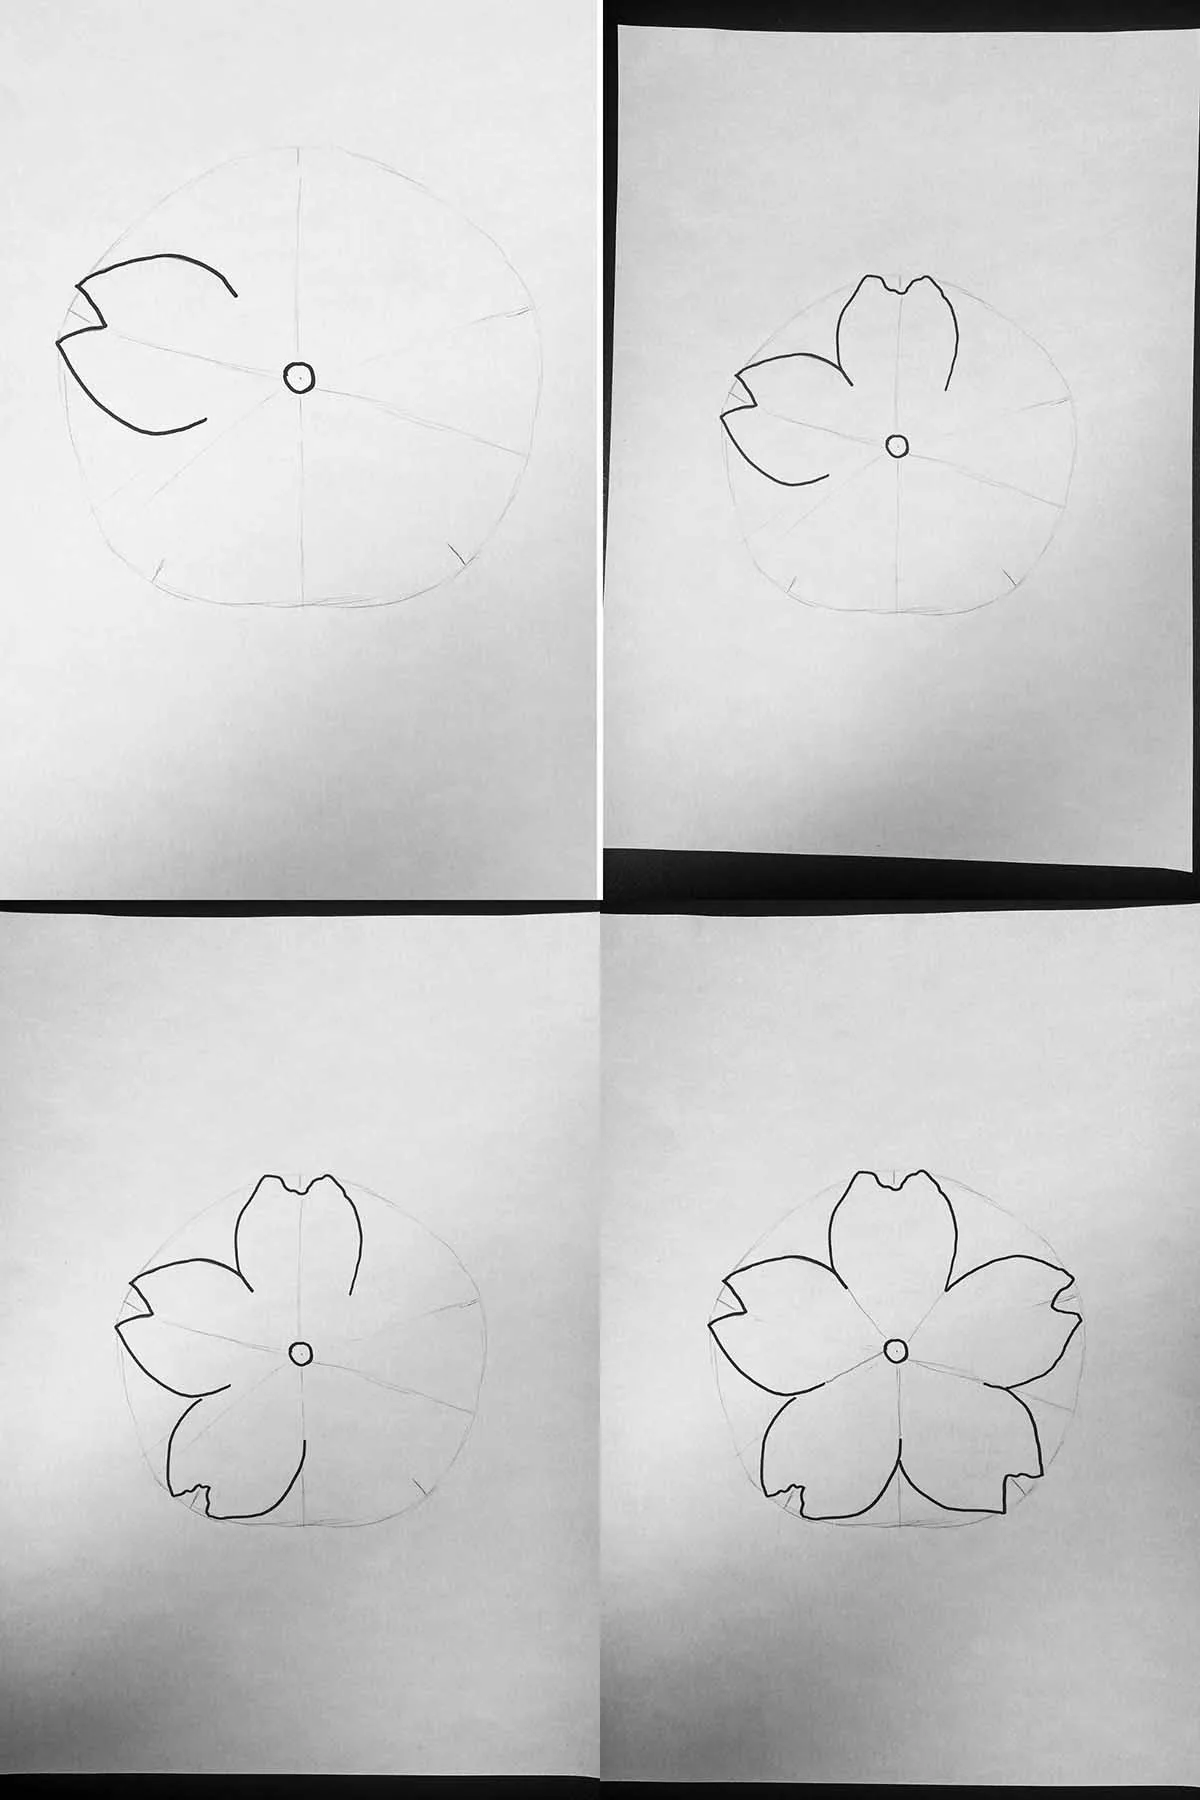
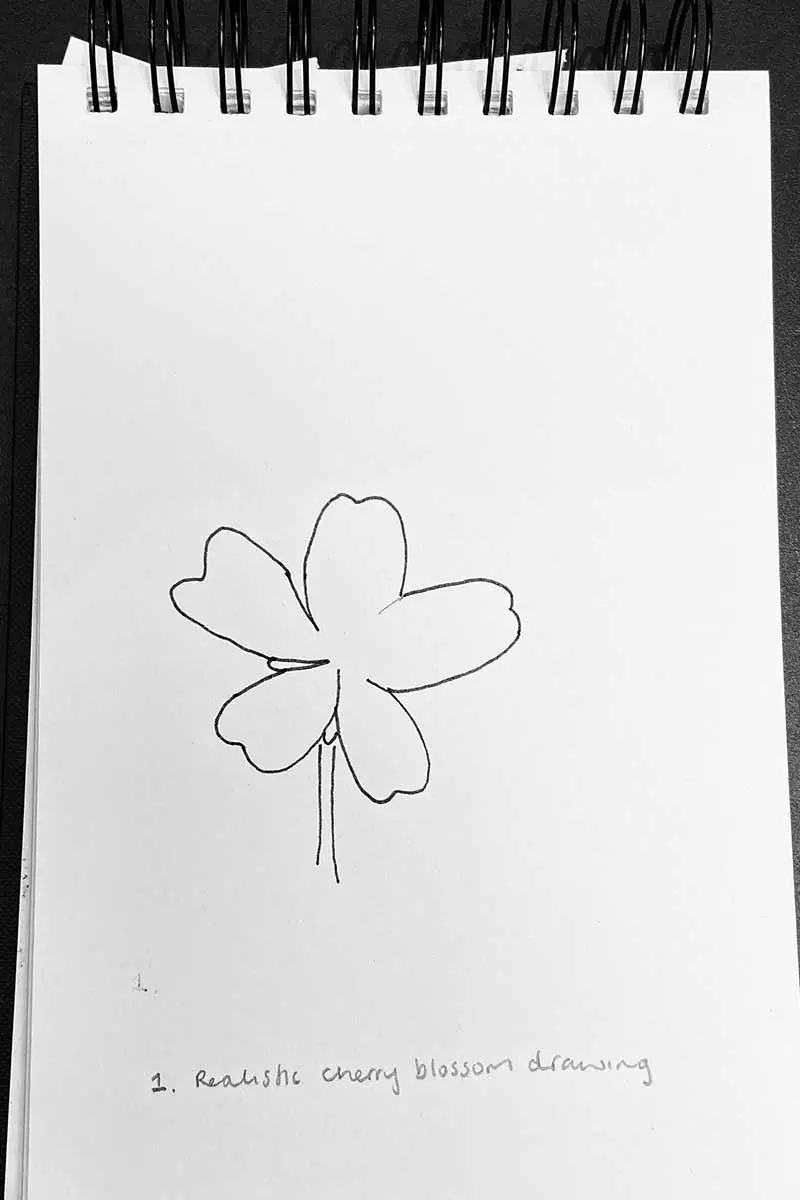
Step 1: For the first step to help guide your drawing, in pencil, lightly draw a circle to the size of the flower you want. In the centre of your circle, draw a small circle. This will be the centre of each flower.
Within the outline of your large circle, outline the first classic cherry blossom petal shape. Each petal shape has a slight indent similar to a heart.

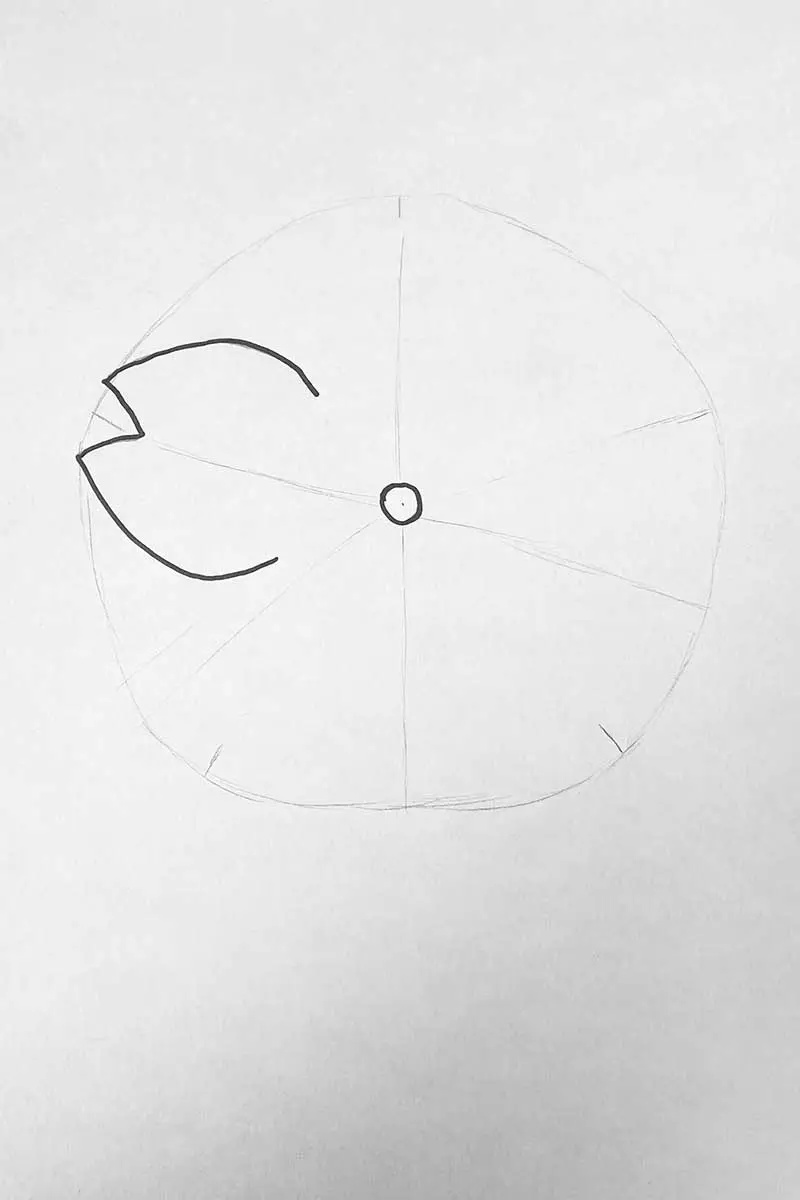
Step 2: Draw your second petal shape next to your first petal, ensuring it is the same size.
The flower has five petals, so use your circle to guide you in spacing the petals evenly. Repeat the previous steps by adding the third, fourth, and fifth petal shapes.

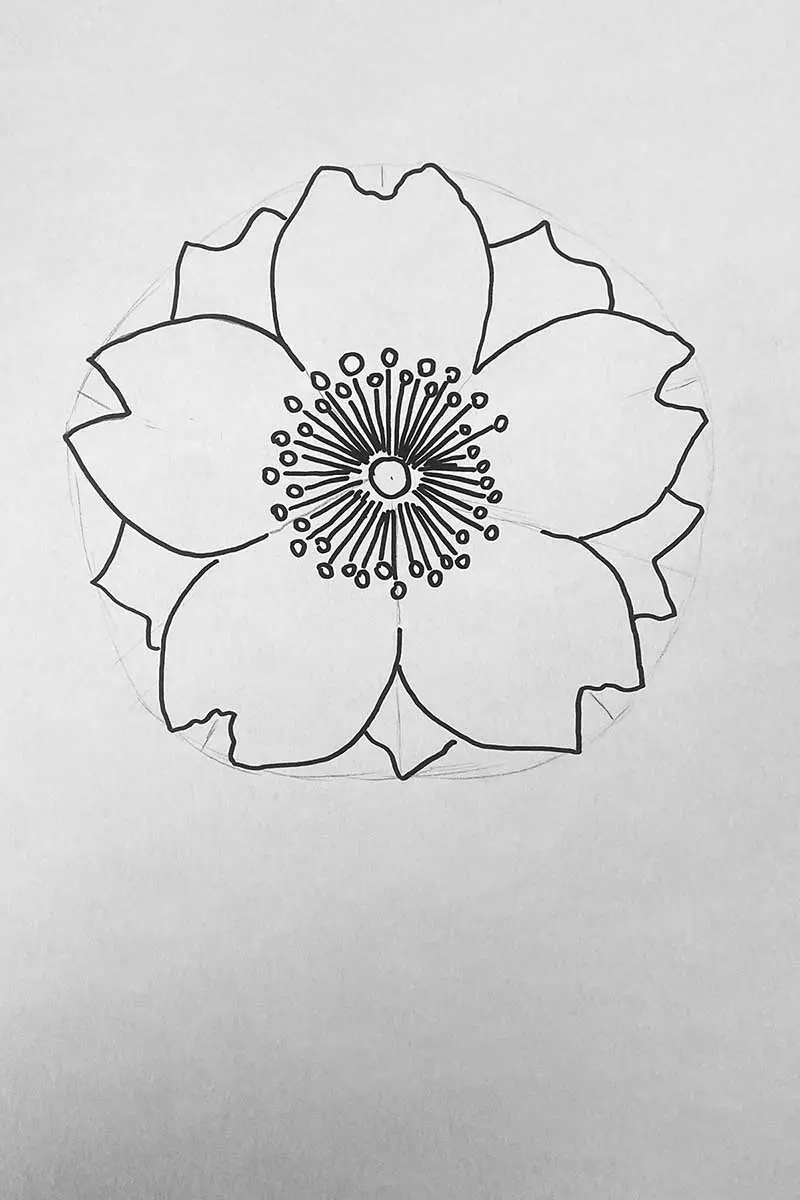
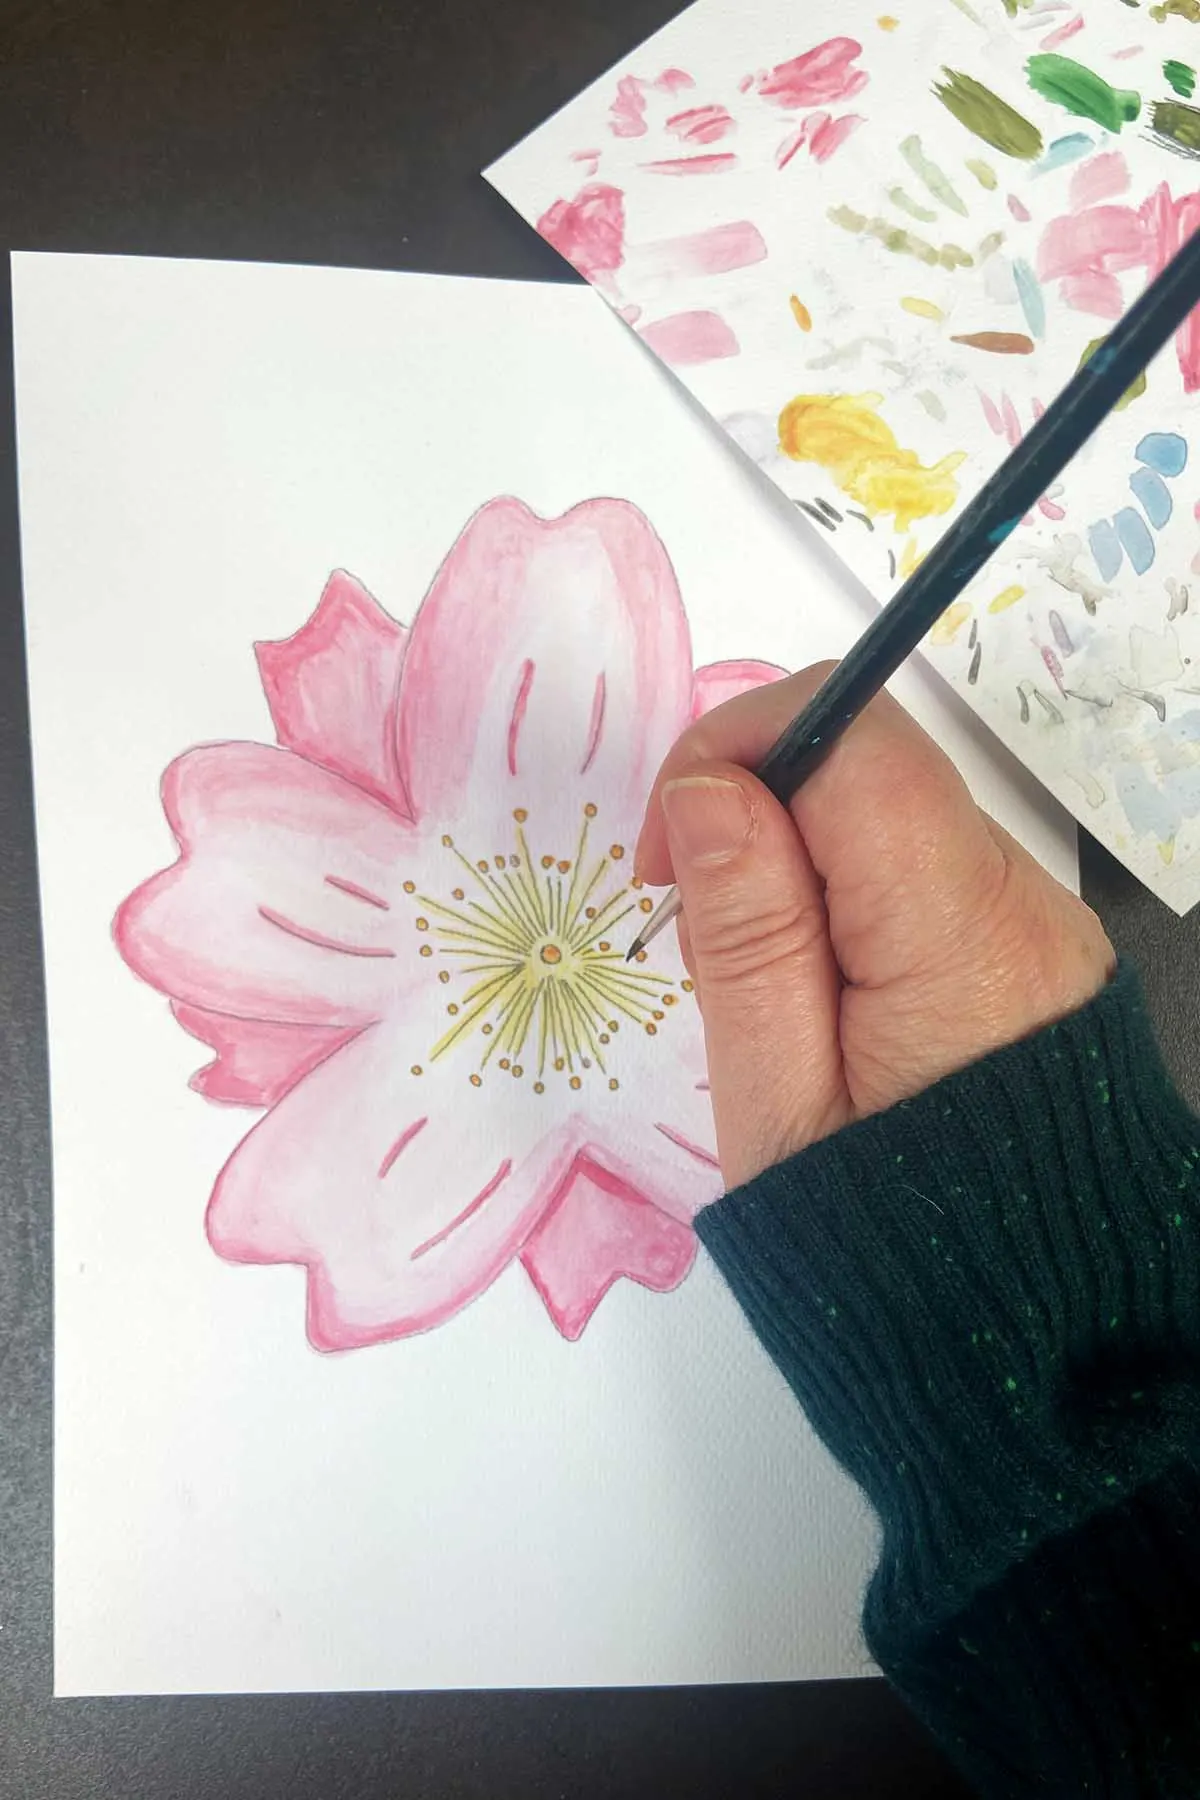
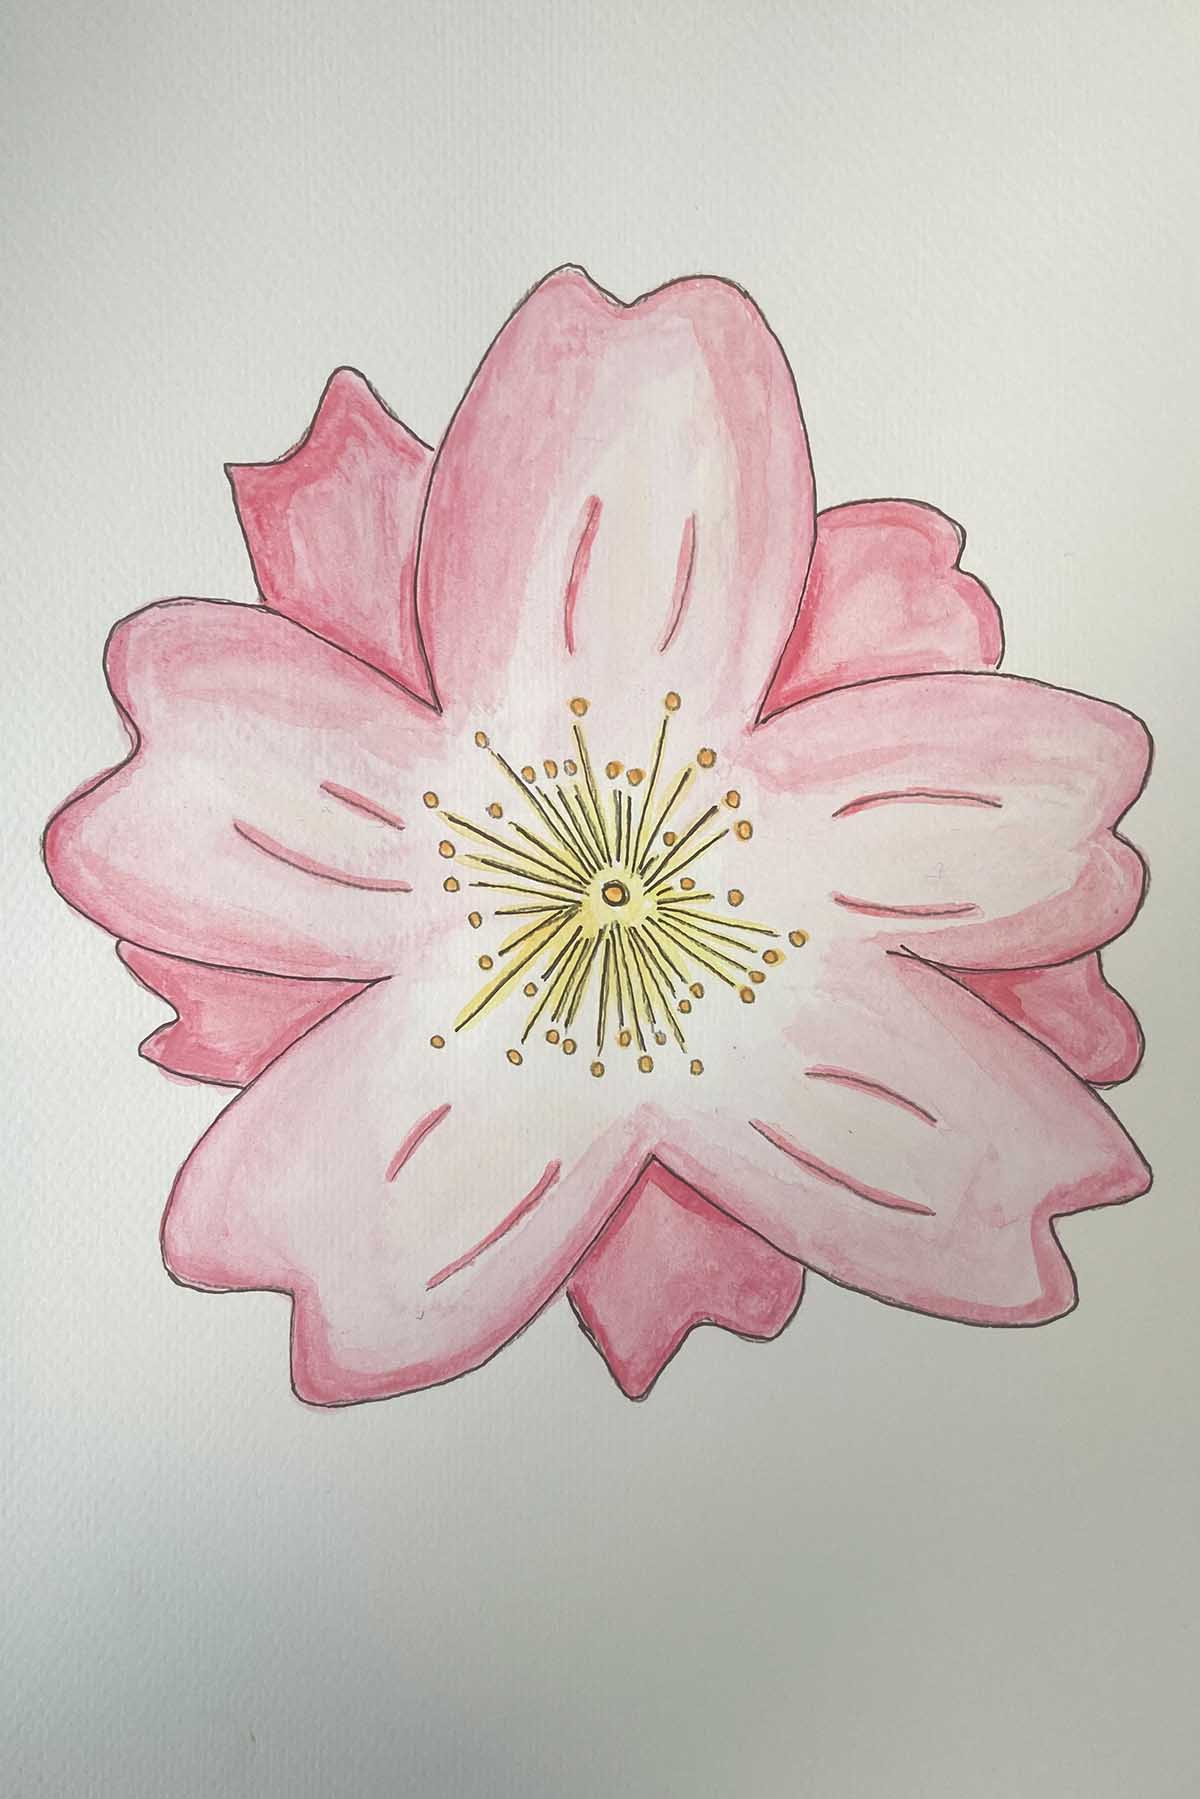
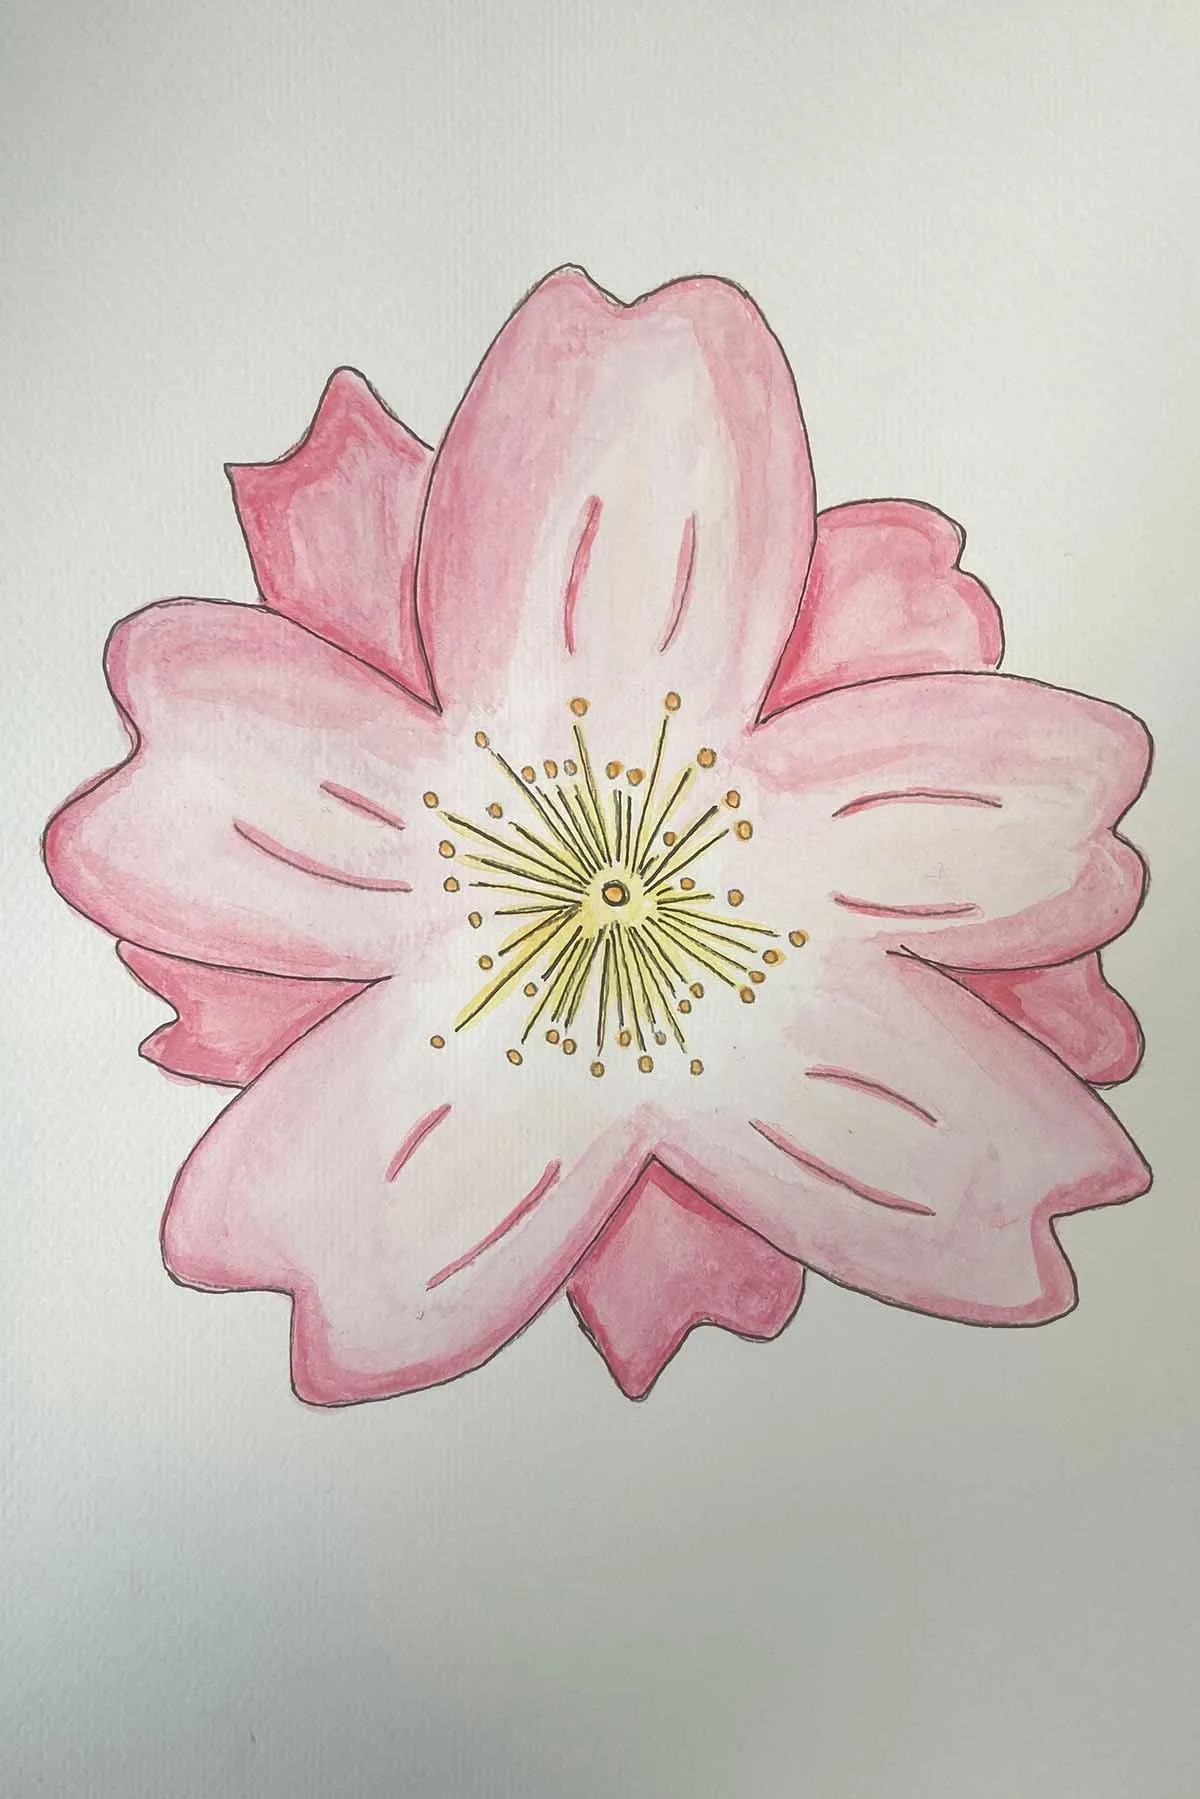
Step 3: From the small circle in the centre of the flower shape, draw straight edge lines of different lengths coming from the centre of each flower in a starburst formation. These lines represent the part of the blossom known as the filament.
Then draw little circles on the top of the straight lines you have just drawn, these circles represent the Anther part of the flower. They make for a more realistic cherry blossom drawing.

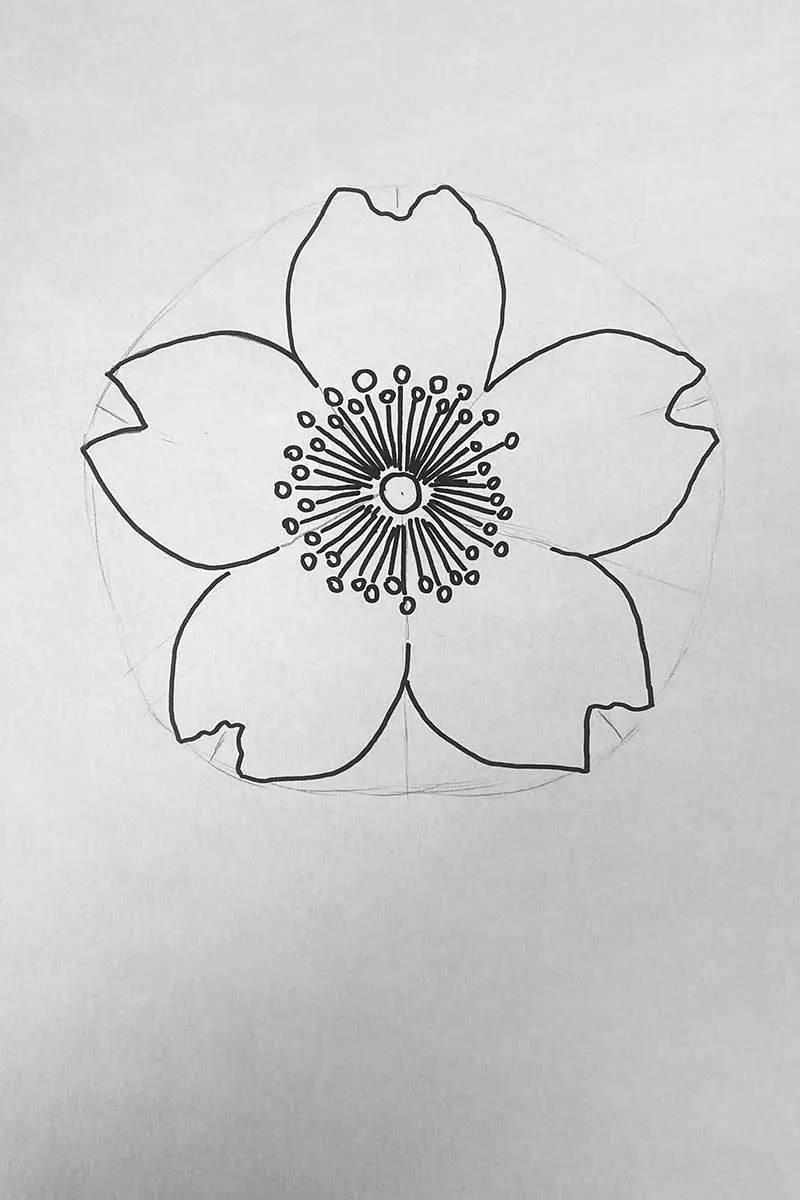
Step 4: This is the classic five-petal Sakura tree flower. If you want to draw a double-petal blossom, a great way to do this is to add an extra petal between your original five petals.
A double-petal cherry blossom is called Yae-Zakura in Japan and is famous for its beauty and strength.

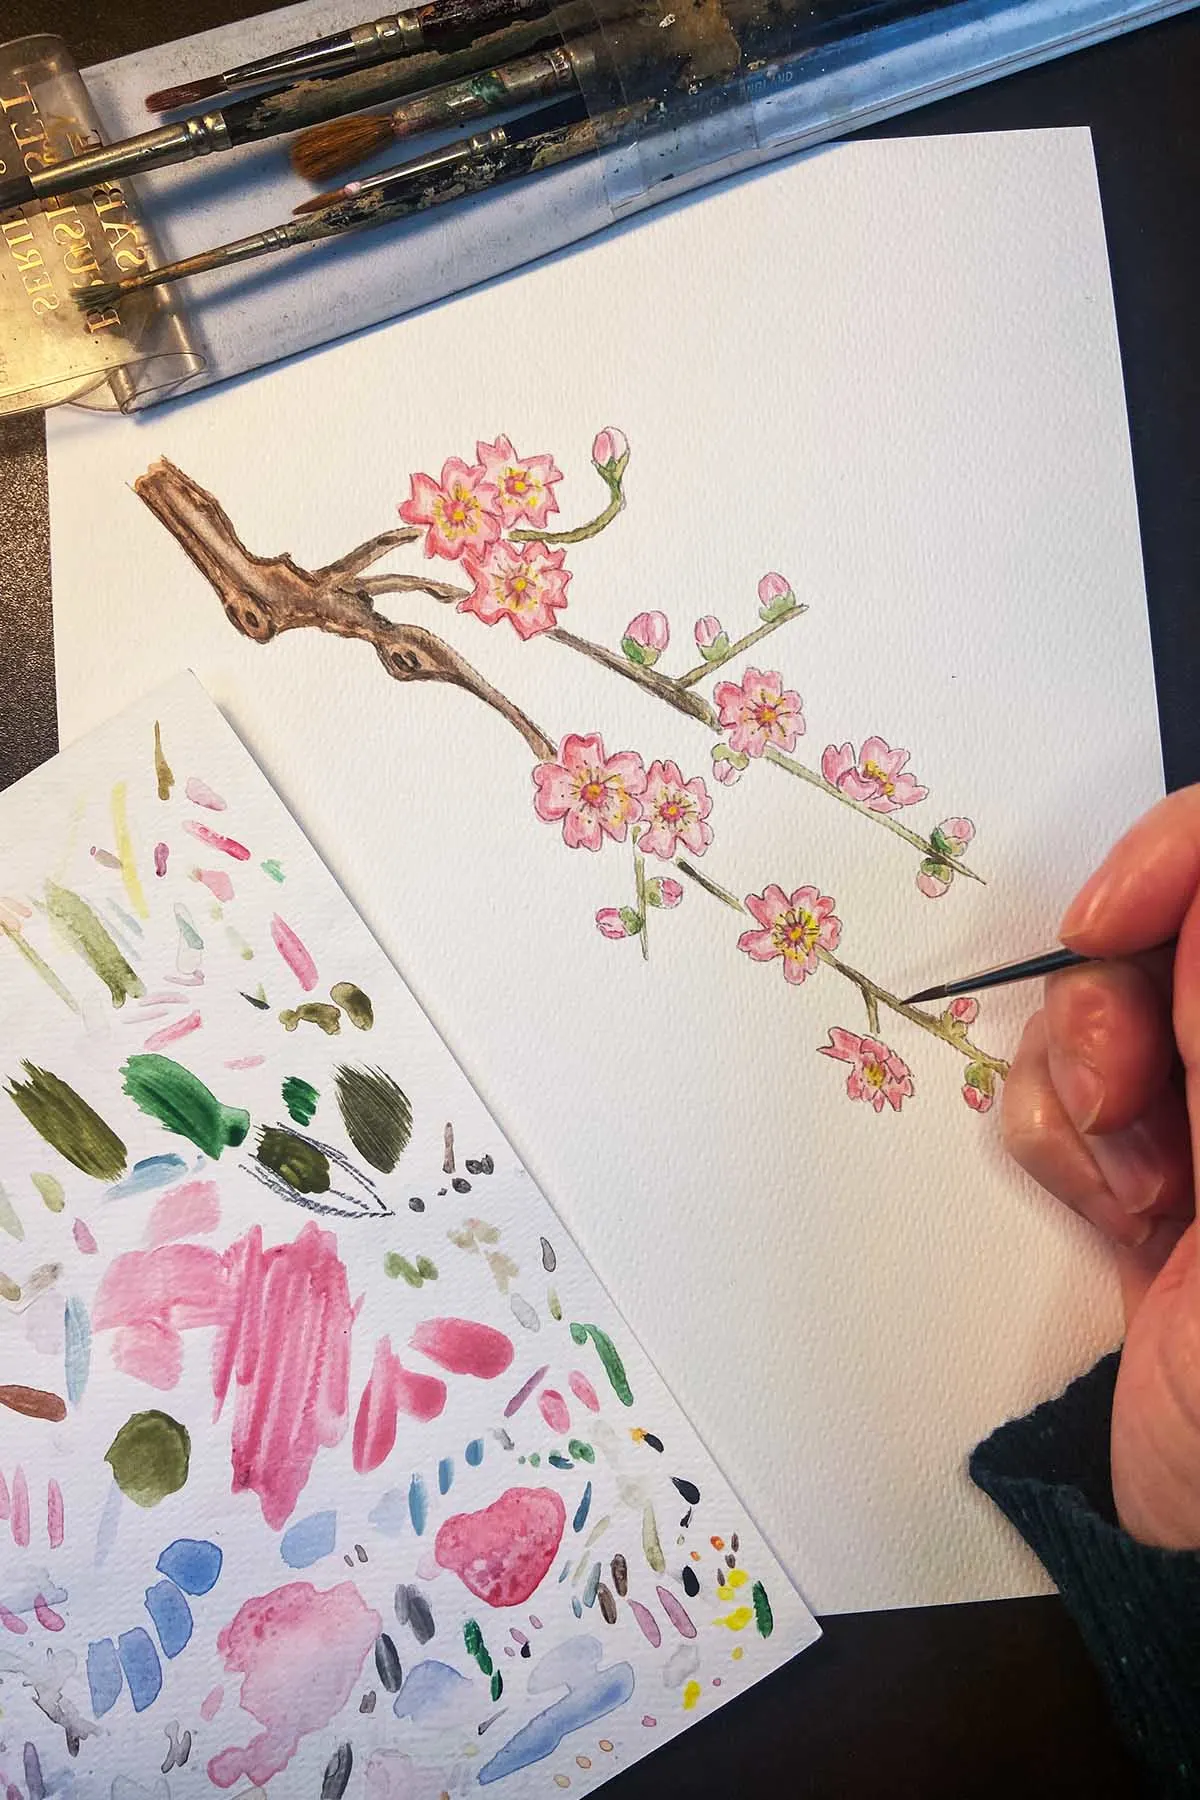
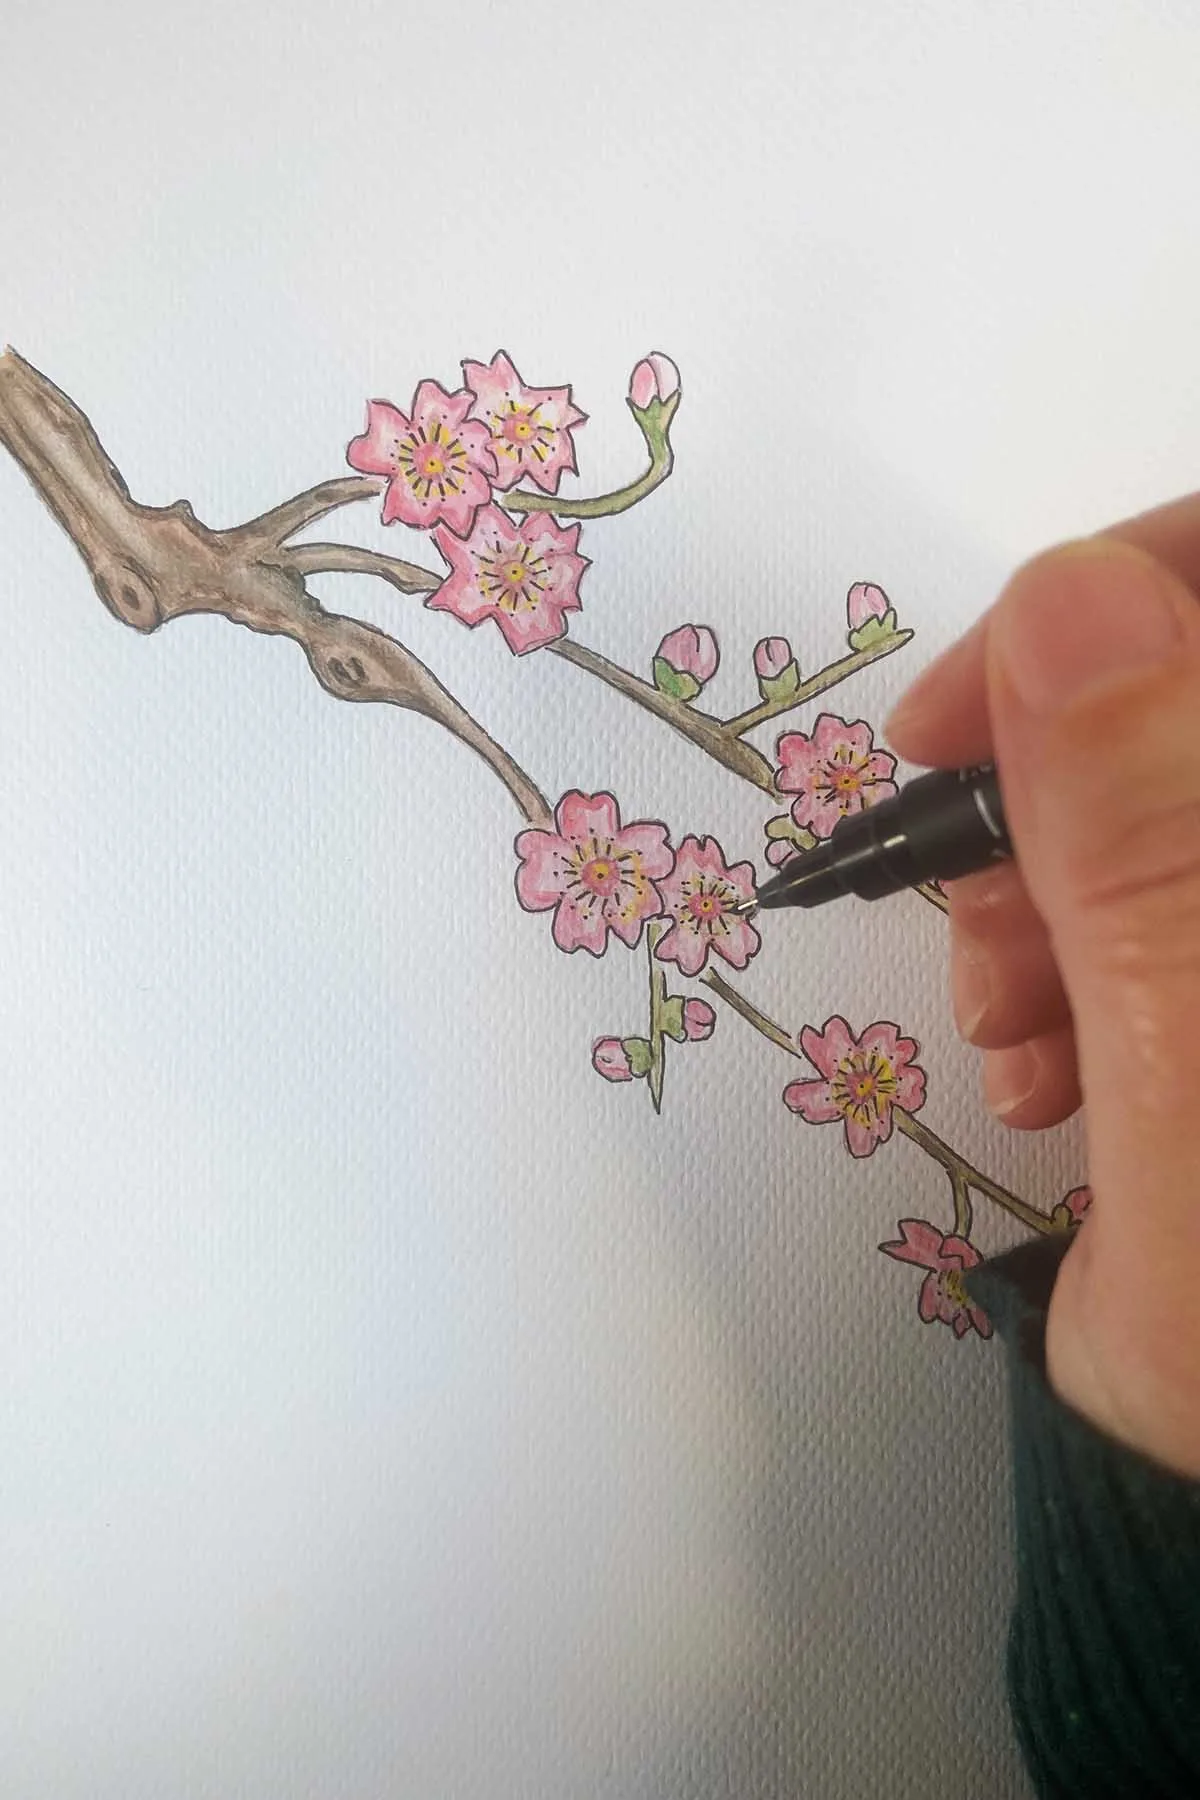
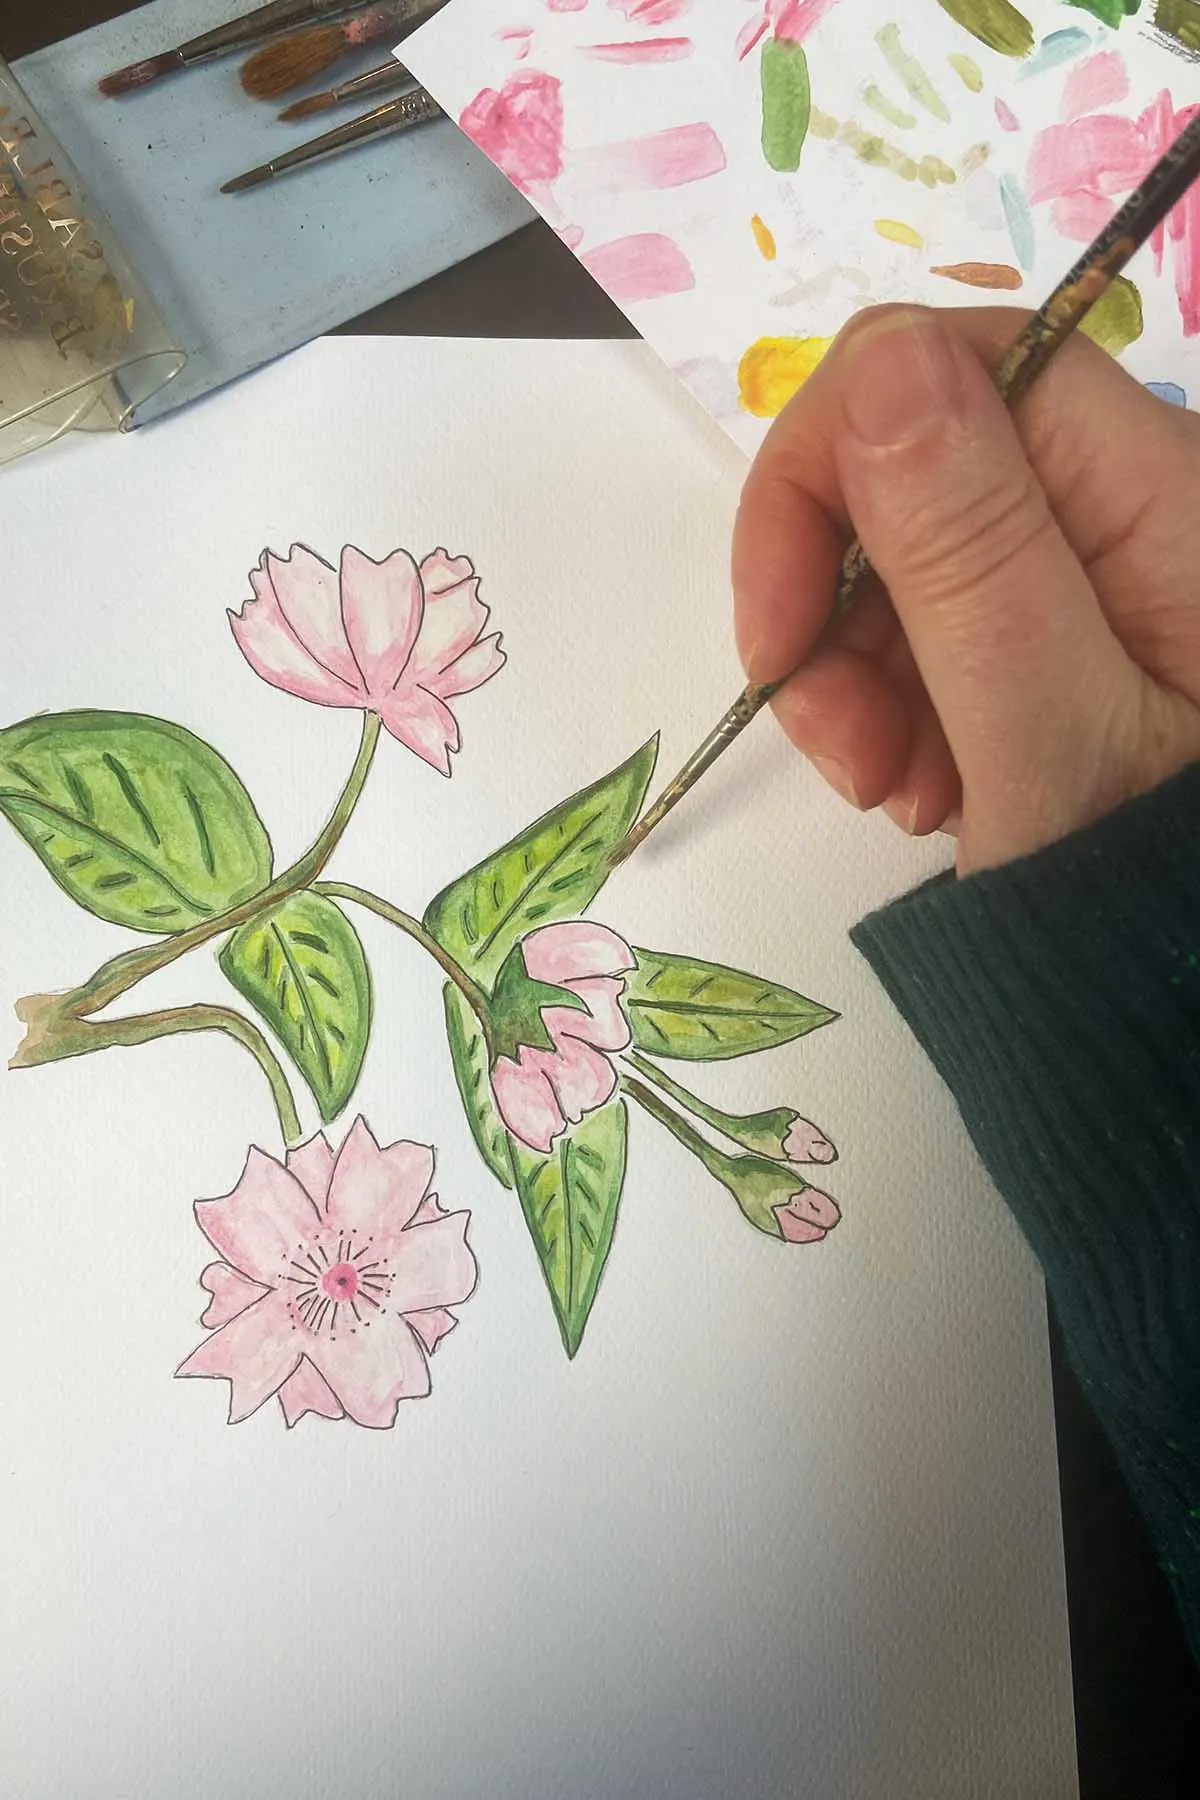
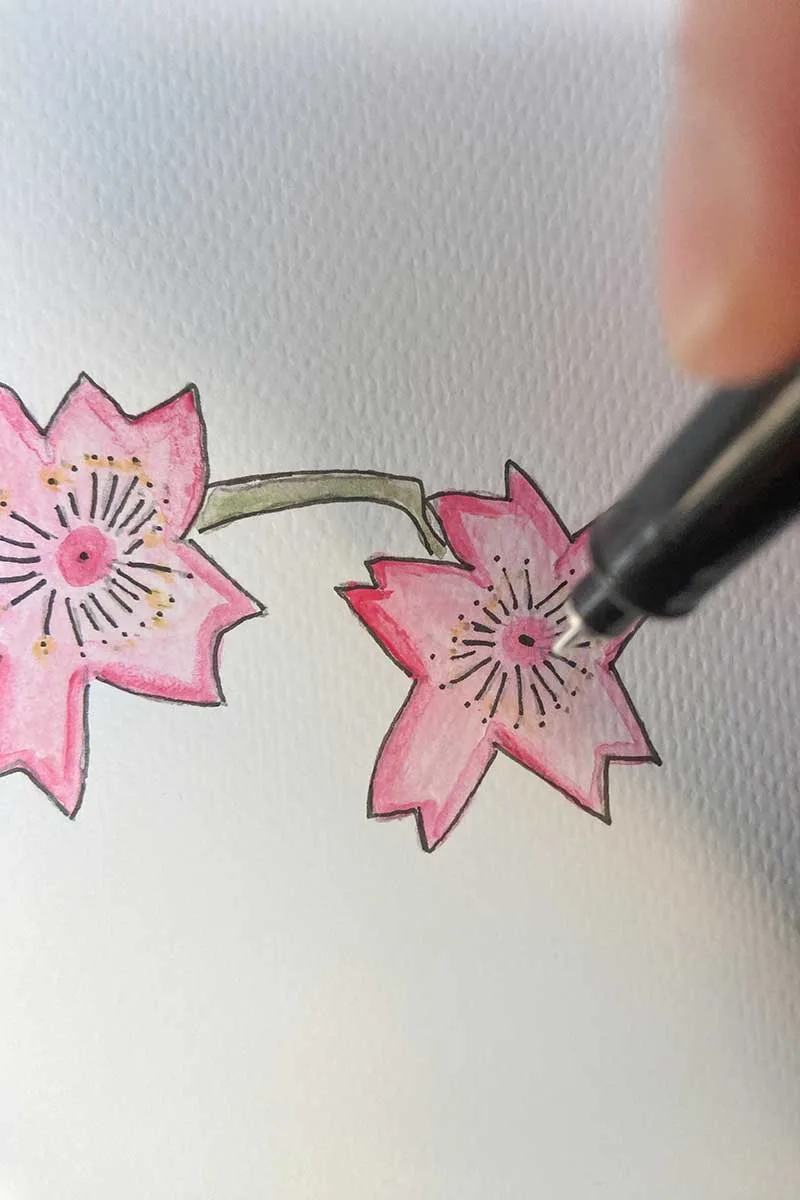
Step 7: It’s time to bring your beautiful cherry blossom drawings to life with colour. Cherry blossoms come in different colours, mainly in shades of pink and white. I opted for watercolour paints, applied pink paint, and outlined the drawing with a black fine-line pen for added definition.
However, you may prefer a gentler appearance. Once you’re comfortable with the basic shape of the cherry blossom, try drawing it freehand for a more natural and fluid effect.

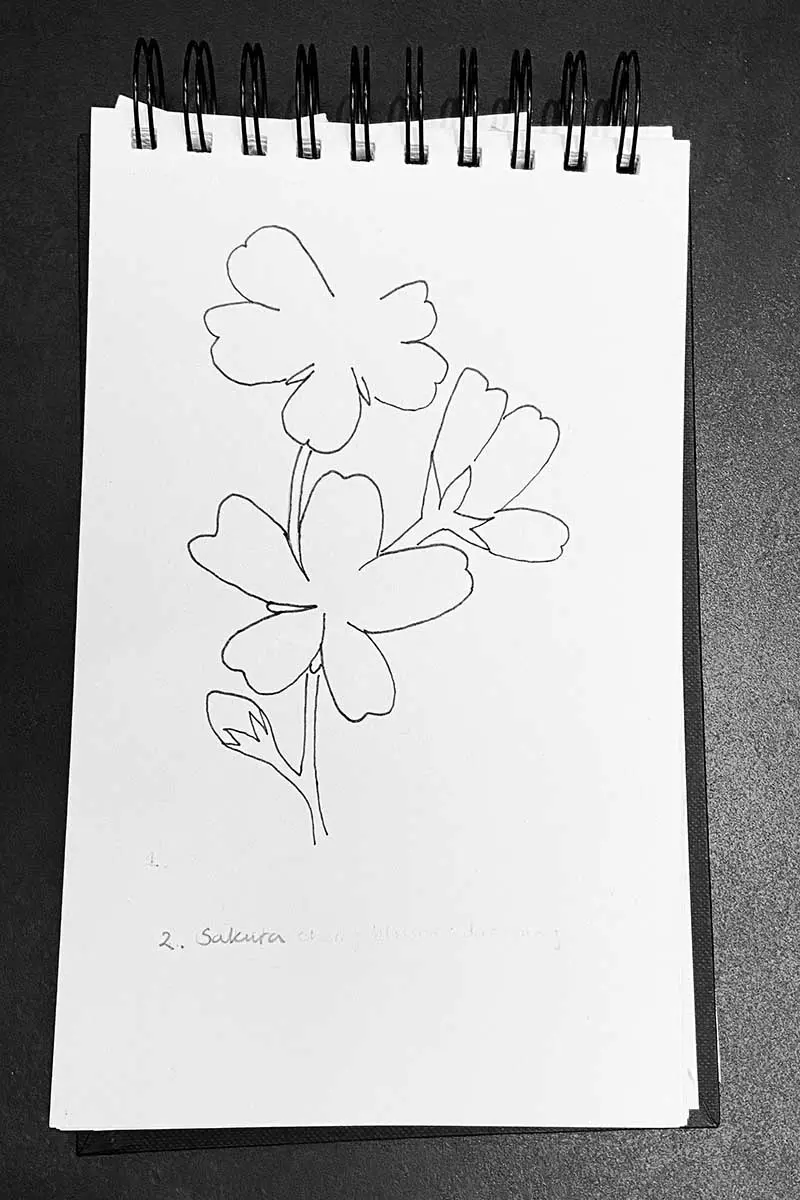
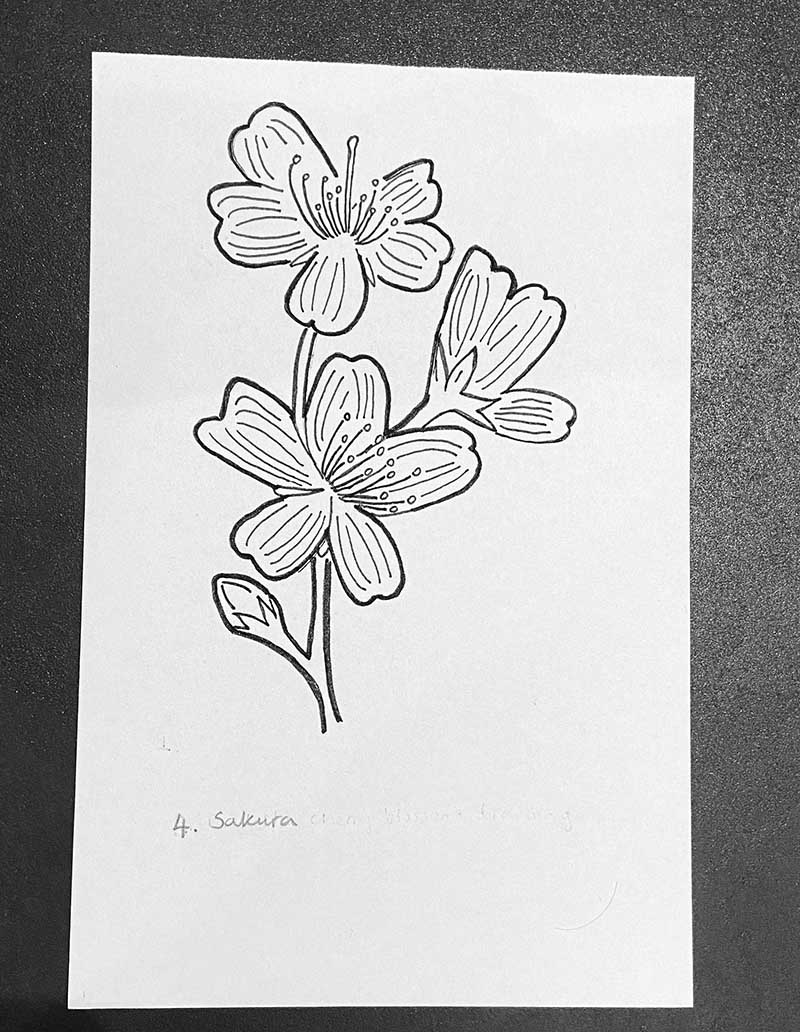
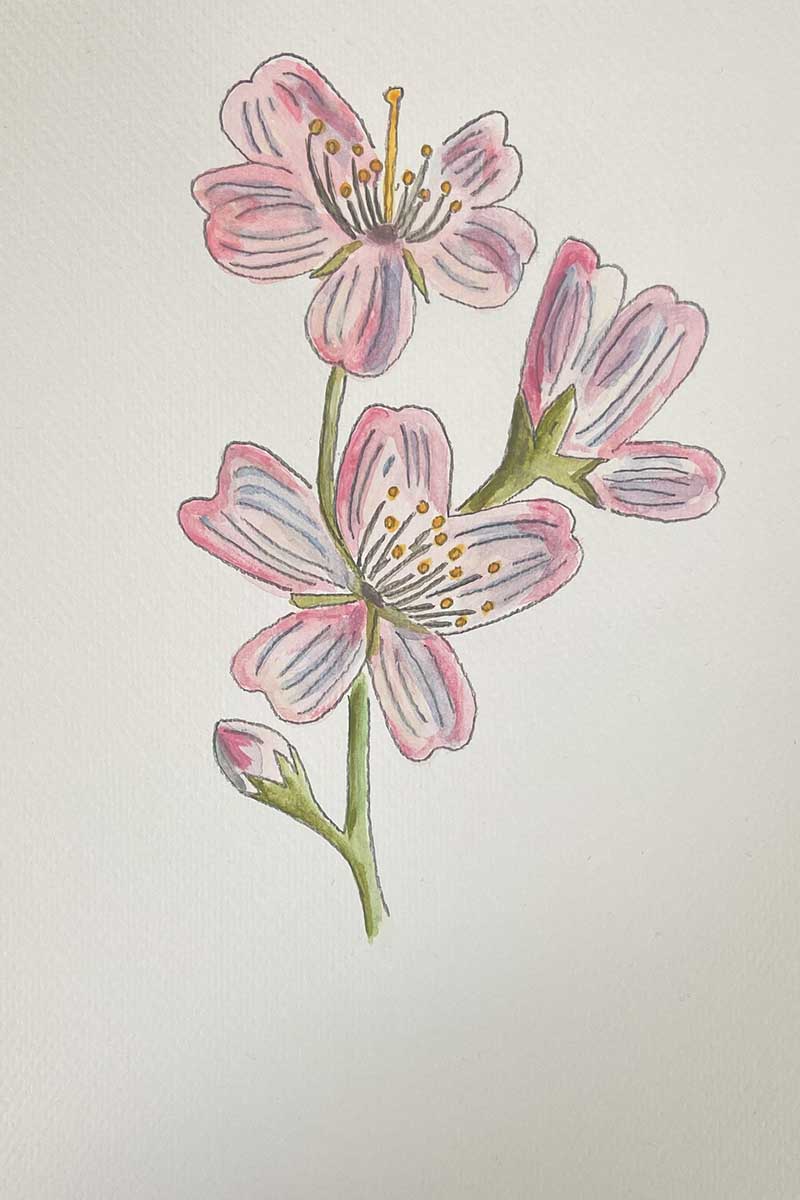
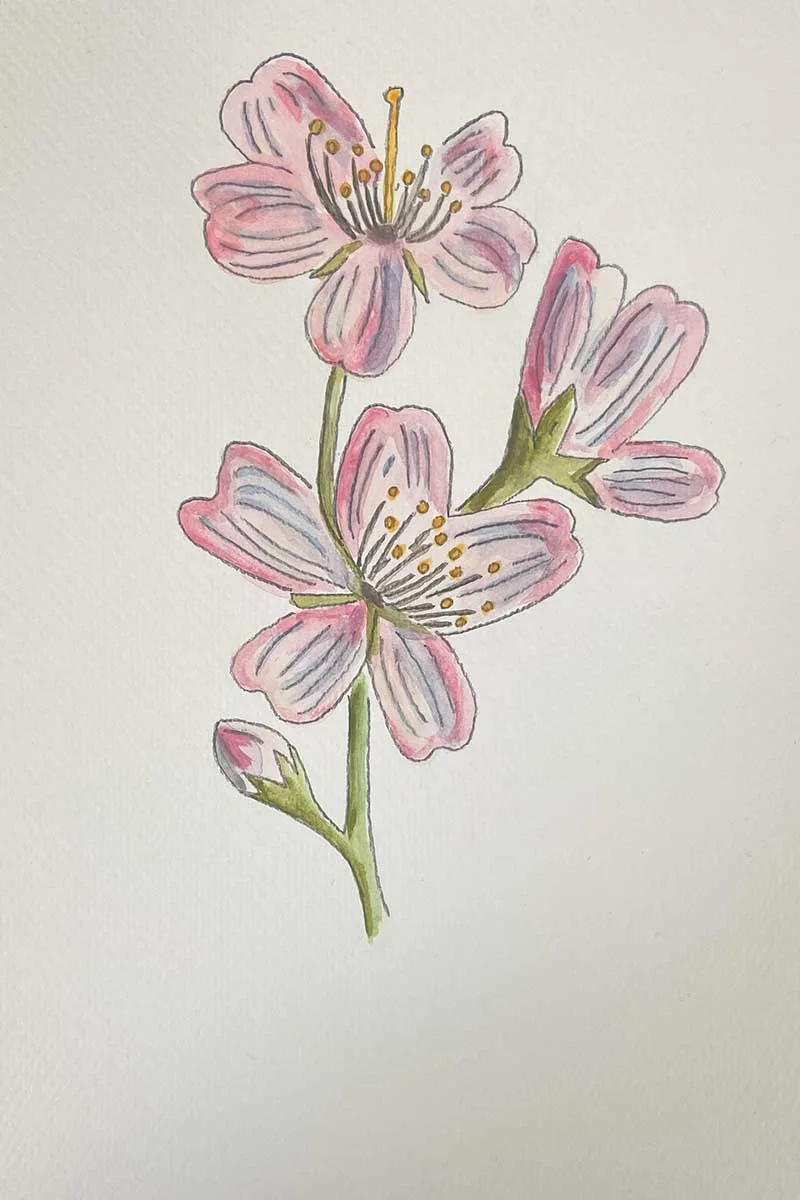
Drawing Tutorial 2: Cherry Blossom Branch
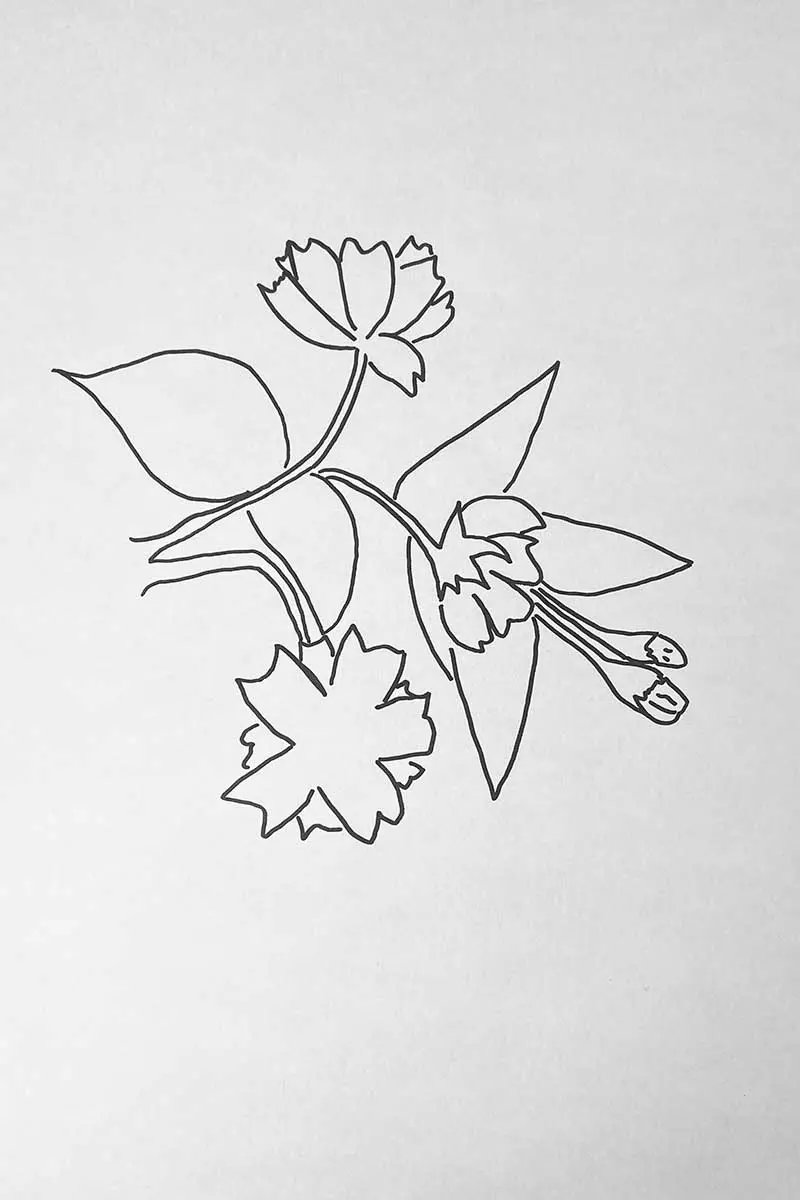
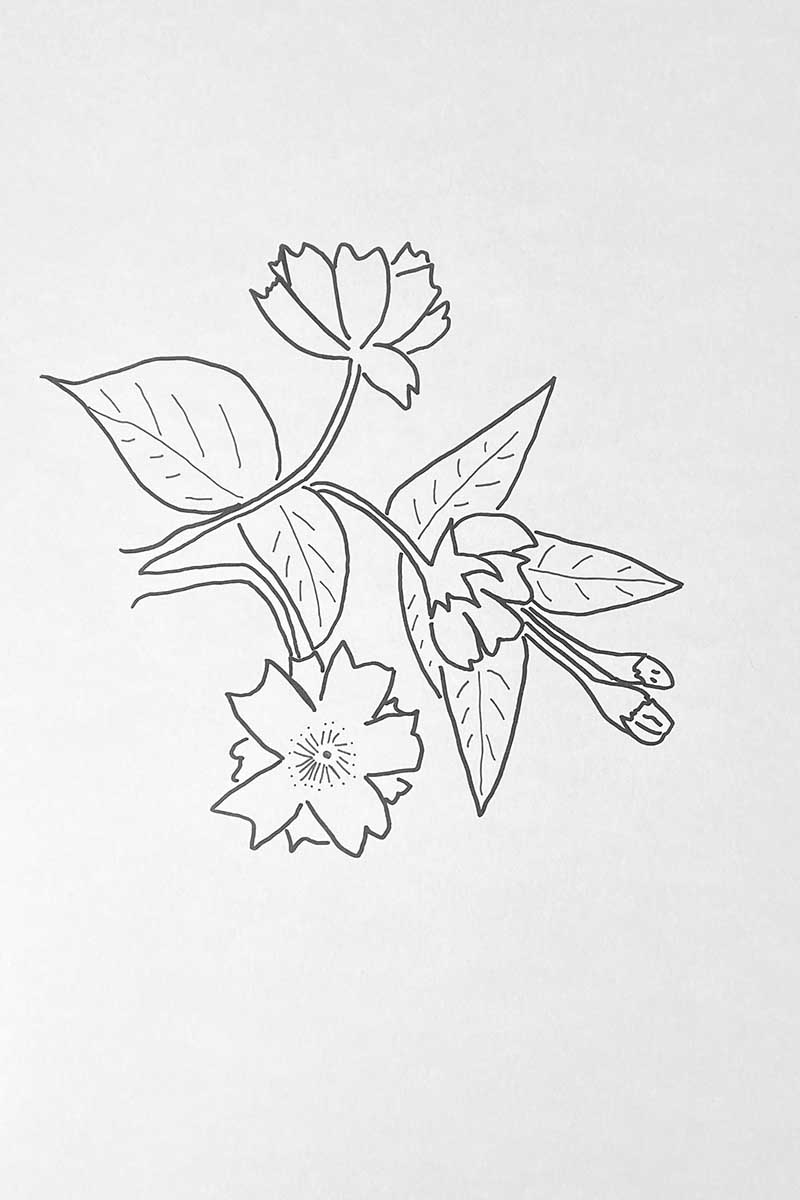
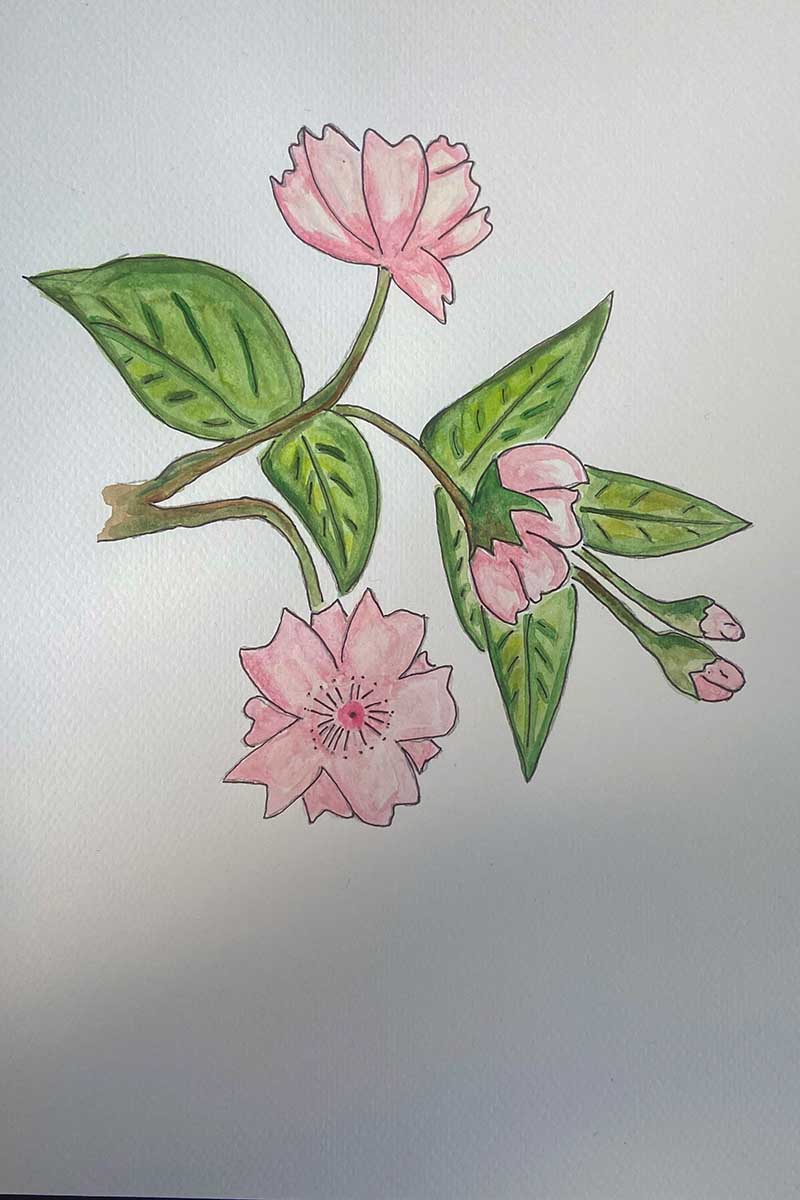
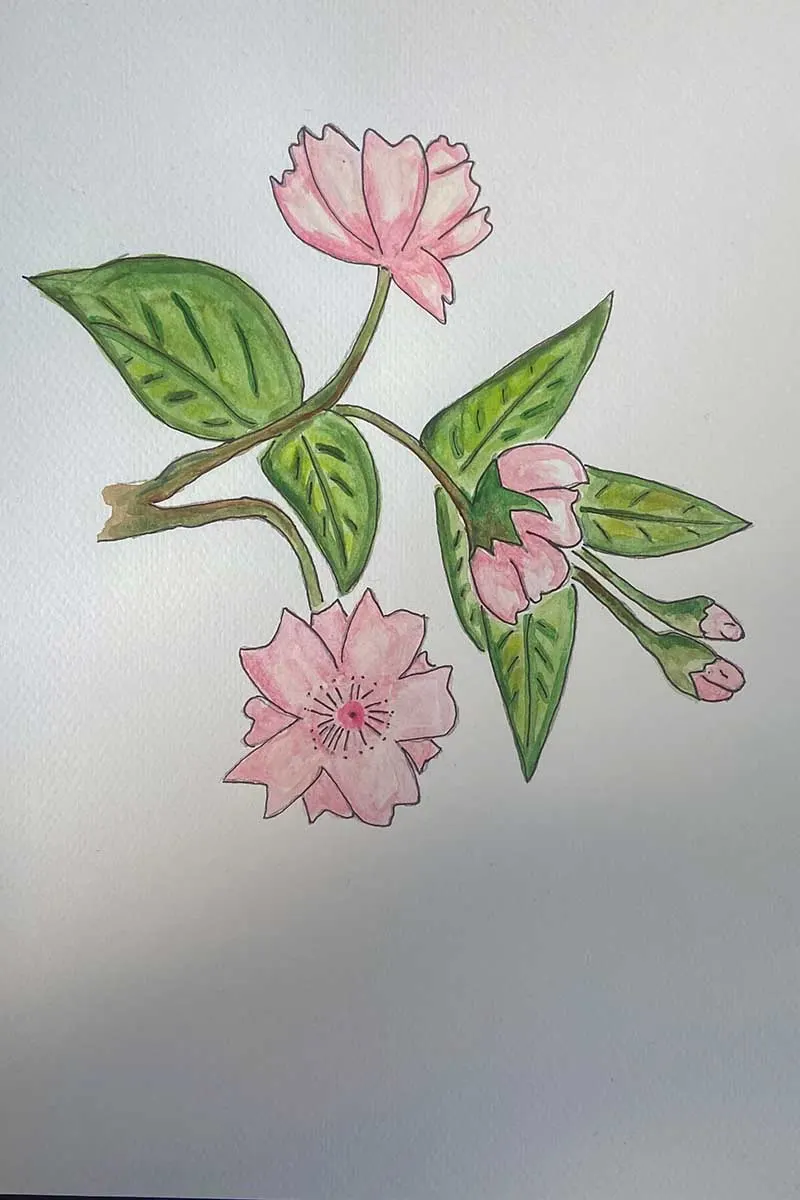
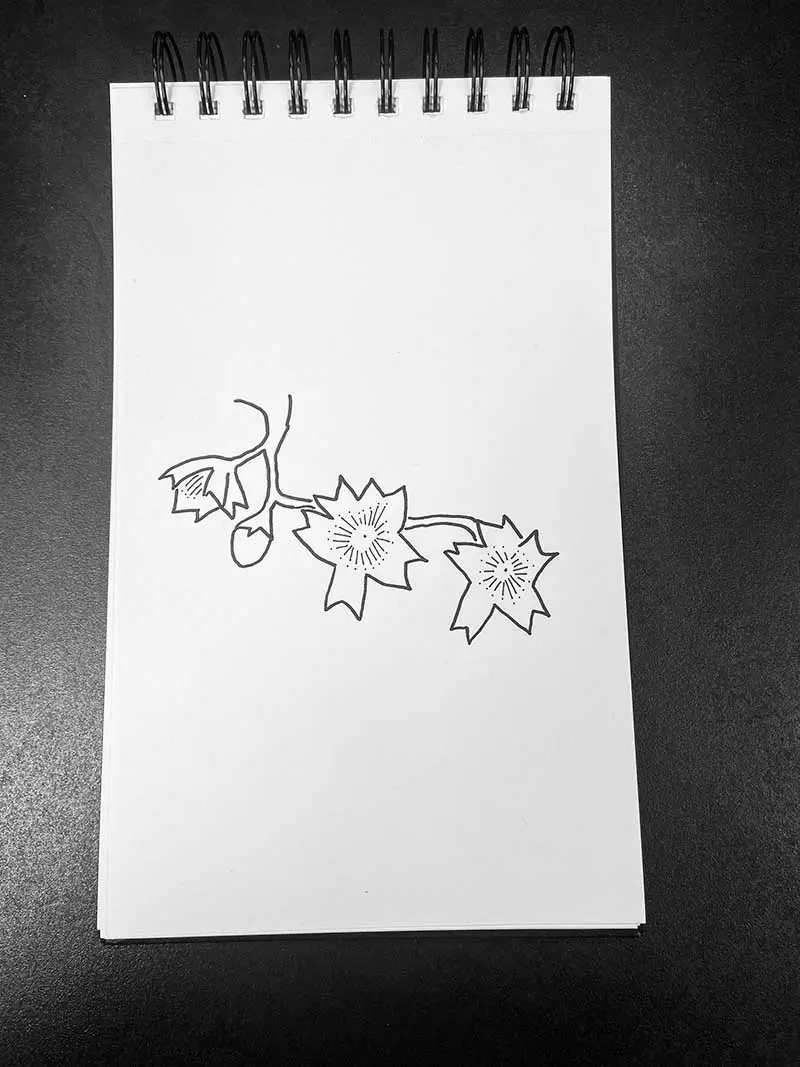
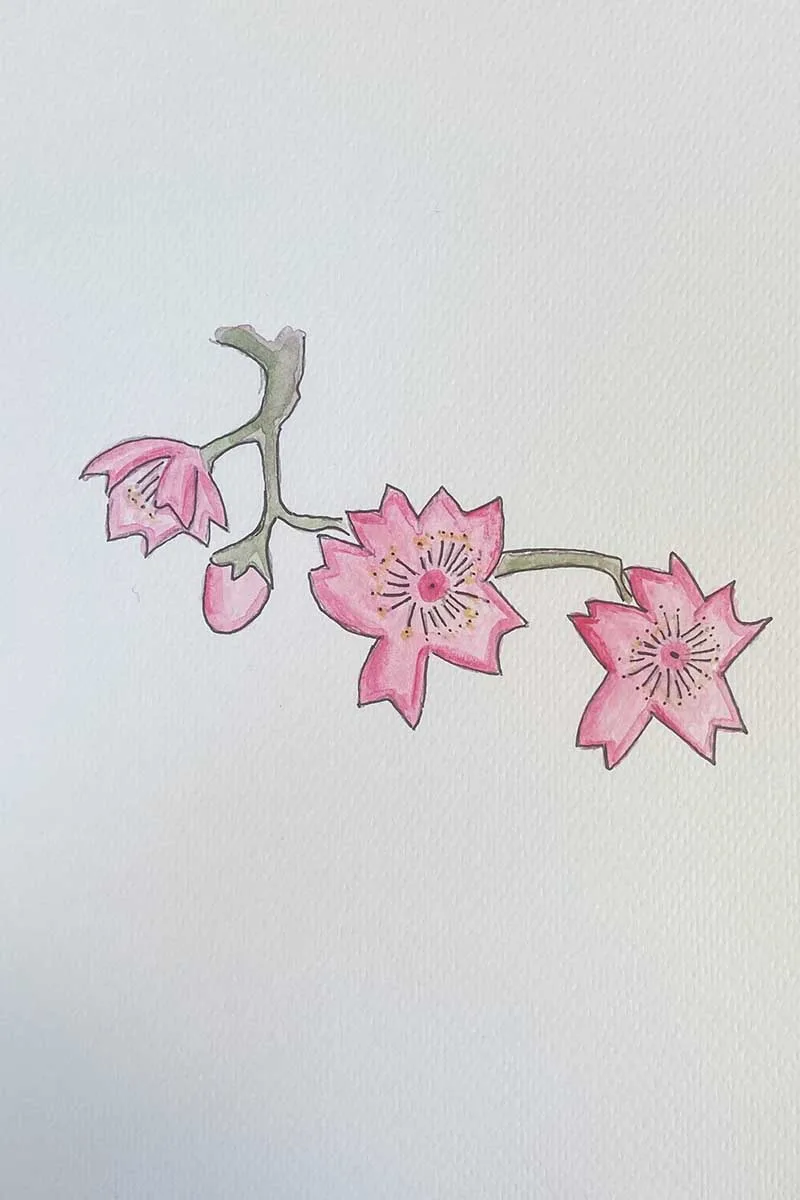
This is a drawing of a five-petal Sakura Cherry blossom on a branch, including two open flower blossoms, a side view of a flower blossom and unopened flower buds.
It’s a detailed drawing broken down into simple steps, showing the different angles and stages of the cherry blossom. You might want to experiment and use this as inspiration to add your flower heads to the branches of your cherry tree drawing.
Step 1: The best way is to start drawing at the bottom two-thirds of your paper. Outline your open five-petal flower head with the stem as shown.

Step 2: For the next step, draw the outline of the two other flower heads and the closed bud as shown. You can experiment to add your perspective and add as many buds and flower heads as you want.
Just remember each blossom has five petals with a little heart-shaped indent at the top of each petal. If drawing a side view, only three petals may be visible, as shown here.

Step 3: Draw lines on the two open flower heads coming from the centre of your flower. These are known as the filament. Then, draw a small dot on top of the lines you have just drawn to represent what is known as the anther.
On the top flower, I have included the central Stigma of the flower head for a more realistic drawing.

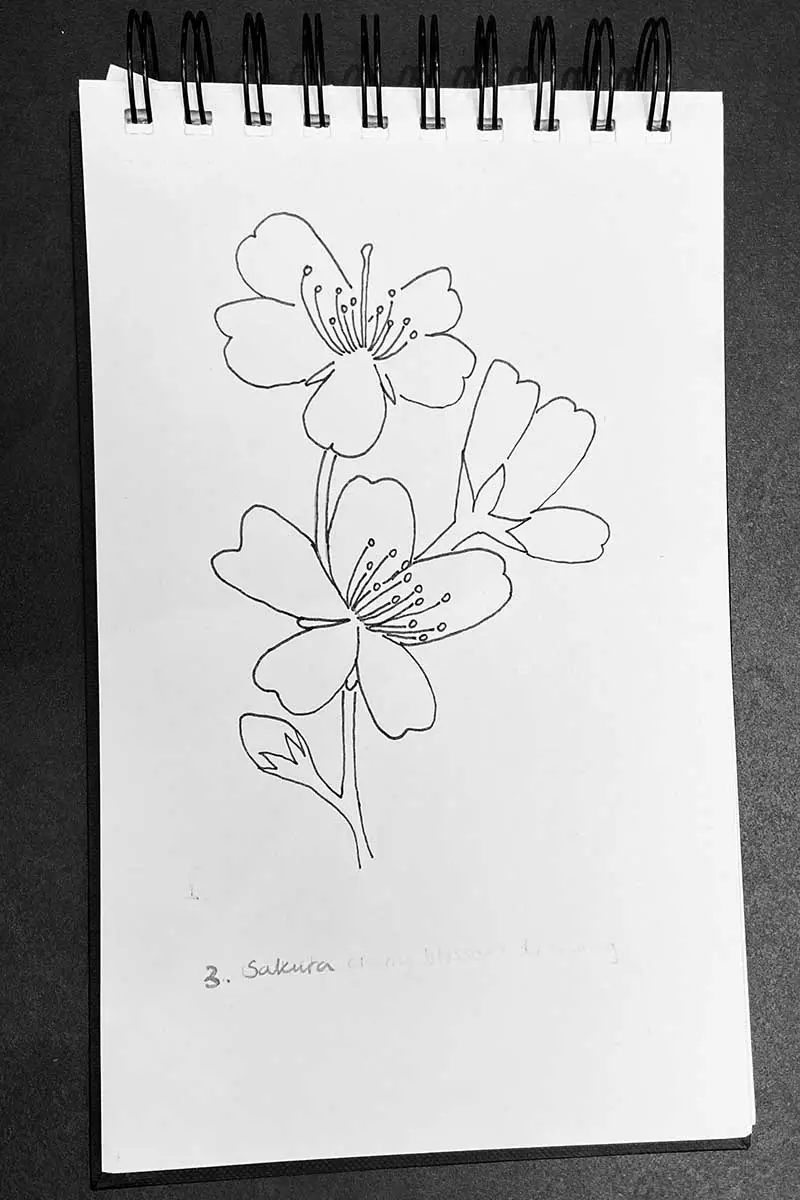
Step 4: Draw lines on the petals, including the unopened bud, to add extra detail and life to your flower drawings. If you intend to add colour with watercolours or pencils, you may want to skip this stage and achieve the same effect through shading or a small blending brush.

Step 5: Finish off these beautiful flowers by adding colour; any shade of white or pink will work great.
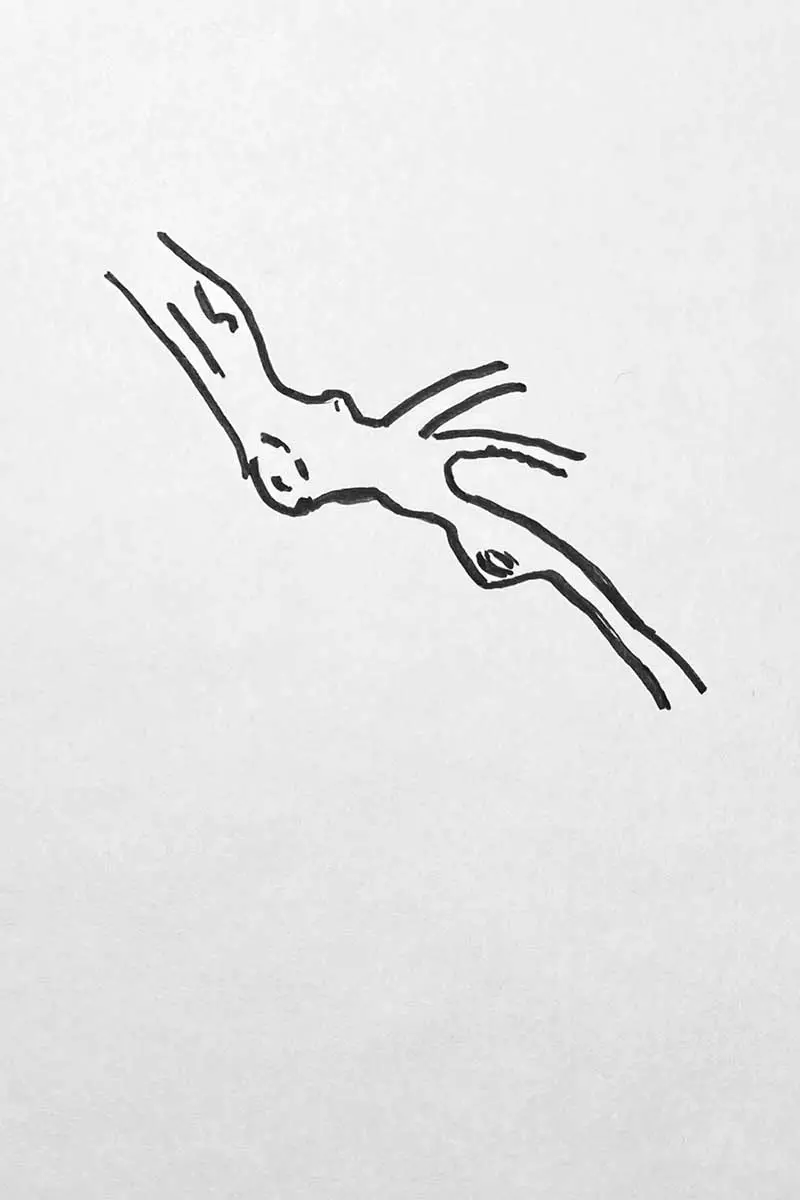
Step Tutorial 3: Delicate Cherry Blossom on a tree branch
This is a beautiful design of individual flowers on a branch.
Step 1: Draw the beginning of your tree branch in the top left corner of the paper. It will go across the page diagonally from left to right. The tree branch can be as gnarly as you like. Imagine an ancient cherry tree, so use jagged lines.

Step 2: Add the outline of the clusters of your cherry blossom and buds to your branch. Refer back to the previous steps in picture one for the basic shape of the five petals of the Sakura flower and repeat this shape in overlapping clusters.

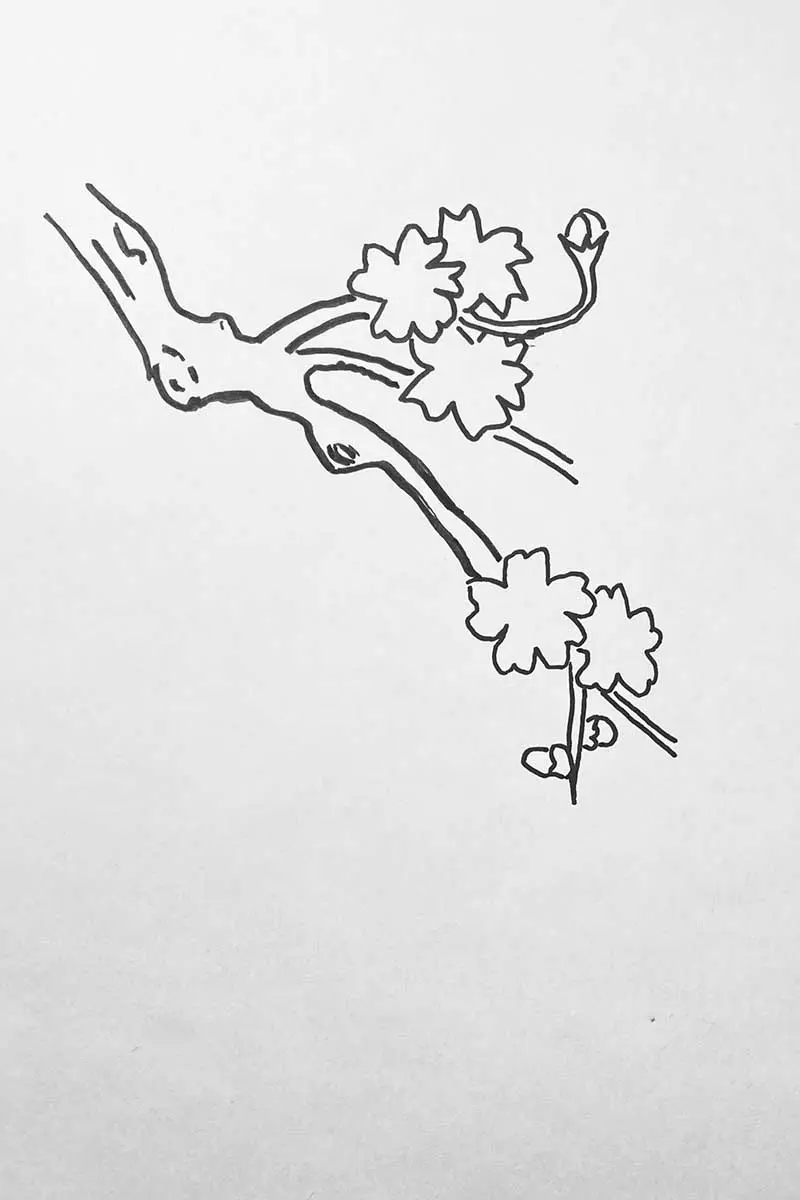
Step 3: Continue to complete the outline of your branch with the clusters of blossoms and buds. Experiment with drawing a couple of flower heads at side angles to add interest and realism to the image. Add as many blossoms as you like.
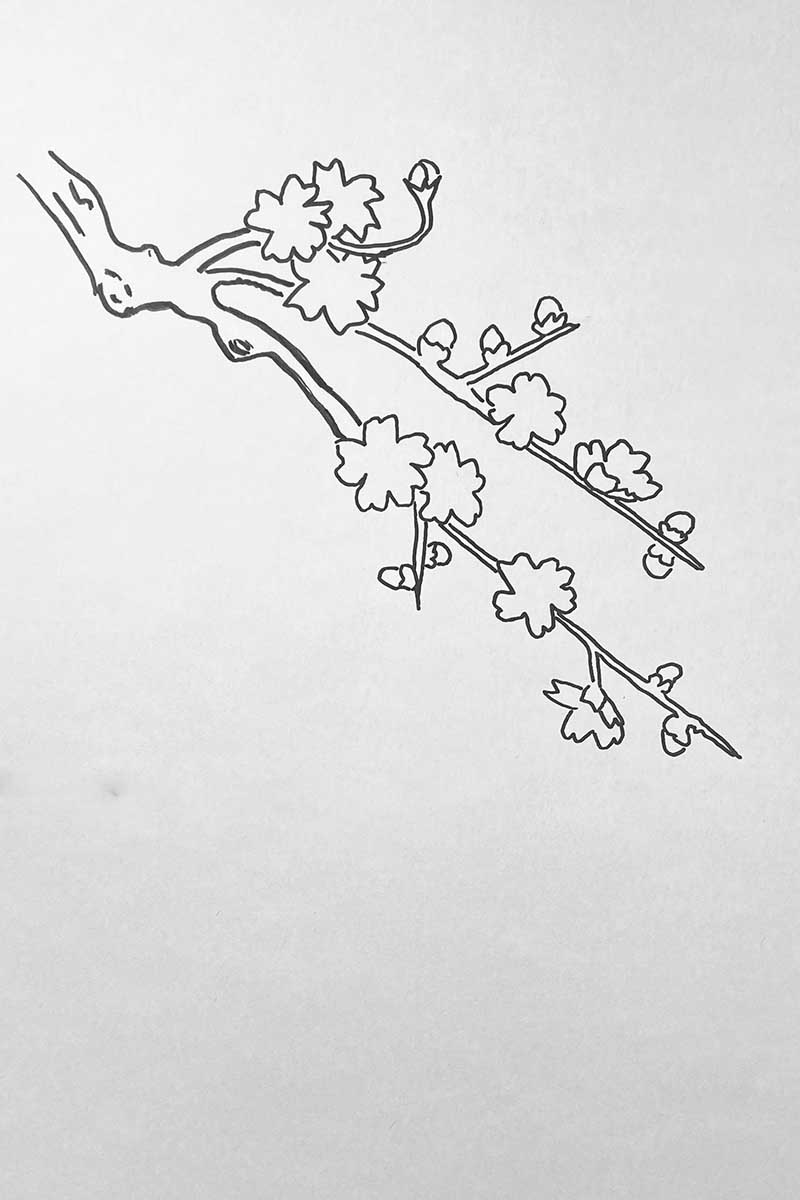
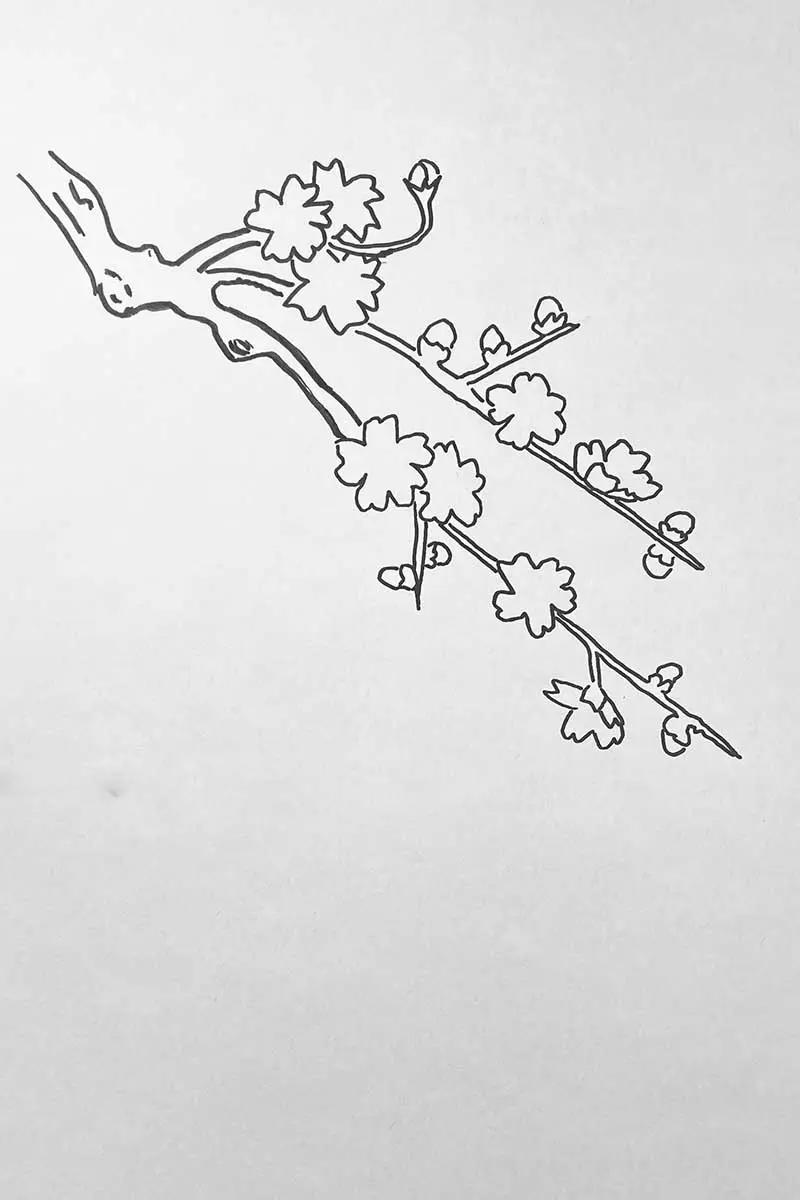
Step 4: Add details to your flower heads and buds. Draw the starburst lines from the centre of your flower head to represent the filament, and add dots for the anther.

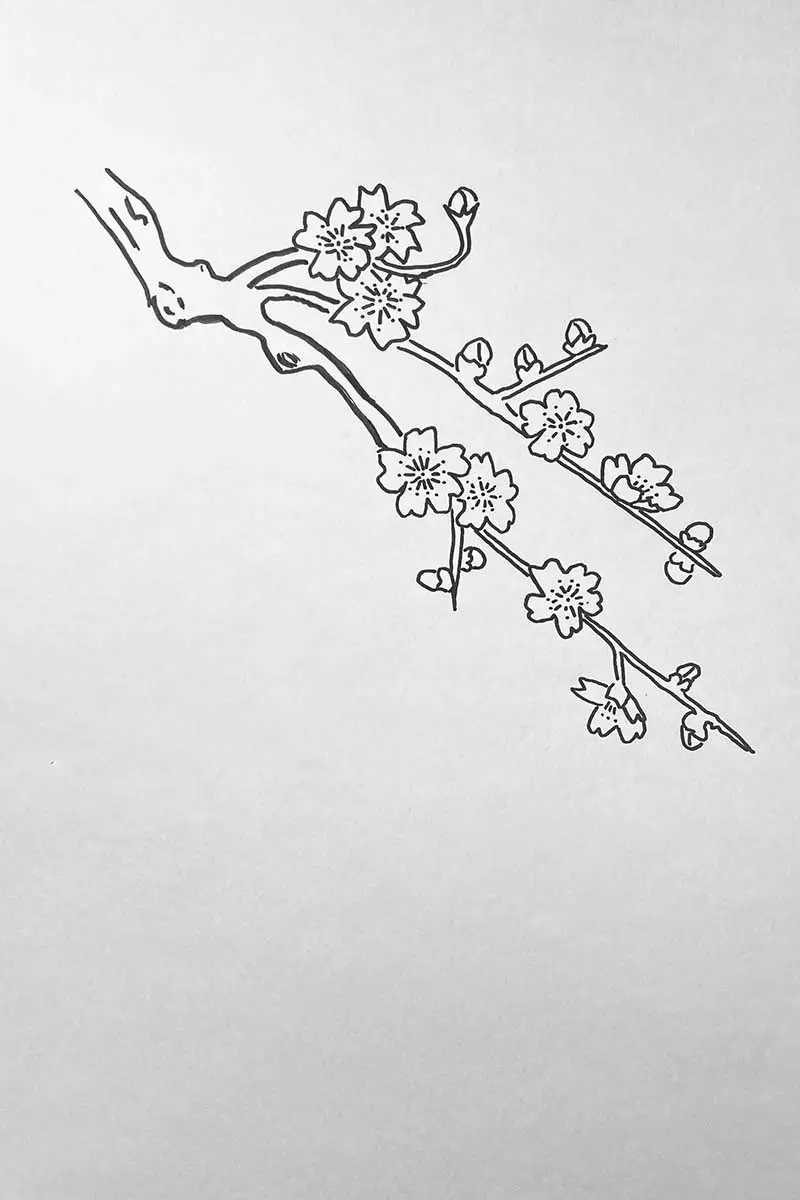
Step 5: Add colour – If you are painting in watercolour, you may want to use a pencil to outline your drawing lightly to avoid a hard edge. However, a hard edge can look good, too, depending on your style.
Here, I have gone for a classic shade of pink, but white would work great, too.


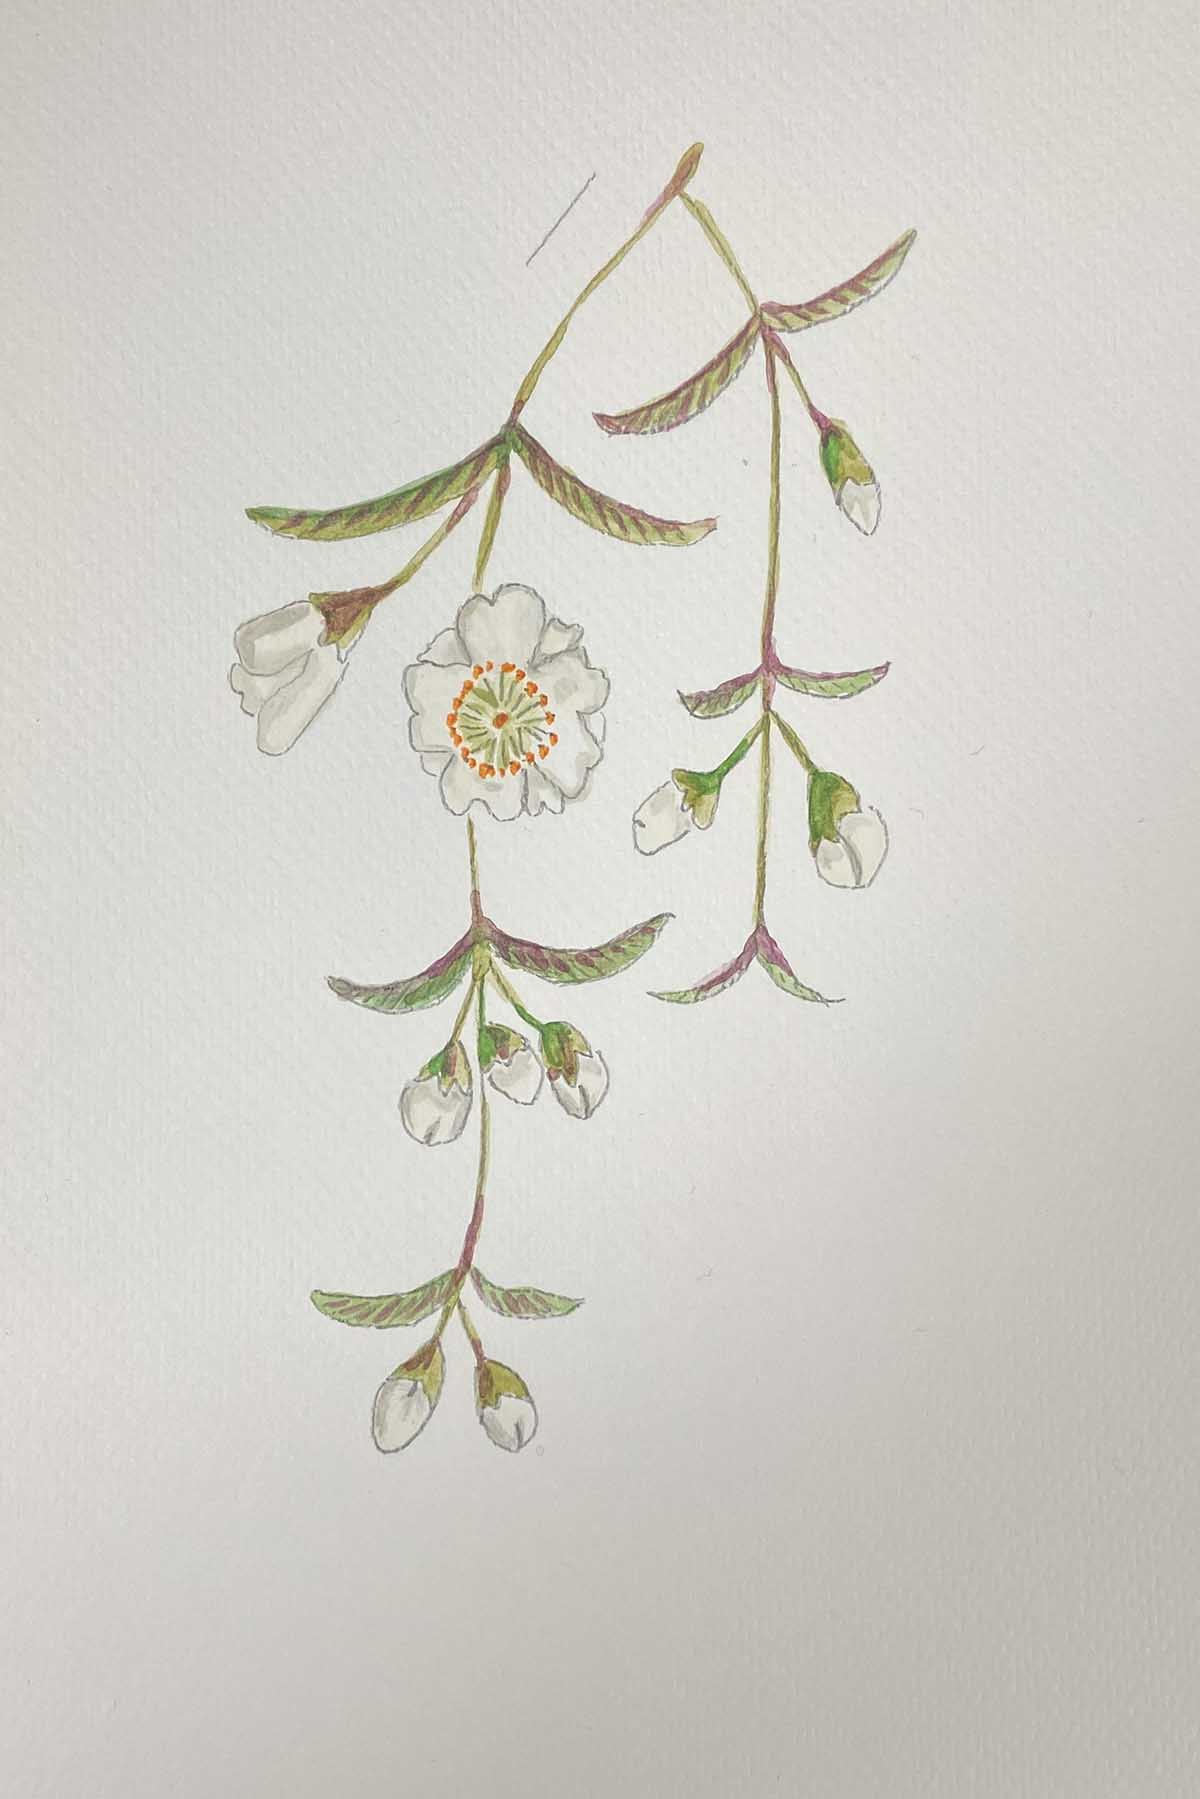
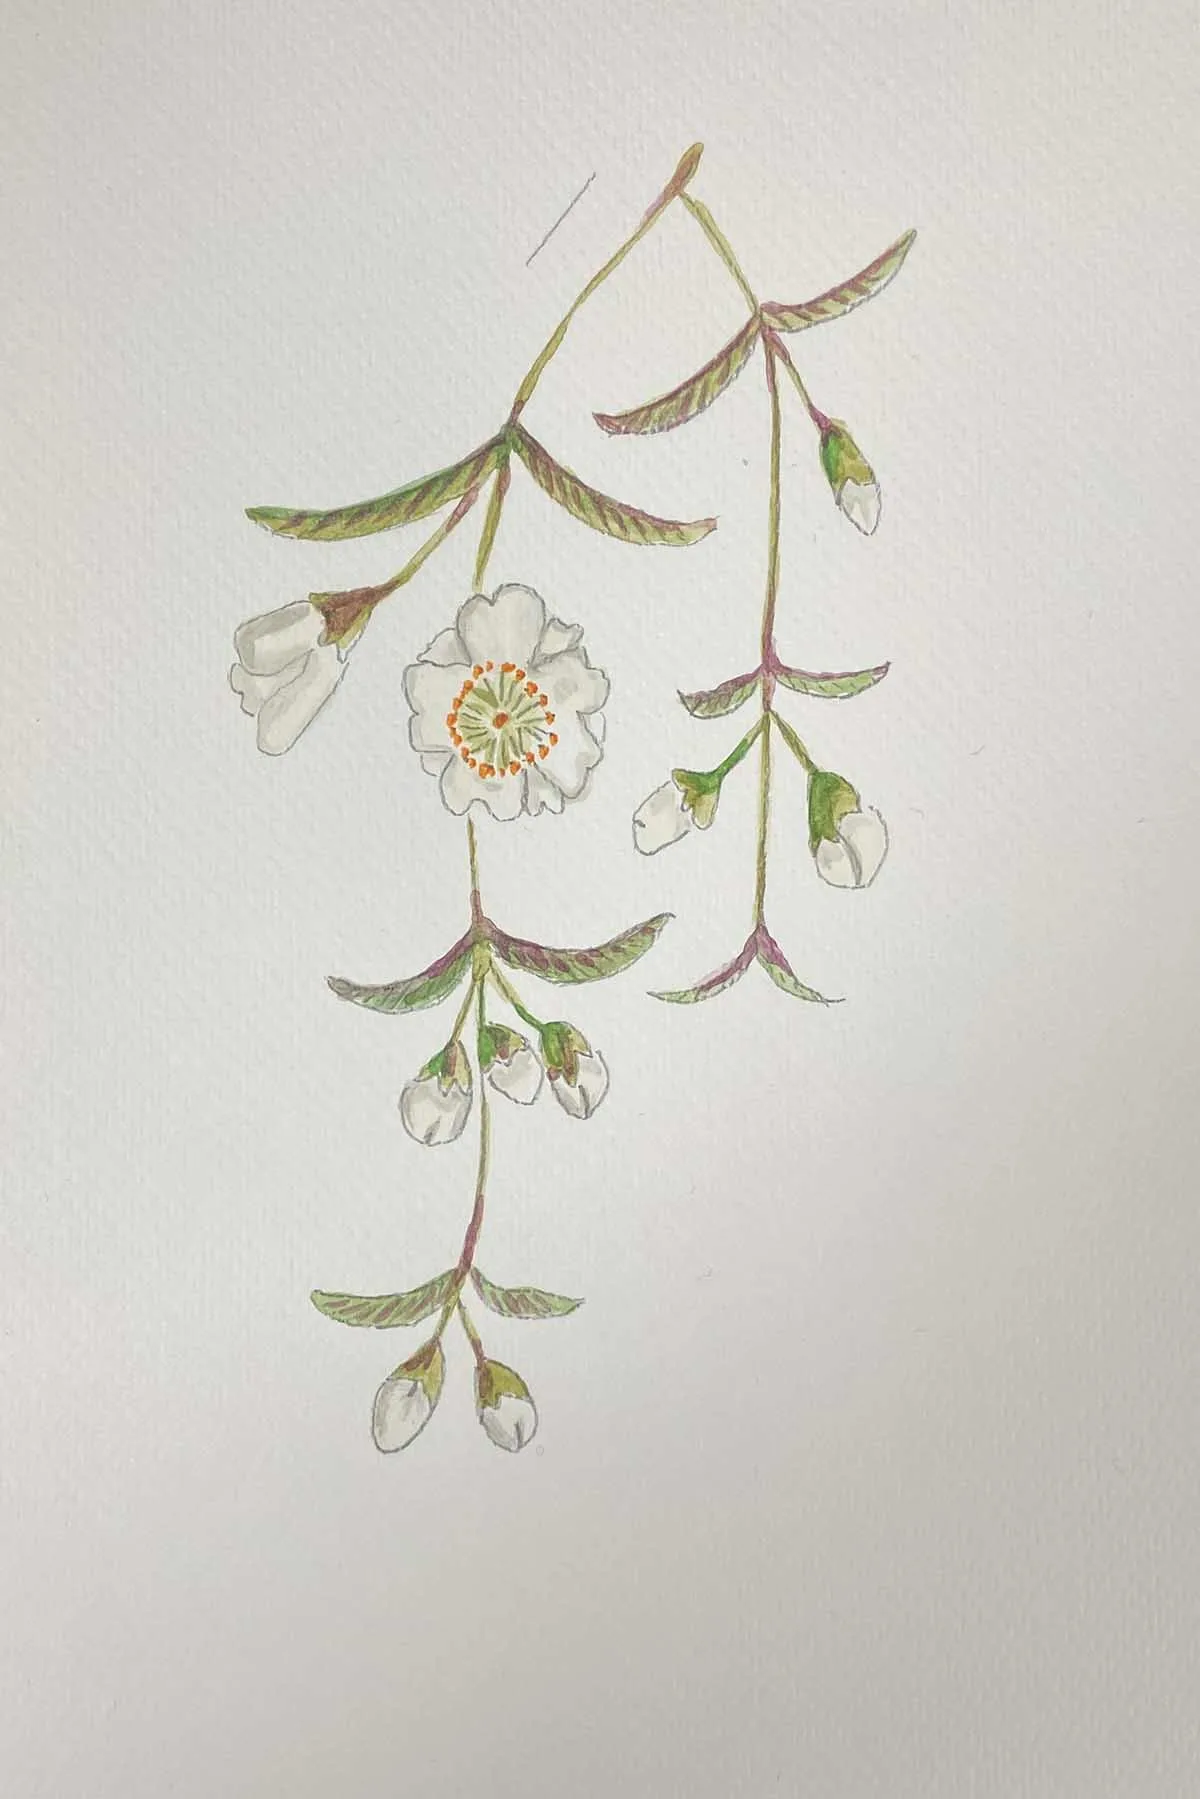
Tutorial 4: Weeping Cherry Blossom Drawing
There is a beautiful variety of weeping cherry trees called Prunus Pendula. The way the branches cascade to the ground in bursts of white or pink blossom is a gorgeous sight.
Step 1: Draw two sweeping lines downward with the outline of pairs of leaves from the middle top of your paper as shown. Think of long half-moon shapes or smiles for the shape of the leaves. Add the outline of the buds and open the flower shape.
I have outlined a double-petal blossom known in Japan as Yae-Zakura. Draw as many buds and open flower heads as you like. I have chosen to go with many buds rather than the flowers available here.

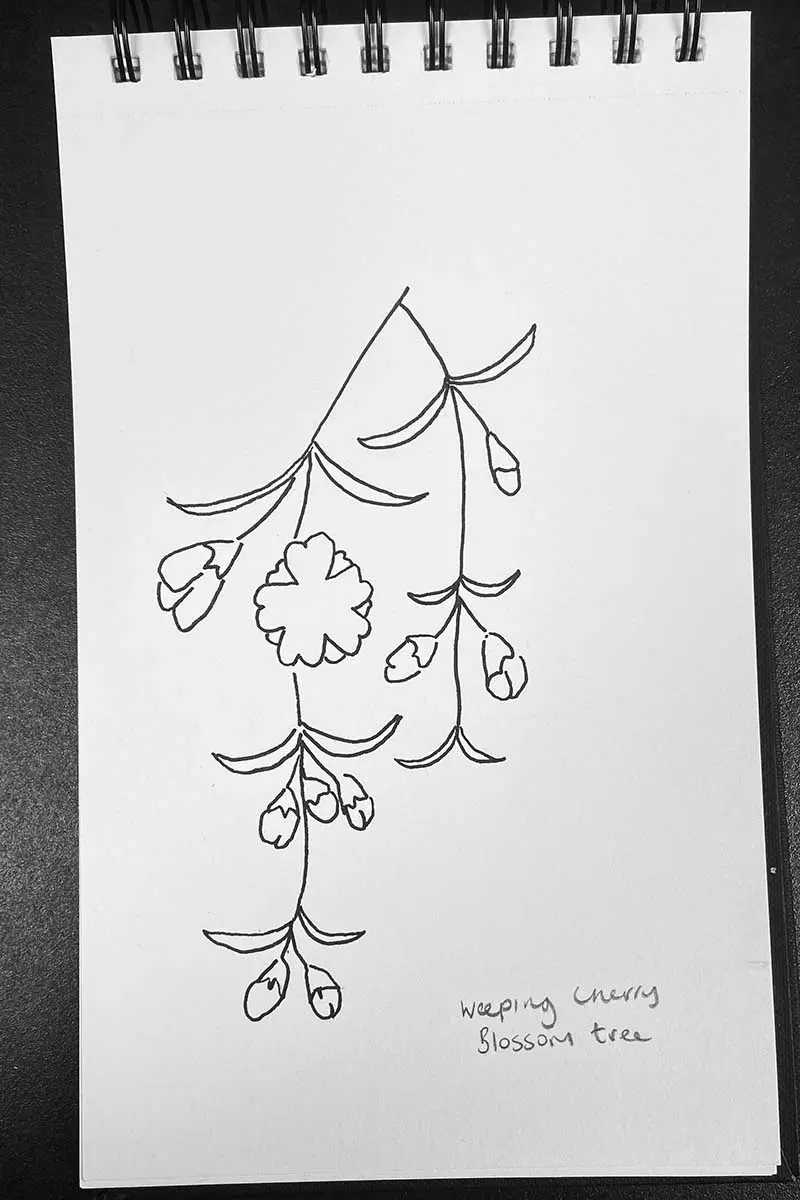
Step 2: Draw the details of lines onto your leaves. Draw starburst lines from the centre of your open flower head to represent the filament and dots for the anther.
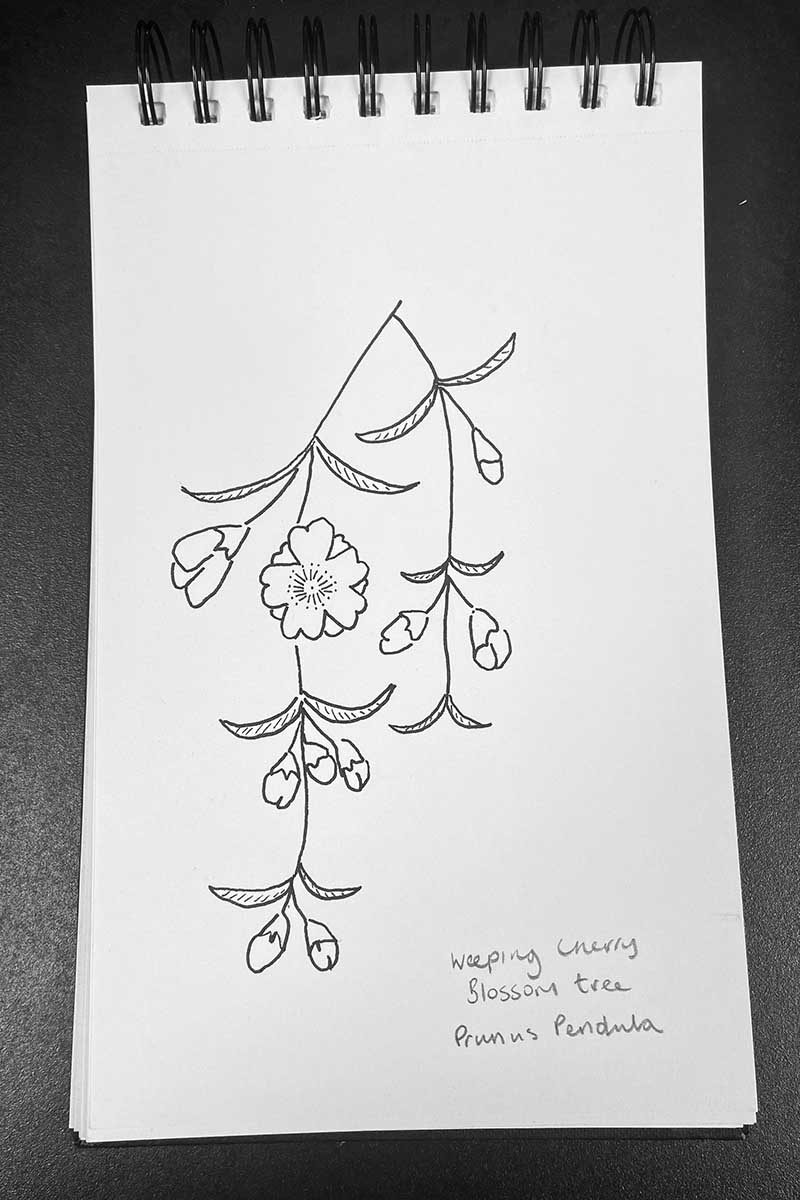

Step 3: Add colour – here, I have gone for a subtle white with a pop of yellow in the centre for the filament and anther as I like the contrast with the green leaves, but pink would work great, too.
Drawing Tutorial 5: Double Petal Cherry Blossom with Leaves
Close up drawing of double Cherry Blossom (Yae-Zakura) with the leaves.
Step 1: Starting from the upper middle of the left-hand side of your paper. Draw your first branch with the outline of two large leaves and a lovely outline of a side view of a double-petal Cherry Blossom.
Step 2: Draw your second branch with the outline of a large open double blossom flower head shape.


Step 3: Draw your final branch from your first branch. Then, outline another side view of a blossom head, large leaves and a couple of buds.

Step 4: Add details to the leaves, starburst lines, and dots for the filament and anther on the blossom.

Step 5: Add pink or white, which will work great. Here, I went for pink and outlined my image in black fine-line pen to give the image more of a graphic quality like an illustration.

Woodblock Style Cherry Blossom
Cherry blossoms are frequently featured in traditional Japanese woodblock paintings, whose representation often takes on a more stylized form. In these classic artworks, the petals of the cherry blossoms are typically depicted with a distinctive, angular appearance, differing from their naturally soft and rounded edges.
Step 1: Draw the outline of your branch with a blossom head and bud shape. Make the petal shapes quiet sharp and pointy rather than round for a more stylised woodcut effect. Continue to add two further blossom shapes keeping the petals pointy.

Step 2: Add the details to the blossom of lines and dots for the filament and the anther.

Step 3: Add colour. I went for pink and used a black fine-line pen to outline the drawing to make it look like a graphic illustration. White blossoms would also look great, and you can extend the branch and add more flowers to complete the picture in the same style.


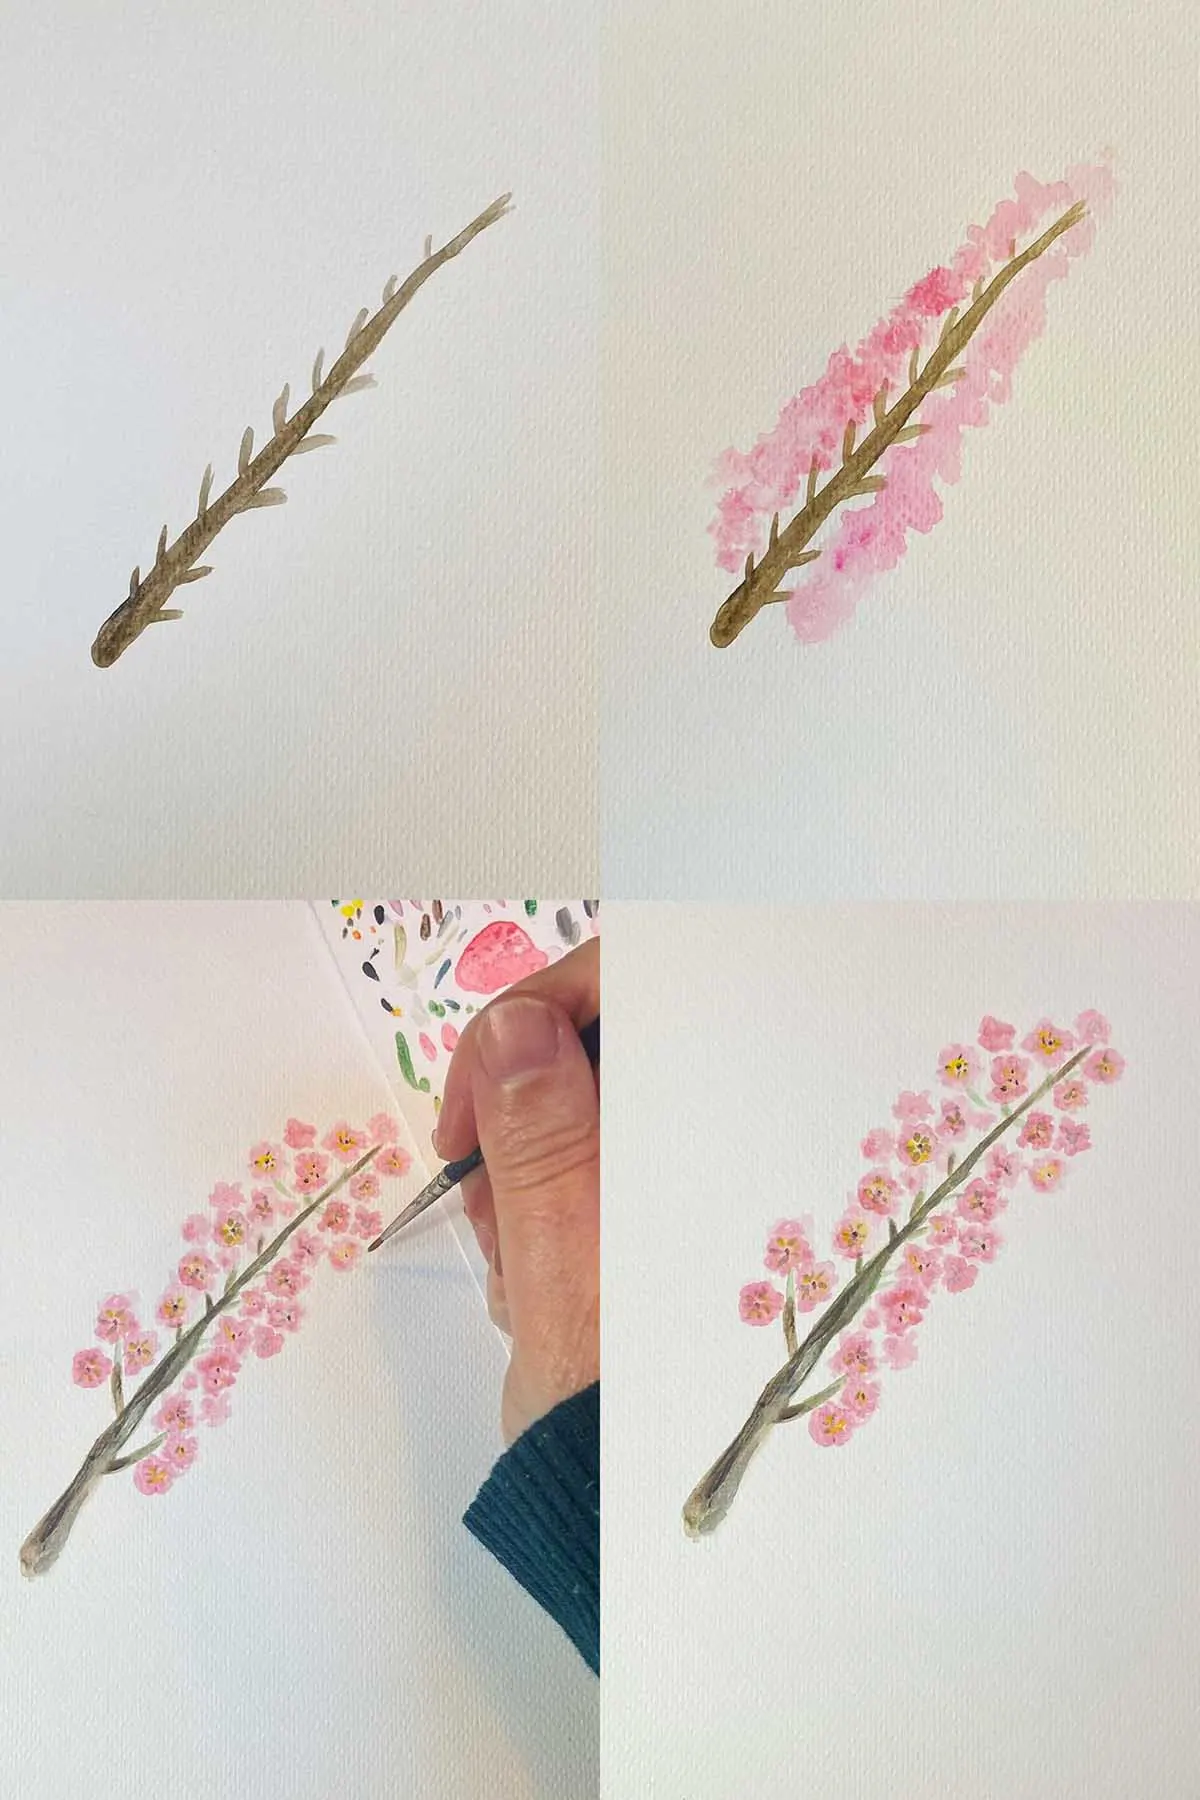
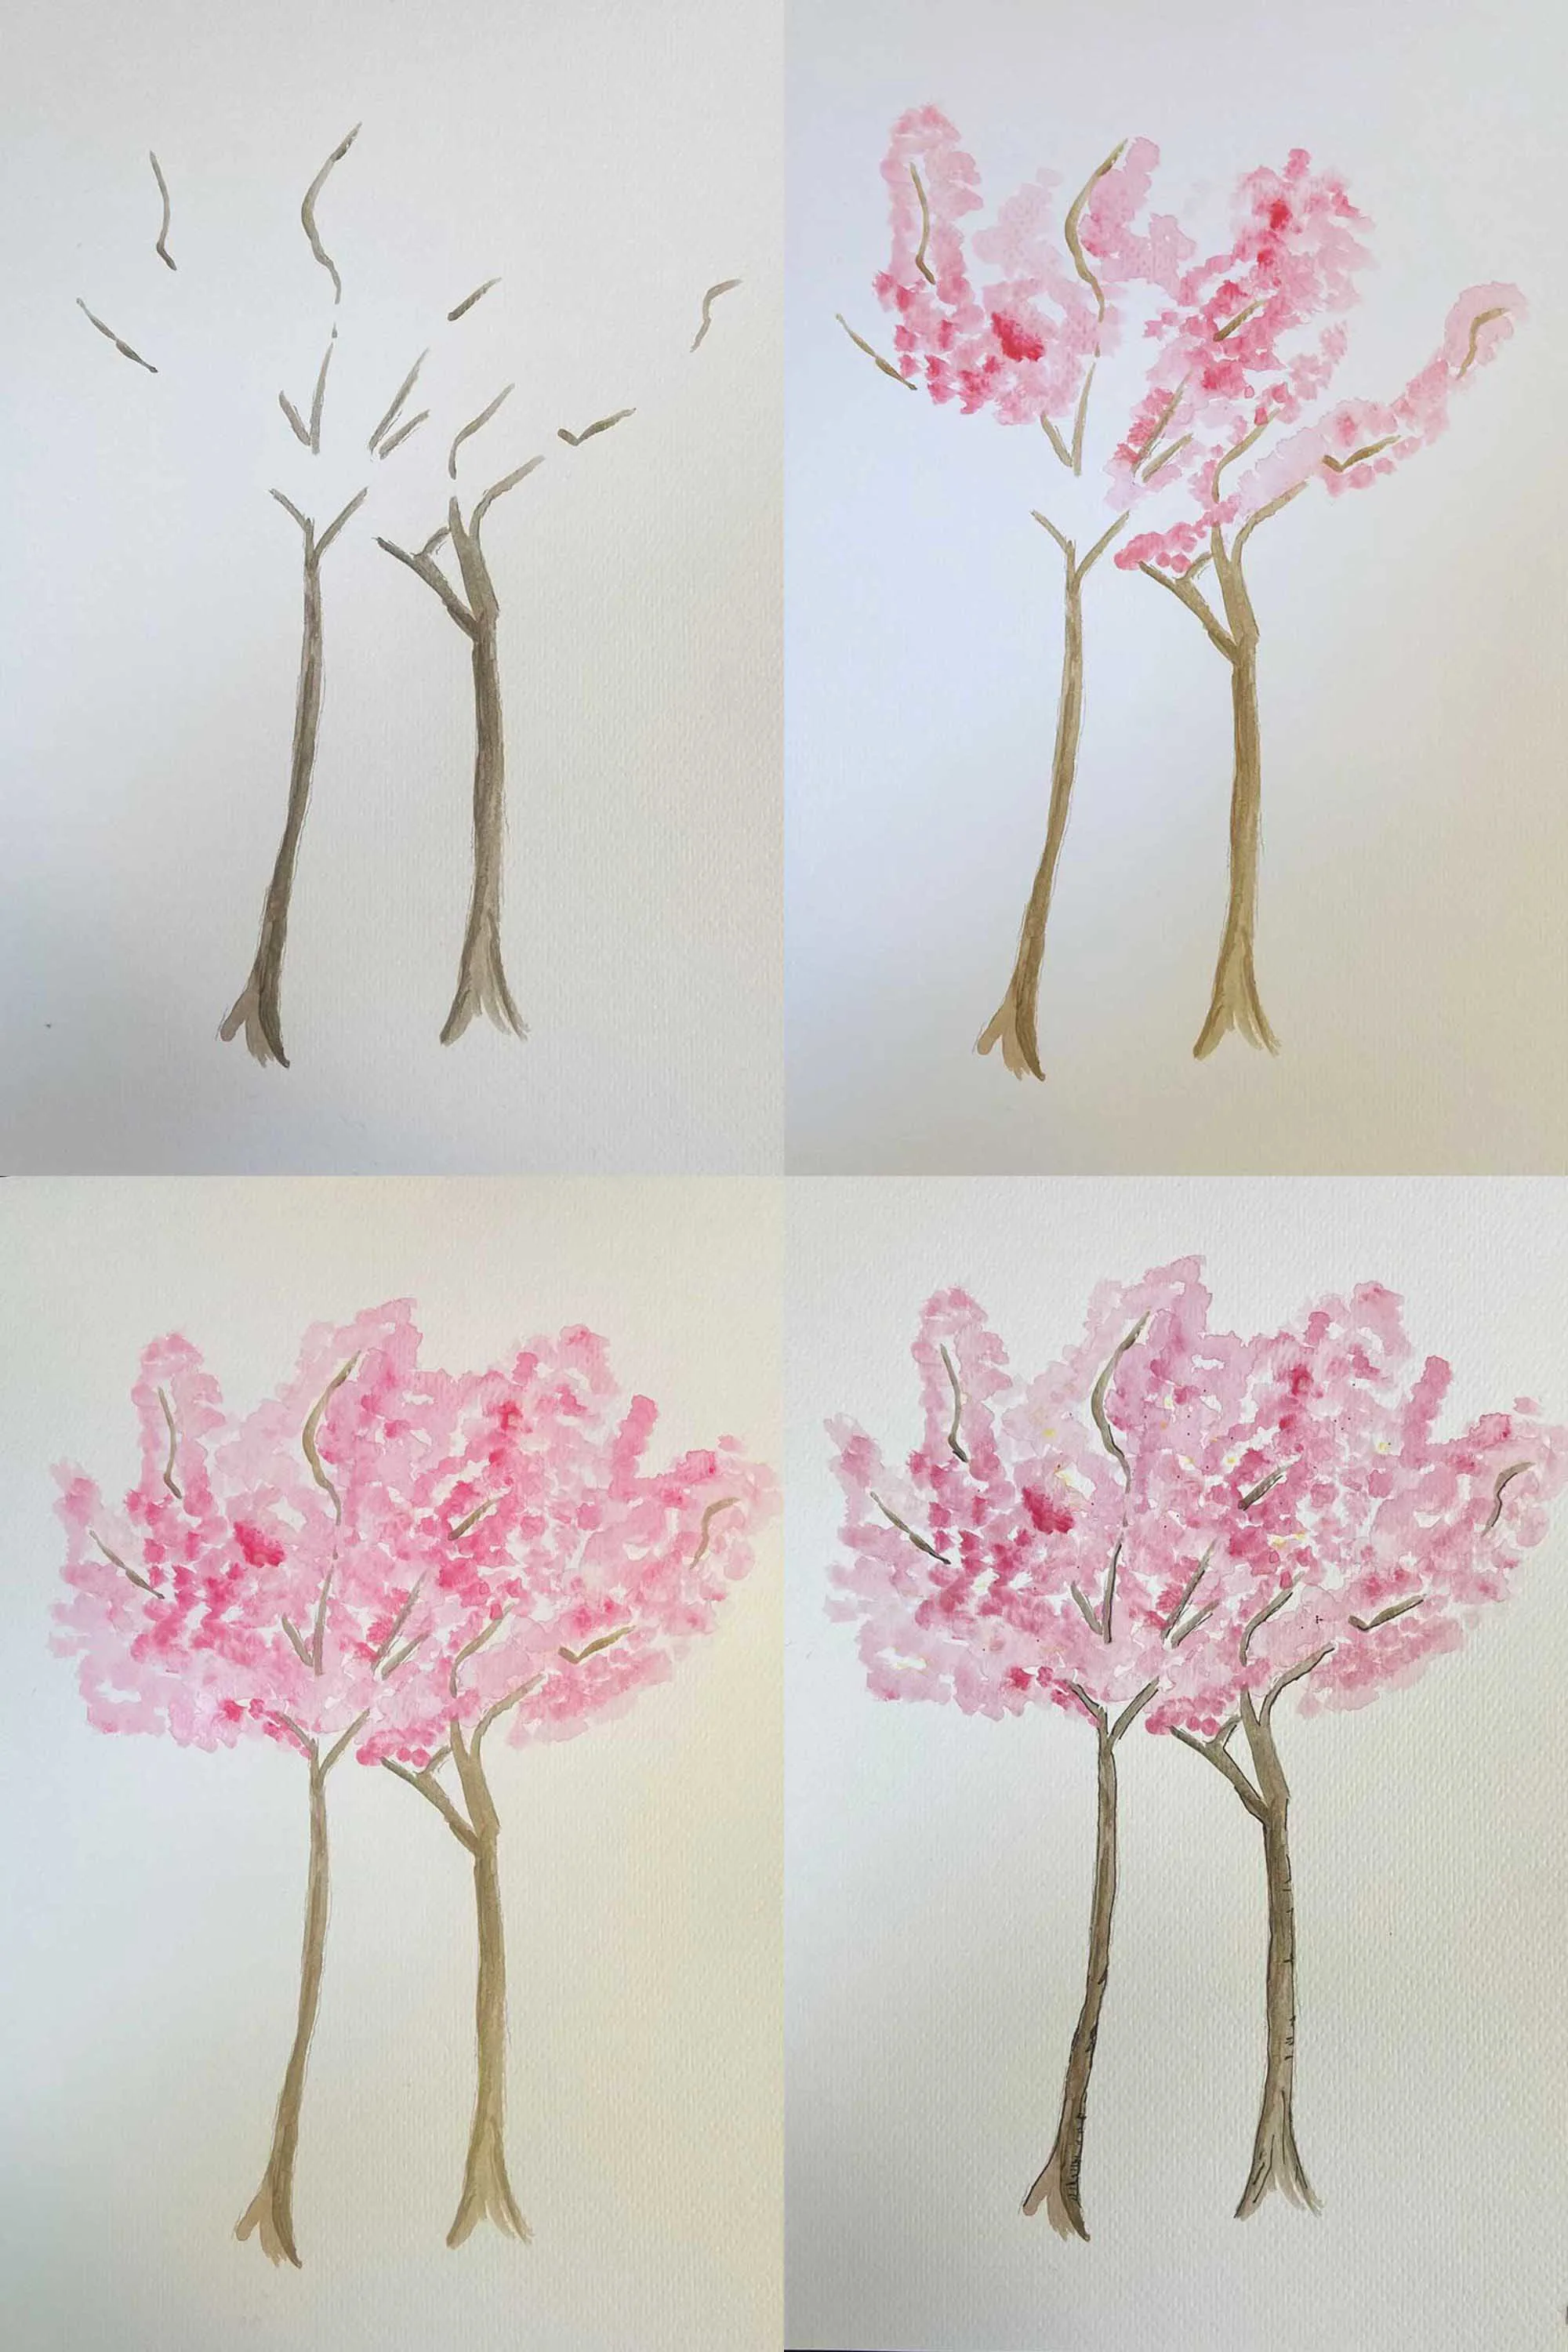
Watercolour Impressionist Style Cherry Blossom Branch and Tree
Cherry blossoms are great for impressionist painting, a style made famous by Claude Monet, an 18th-century artist known for his beautiful cherry blossom paintings.
I used this style using watercolours, first with a cherry blossom branch and then a whole Sakura tree. This way of painting is quick and makes lovely pictures quickly. Its simple style captures how cherry blossoms look when fully bloomed and is very appealing.
The Cherry Blossom branch
Step 1: With your paintbrush, pick a shade of brown that you like and paint a simple upward stroke with little side branches to create your branch.
Step 2: Clean the brush. Then, pick some shades of pink paint and dab the paintbrush to create the blooms.
Step 3: Add a few details by adding a few dots of yellow and black for the centre of the flowers.

The Sakura Tree
Step 1: Following the same technique as for the impressionistic Cherry Blossom branch, choose a shade of brown to paint the frame of your tree. If you paint the tree’s upper branches with gaps as shown, it will look more effective when you add the blossom.
Step 2: Now clean the brush and choose some shades of pink. I like to use light and darker shades as they help add variation to the blossom. Then, dab your brush to create the blossom. You can experiment with this and add as much blossom as you like, as it’s a very loose style.
Step 3: Finally, add a few subtle dabs of yellow paint for details on the cherry blossom. To add depth to the picture, add shading onto the trunk once the painting is dry, and outline the tree trunk and branches with a black fine-line pen.

Other Related Posts
If you are looking for more drawing tutorials, check out the mushroom drawing easy tutorials and how to draw hibiscus and easy daffodil drawings.
For more reference ideas don’t forget to look at all the amazing vintage flower illustrations on the site.
I decided to focus on drawing cherry blossoms because they are among my favourite flowers and hold significant cultural importance in Japan, a culture that deeply fascinates me.
You can explore an extensive range of cherry blossom illustrations on our site, particularly in our Japanese patterns and design collections, including notable works from the Shin-Bijutsukai and the Bijutsu Sekai.


If you fancy, you can Buy Me A Coffee Here.
Julie
Sunday 28th of January 2024
I love this kind of step by step instruction, thank you. When I was sorting my grandma's old paintings a few months ago I discovered she was a huge fan of painting cherry blossom too. She practiced and practiced so I had quite a bit to work with with my upcycling projects. We kept a couple of the best versions as they were and they are now framed an on display. It's lovely to see so many different styles and techniques.
claire
Monday 29th of January 2024
Thank you. There will be more flower tutorials to come to match the vintage botanicals on the site. I bet your Grandma's cherry blossom painting were gorgeous.
Pat @ Mille Fiori Favoriti blog
Saturday 20th of January 2024
beautiful! Thank you for the instructions
claire
Sunday 21st of January 2024
Thank you, you're welcome; they are a lovely flower to draw.
EsmeSalon
Wednesday 17th of January 2024
You make it look so easy, Thanks for sharing I visited you via TEAM CREATIVE CRAFTS LINK PARTY #181 My links: 72+73. We will be honored if you share your links with us at SeniorSalonPitStop. Link under BLOGGING.
claire
Thursday 18th of January 2024
Thank you for visiting. Cherry Blossoms are fun to paint for spring projects.