
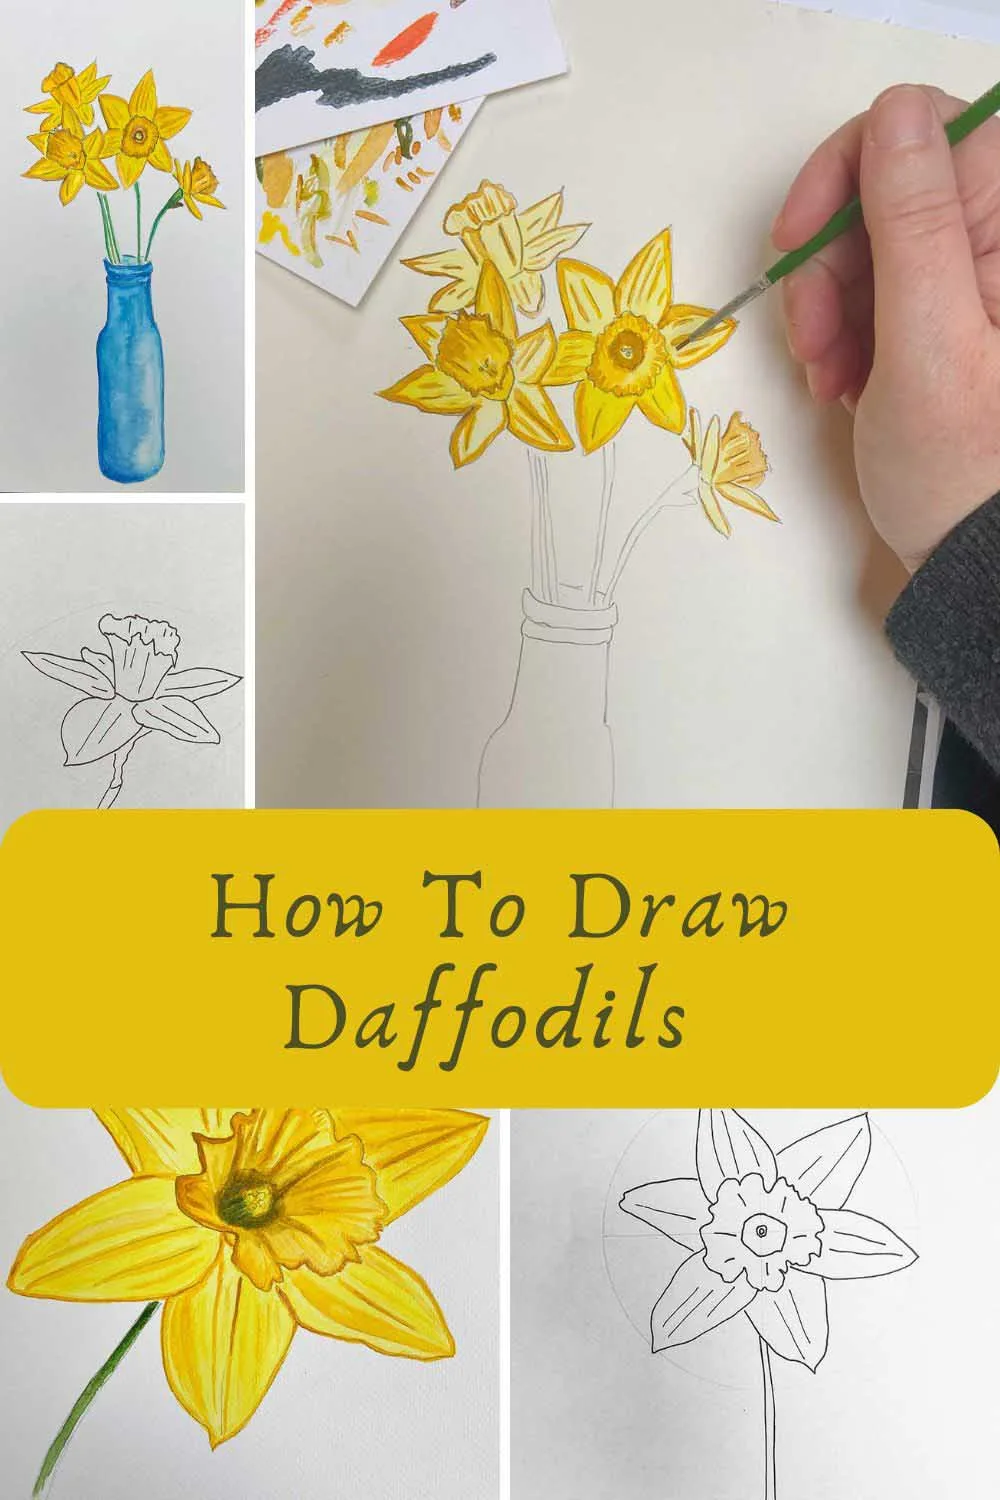
Embrace the charm of spring by learning how to draw daffodils from different viewpoints.
Spring is here when the daffodils start popping up, bright and cheerful, telling us that warmer days are on the way. Daffodils are all about new starts and happiness.
They even remind us that Easter’s not far off, and they’re a sign of friendship too. Imagine my joy when my friends handed me a beautiful bunch of these sunny flowers. I couldn’t wait to get my pencils and paints out! I always love drawing from real life, so getting flowers is the perfect chance for me to do just that.
But you know what else is helpful? Viewing vintage daffodil flower prints is also a great way to learn and get inspiration. When looking at a vintage daffodil flower drawing, it can be handy to study and try to look at the shading and techniques used and understand the style that appeals to you.
Here is my tutorial on drawing Daffodil flowers from different perspectives, finishing up with a bunch in a vase. Whether you’ve got fresh daffodils in front of you or you’re browsing through old prints for inspiration, let’s have fun drawing them together!
Daffodils are also known as Narcissus.
Daffodil Drawing Step-by-Step Tutorial
Tutorial 1- Daffodil Front perspective
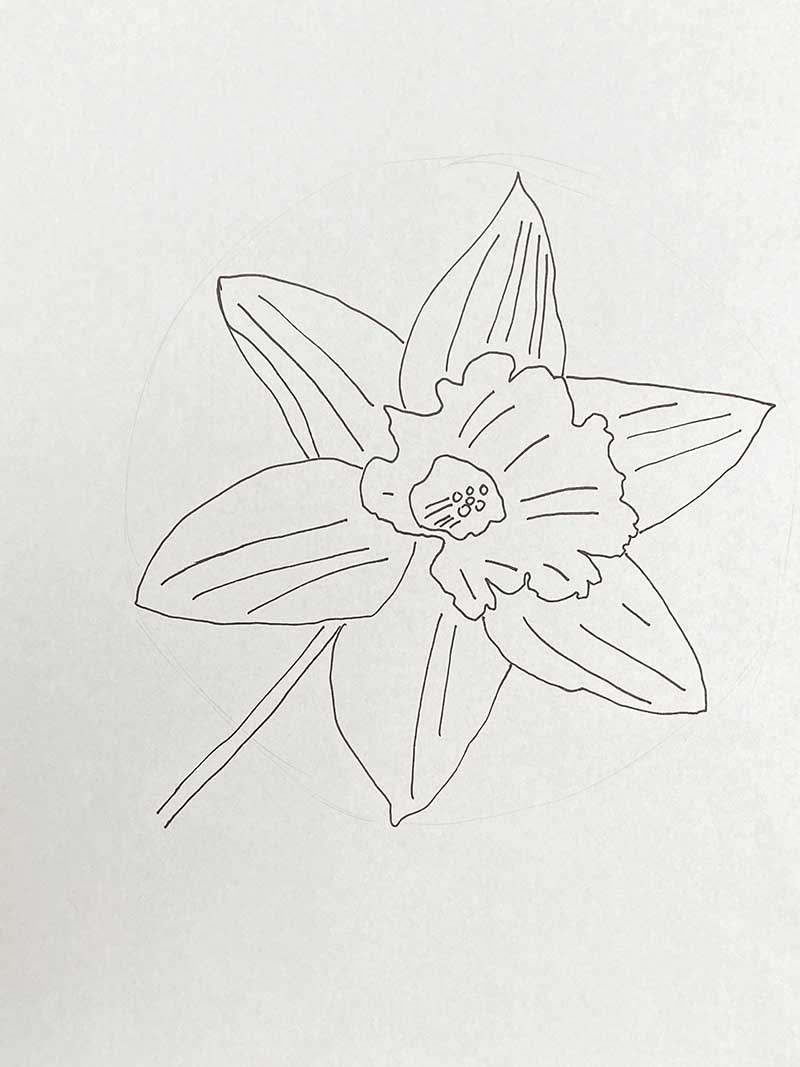
Drawing a Daffodil from a front perspective is more challenging than a side view, as it’s difficult to convey the three-dimensional corona/trumpet at the centre of the flower—this is best achieved in the colouring stage. However, I always like to start learning to draw a flower where all the petals are on view to understand its essential shape.
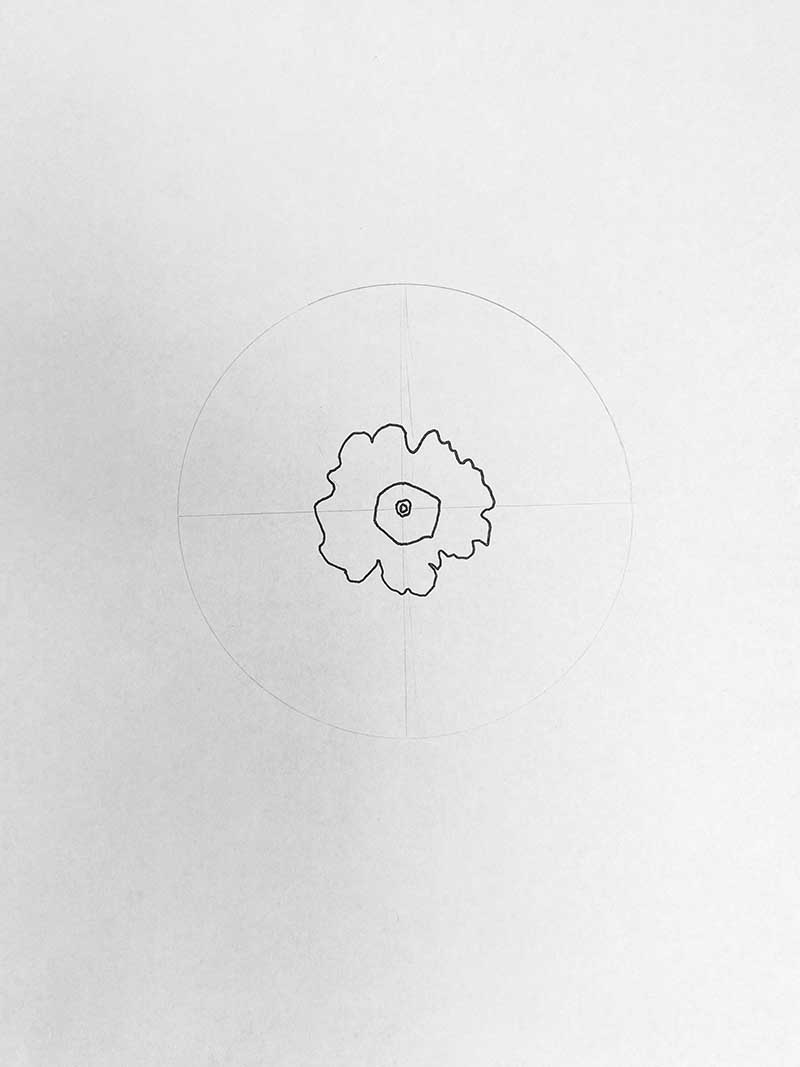
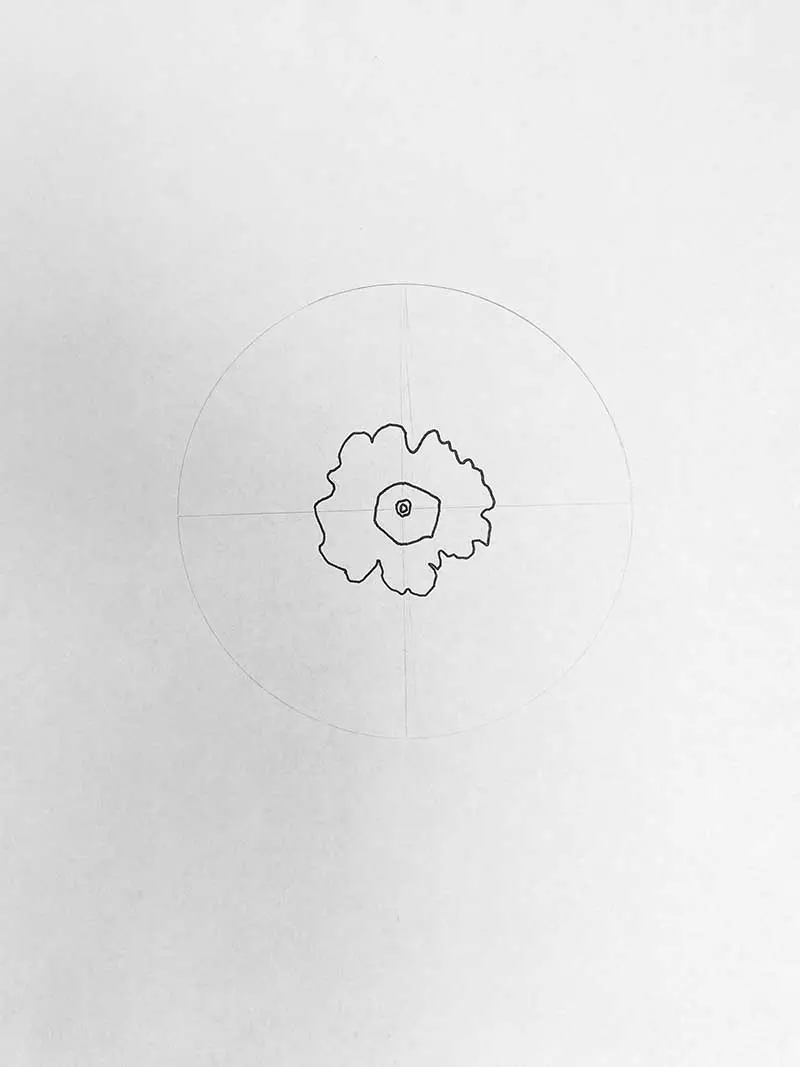
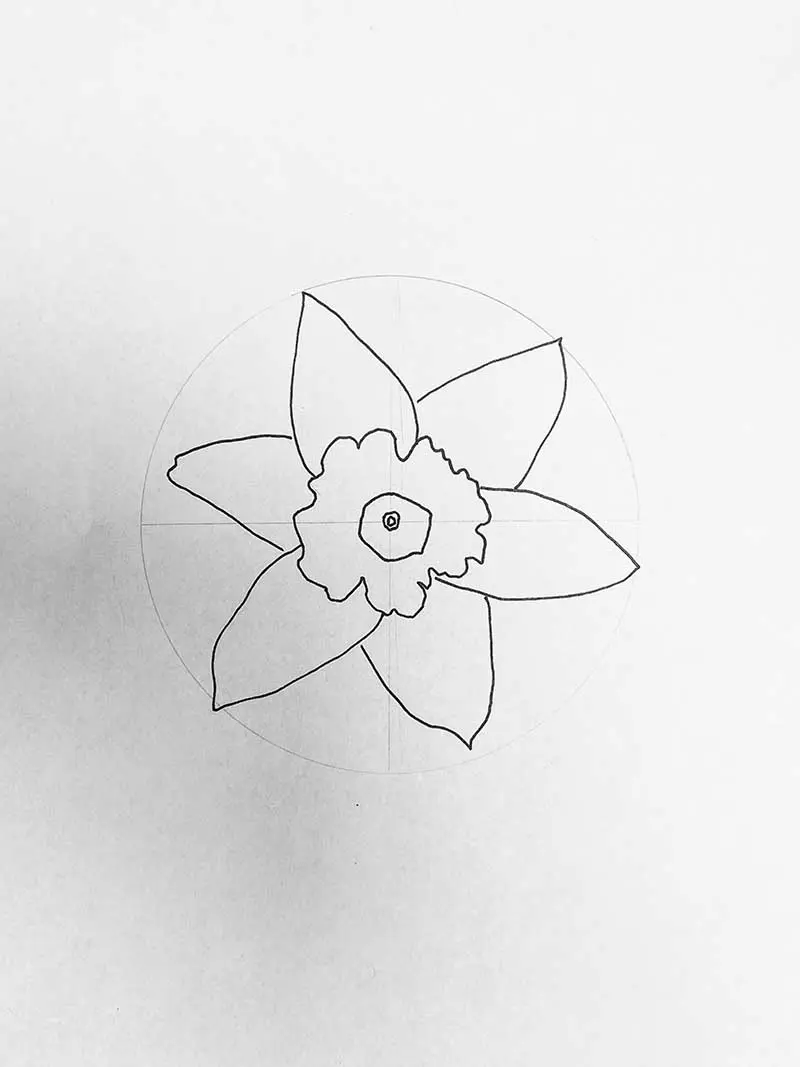
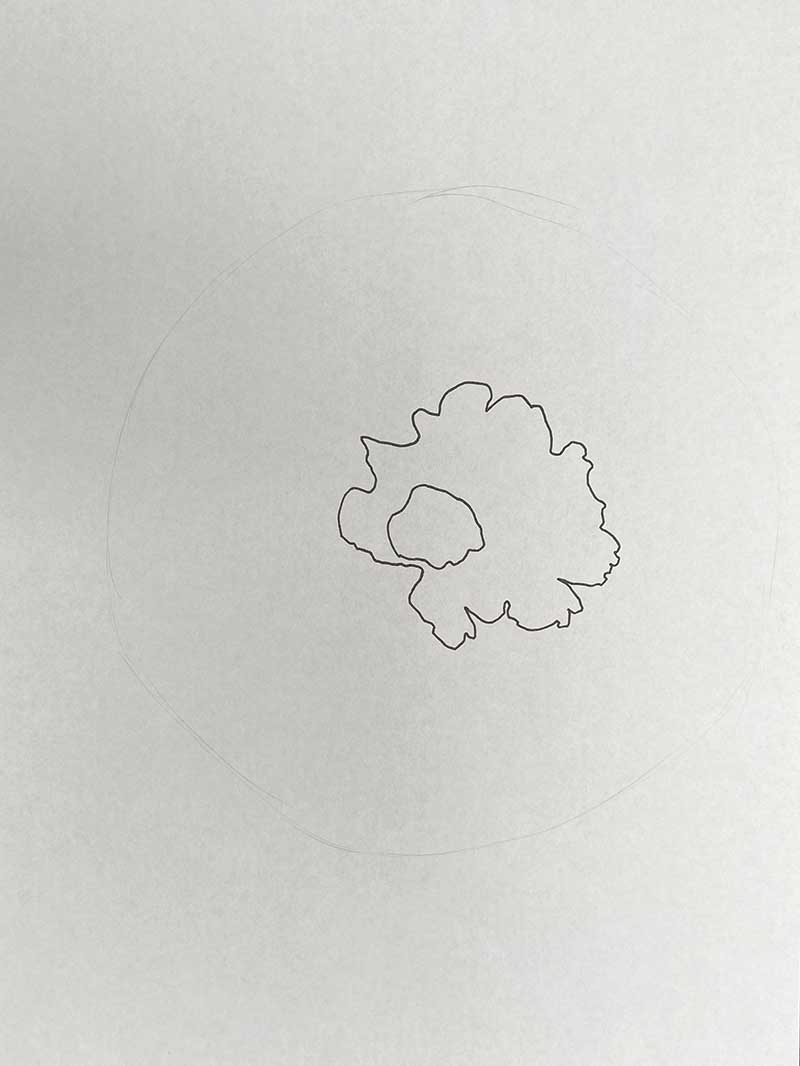
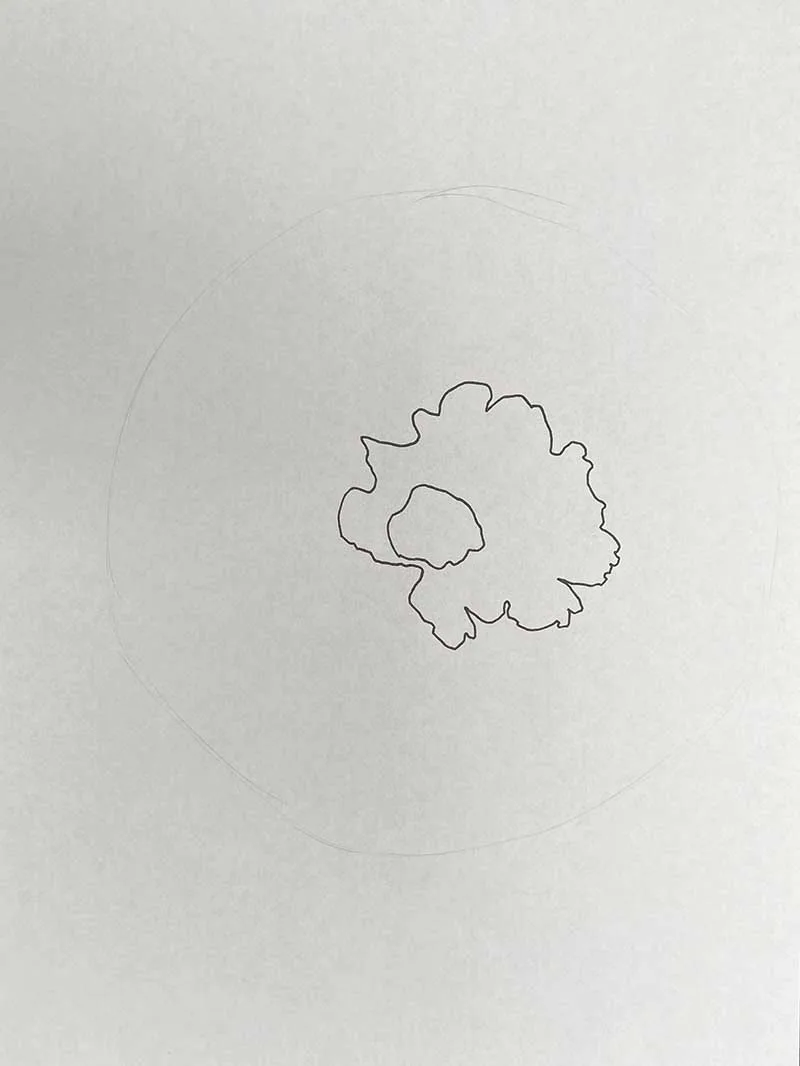
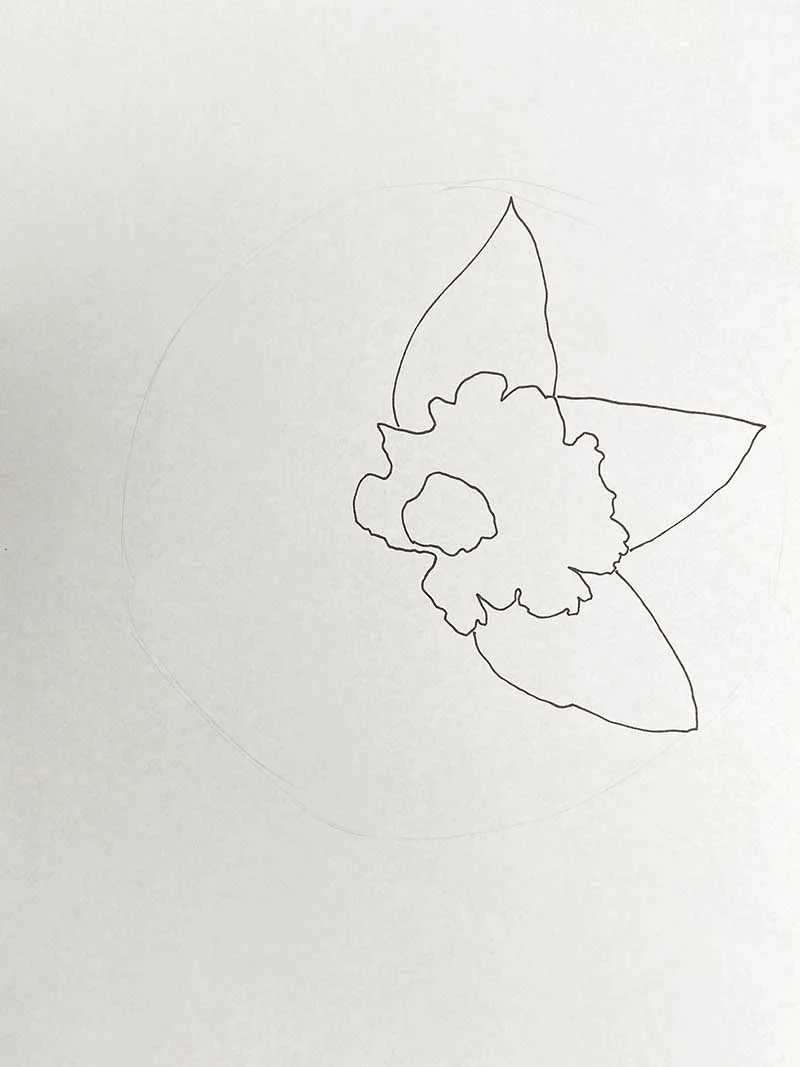
Step 1: To start with a light pencil, draw a circular shape to represent the size of your flower head to help guide you. Next, in the centre, draw the centre of the Daffodil flower, which consists of four circles, the smallest two circles representing the stigma and the third small circle to guide your shading as this is the central part of the flower head; finally, the outer wavy circle is the edge of the corona or trumpet which is the distinctive centre of the Daffodil.
(Note: I am drawing in pen, but it’s best to draw a soft line in pencil if you want to add watercolour.)
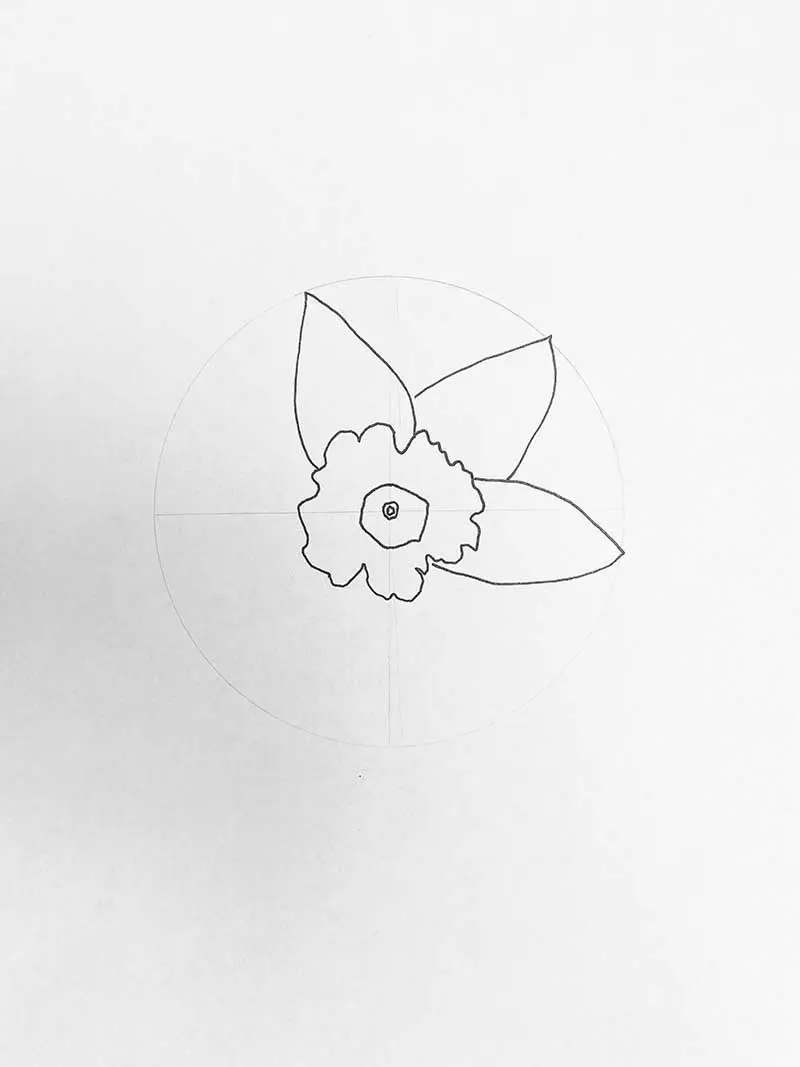
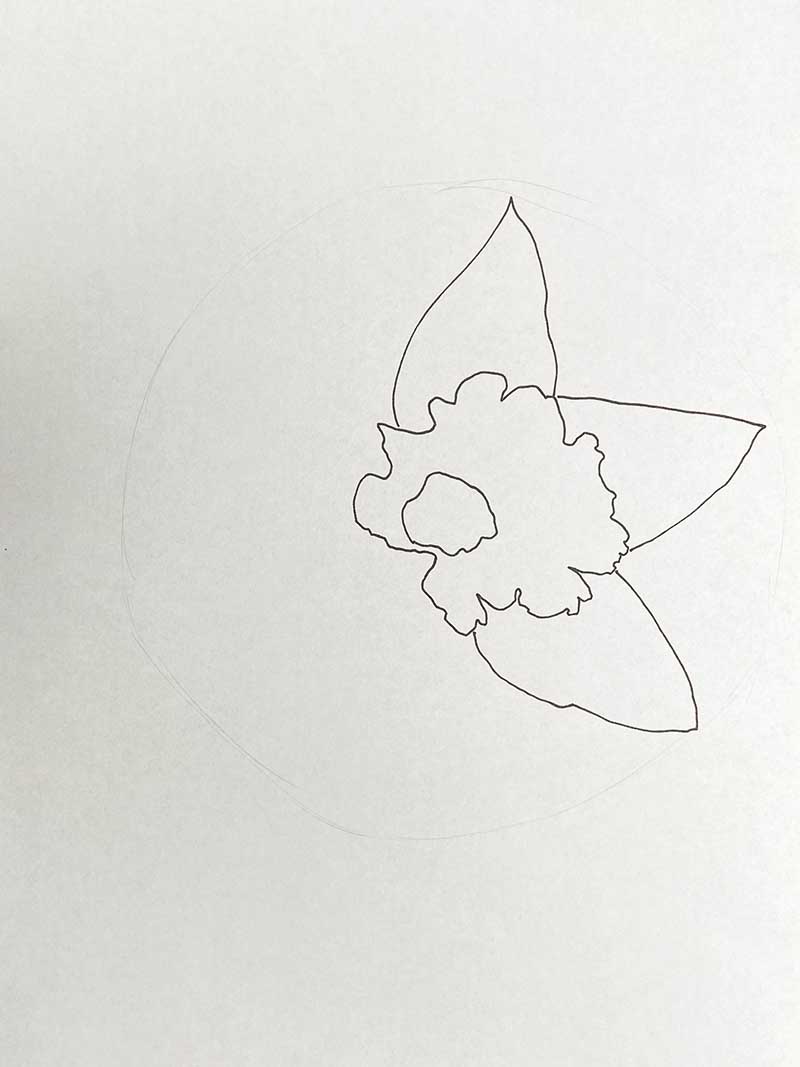
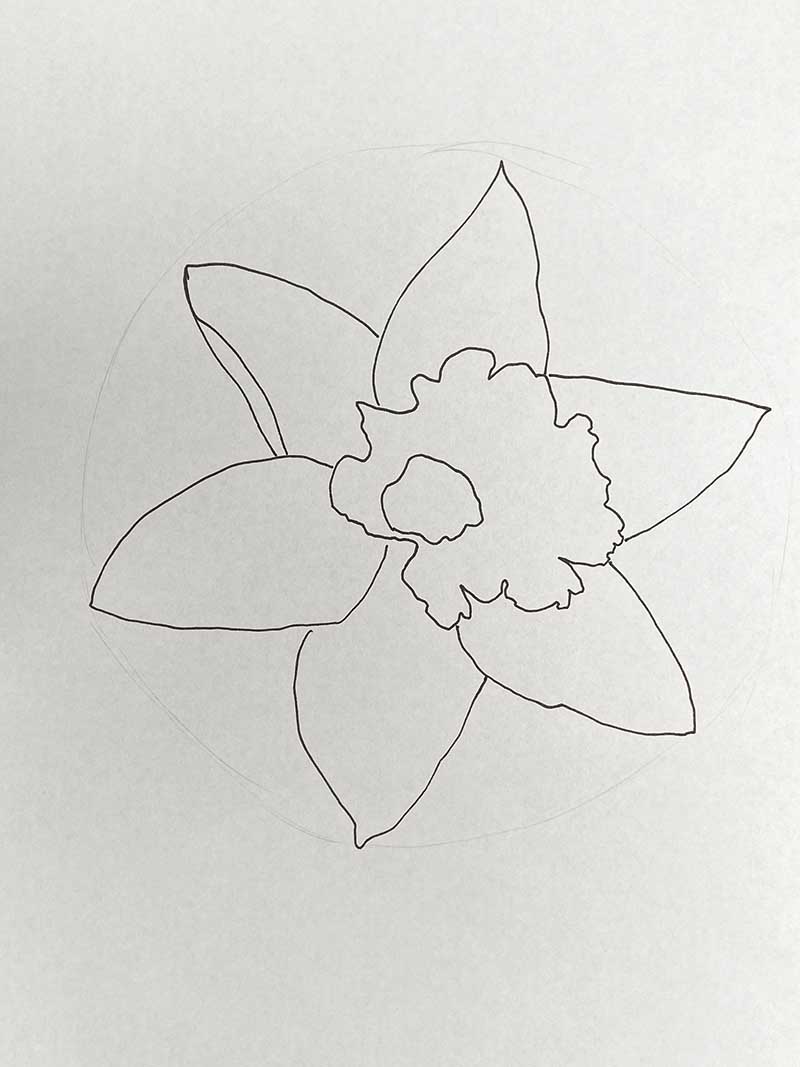
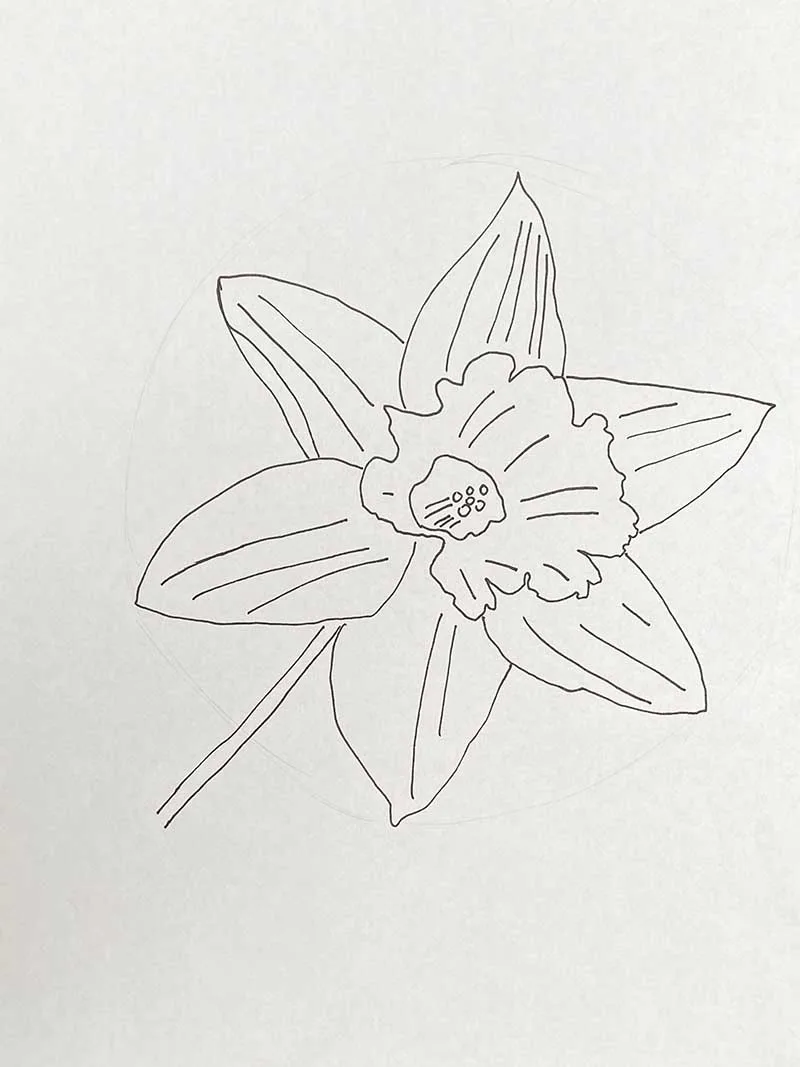
Step 2: Now add the rest of the petals step by step. Six petals have a triangular shape and overlap. Use the circle to guide your spacing.

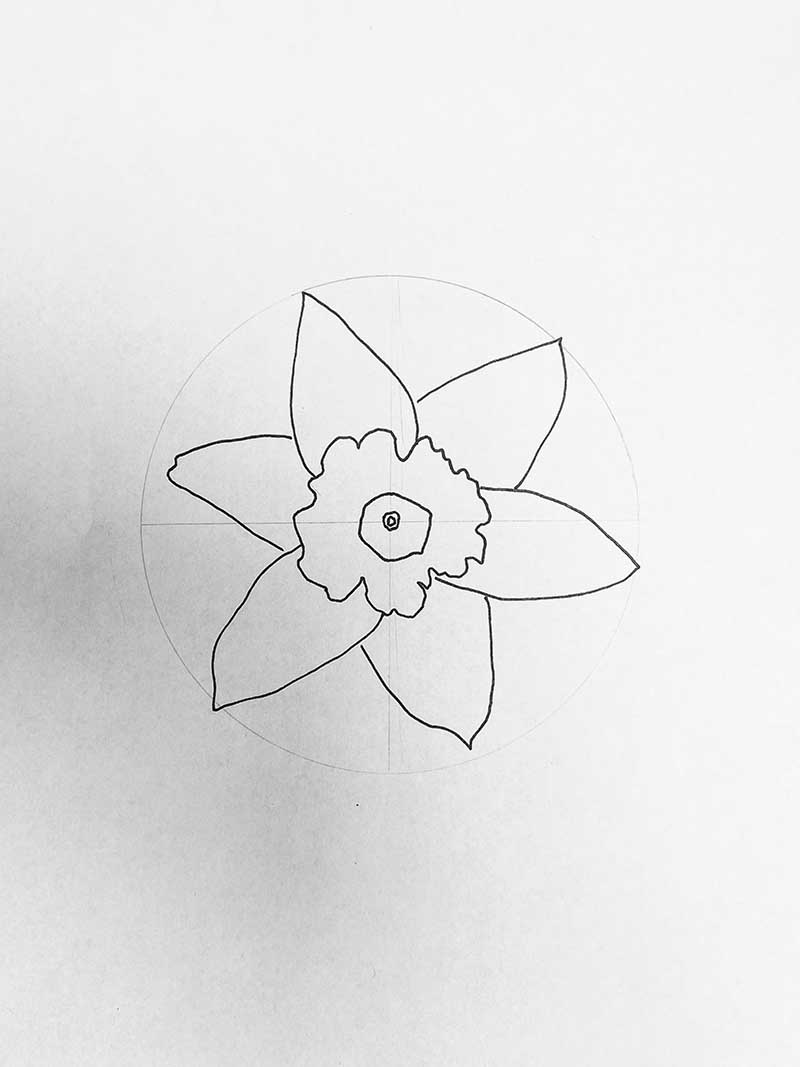
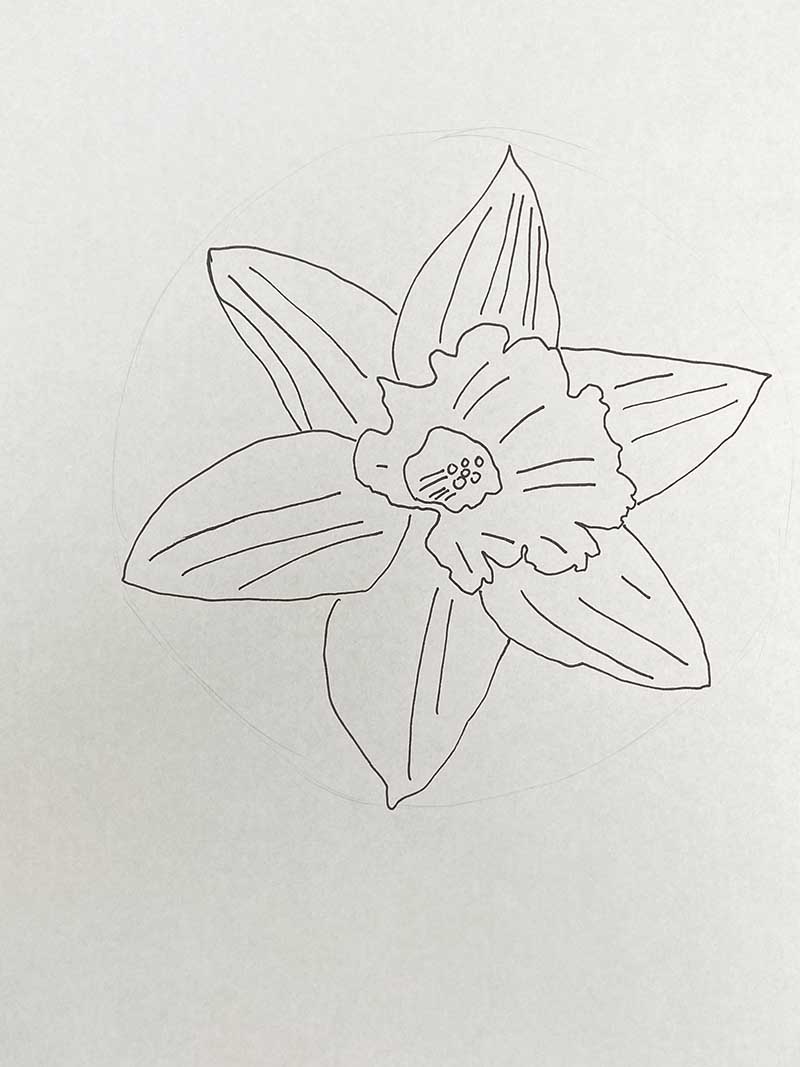
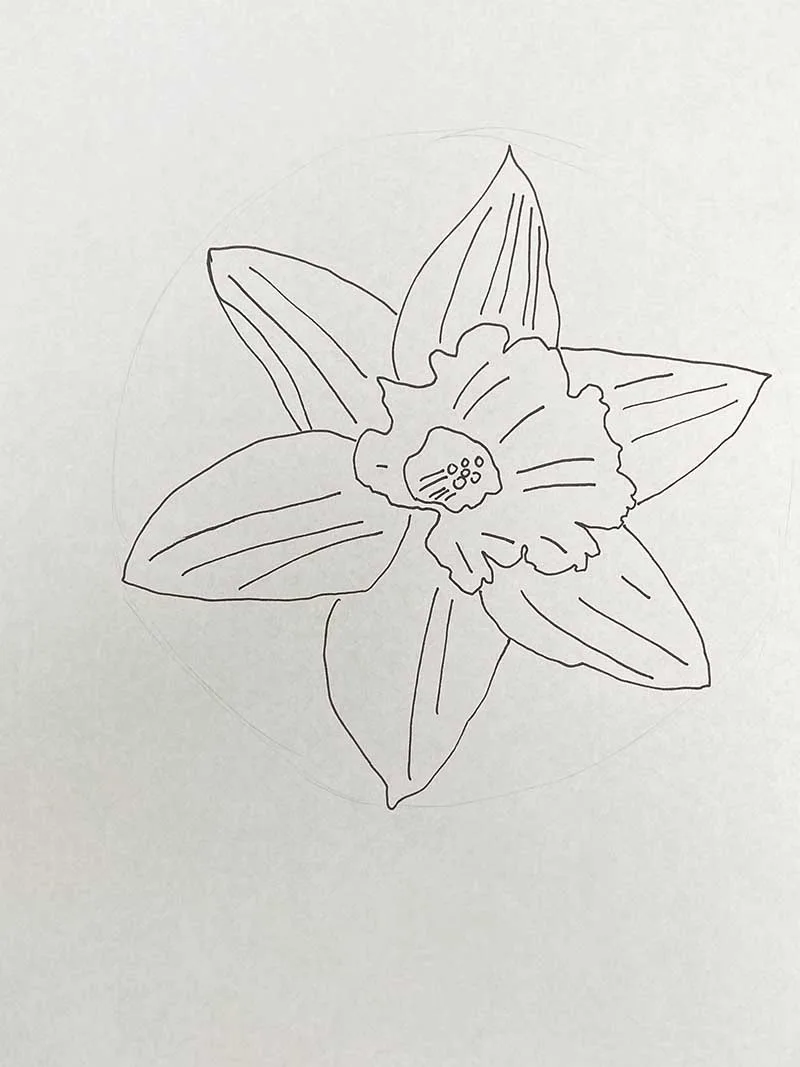
Step 3: Add some lines for texture that will guide your shading when you add colour.
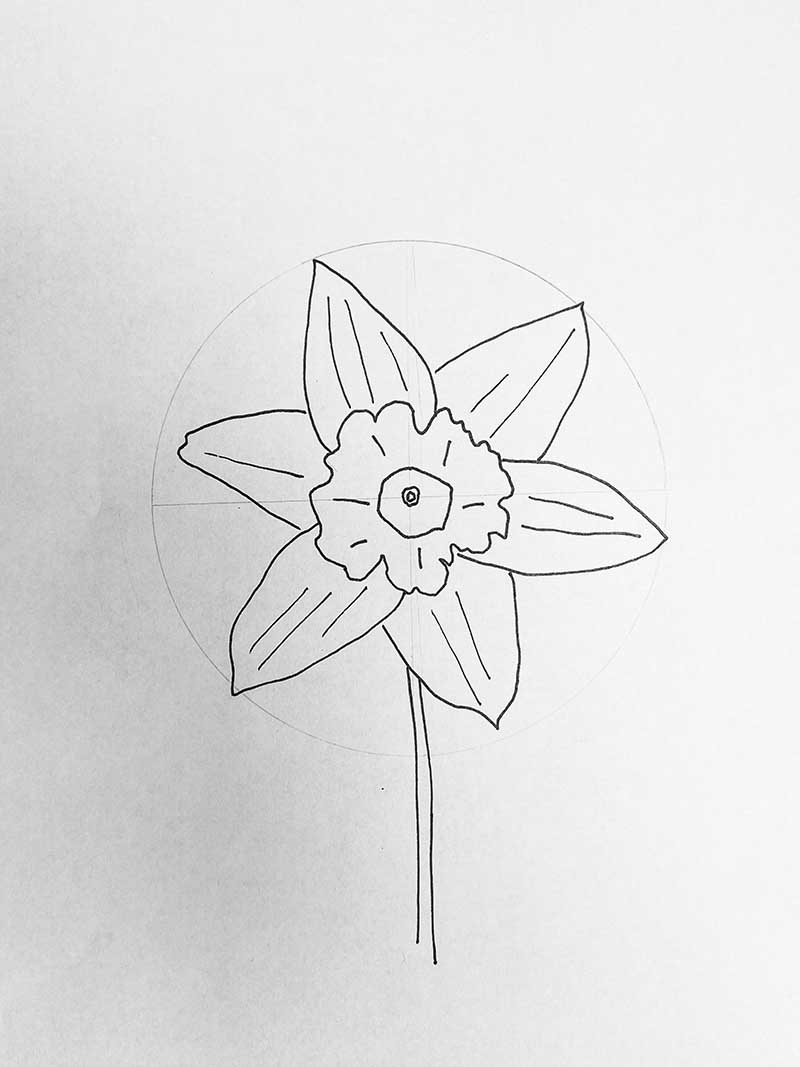

Step 4: Add colour here. I used watercolour, and in the following tutorial, I will show you how I like to use watercolour by building up the layers of colour.

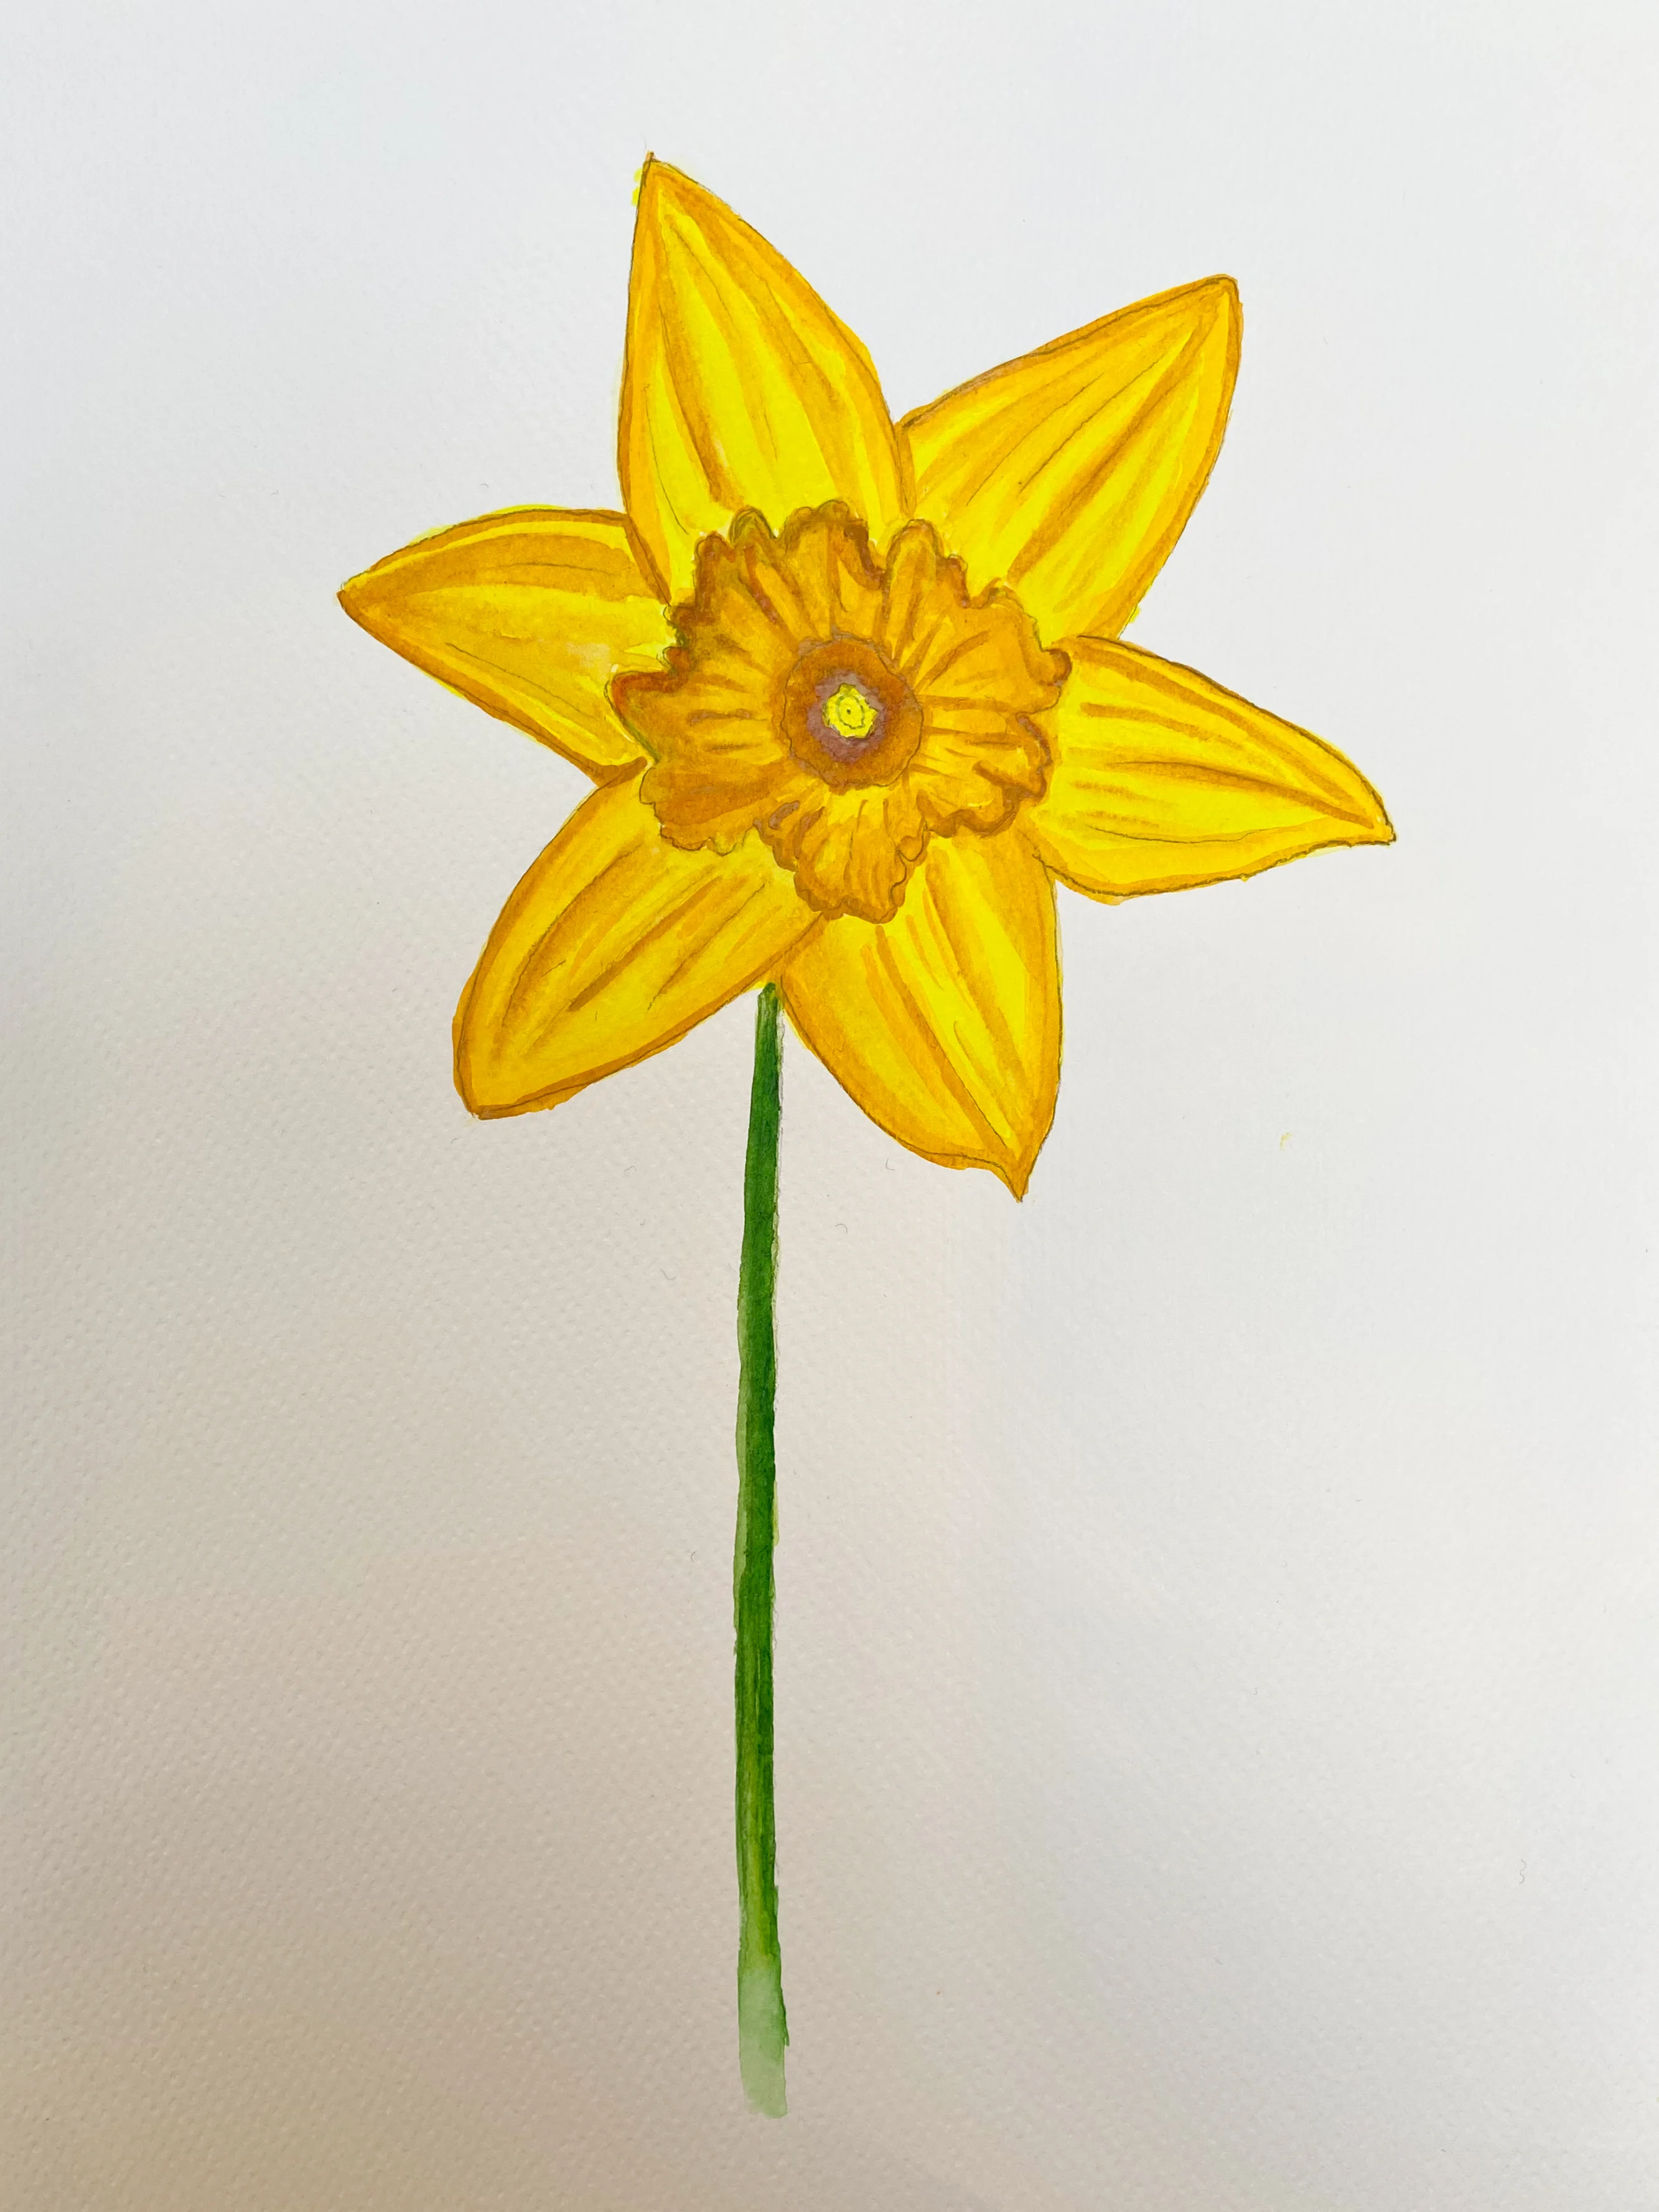
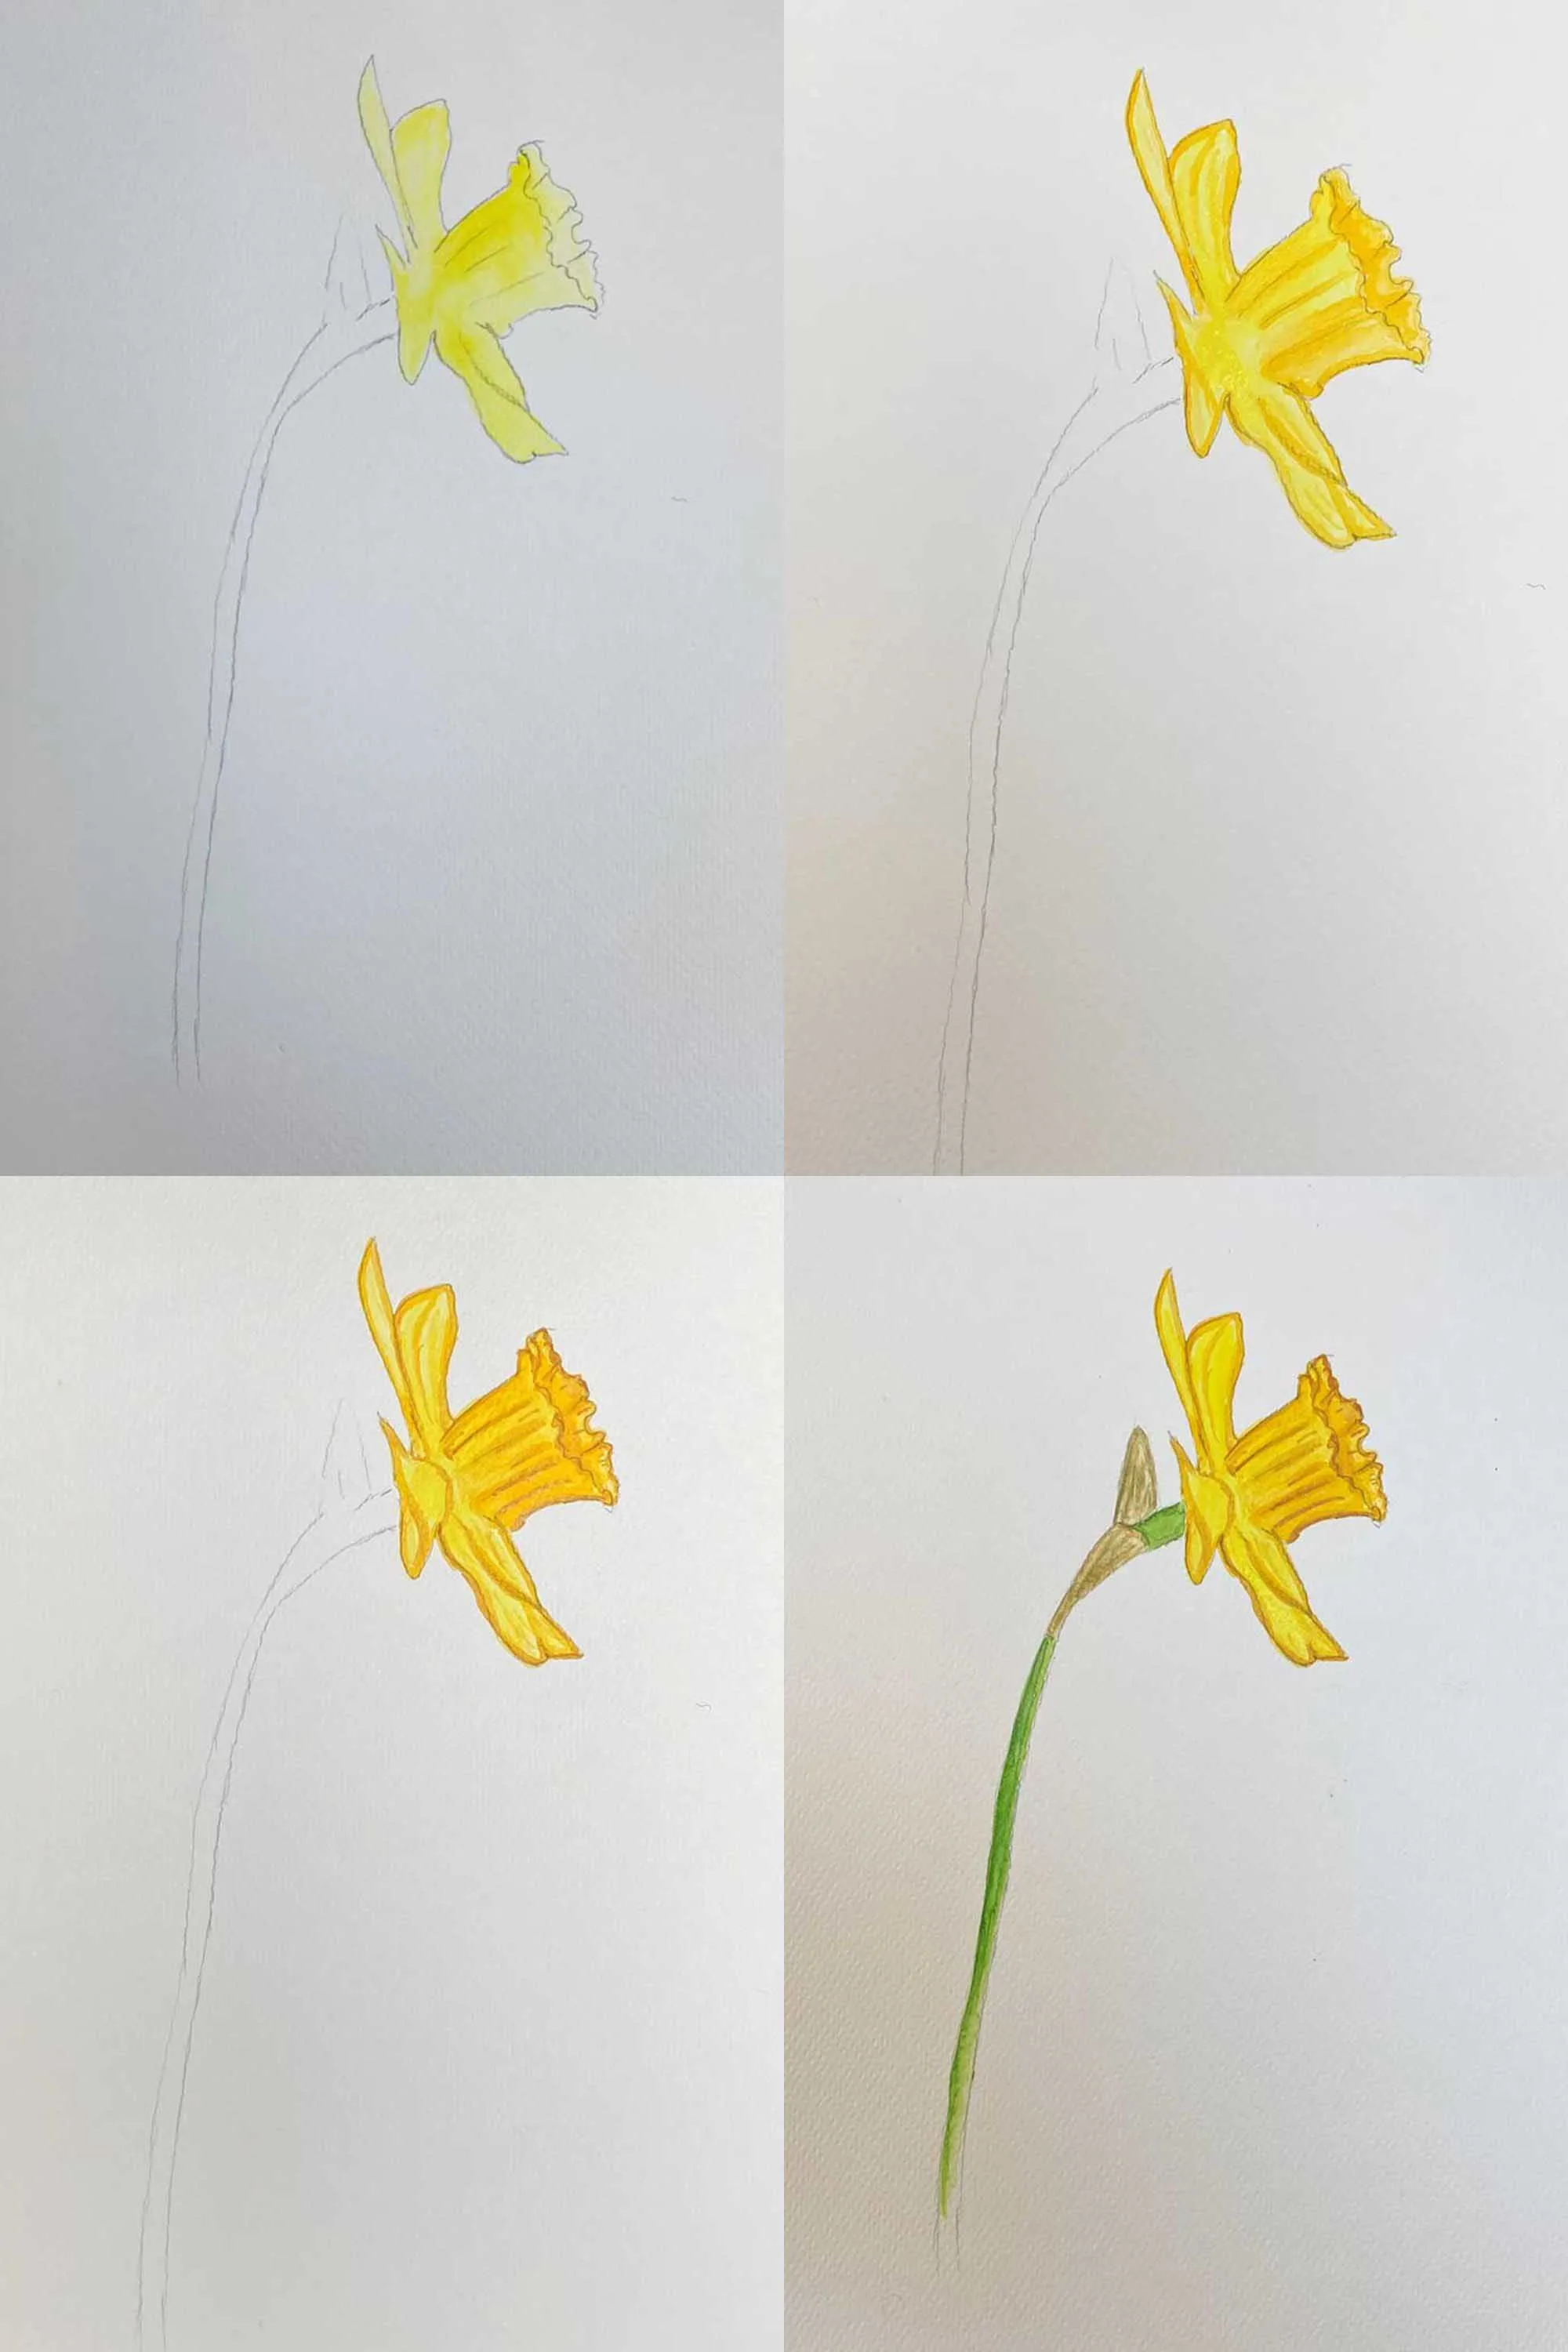
Tutorial 2- Front perspective with slight angle / using watercolour
Drawing a Daffodil front is quite a tricky perspective, so it’s easier to draw a side view or at an angle like here.
Step 1: As in the previous tutorial, start by drawing a circle in pencil that is the size of the flower head you are drawing. This will help guide you. In the centre, draw two circles: one for the centre, which will contain the stigma and one for the wavy edges of the corona or trumpet.
Step 2: Add the six petals step by step. Sometimes, the petals curl at the edges, so you can draw that in if you like.

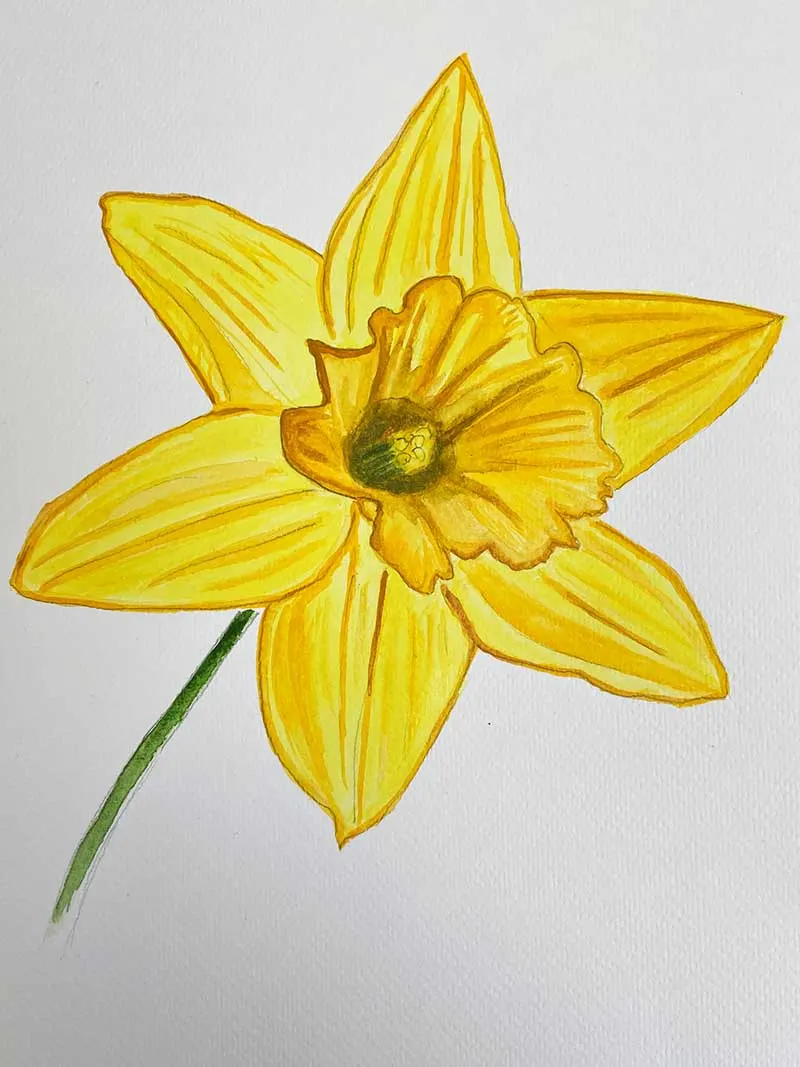
Step 3: Draw details, lines, and dots for your anther and stigma in the centre and lines on the petals. These lines help give a more realistic look when adding colour as they provide depth to the flow of the petals. Finally, add the stem. Here, I have drawn the stem at a diagonal, which gives the flower a bit more dynamism.
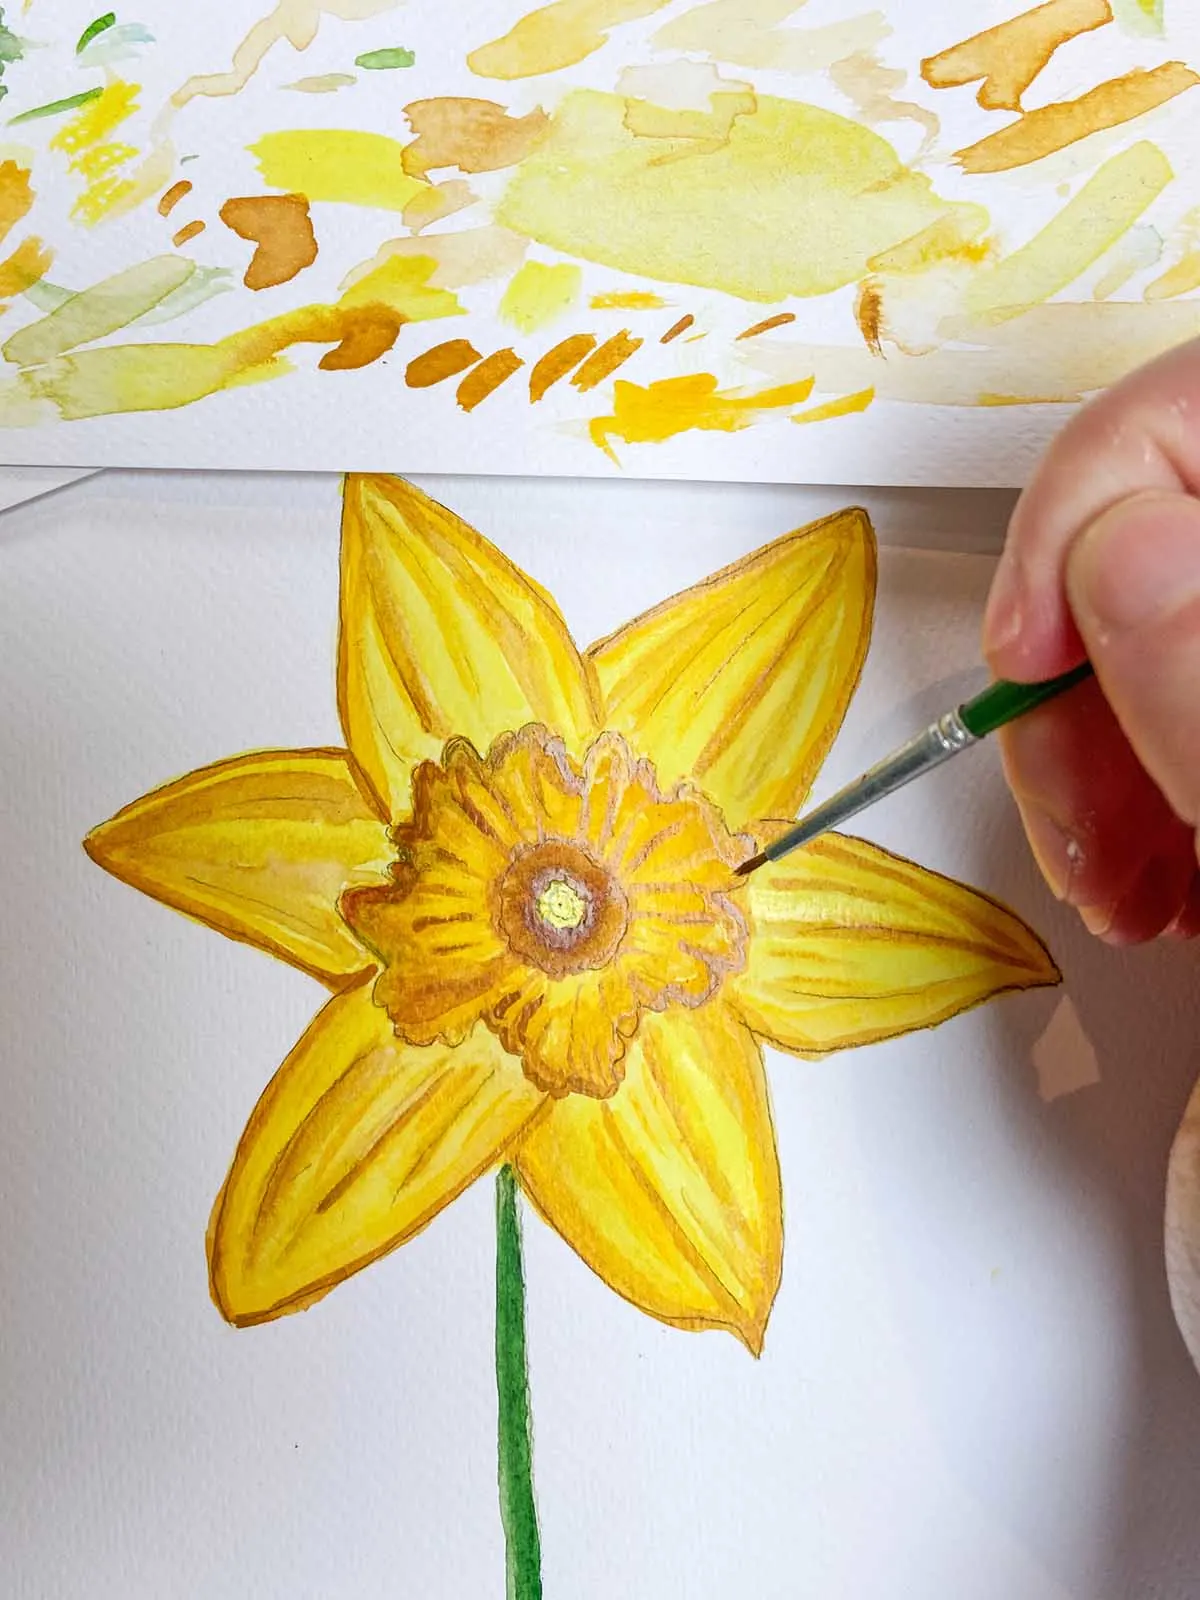
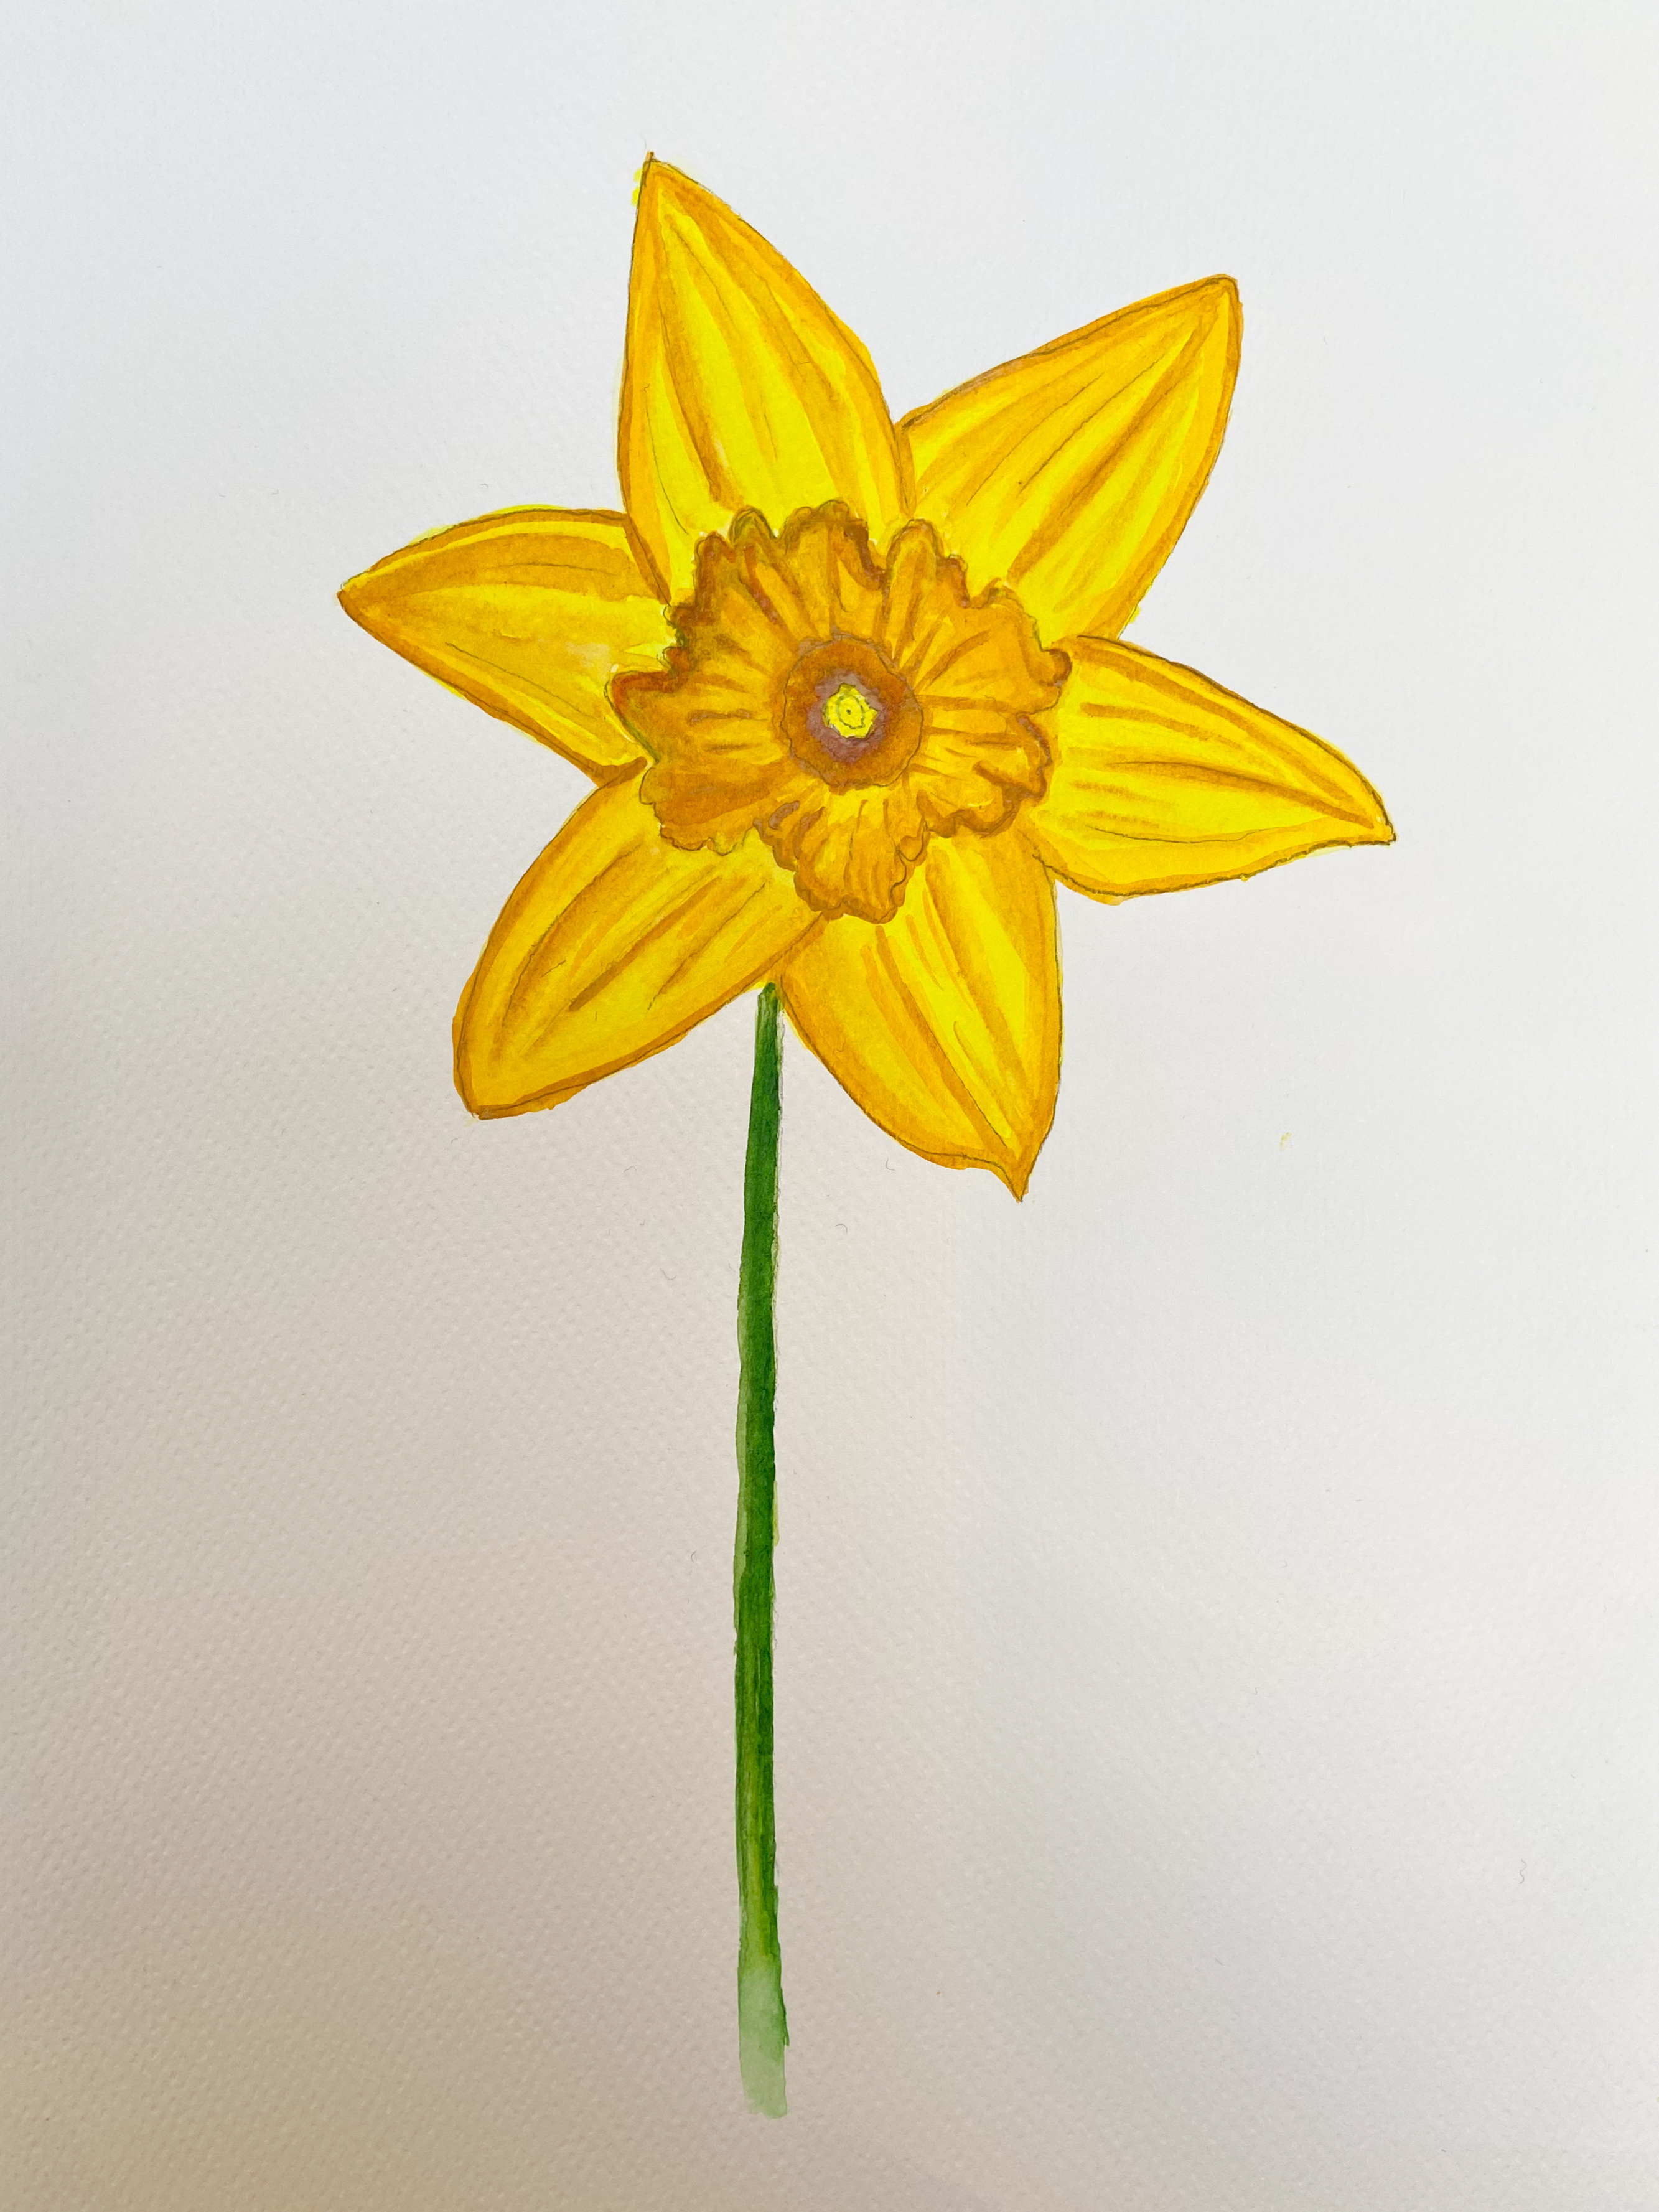
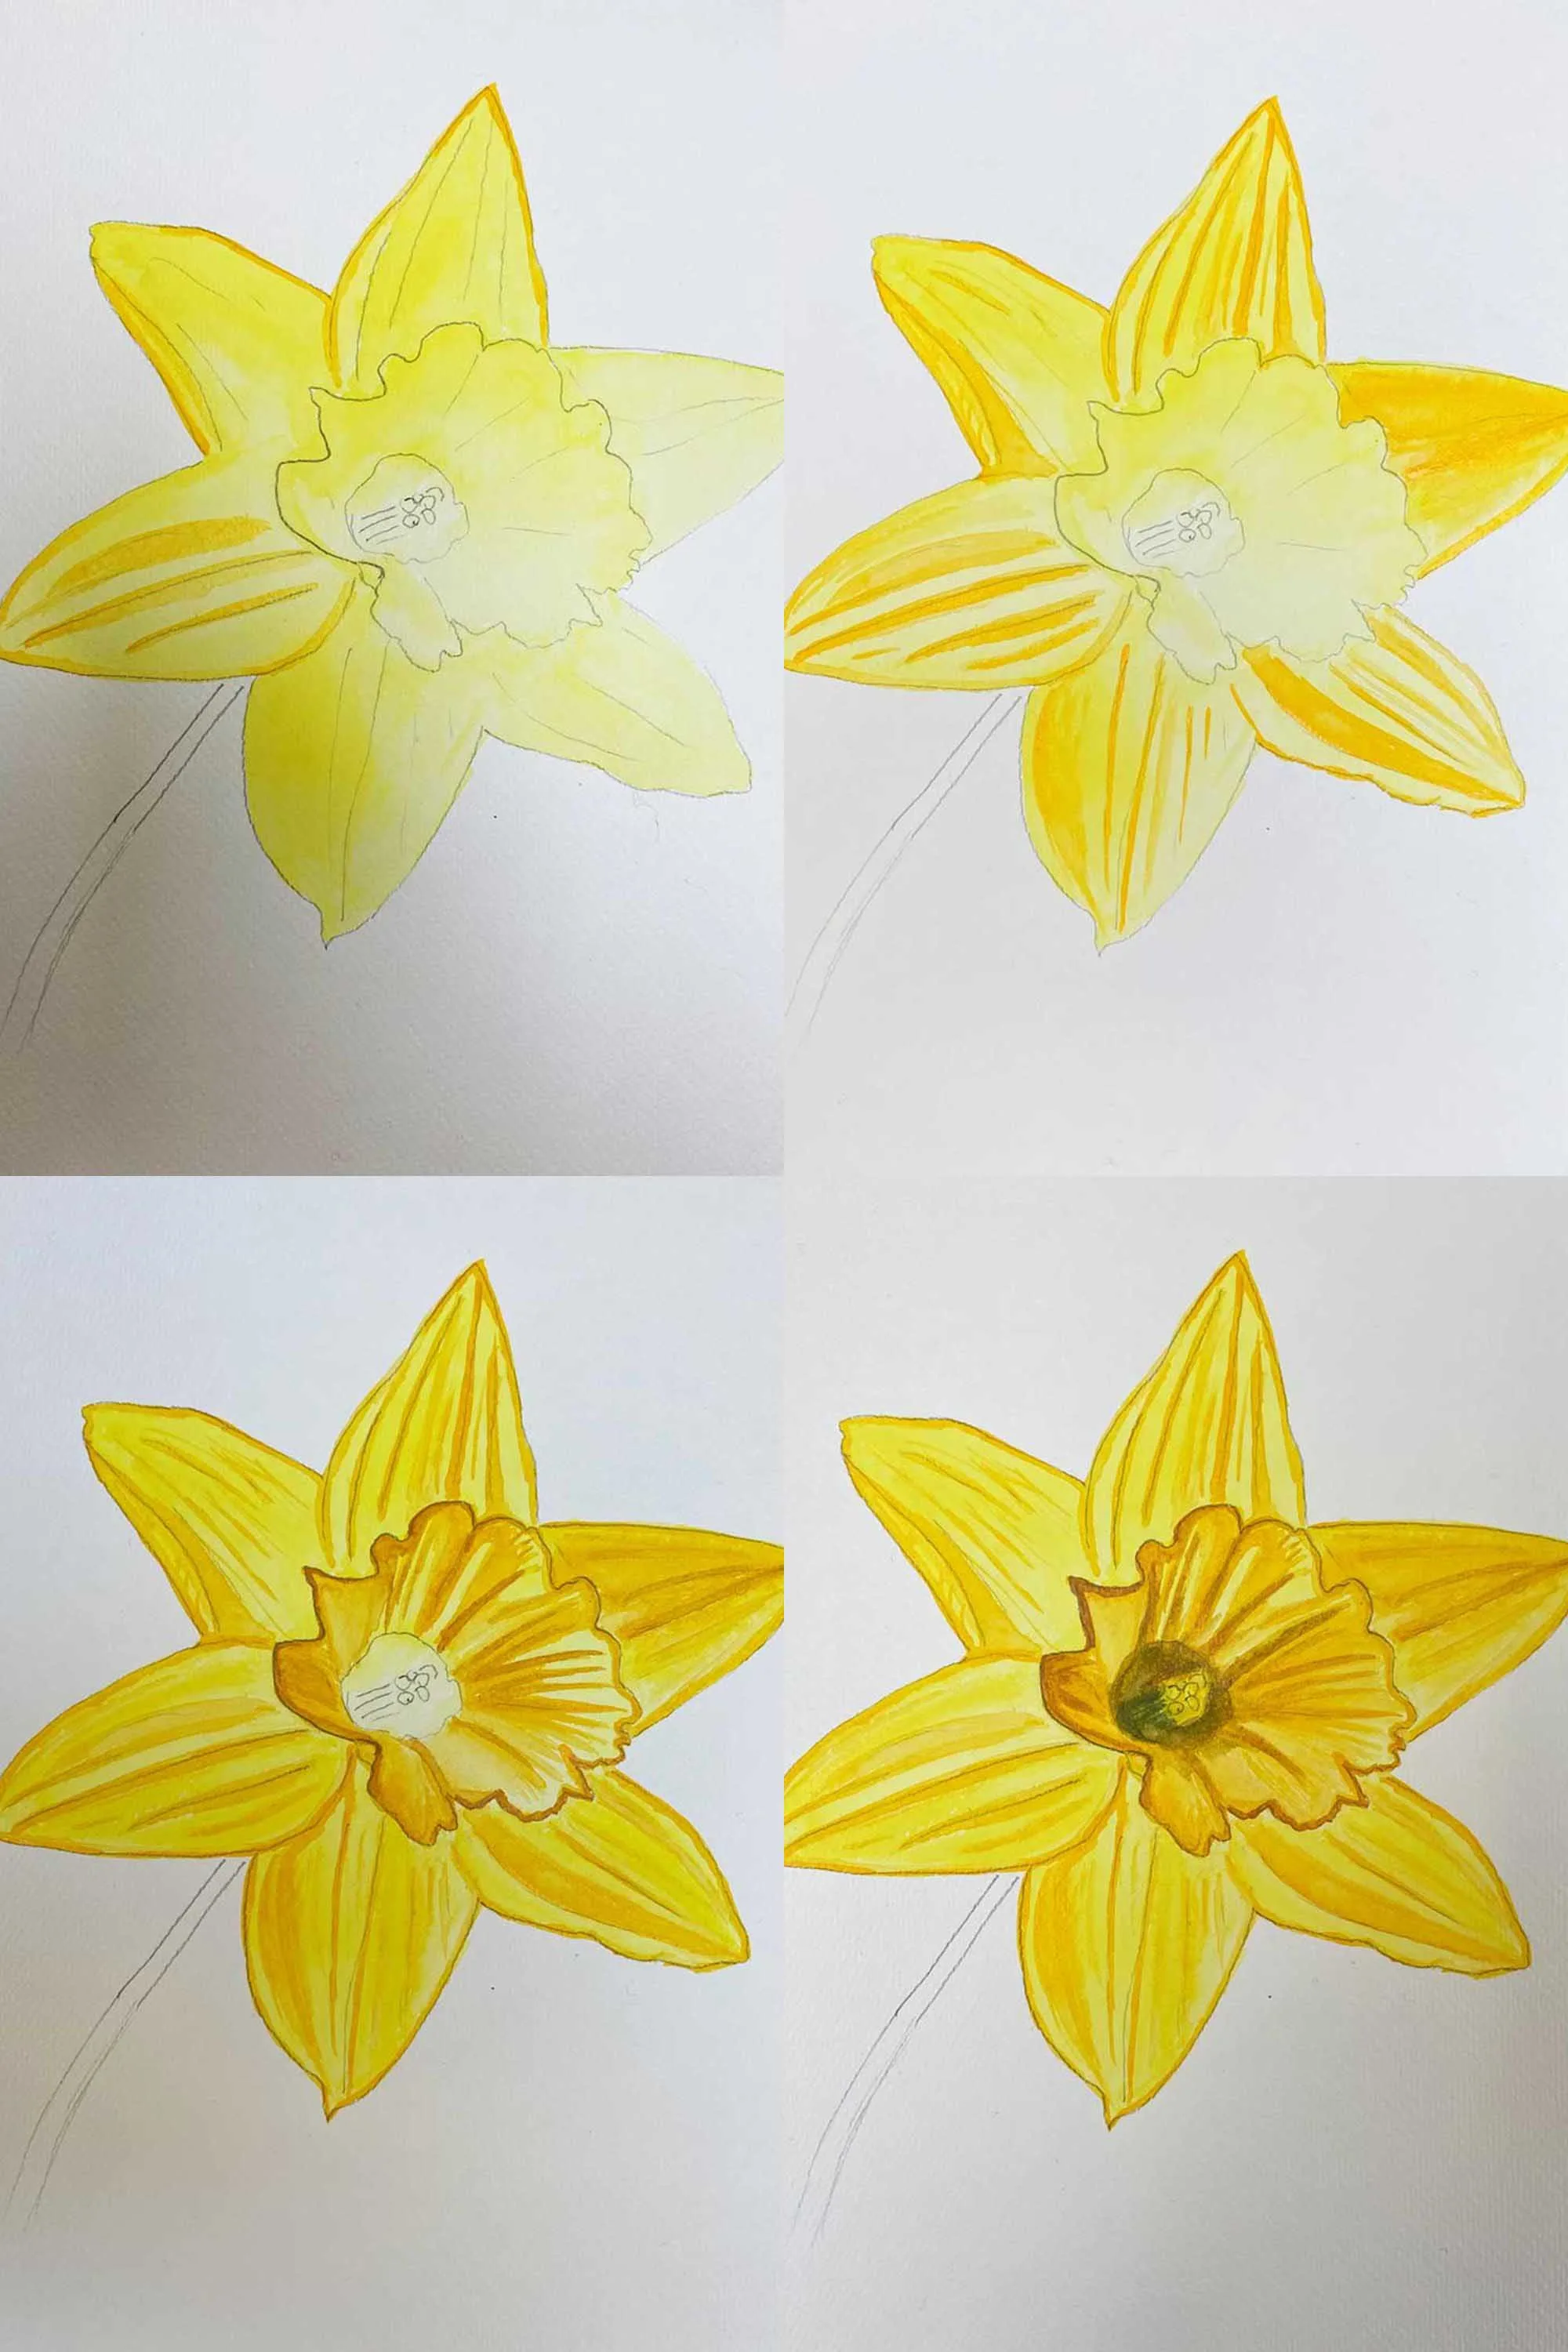
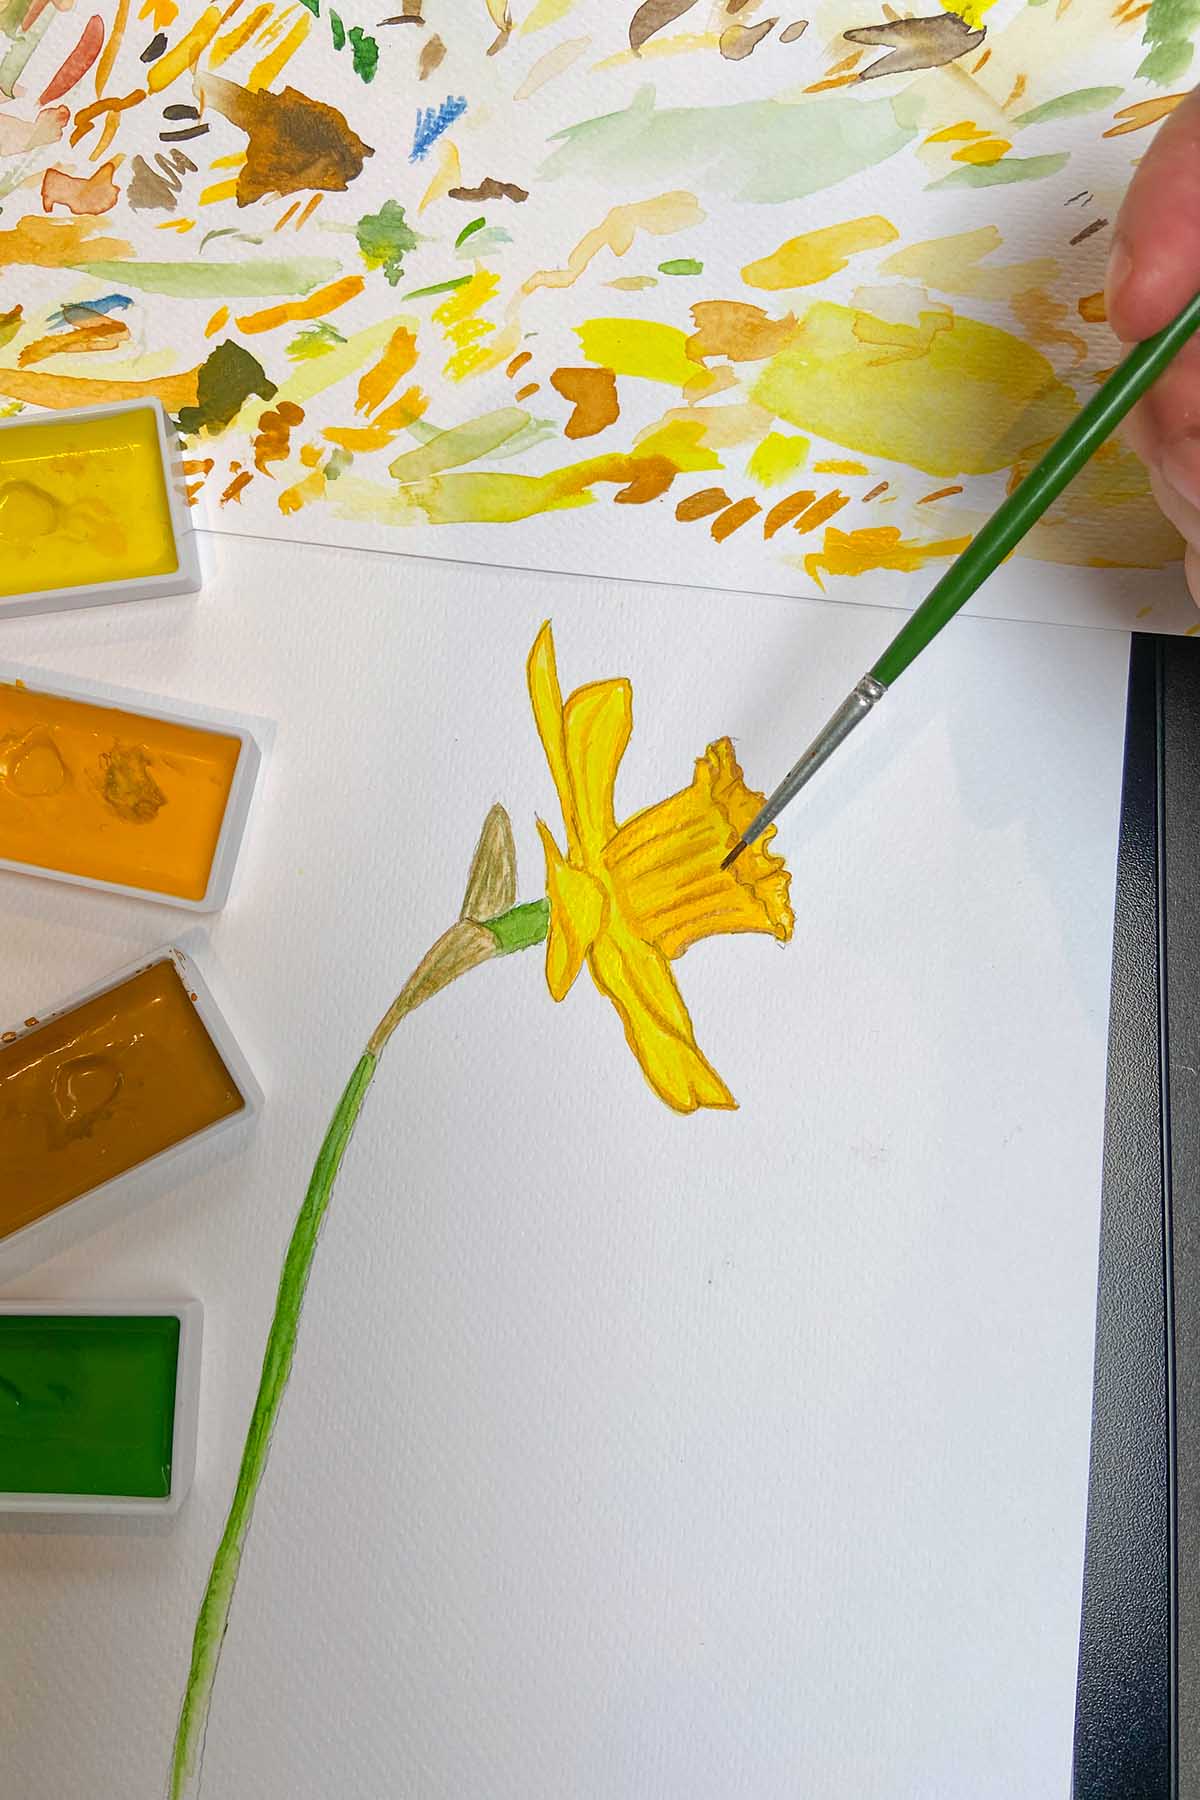
Step 4: When adding watercolour, I like to build up the colour gradually, so I start with a light yellow wash. Then, I use a darker tone of yellow on the lines I have drawn on the petals.
I keep building that up, going particularly dark around the centre of the flower to give the impression of depth. Looking at the images, you can see how my painting progressed. You might prefer to use another method to add colour.


Tutorial 3- Daffodil Side perspective from above
Drawing a Daffodil from a side perspective is slightly more manageable as you don’t have to draw the stigma. You can get a more achievable three-dimensional image of the lovely trumpet/corona shape in the centre of the flower.
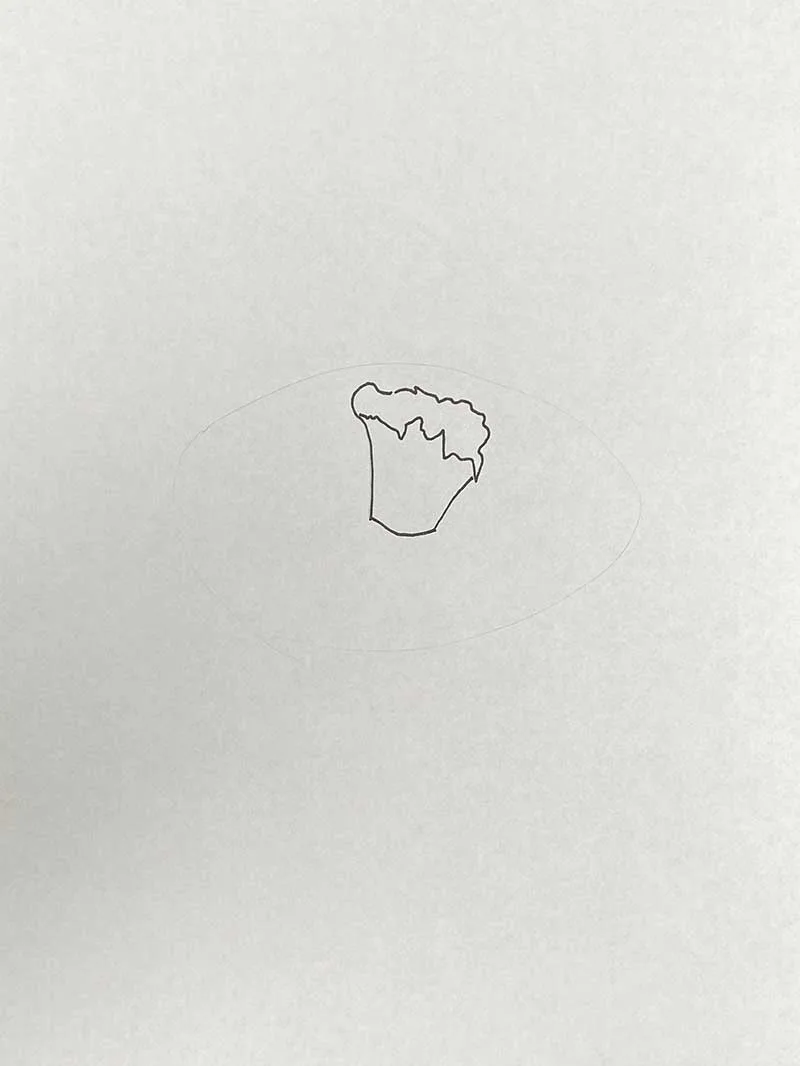
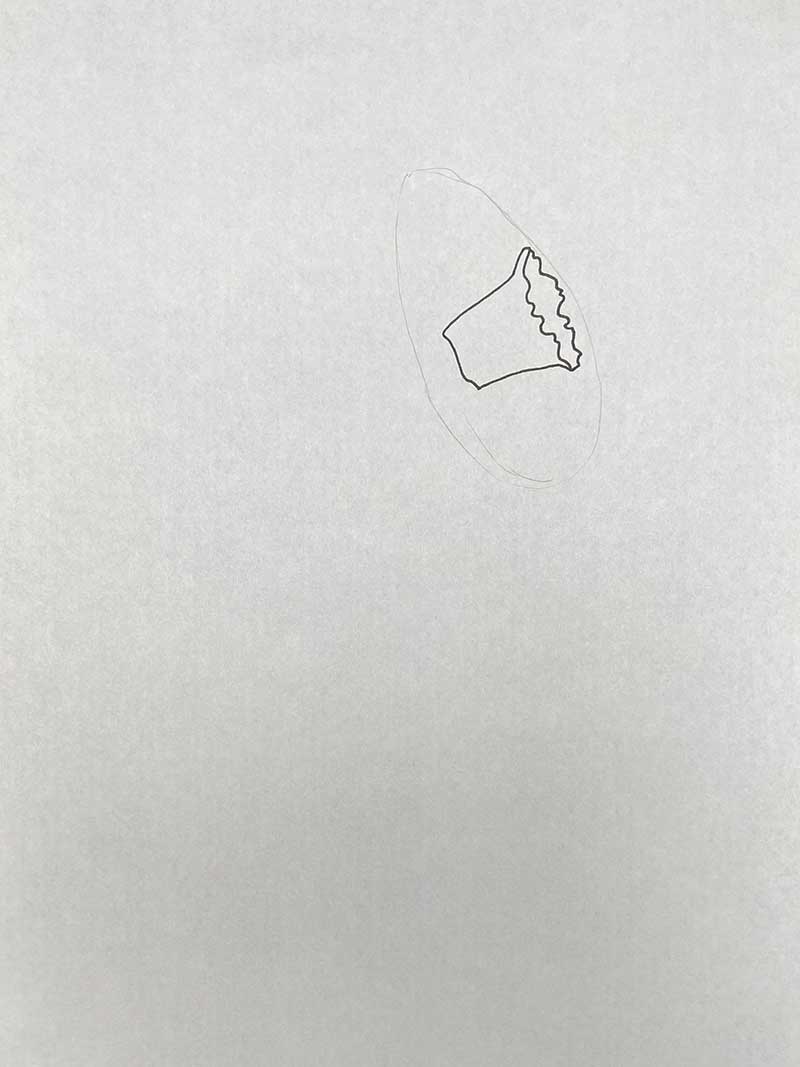
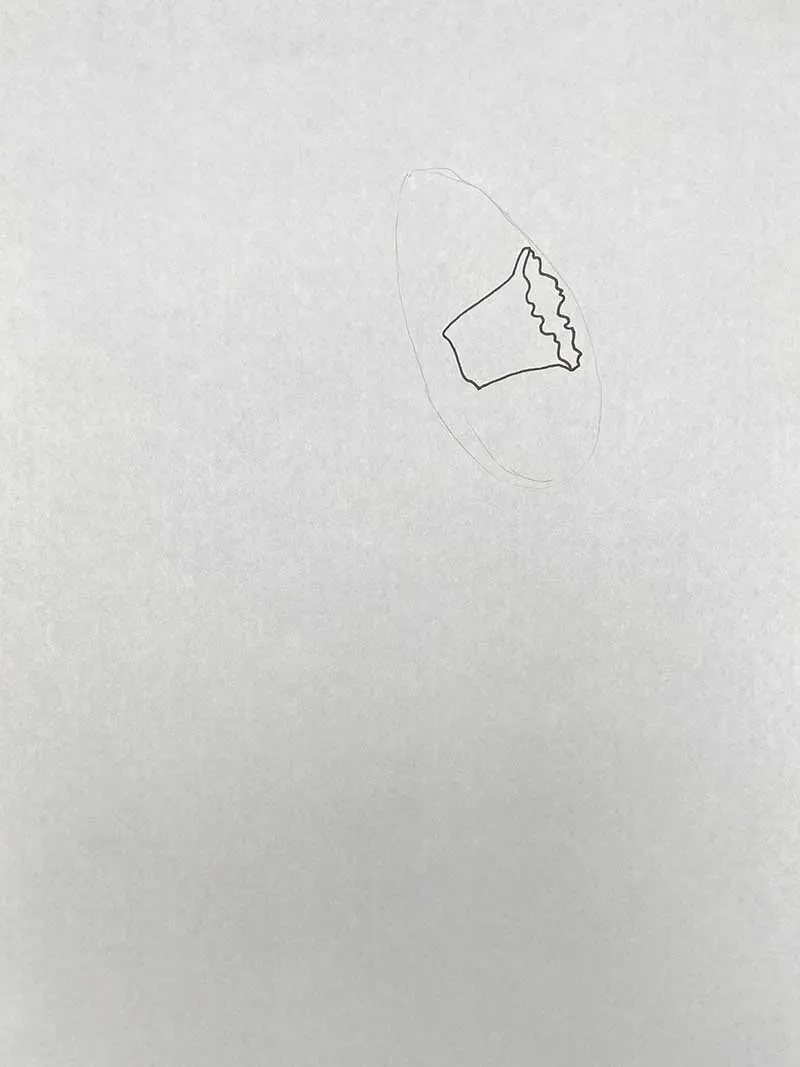
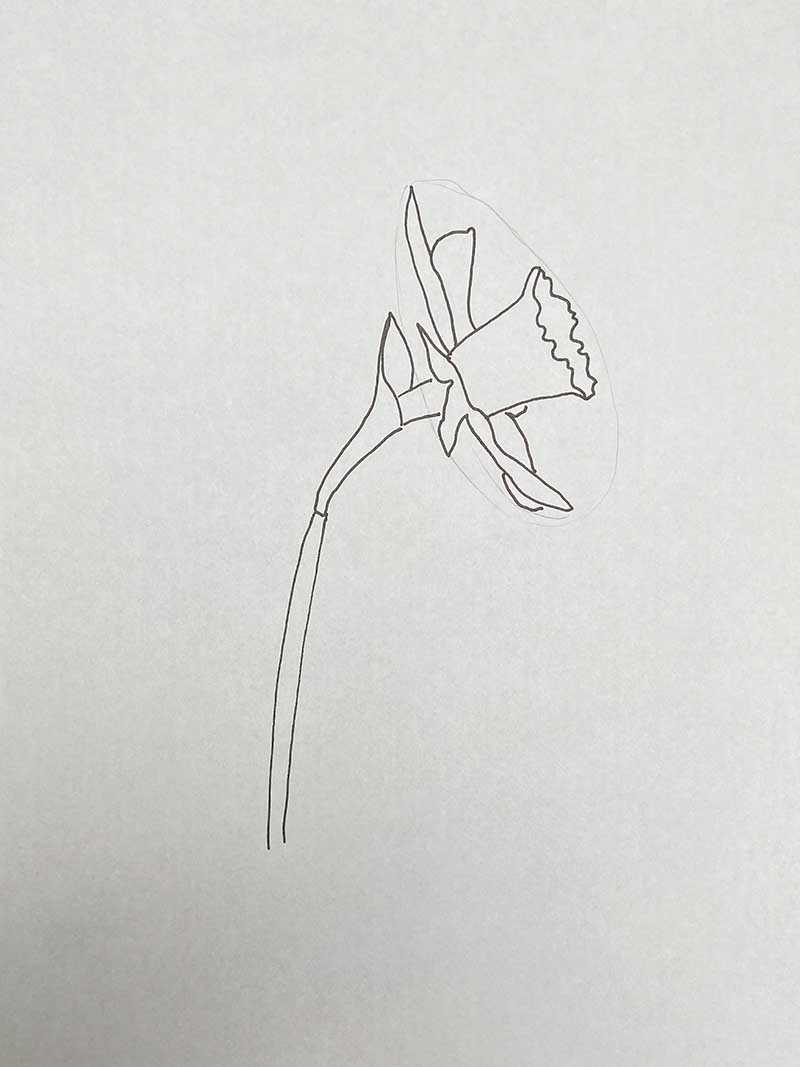
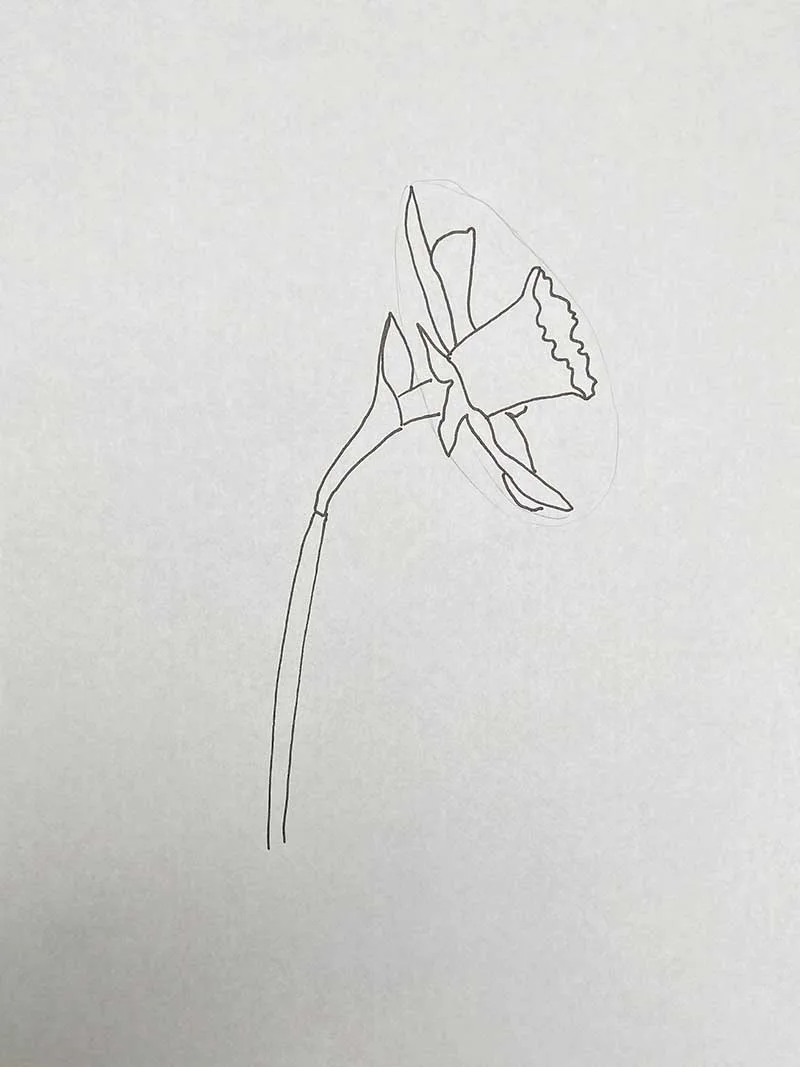
Step 1: Lightly draw an oval shape in pencil to determine the size of your flower head. Then, in the centre, draw the distinctive corona/trumpet shape. Note how wavy the top of the trumpet is.

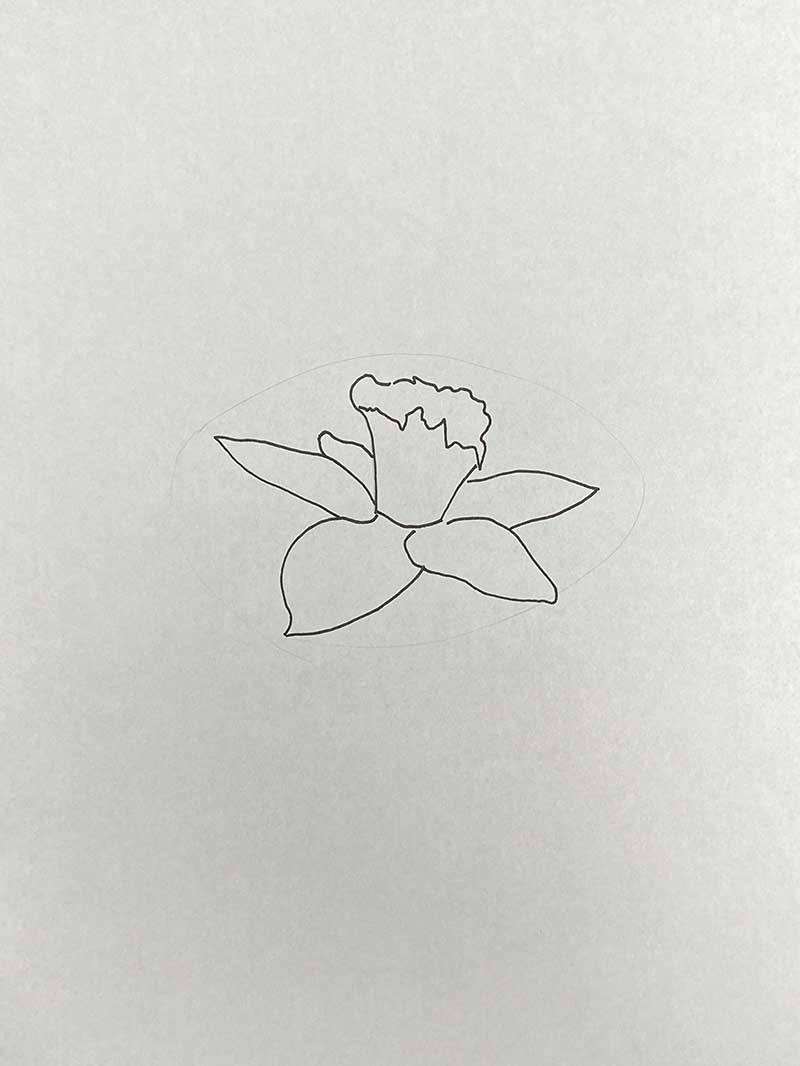
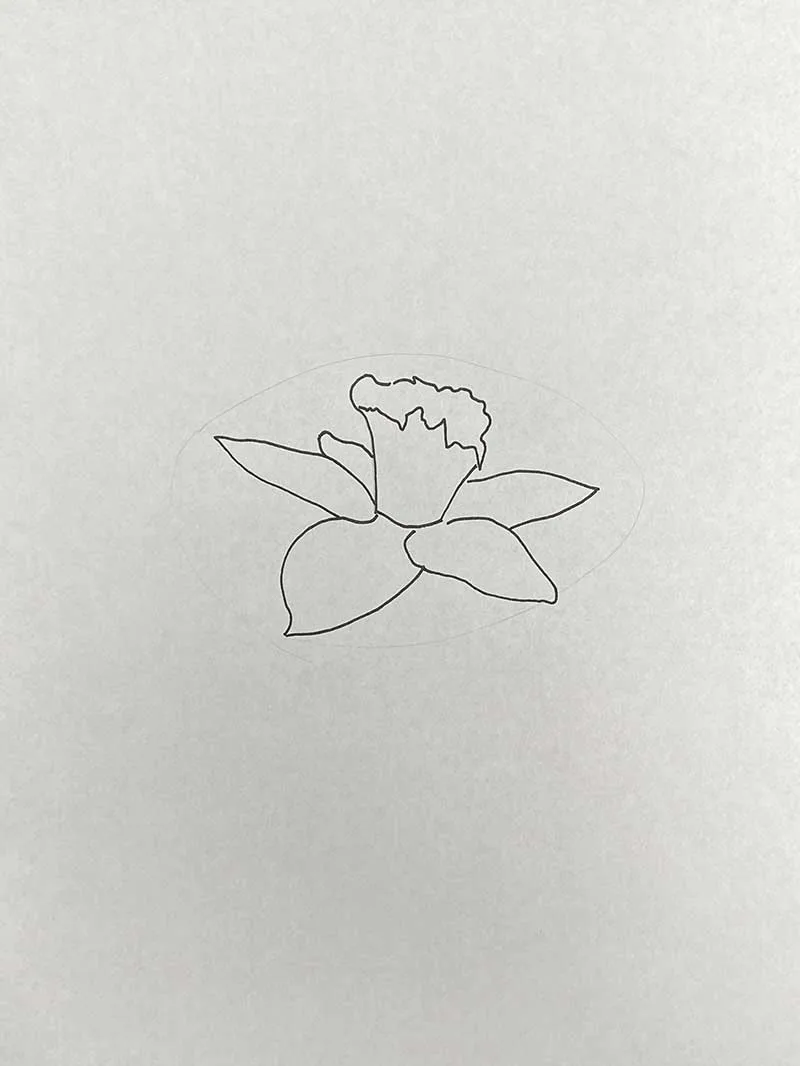
Step 2: Add the petals; due to the perspective of this drawing, only four petals are visible. Use the oval to guide you in spacing the petals.
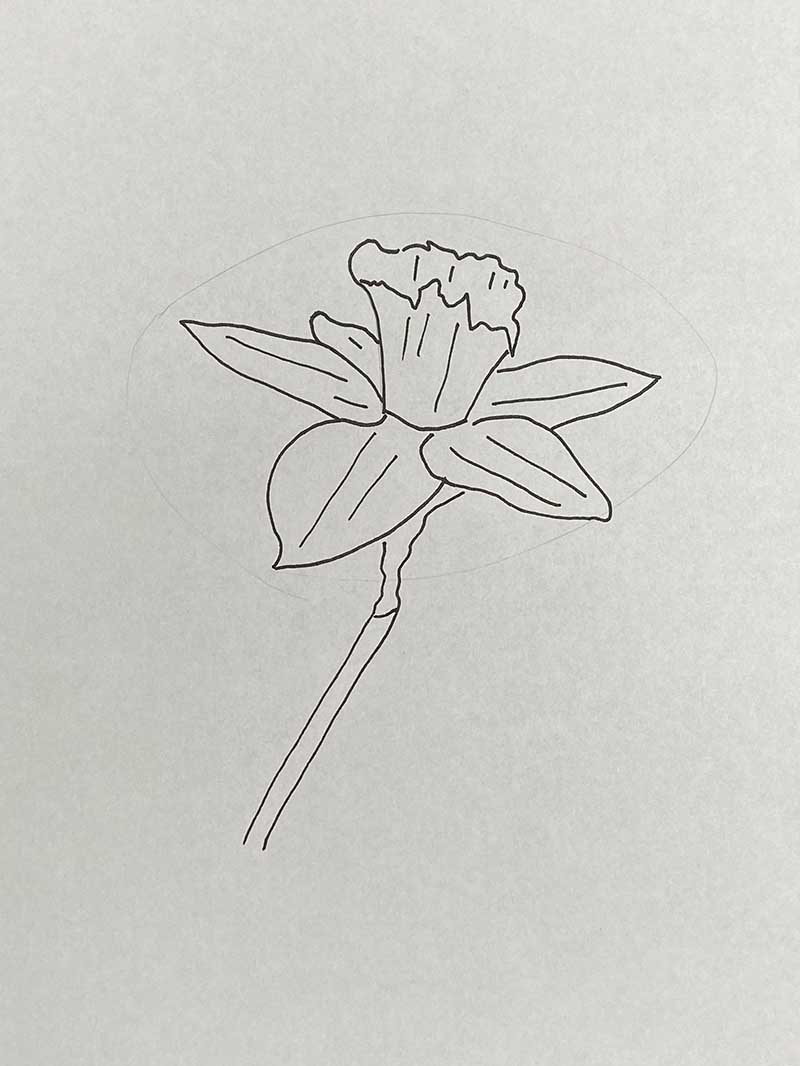
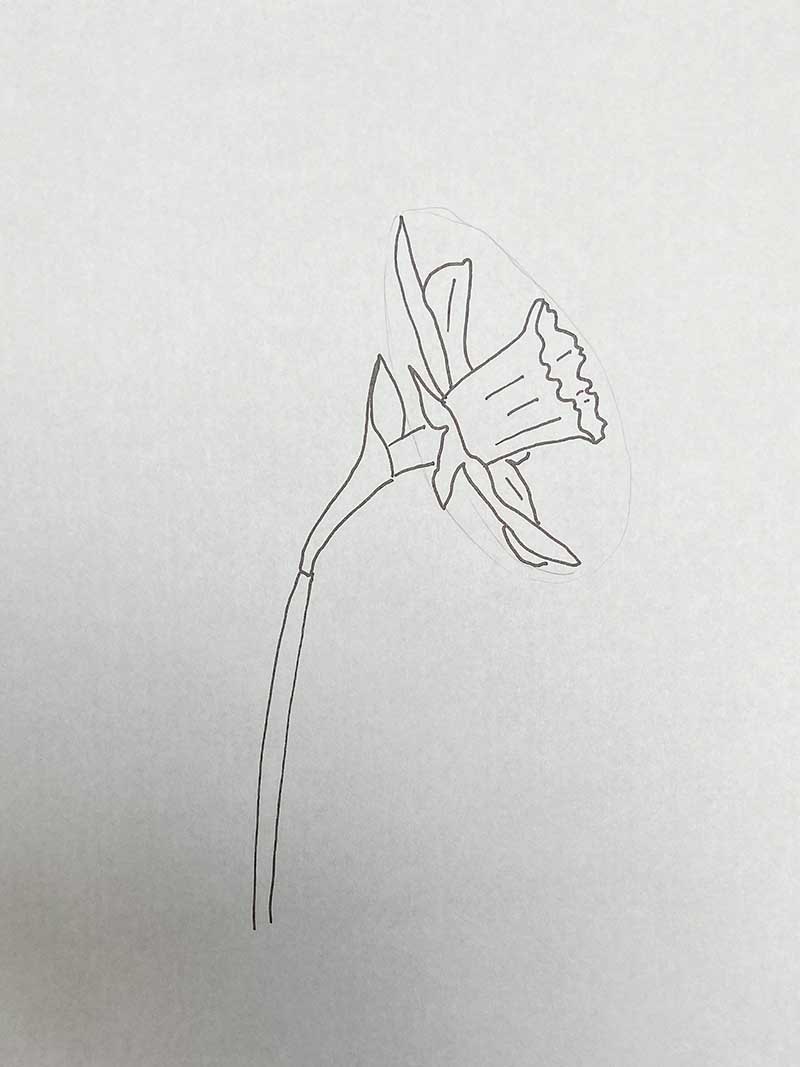
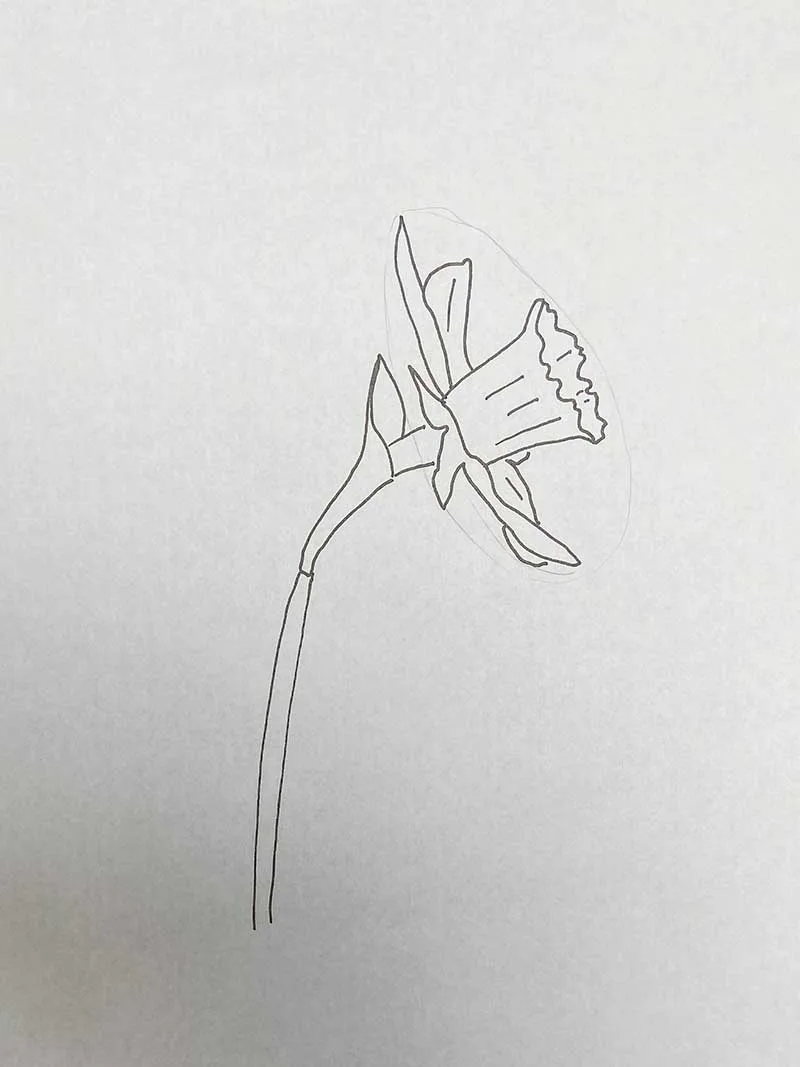
Step 3: Add the lines on the petals and the stem. Here, I have added the spathe on the stem as these are often visible. These look like little brown paper bags that have ripped open to allow the flower to bloom, and essentially, that’s their purpose. They wrap up the bud before the flower is ready to open, and their remnants remain visible.

Step 4: Now add colour. Here, I used watercolour. Refer to my previous tutorial if you want to see how I built up an image using watercolour. Of course, you can add colour in any way you like. I find watercolour pencils also work well.
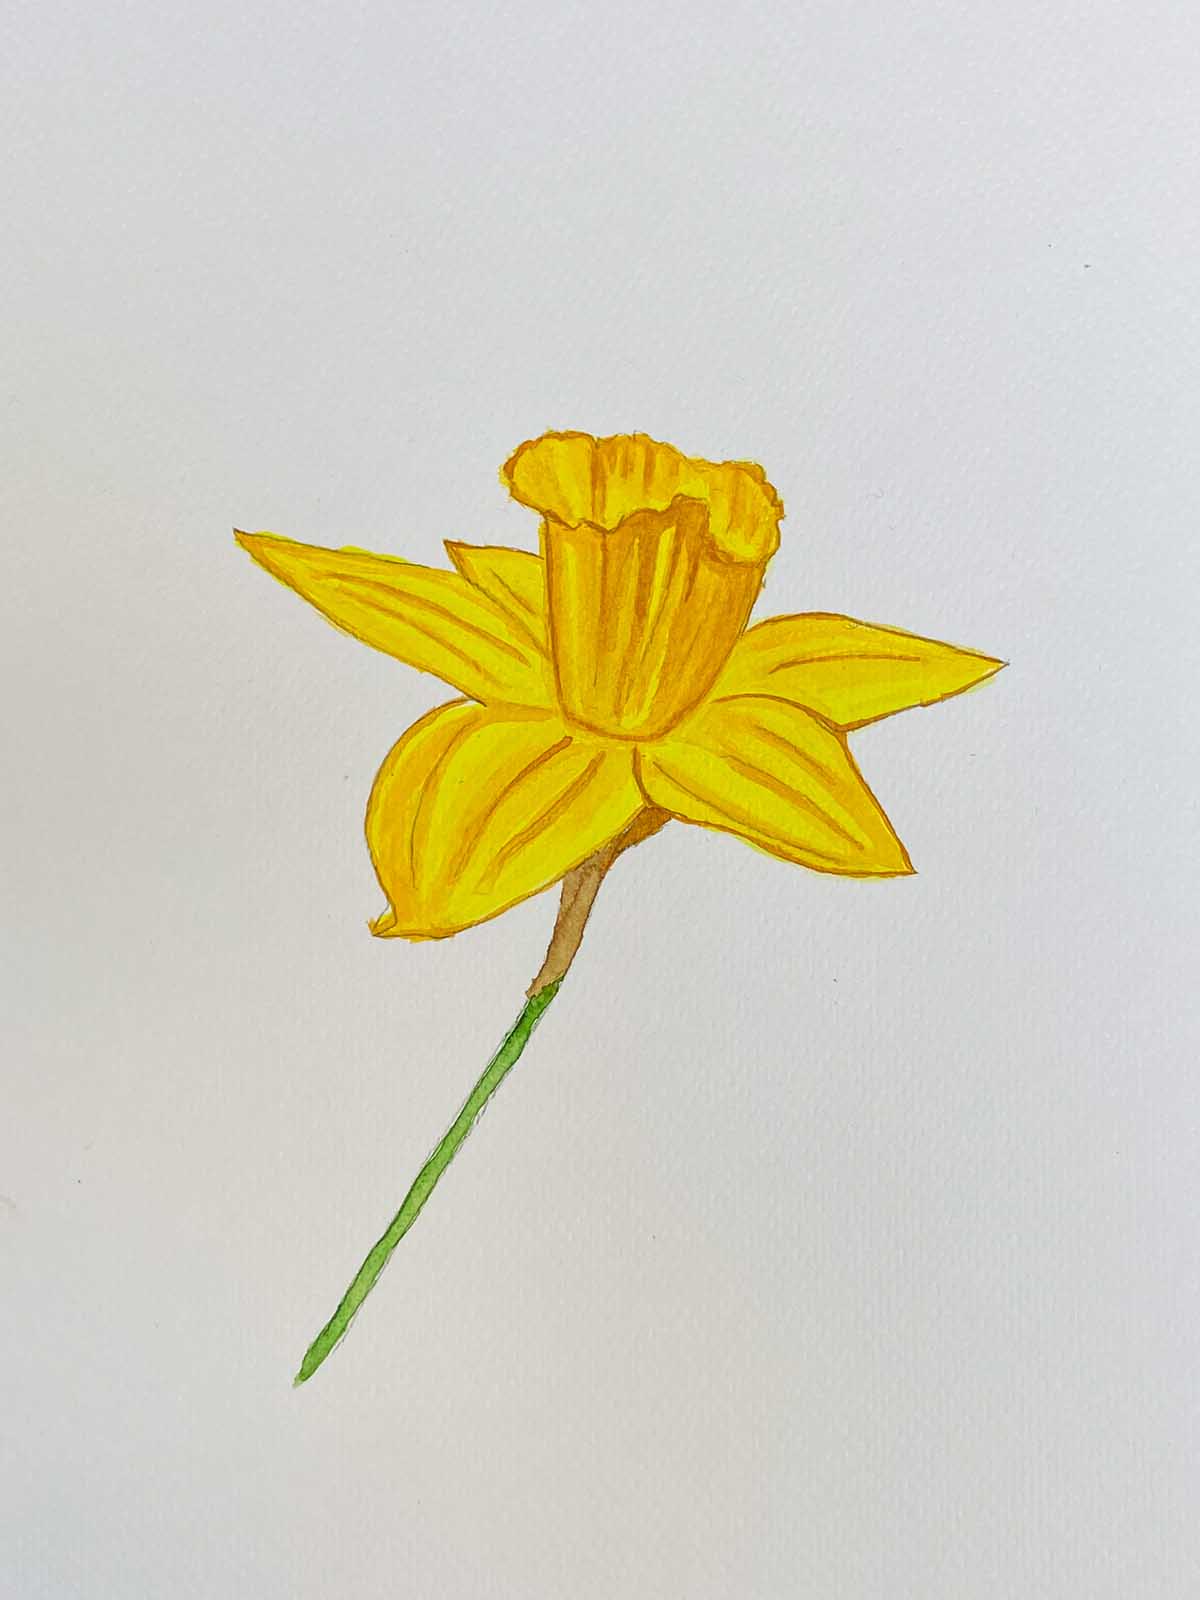
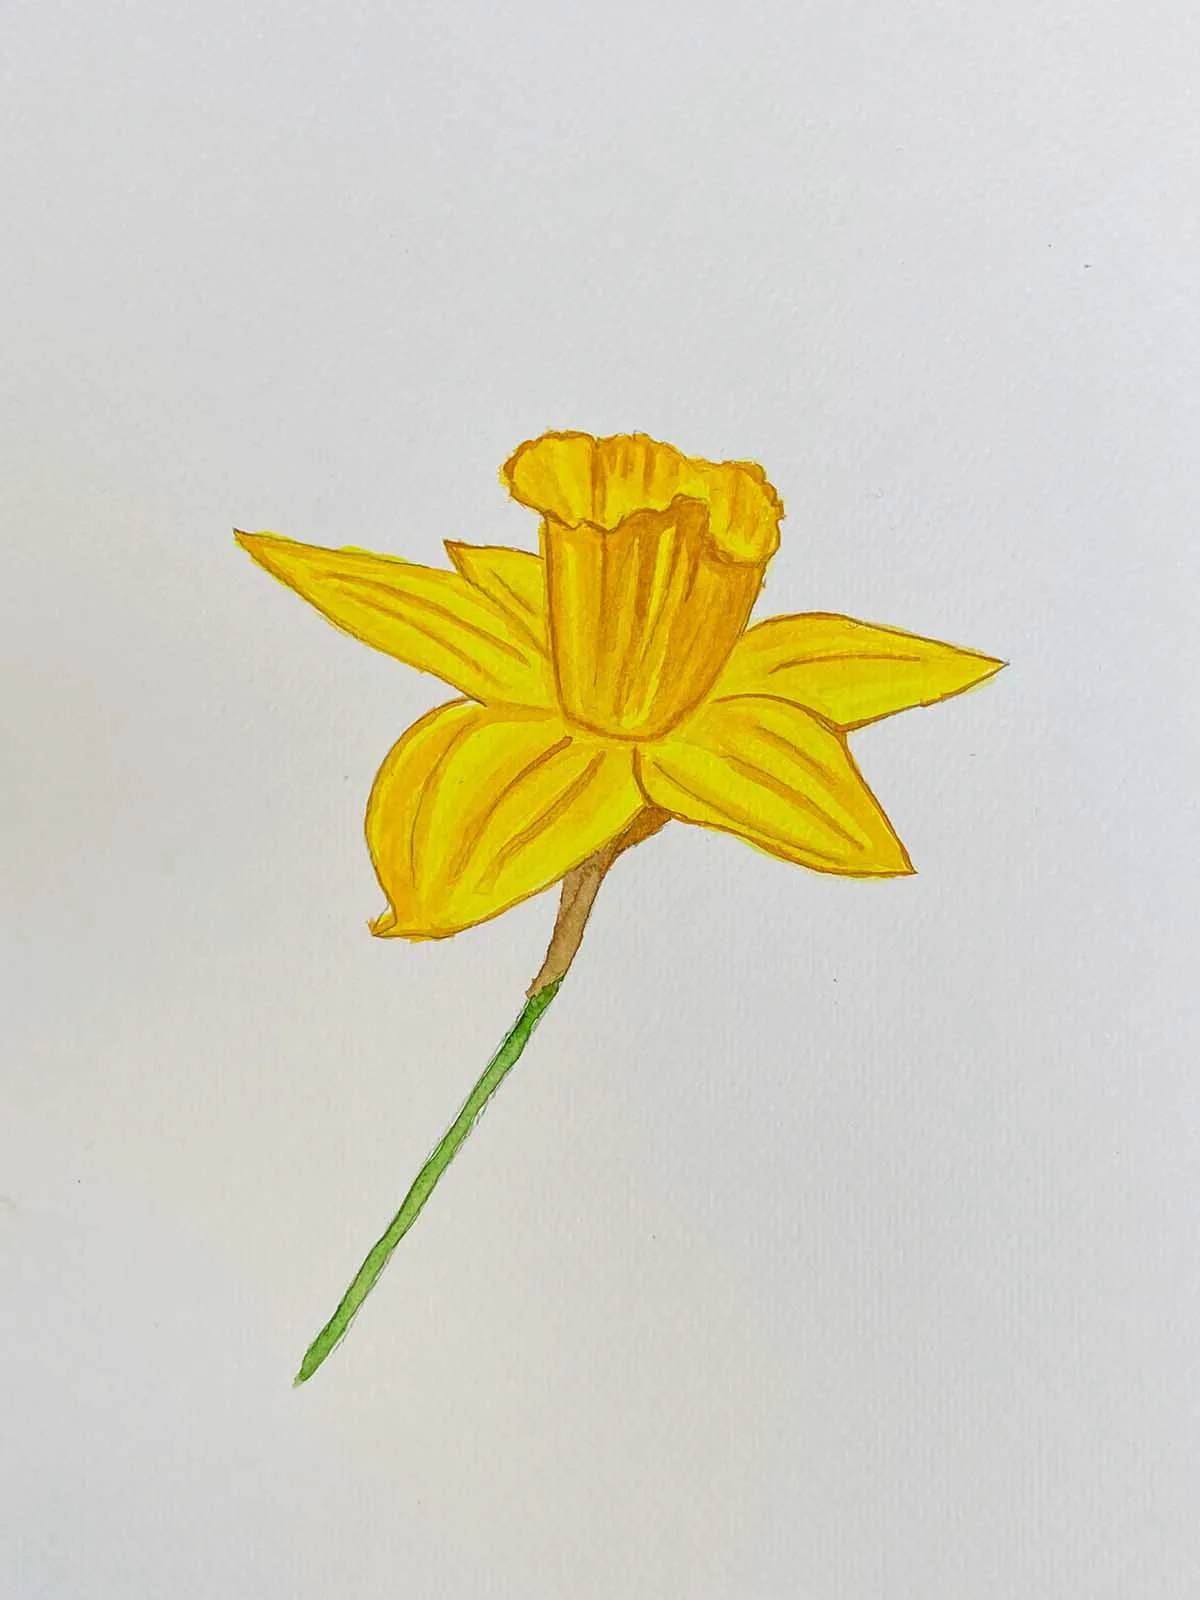
Tutorial 4 – Daffodil Classic Side Perspective
Here, I have drawn the classic side perspective of a Daffodil, which is how we often encounter them growing in the ground.
Step 1: Lightly draw an oval shape in pencil to determine the size of your flower head and guide your drawing. Then, in the centre, draw the trumpet shape of the flower’s centre.
Step 2: Add the petals, the stem, and the spathe. It can be tricky to get the petals right from this perspective, so use the oval to guide you in the parameters of your flower head.
Step 3: Add lines to your trumpet centre and petals to add realism.
Step 4: Painting the daffodil. As in the previous tutorials, I am sticking to watercolour, and you can see how I like to layer and build up the colour.


Tutorial 5 – A Bunch of Daffodils in a Vase
Now, putting together all the previous tutorials on Daffodils from different perspectives, use that knowledge to draw a bunch of Daffodils or, if you prefer, a group growing in the ground.
Daffodils are most often found in clusters, and every time I see Daffodils at this time of year, I am reminded of William Wordsworth’s poem “I Wandered Lonely as a Cloud” that I learnt at school; it is a poem to celebrate Daffodils- “And then my heart with pleasure fills, and dances with the Daffodils”.
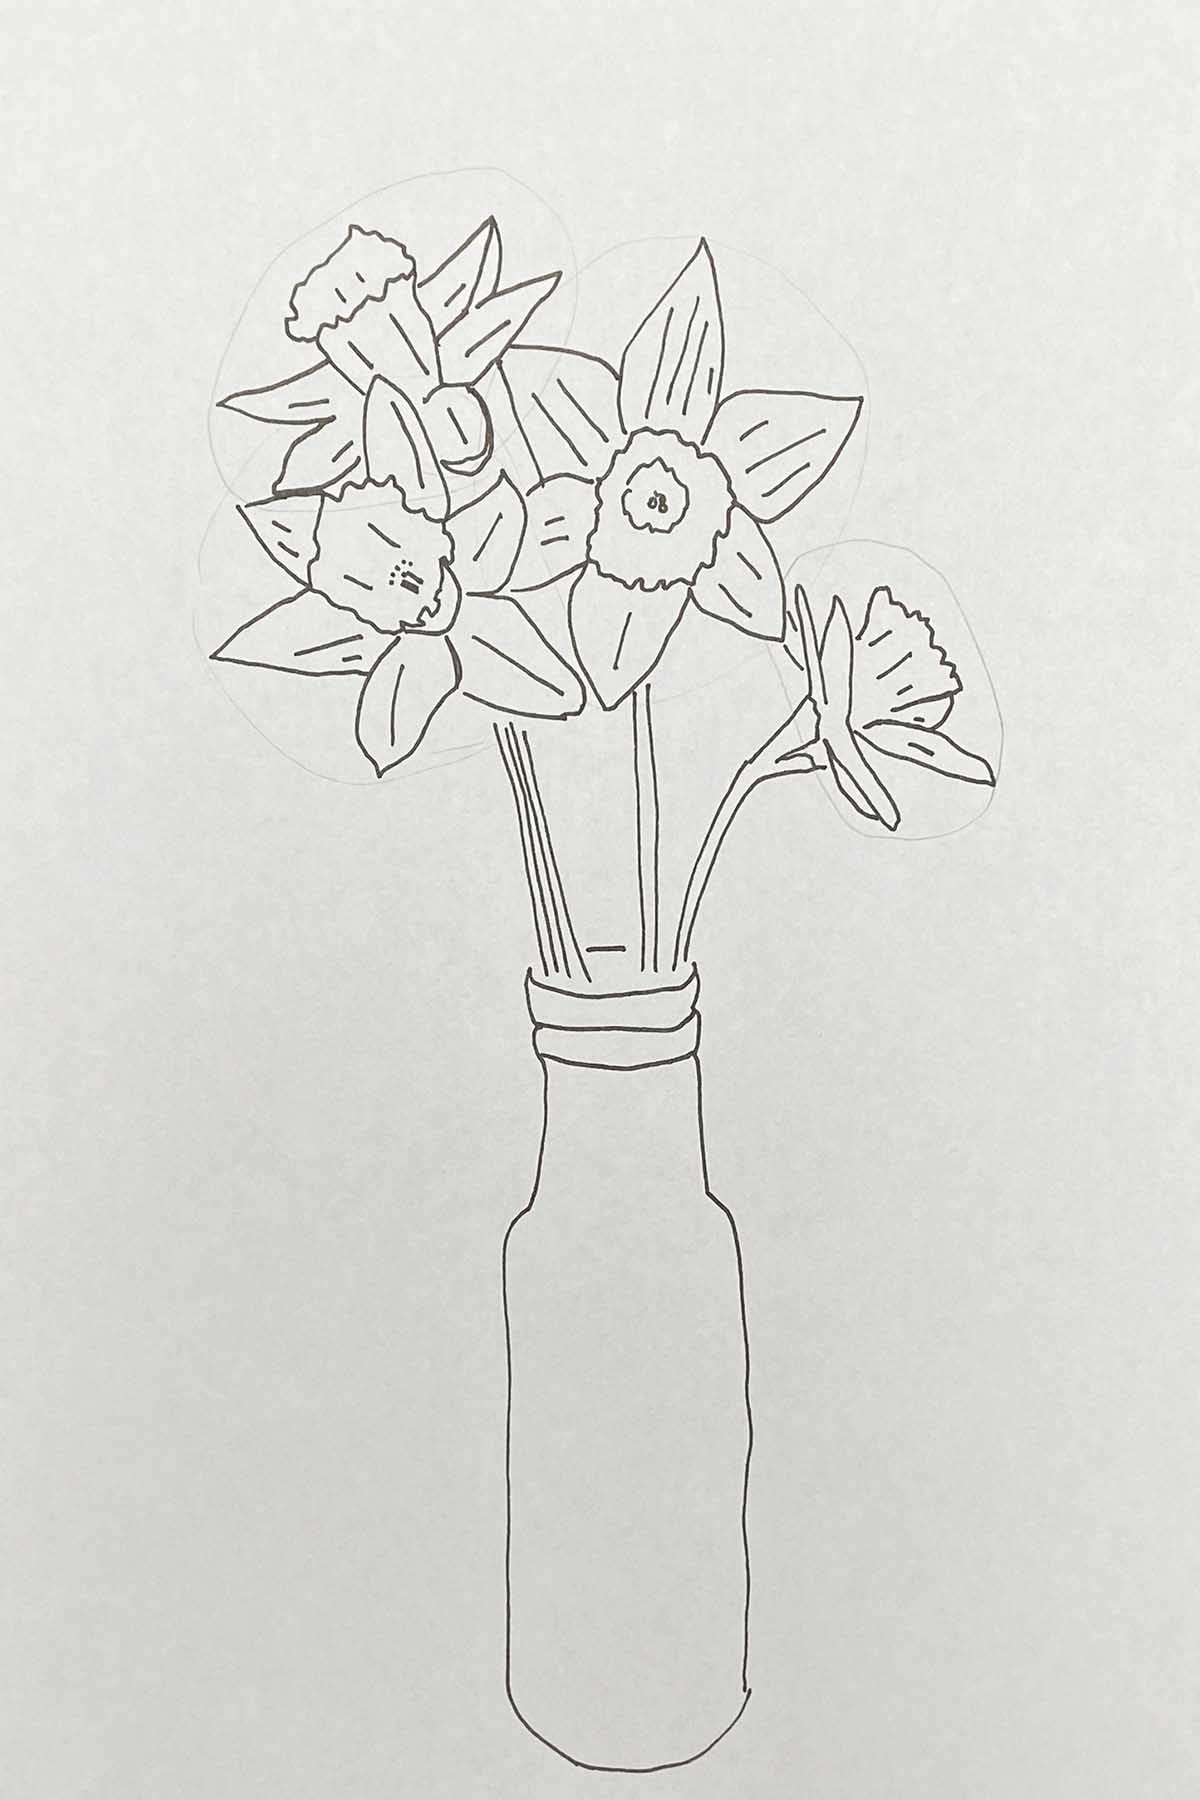
Step 1: Draw your vase with stems coming out of it. Here, I have chosen a milk bottle shape, but you can choose whatever shape you like.
Steps 2 & 3: In pencil, draw overlapping ovals and circles on top of the stems to help define where your flower heads will go. As shown in the previous tutorials, add your flower heads from different perspectives.
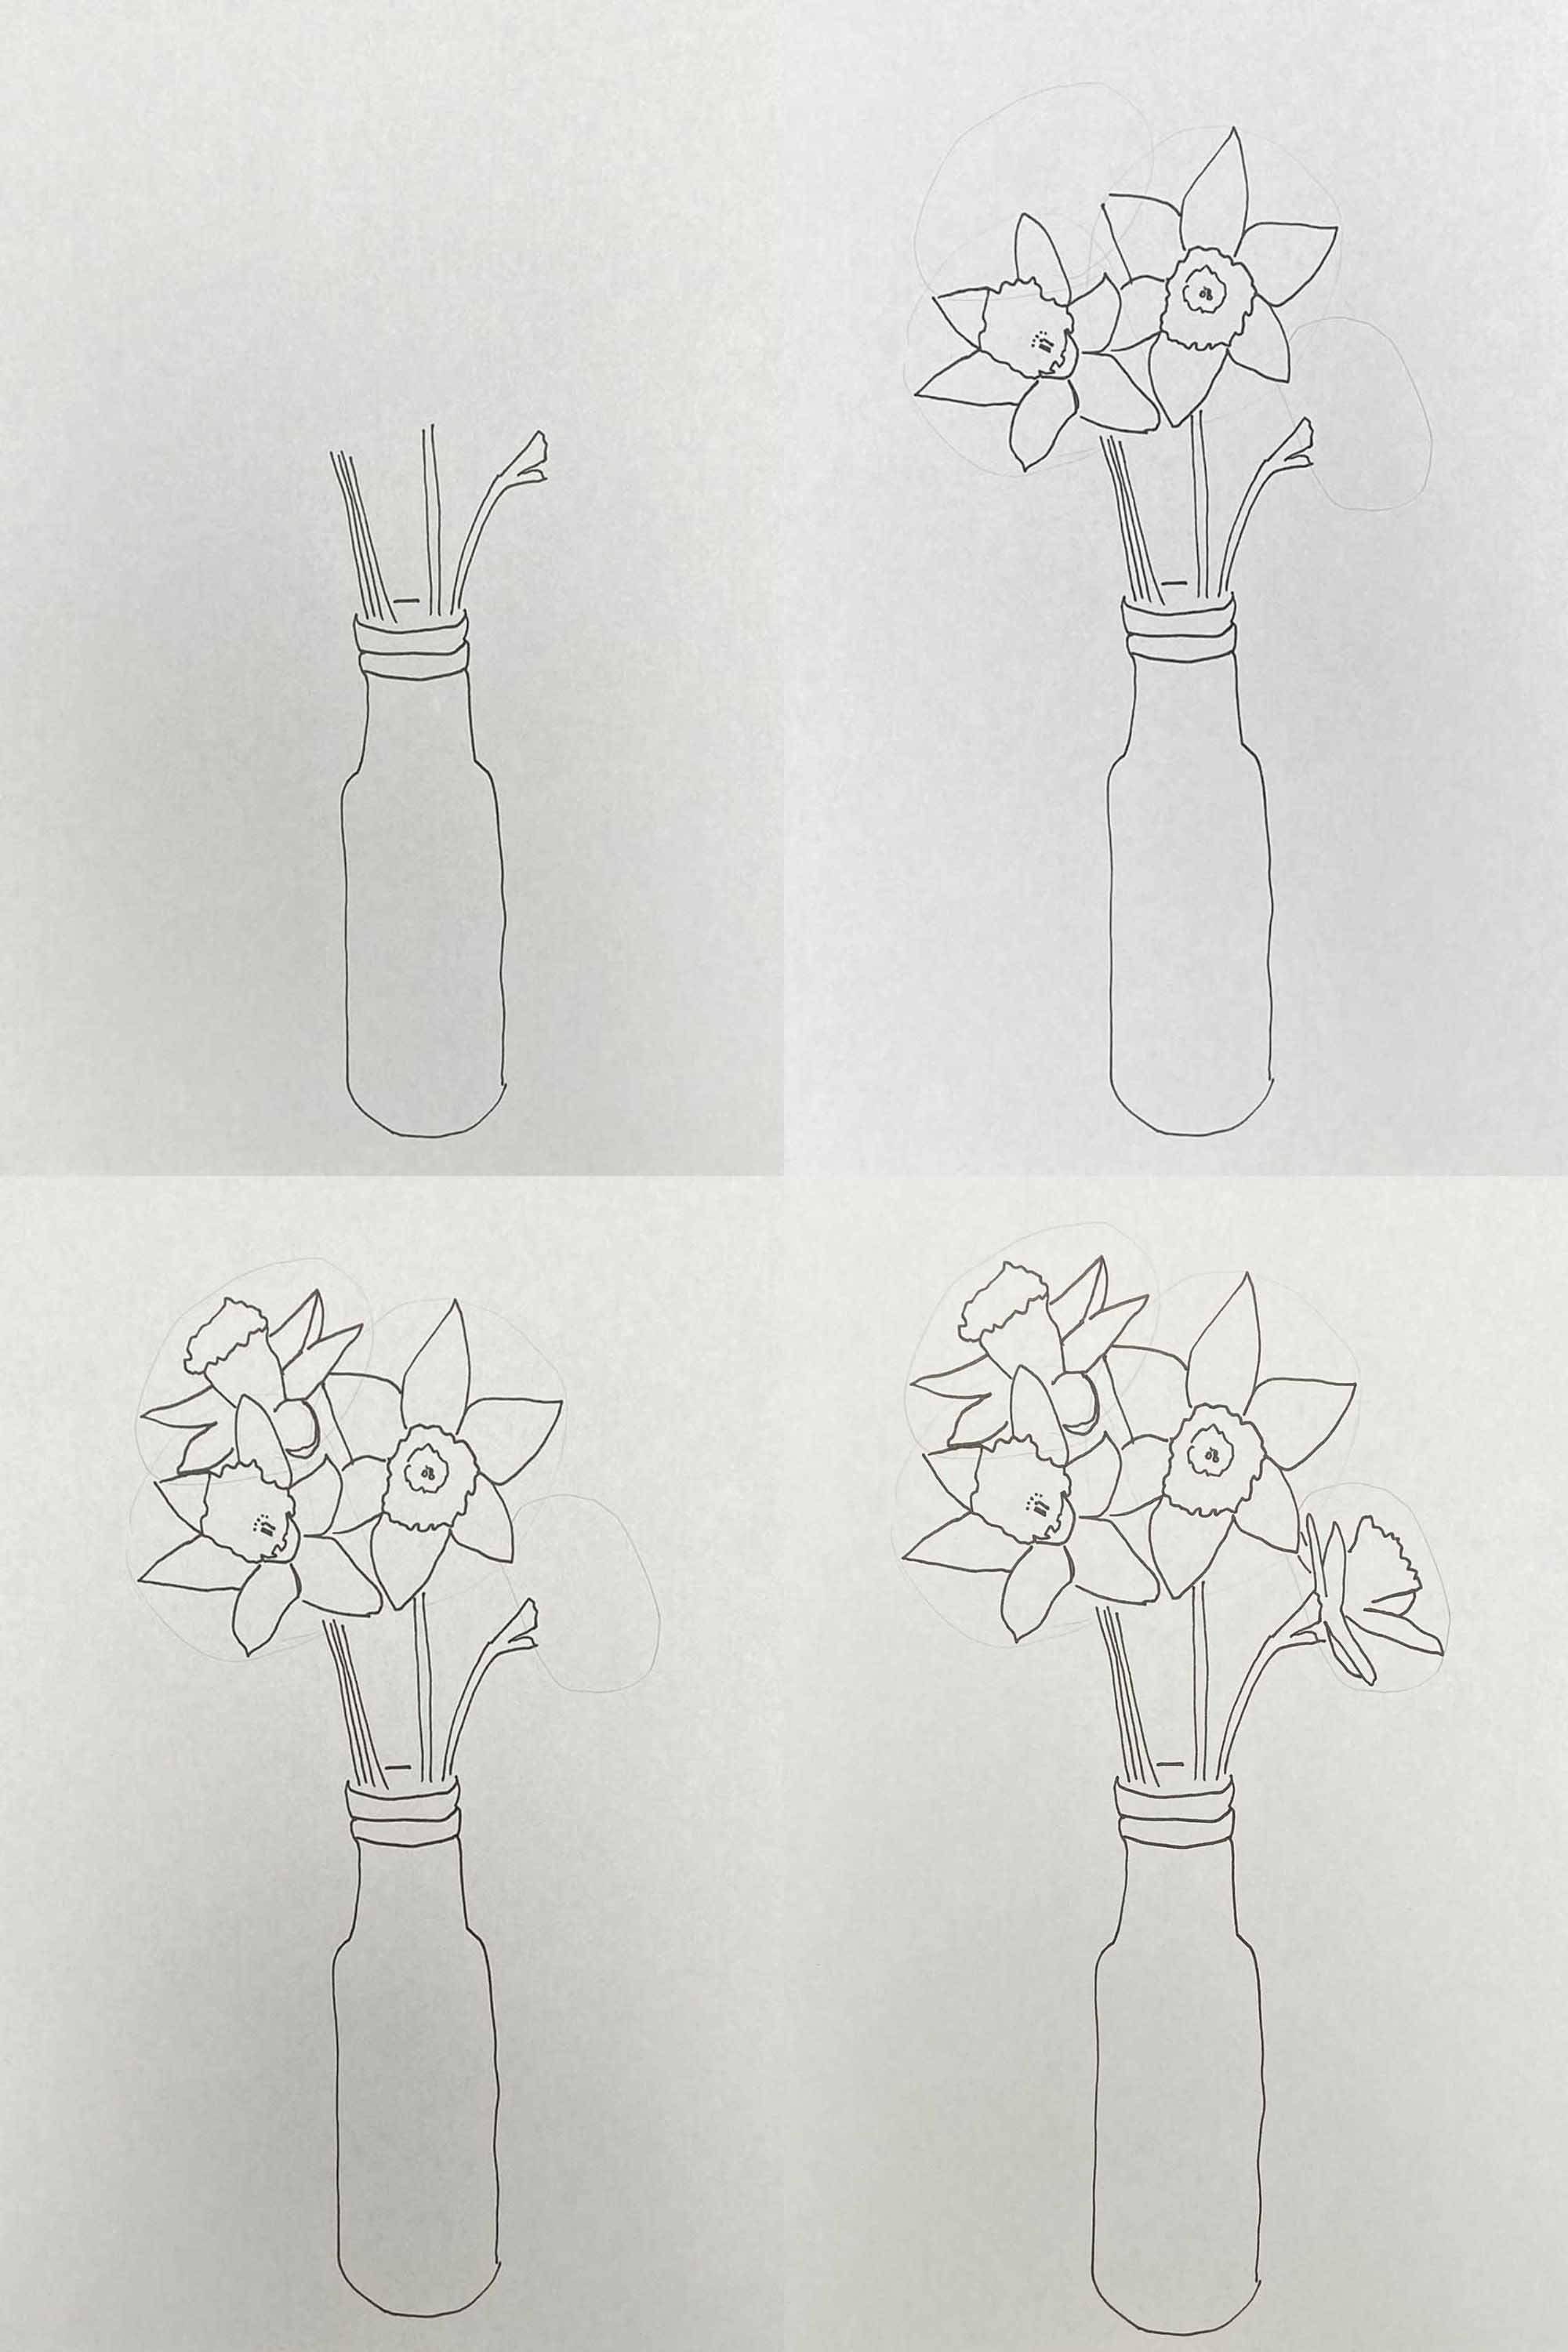
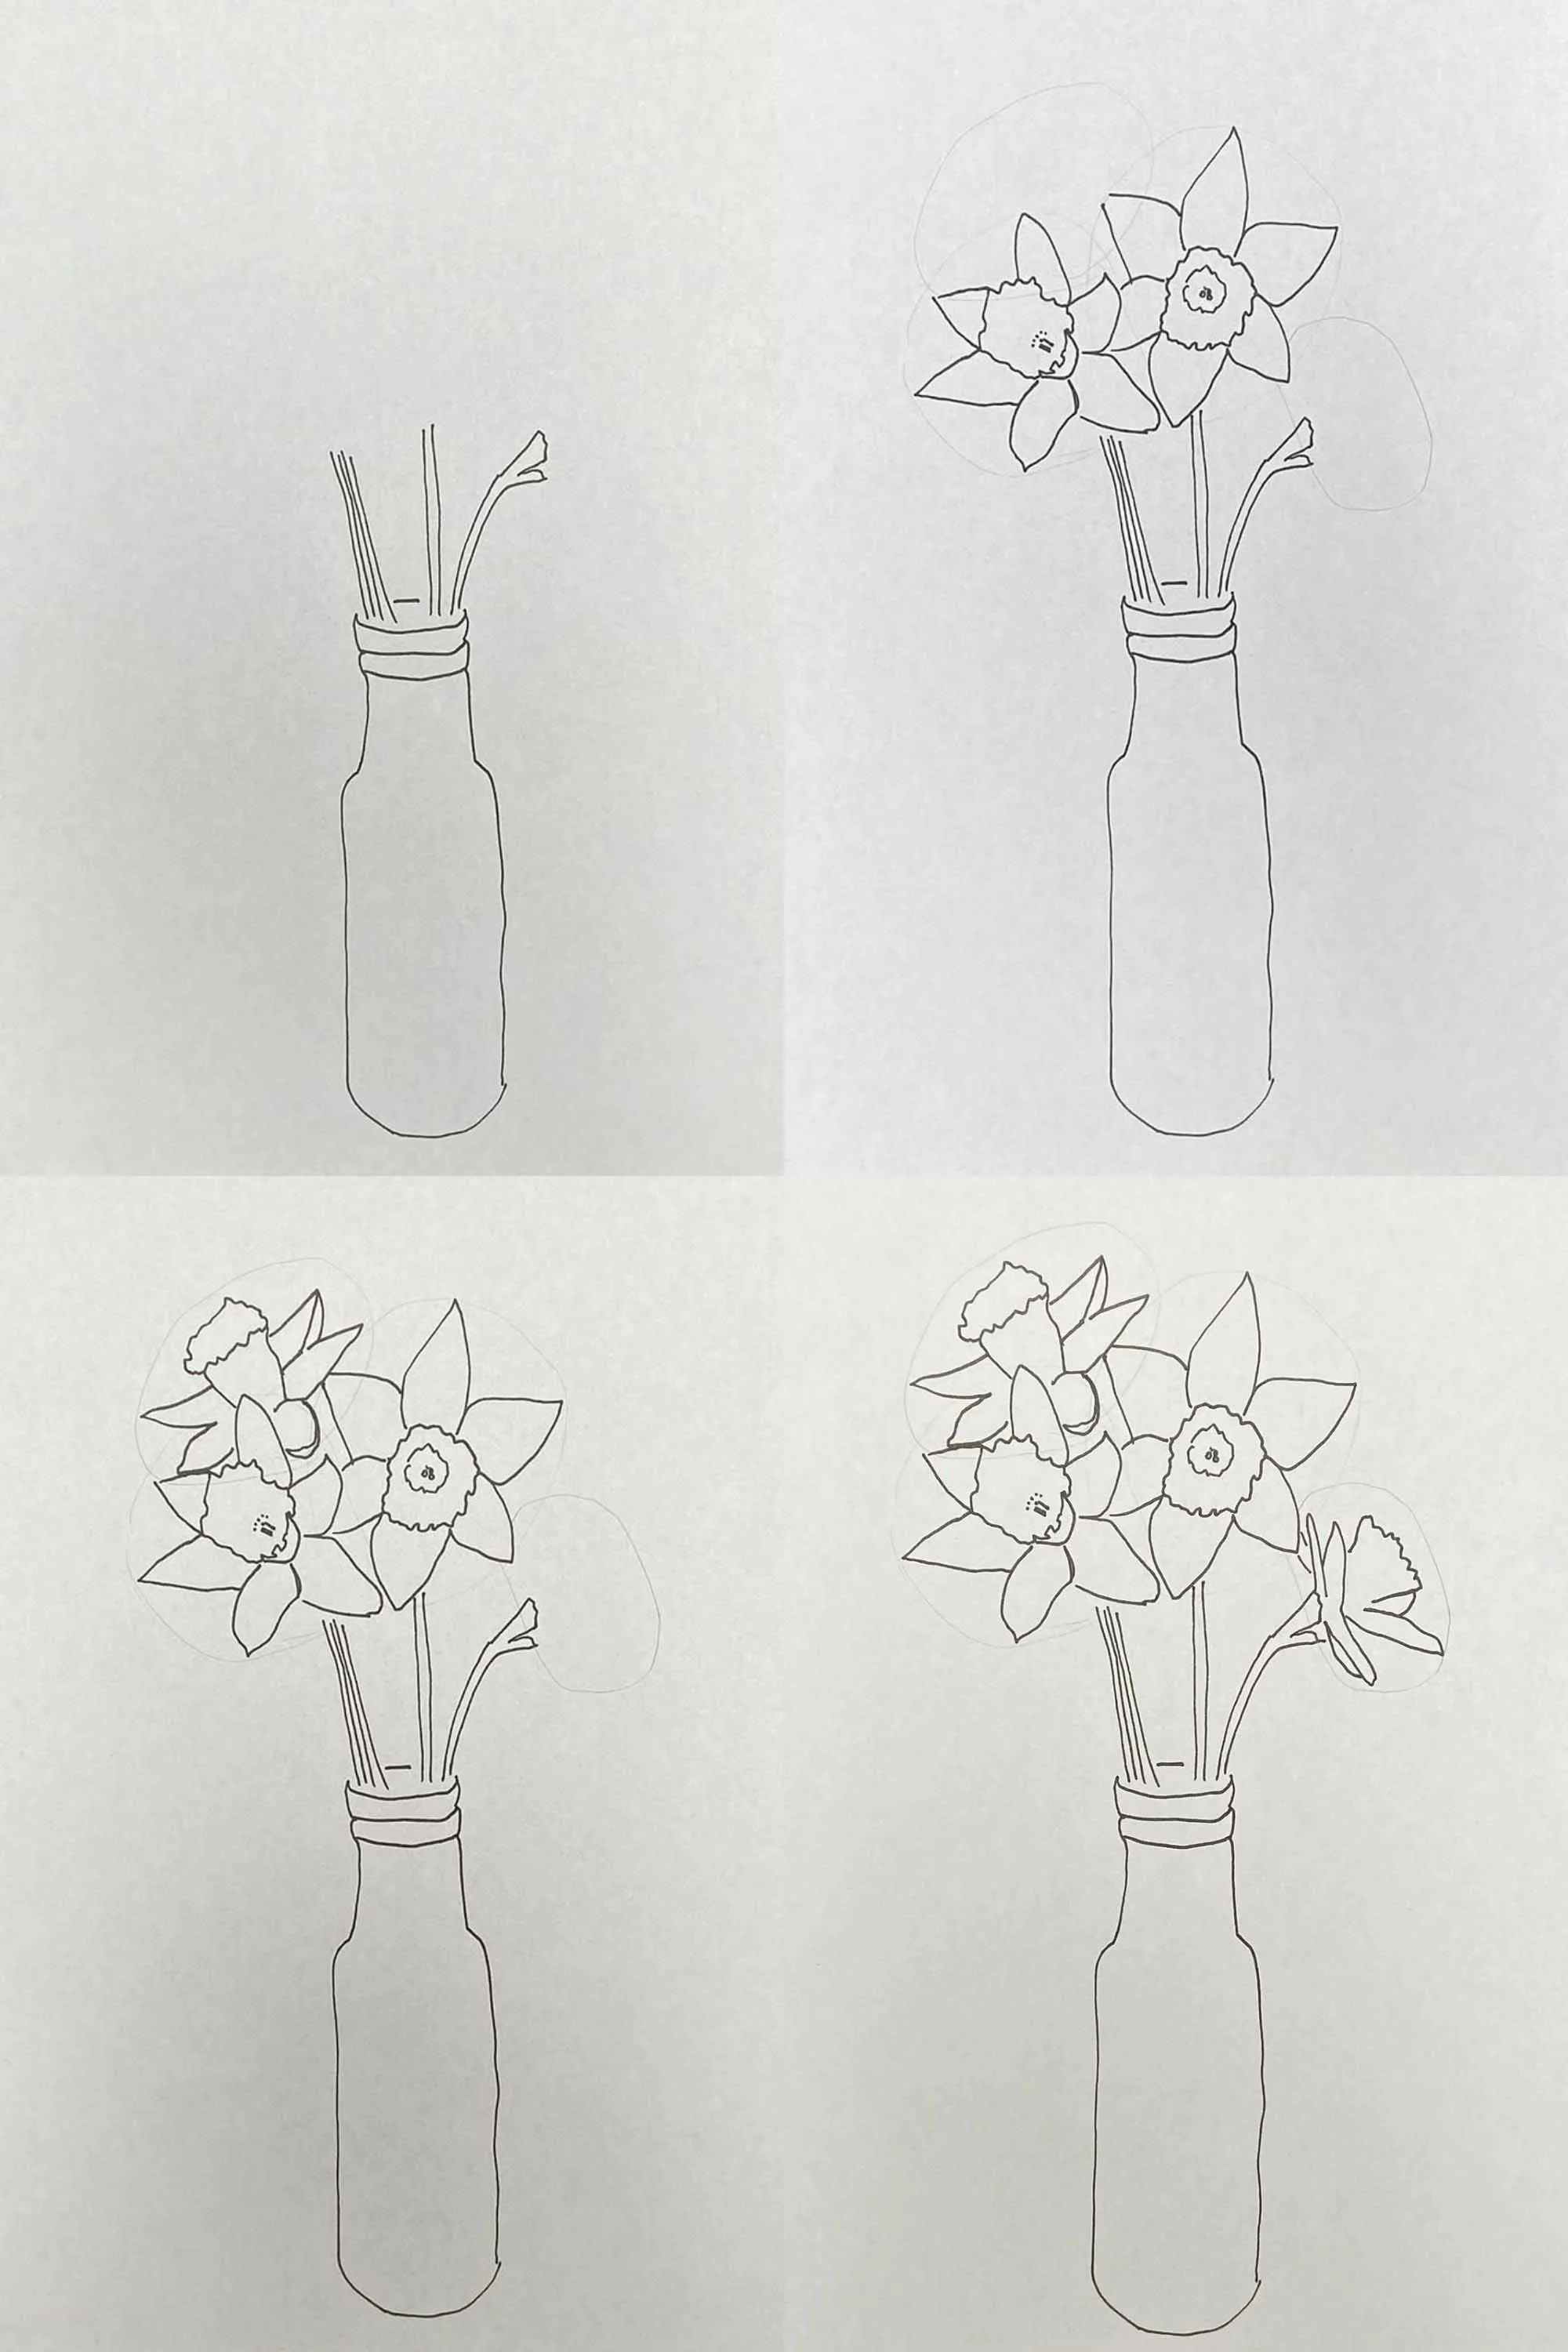
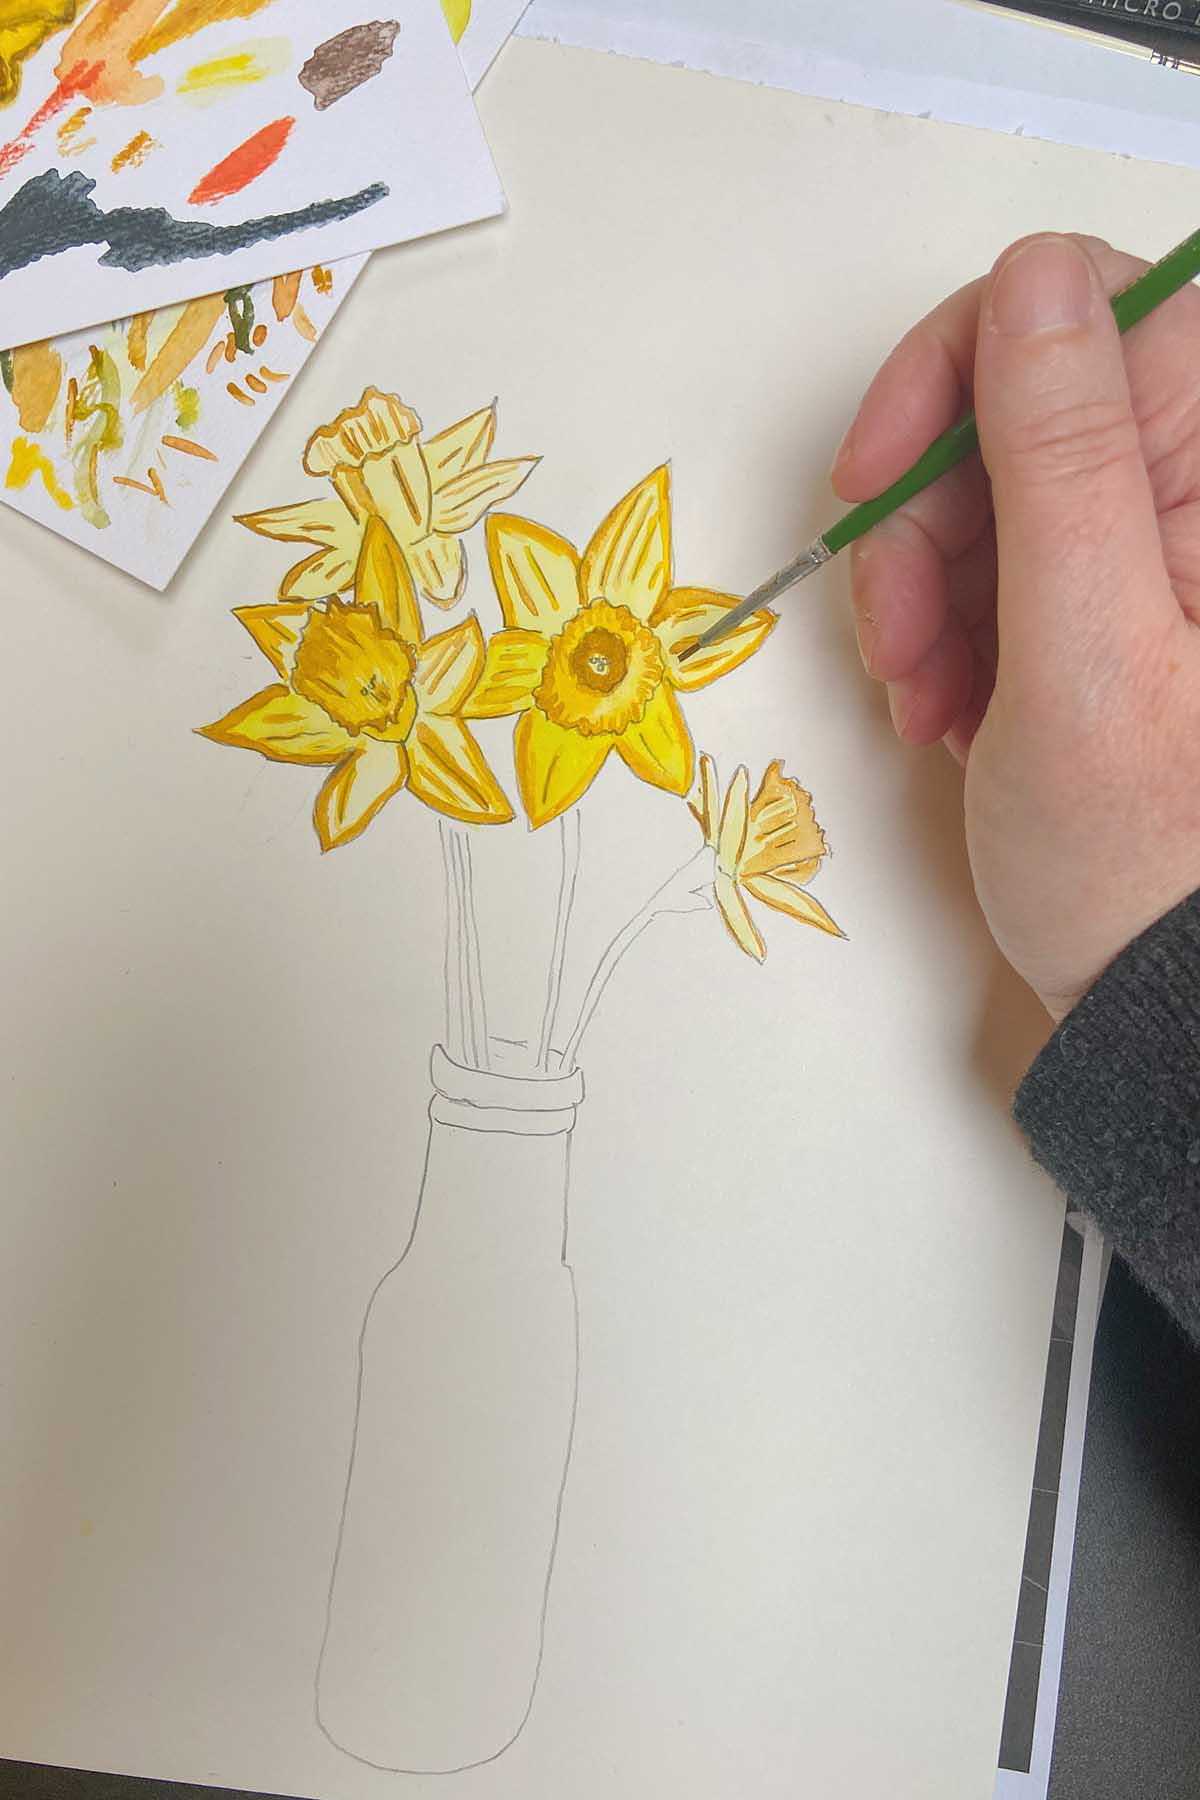
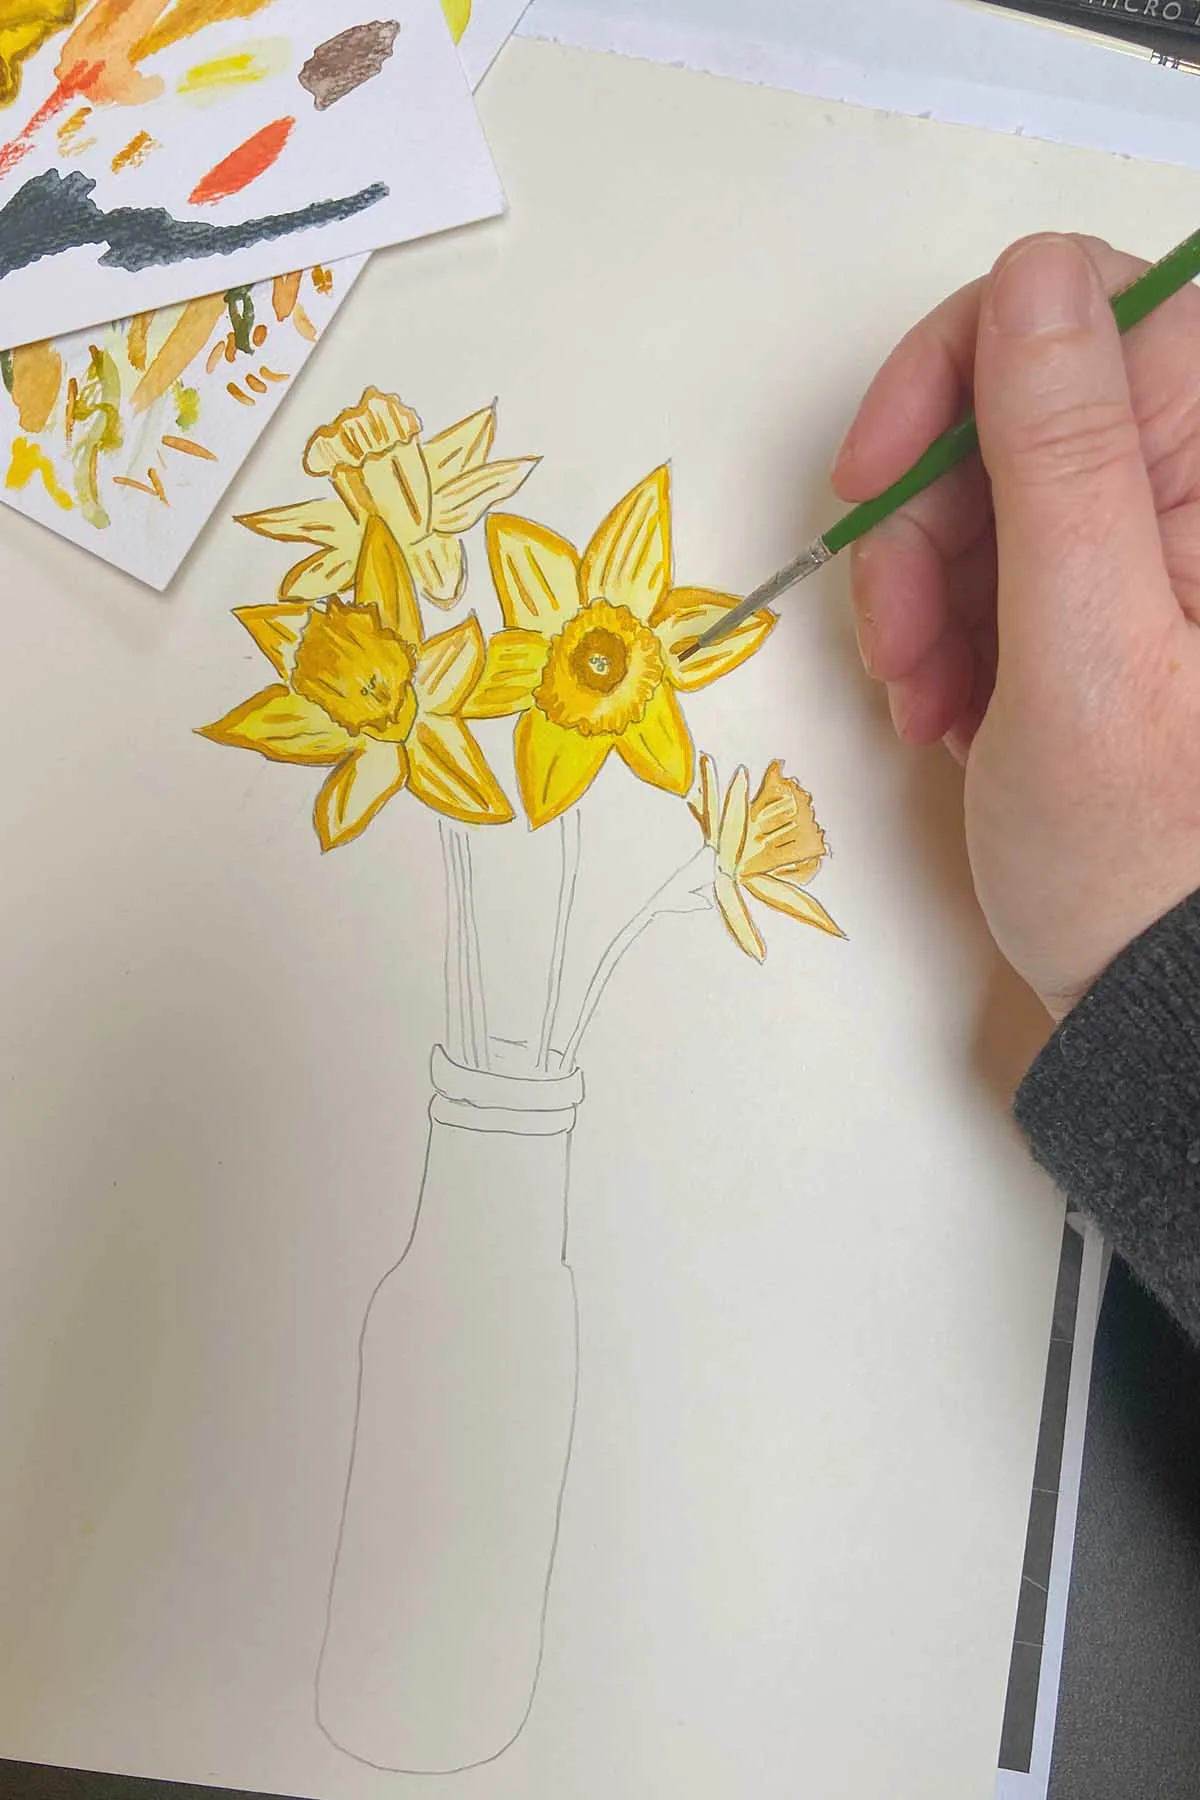
Step 4: Finish off by adding the lines and details to your flowers.

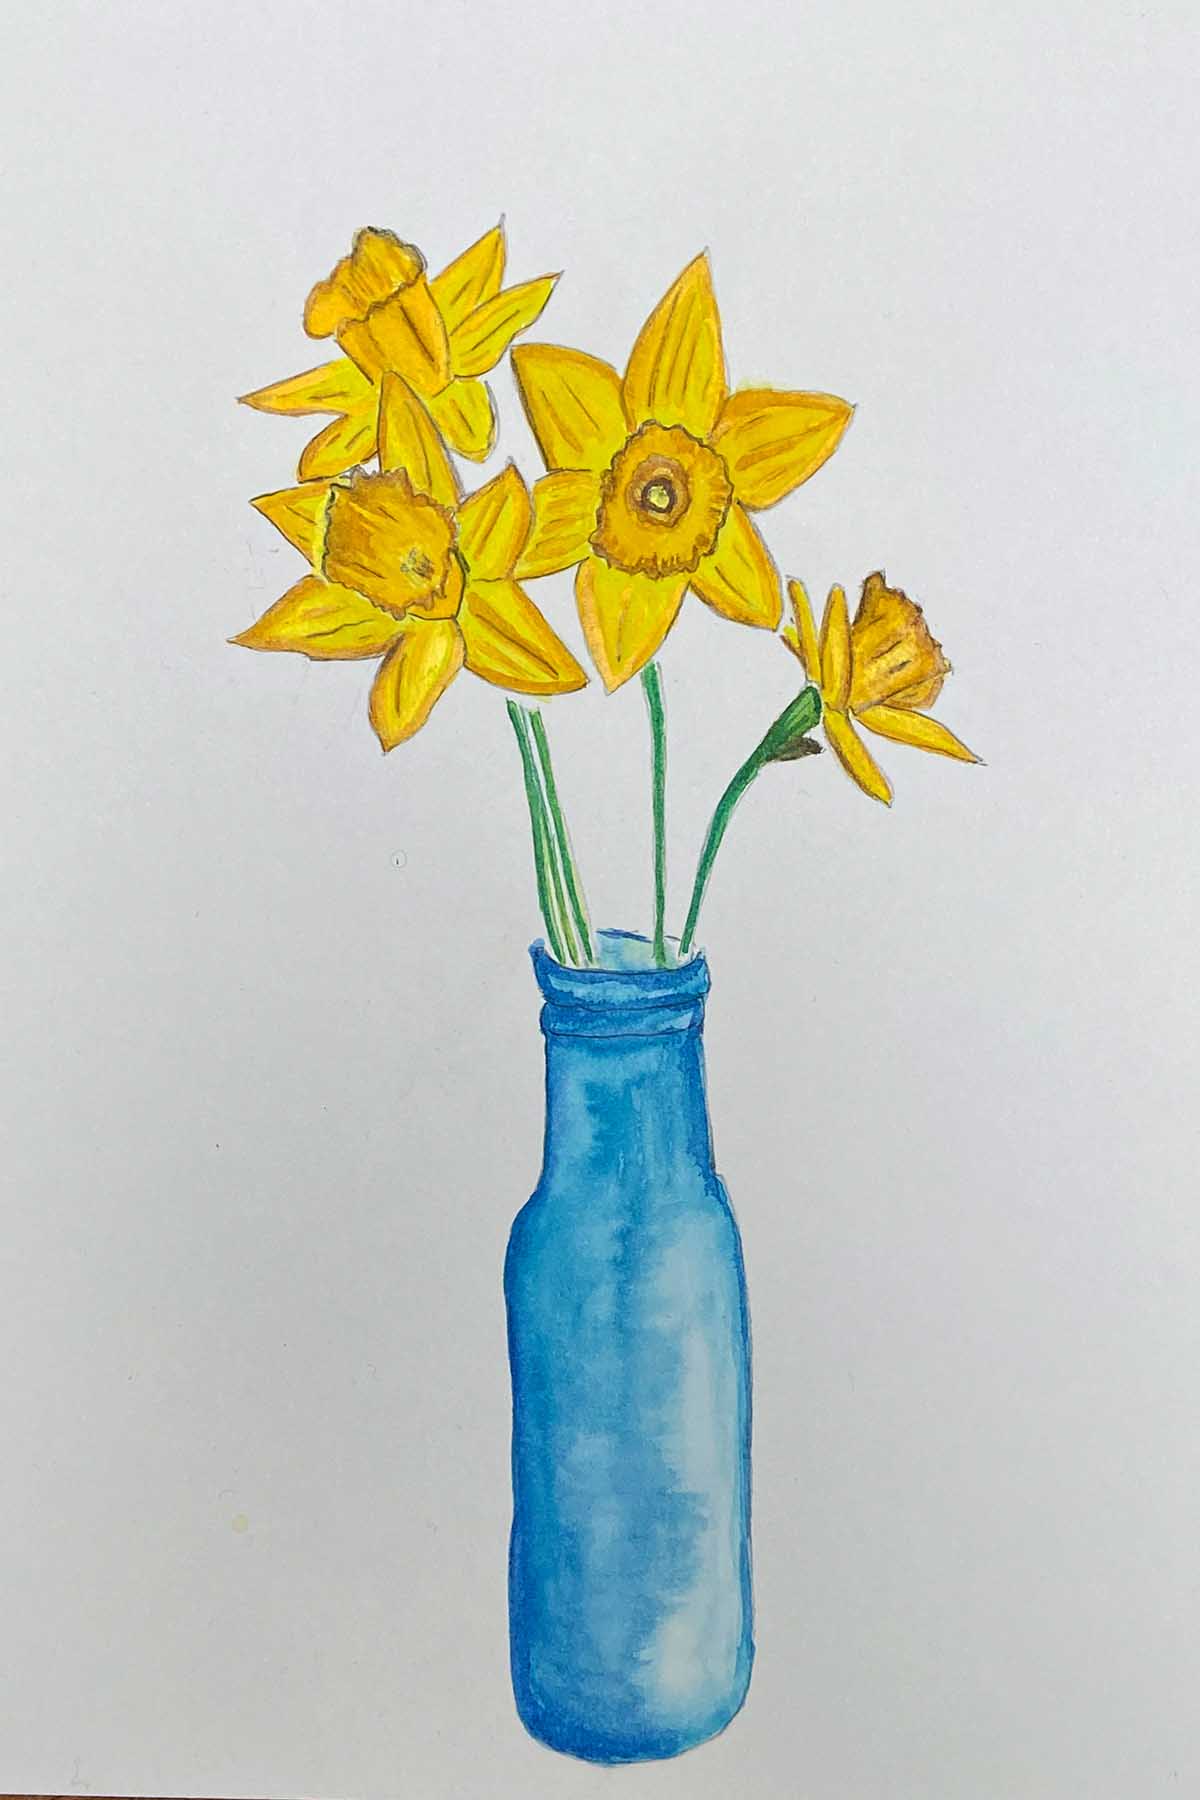
Step 6: Add colour; I used watercolour, although I chose classic Daffodil yellow for all my flower drawings. You can get some inspiration from the vintage images here for different variations. I like the variety with a dark yellow or orange trumpet centre and white petals.
Also, the poet Daffodil, with a pretty pink ring in the centre, would be lovely to try to paint. All the shapes are very similar, so you can use this tutorial as a starting point to paint different varieties.

Conclusion and Related Posts
Congratulations on completing your daffodil drawing journey! With these tips and techniques, you’ve learned to look at these sunny flowers from new angles, capturing their beauty in your unique style. Remember, practice is key to mastering any art form, so don’t hesitate to revisit these exercises or explore new perspectives.
For more floral inspiration, check out my collection of vintage flower illustrations. You’ll find more examples of daffodil illustrations in Adolphe Millot’s antique Botanical Posters, Jane Loudon’s Bulbous Plants and a beautiful stylised Daffodil in Maurice Pillard Verneuil art nouveau flower prints.
These public-domain treasures are perfect for study, practice, or use in your creative botanical projects.
And if you’re eager to expand your botanical art skills further, don’t miss my other flower drawing tutorials, which include how to draw hibiscus and easy cherry blossoms.
Another popular spring flower is the tulip and it’s much easier to draw than daffodils. Check out my easy tulip drawing guide.
Pin for later

If you fancy, you can Buy Me A Coffee Here.
Paula Short
Friday 22nd of March 2024
Claire, I so appreciate this tutorial on how to draw daffodils. You do such lovely work.
claire
Saturday 23rd of March 2024
Thank you so much; that is lovely to hear.
Julie
Thursday 21st of March 2024
I love daffodils, they are just so cheerful. Thank you for this lovely and clear tutorial and for sharing it at Handmade Monday.
claire
Friday 22nd of March 2024
Thank you; they are a lovely, warm welcome after winter.
Kristie
Thursday 21st of March 2024
I'm loving these painted daffodils. You're being featured on the Home Matters Link Party tonight at 9 pm. I hope you can drop by!
claire
Friday 22nd of March 2024
Thank you so much. That's lovely to hear; I look forward to seeing it.
Jennifer
Tuesday 19th of March 2024
This is wonderful! I need to take some creative time to do this! I don't have much experience drawing, but I love all these easy-to-follow steps! Thank you for sharing this post.
claire
Wednesday 20th of March 2024
Thanks, yes these tutorials are aimed a beginners so that anyone can try and draw the flowers.