
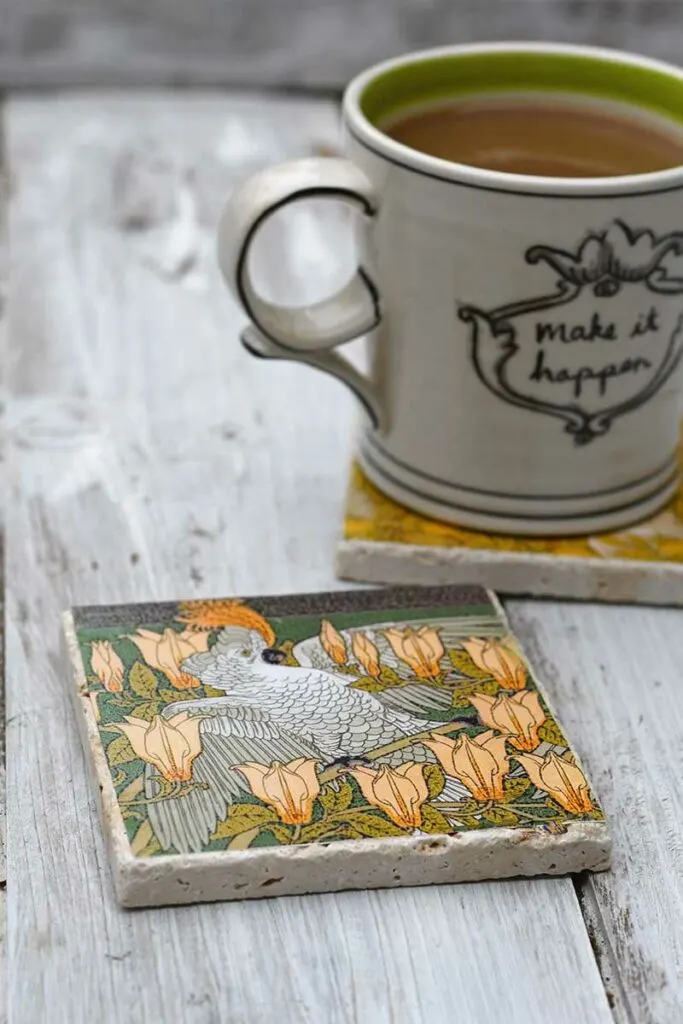
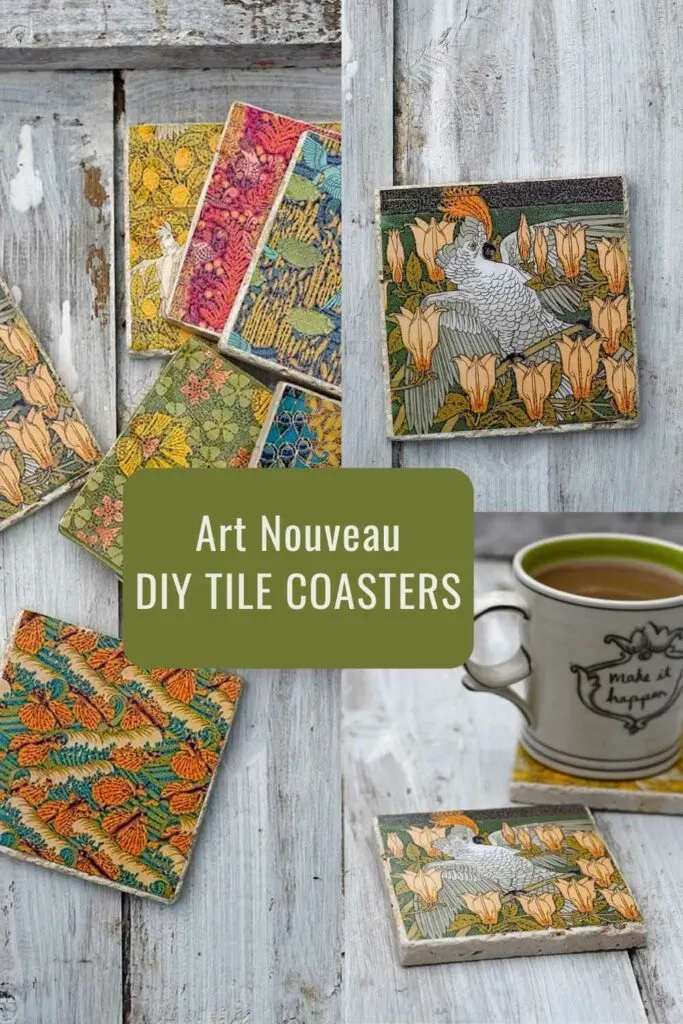
Here are two crafts in one. The first is a tutorial for DIY tile coasters using the wonderful Art Nouveau animal designs shared on this site. The second is a tutorial on how to make gorgeous art nouveau tile planters using tile coasters.
The posts include free downloads of the art nouveau patterns in a square format to make the pretty tile coasters. But many other retro patterns and art designs would look great as coasters, such as those of William Morris or Ernst Haeckel.
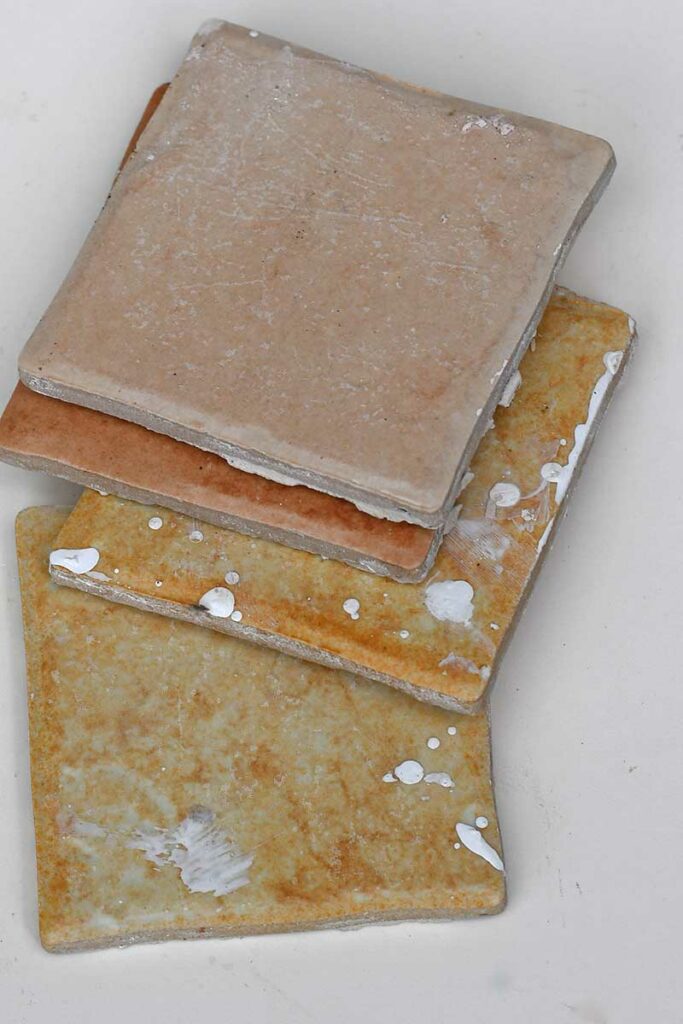
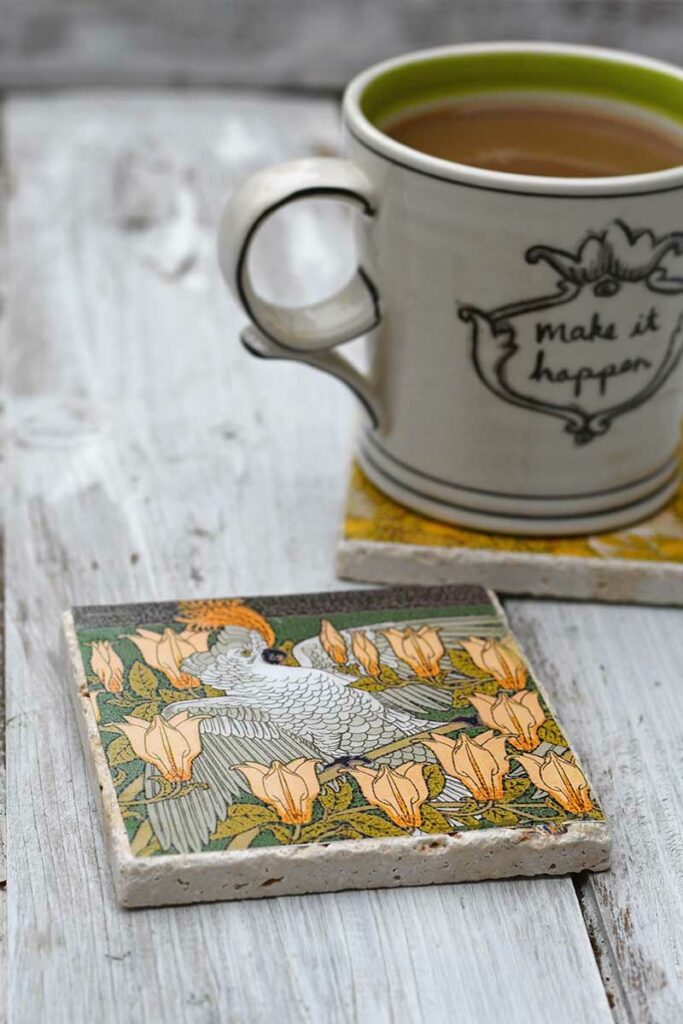
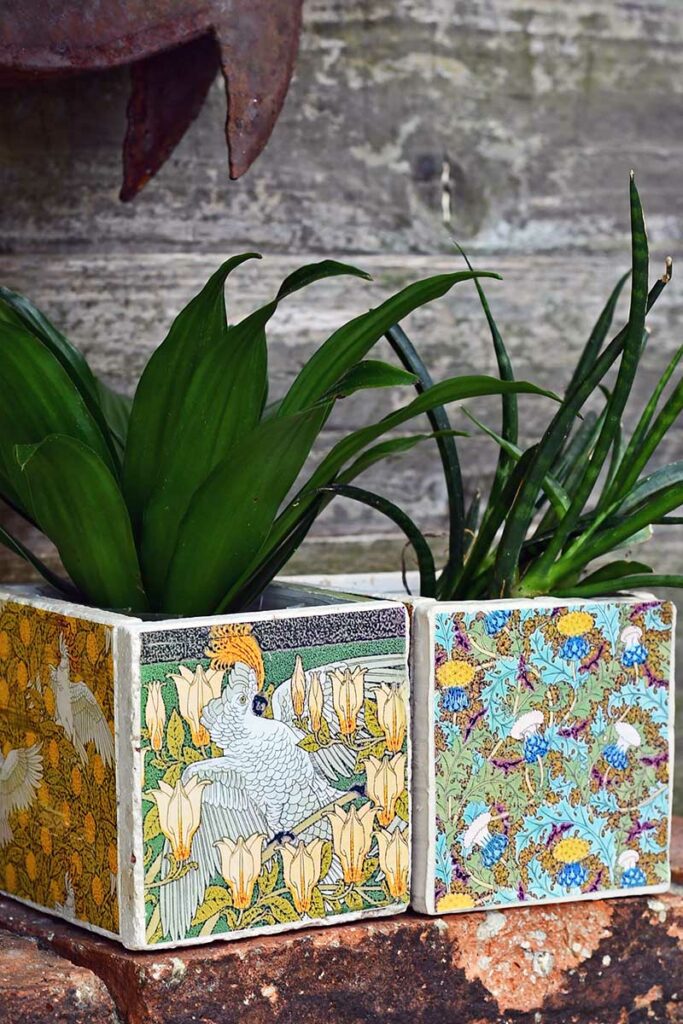
These DIY tile coasters are very easy to make and very affordable. They would make a great handmade gift, and the designs can be personalized to the recipient’s taste. I think the tile planters would make a wonderful hostess or housewarming gift.
We are a participant in the Amazon Services LLC Associates Program, an affiliate advertising program designed to provide a means for us to earn fees by linking to Amazon.com and affiliated sites. As an Amazon Associate, I earn from qualifying purchases.
What You Need To Make Tile Coasters
- Ceramic tiles – I used 4″ square tiles that I rescued from my neighbour’s dumpster when they were updating their kitchen. But you can buy plain square tiles cheaply from the store or use tile samples.

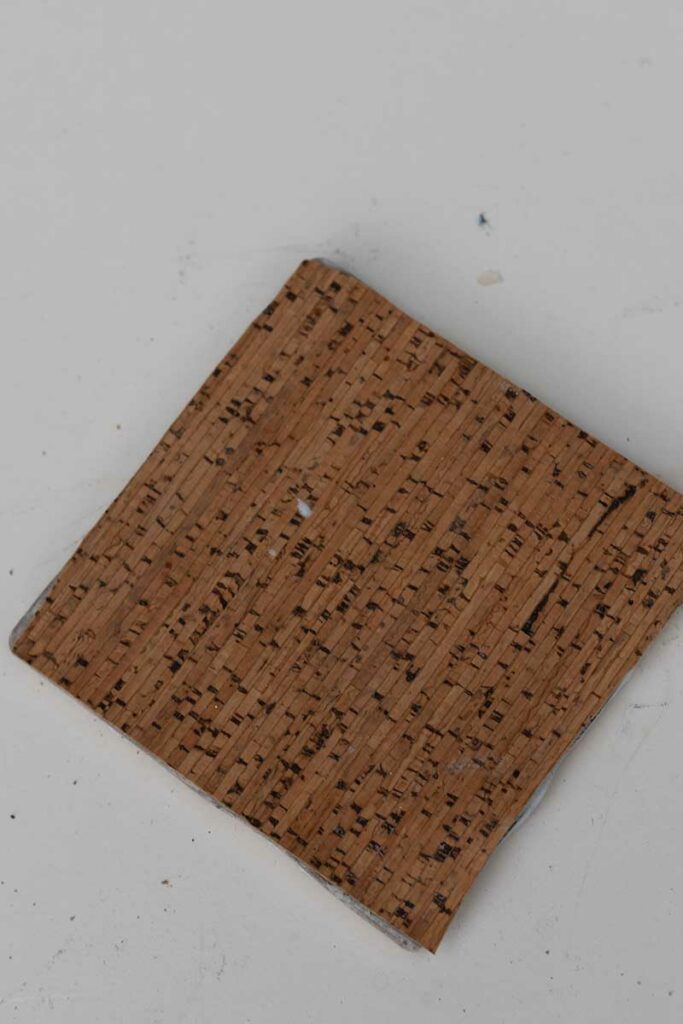
- Cork sheet or felt for the backing
- Mod Podge
- Matt acrylic varnish spray
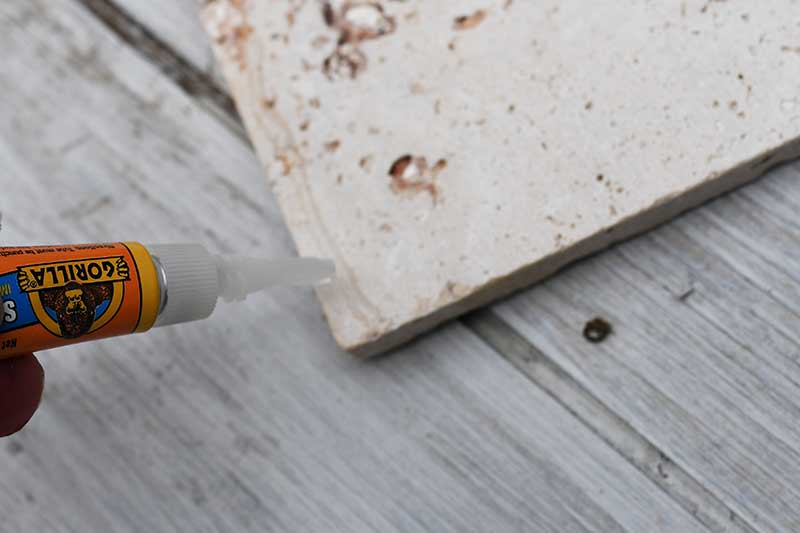
- Superglue gel – This is all you need to turn the tile coasters into tile planters
- Scissors
- Printable decoupage paper or plain white paper napkins.
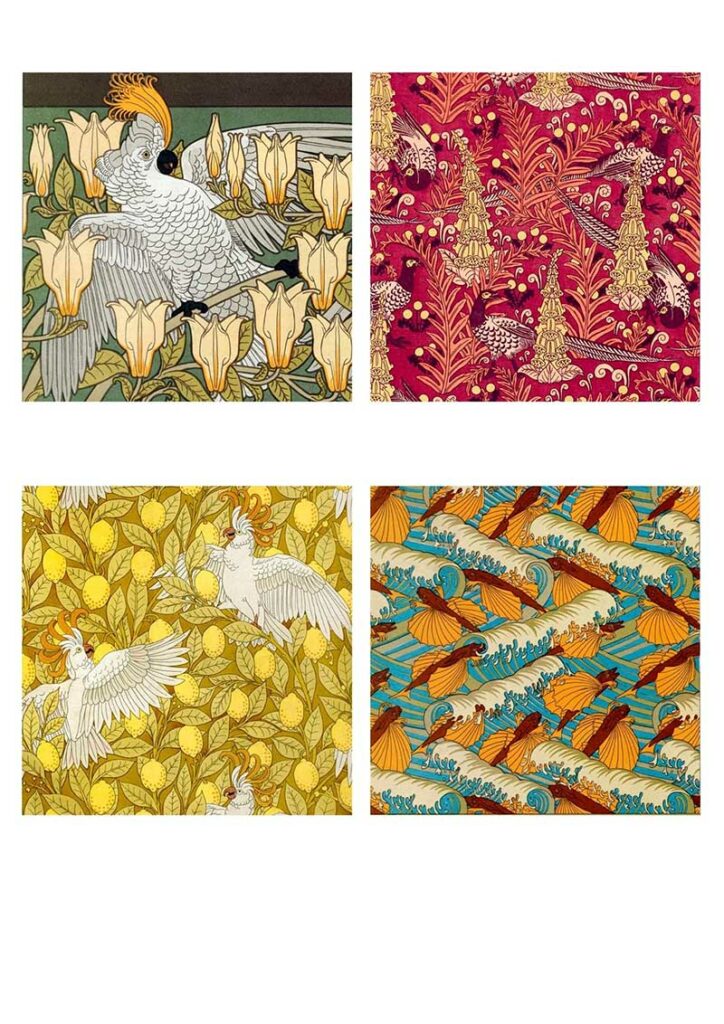
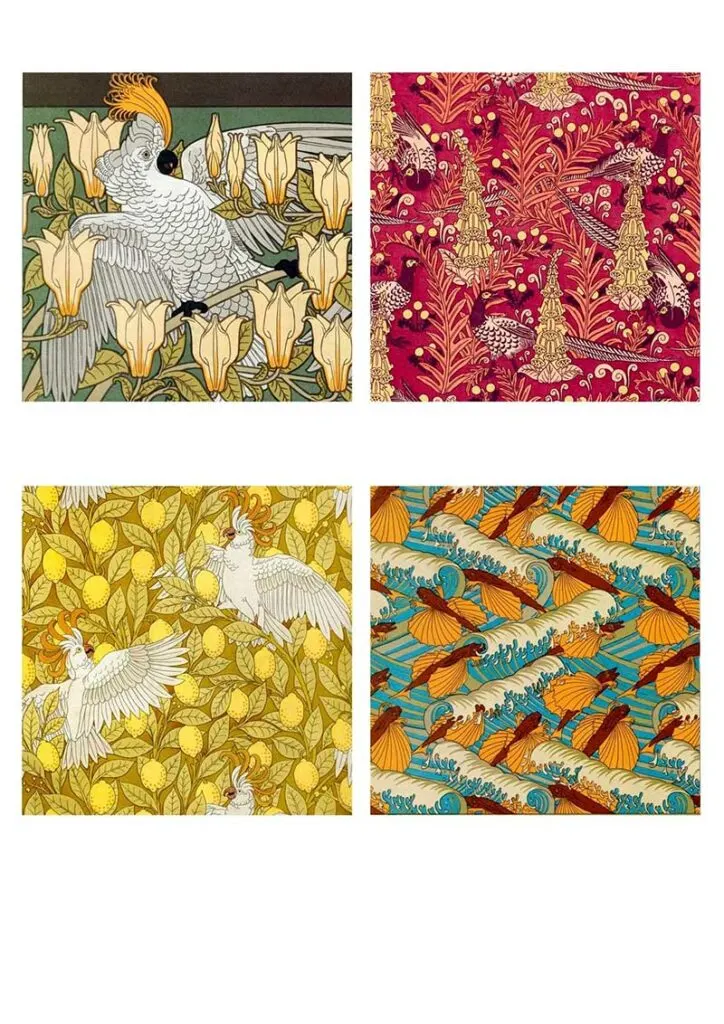
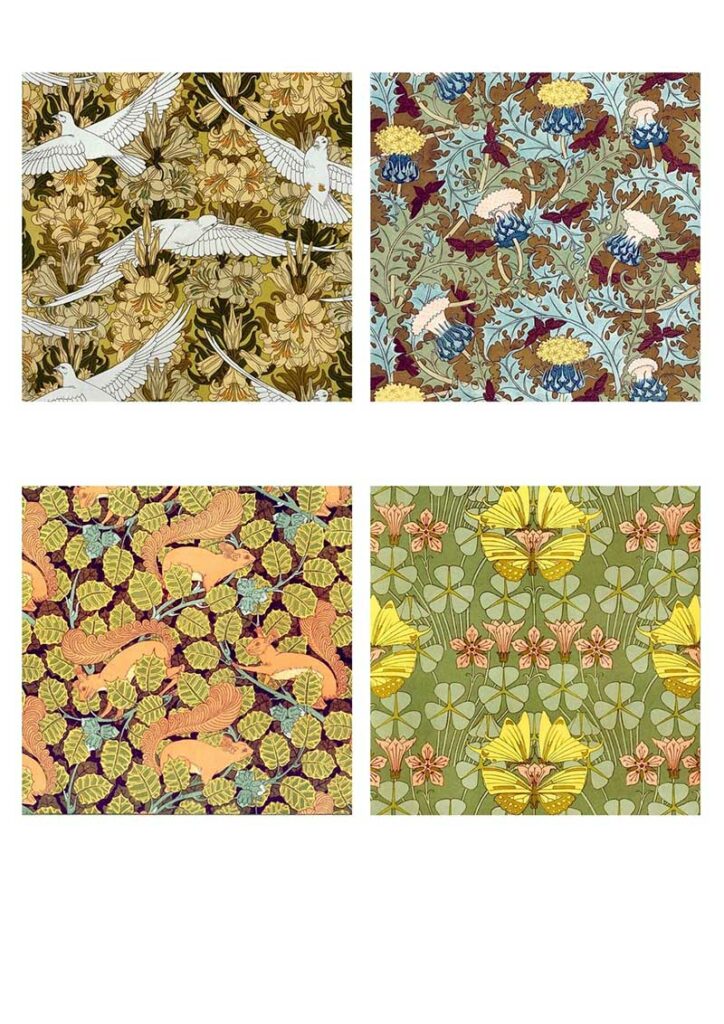
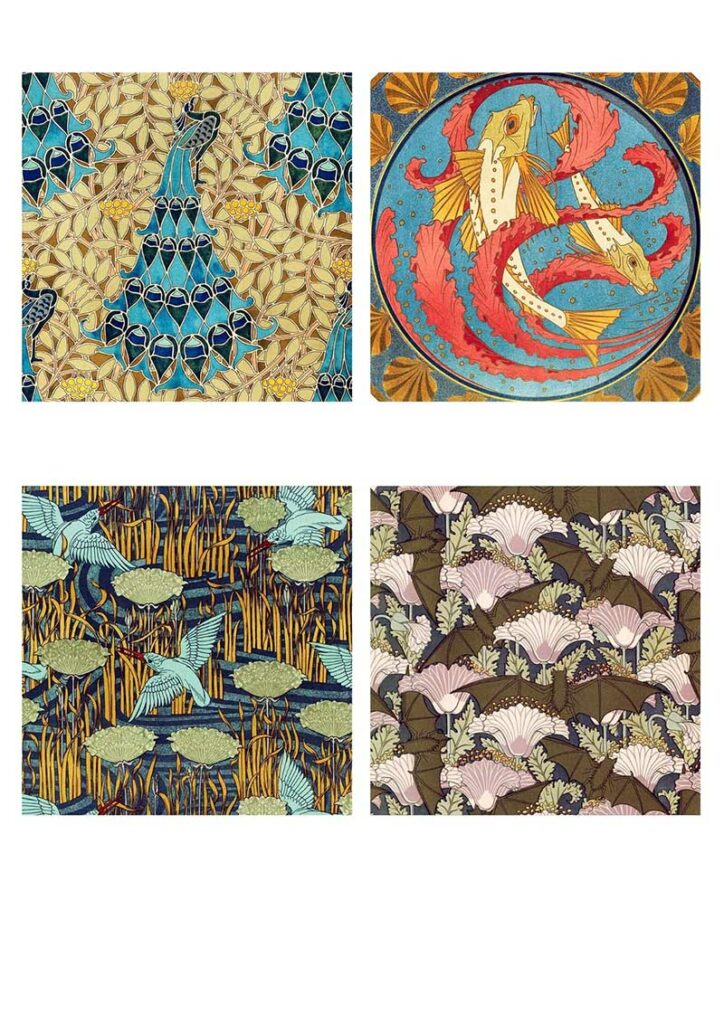
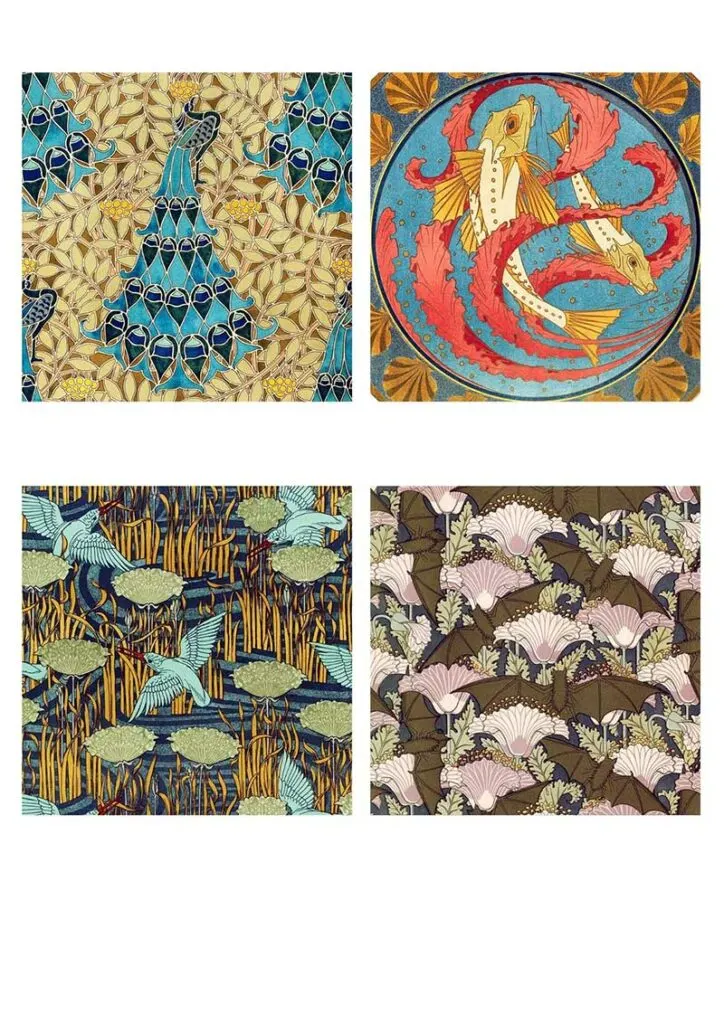
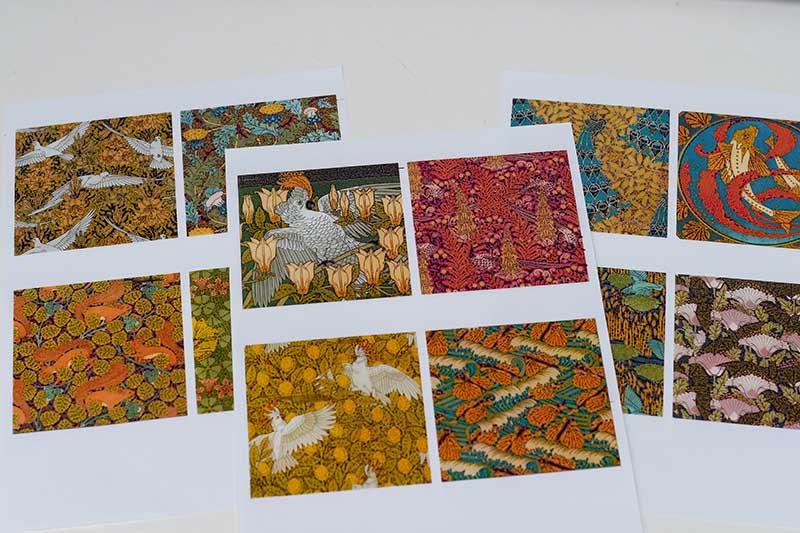
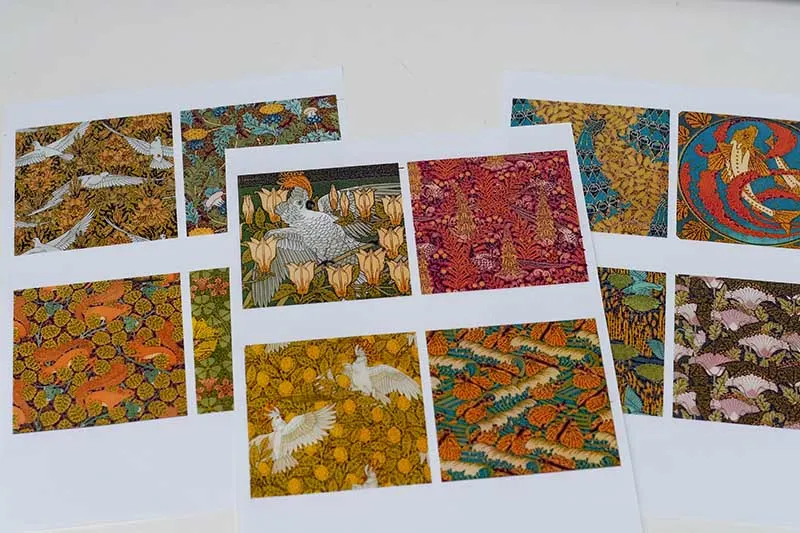
The Art Nouveau Patterns
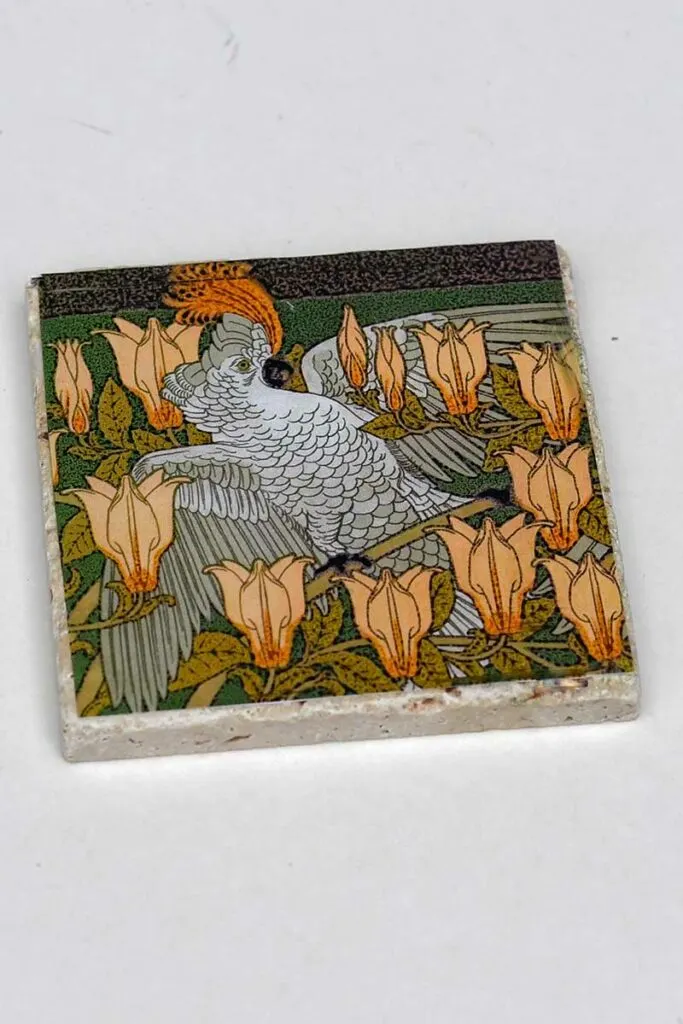
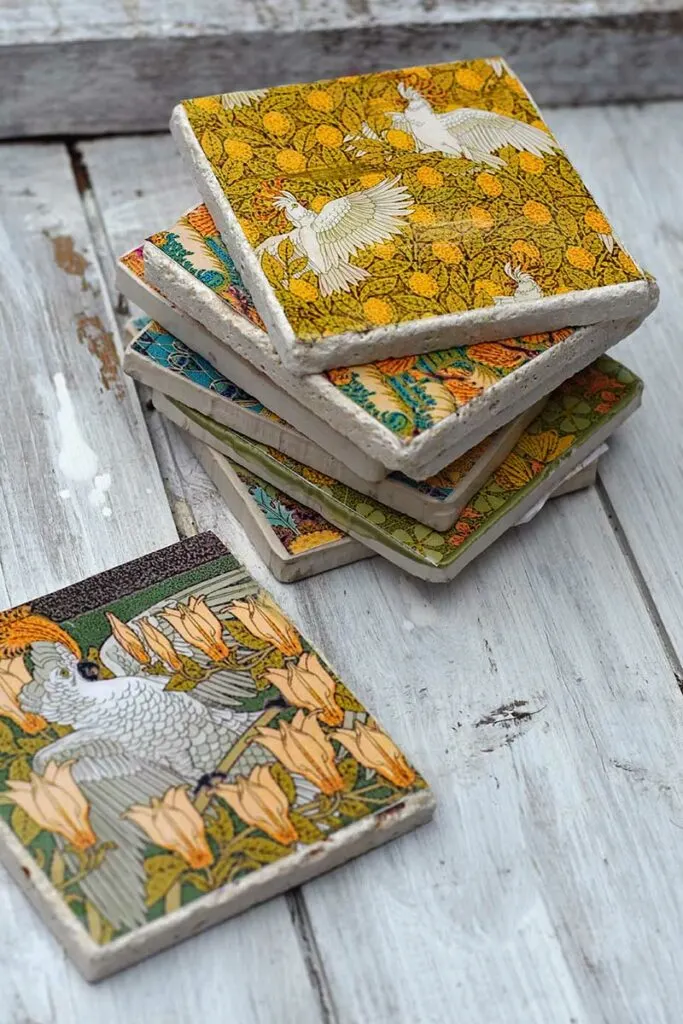
I used the following art nouveau animal patterns for my tile coasters and planters. There are 12 designs to choose from, four on each page. To download the design you want, click on the title above them.
The designs will open as a new window in your browser. If you right-click on that image with your mouse, you can save the designs to your hard drive.

How To Make Tile Coasters
Step 1: First, decide on the print you want to use. If you can, print the design onto decoupage paper. In your printer options, choose the best available print quality.
To print on other types of thin paper, such as tissue paper or paper napkins, tape the paper to computer paper. Use masking tape for this and then put it through the printer like normal paper.
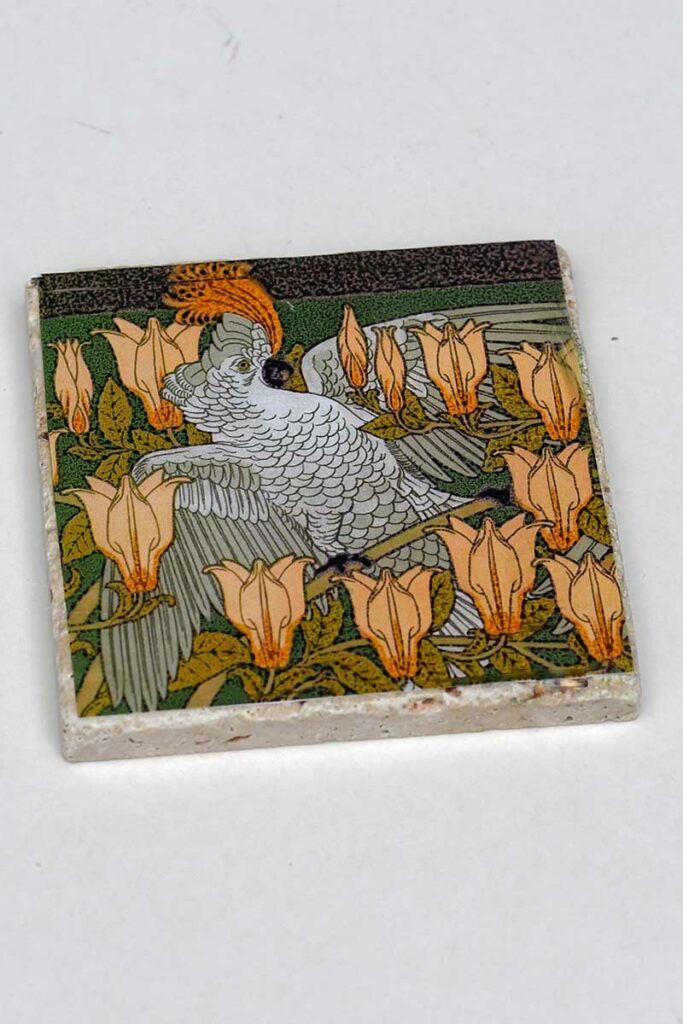
Different papers will look slightly different. If you see below, the print on the paper napkin is a lot duller than the tile prints on glossy decoupage paper.
Cut out the square image once you have decided on your design and paper.
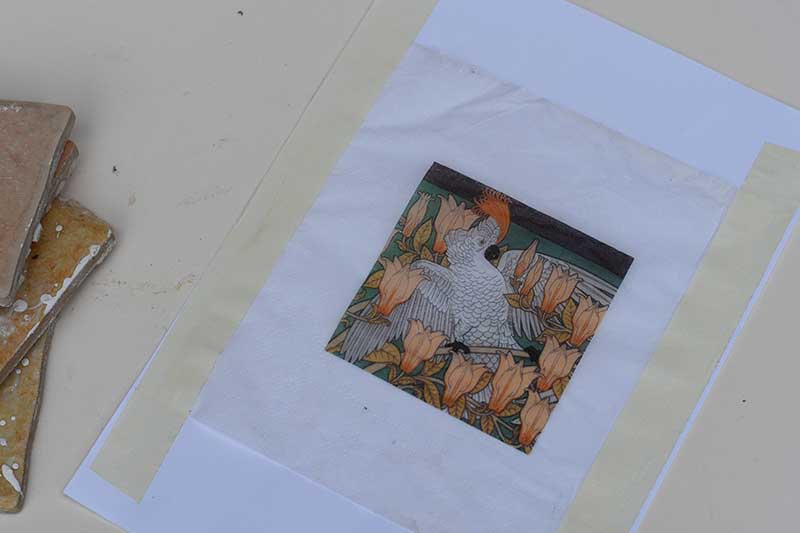

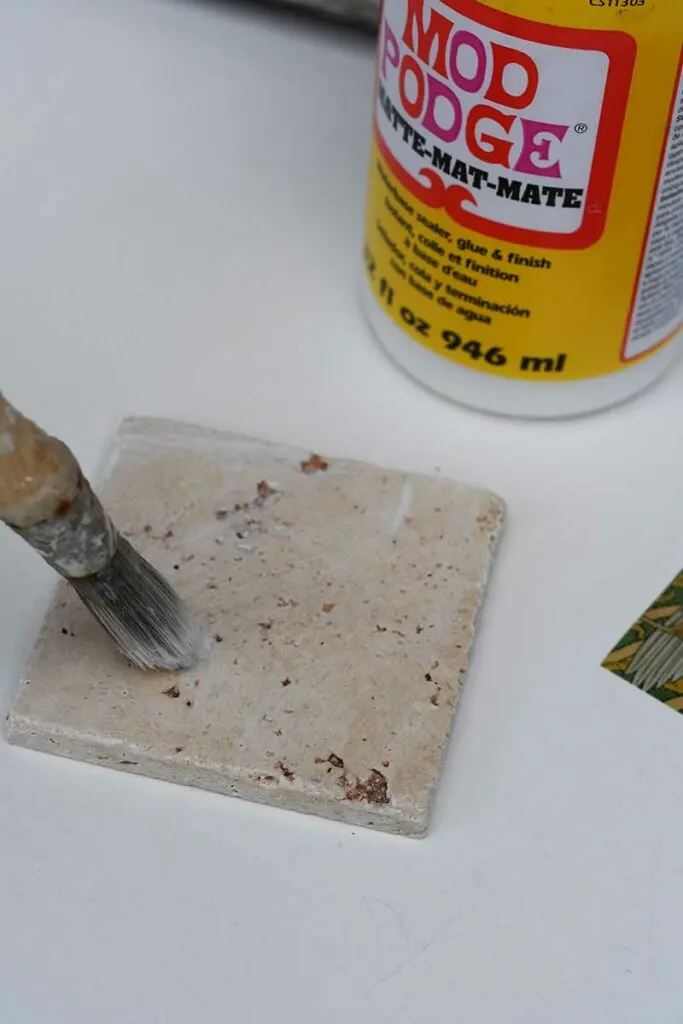
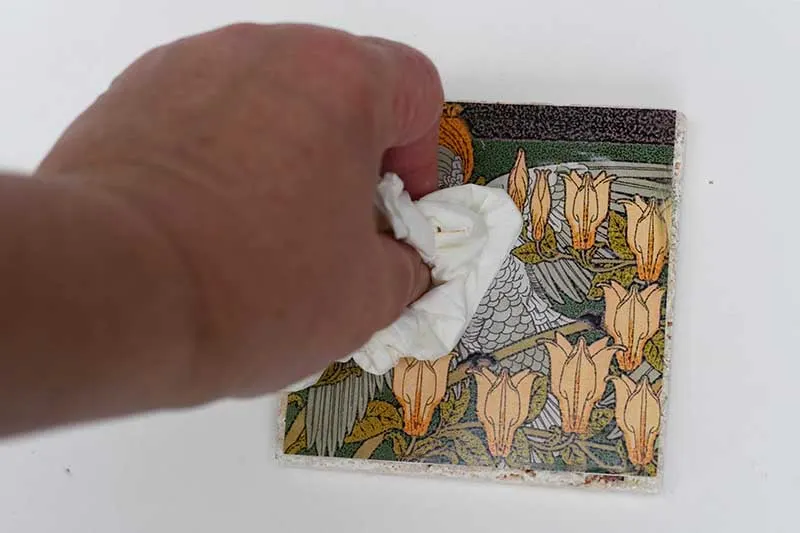
Step 2: Glue the paper design to the ceramic tile. Coat the top of the ceramic tile in Mod Podge and then lay the image on top.
Screw up a paper napkin into a ball and then use this to press the image onto the top of the tile. At the same time, push out any air bubbles. Then leave the tile coaster to dry.


Step 3: Add a protective varnish. Spray the picture on the top of the tile with a matt acrylic varnish. This will provide a protective layer for the coaster.
I like to add two coats of varnish for extra protection.
Step 4: Place the tile coaster onto the cork fabric mat and draw around it. Then cut out the cork and glue it to the underside of the tile. This will protect your table from being scratched by the ceramic tile.
Felt can be used instead of cork.


These DIY tile coasters were so cheap and easy to make that I made quite a few. Each with a different art nouveau design pattern.

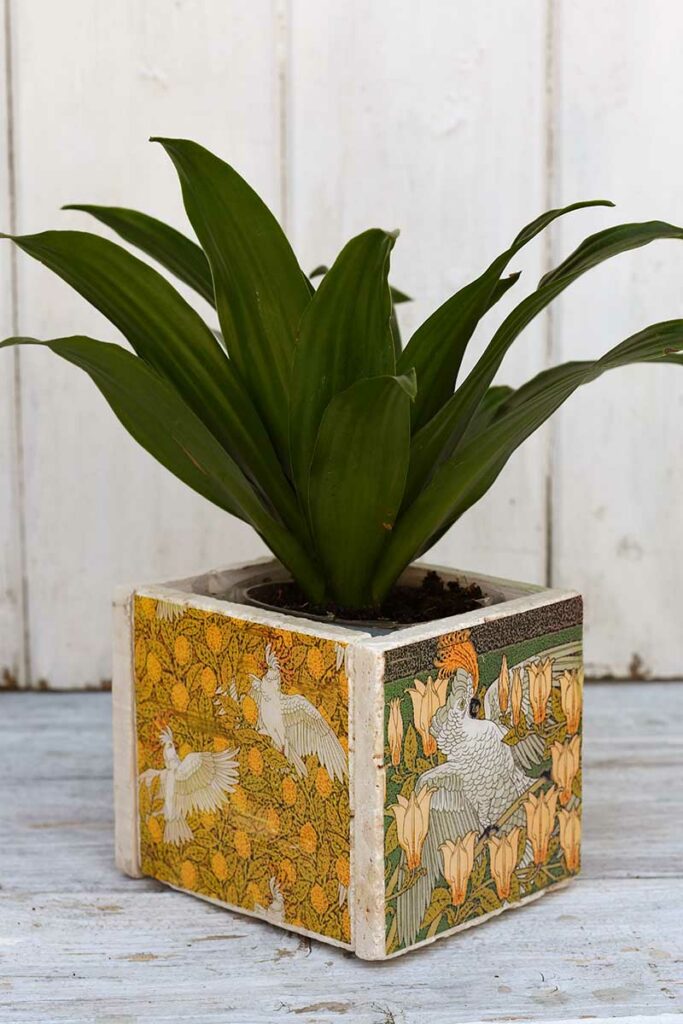
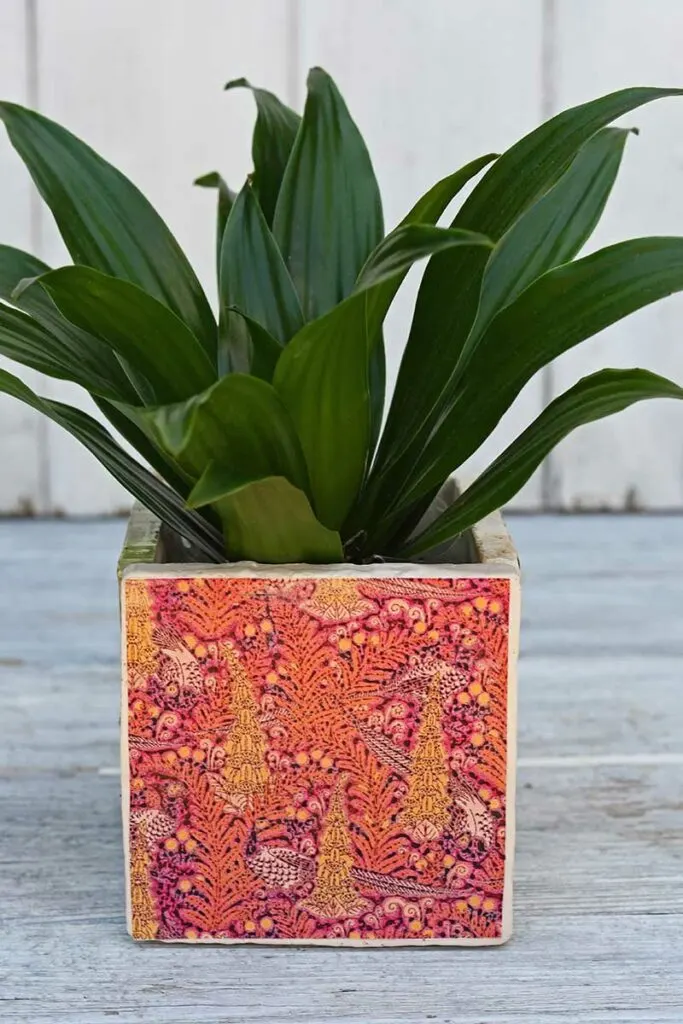
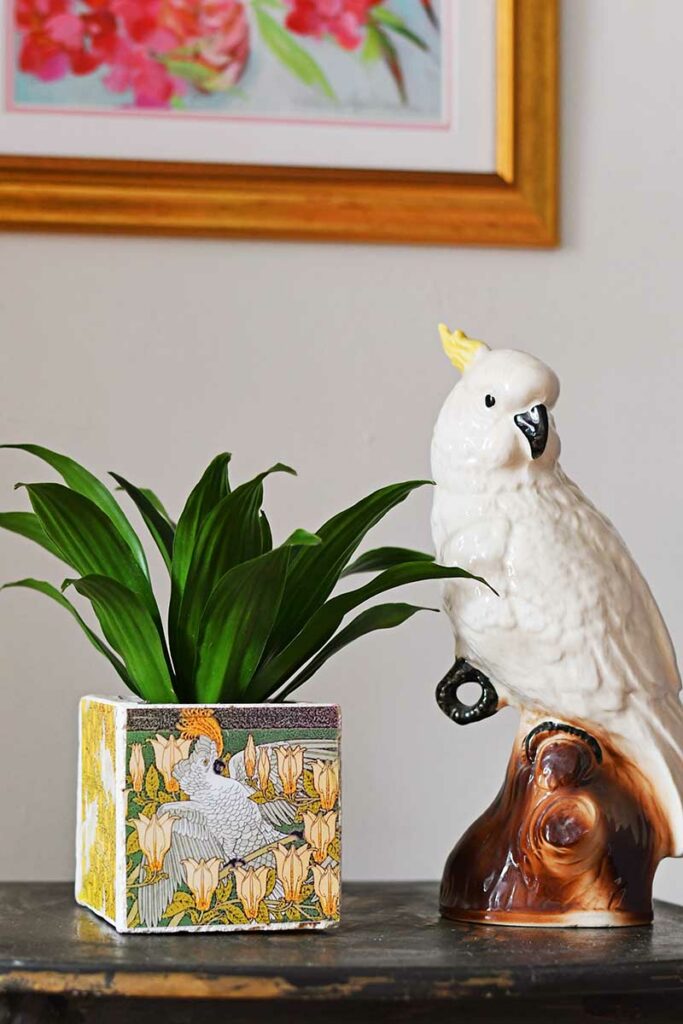
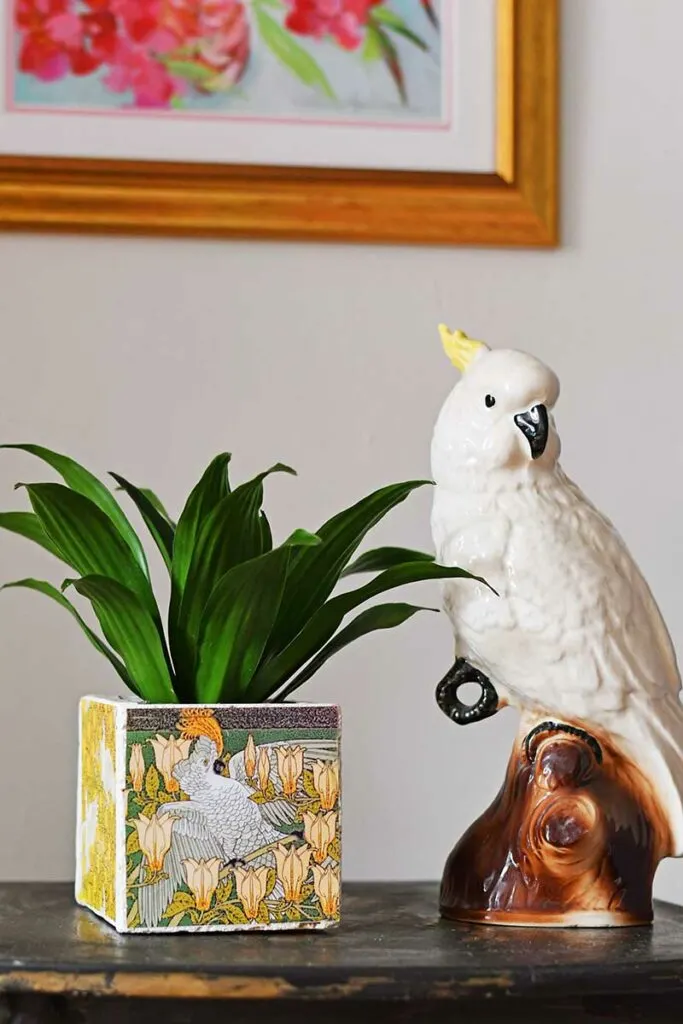
How To Make A Tile Planter
You need four of these DIY tile coasters to make a tile planter. It only takes five minutes.
Step 1: First put lay one tile face down on the table. Then grab another tile, add a strip of super glue along the edge and glue it to the edge of the tile on the table.

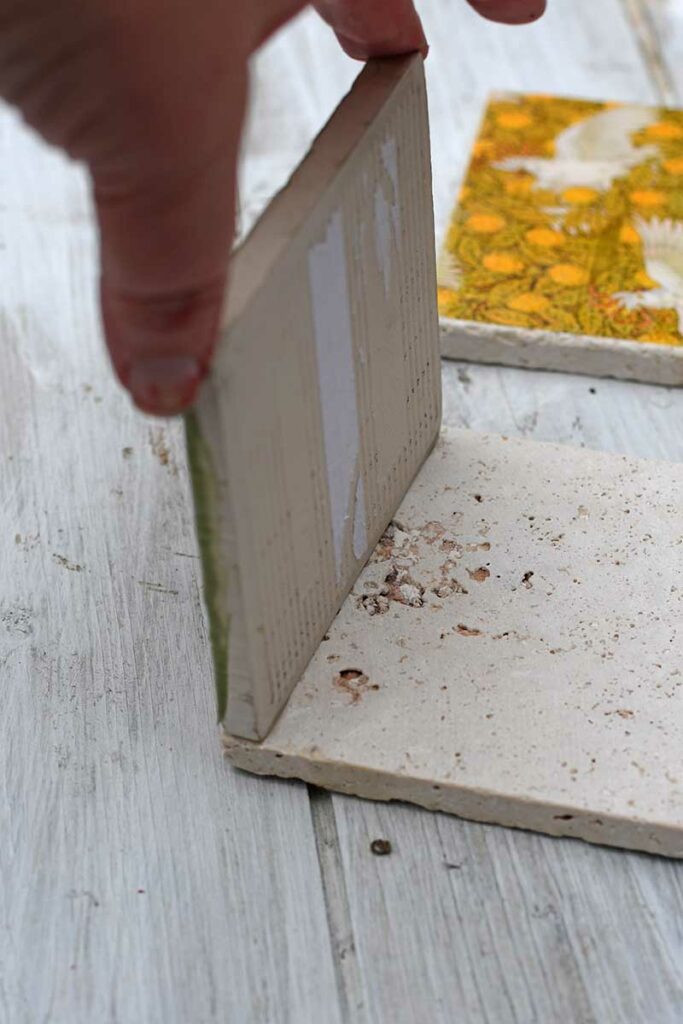


Step 2: Grab another tile and glue it to the opposite edge of the tile laying down on the table.
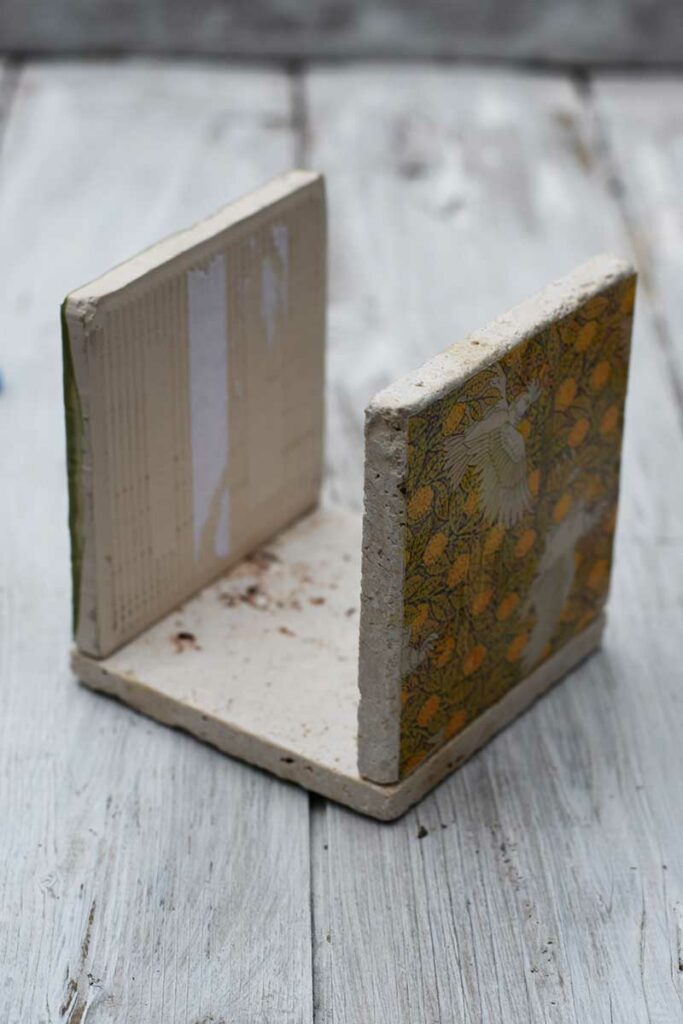
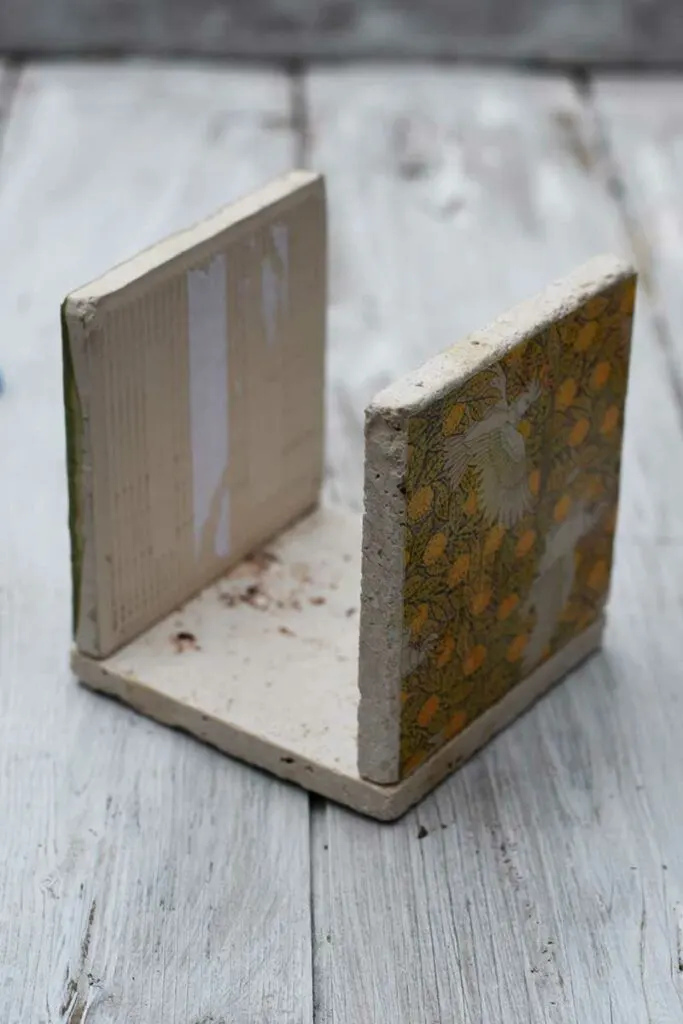
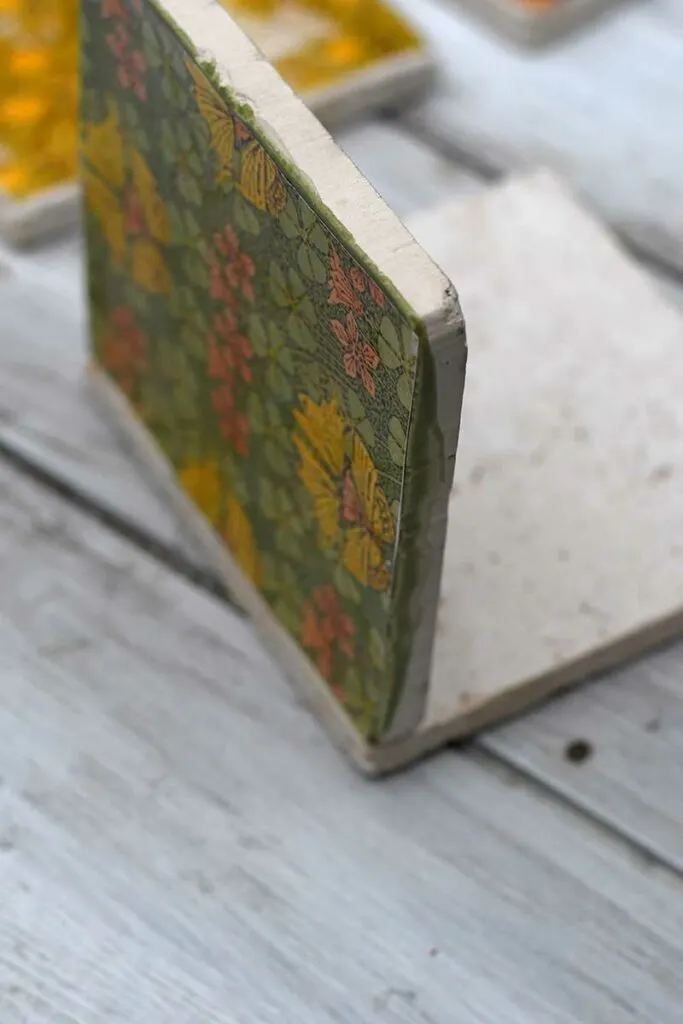
Step 3: Next, apply glue to the edges of the final tile and place it on top of the other tiles to make a box shape.

Top tip: When glueing down each ceramic tile, make sure the patterns are all facing in the same direction.
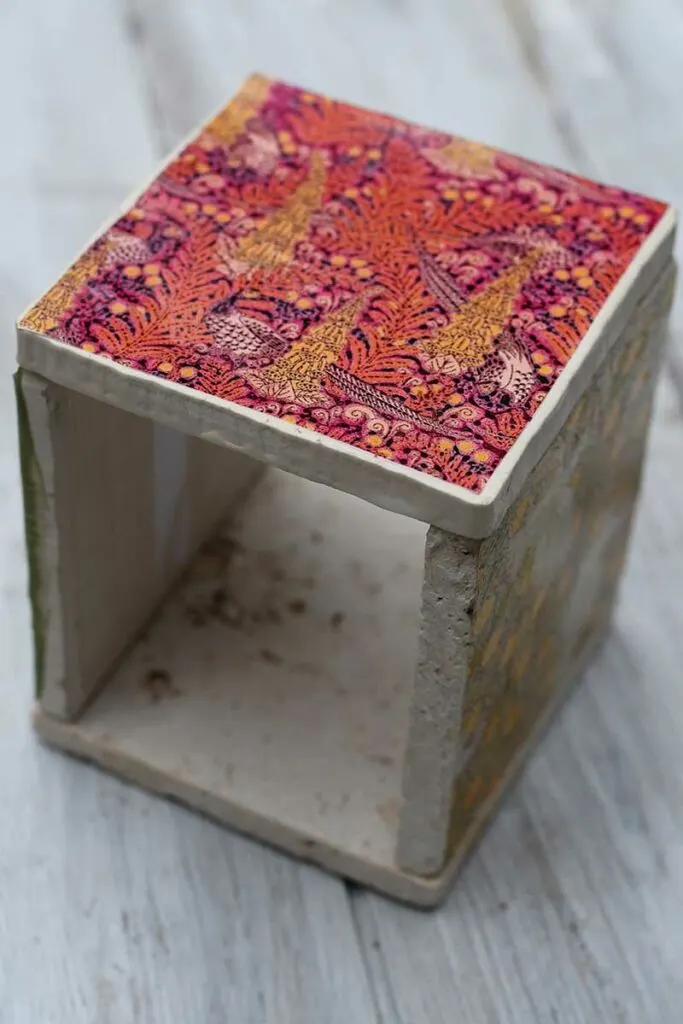
Step 4: Finish the planter by cutting off the bottom of a plastic soda bottle. Then place the soda bottle inside the tile box. You must squeeze the bottle slightly to fit it into the box.
When you lift the planter, the tension between the plastic bottle and the tiles will stop it from falling out.
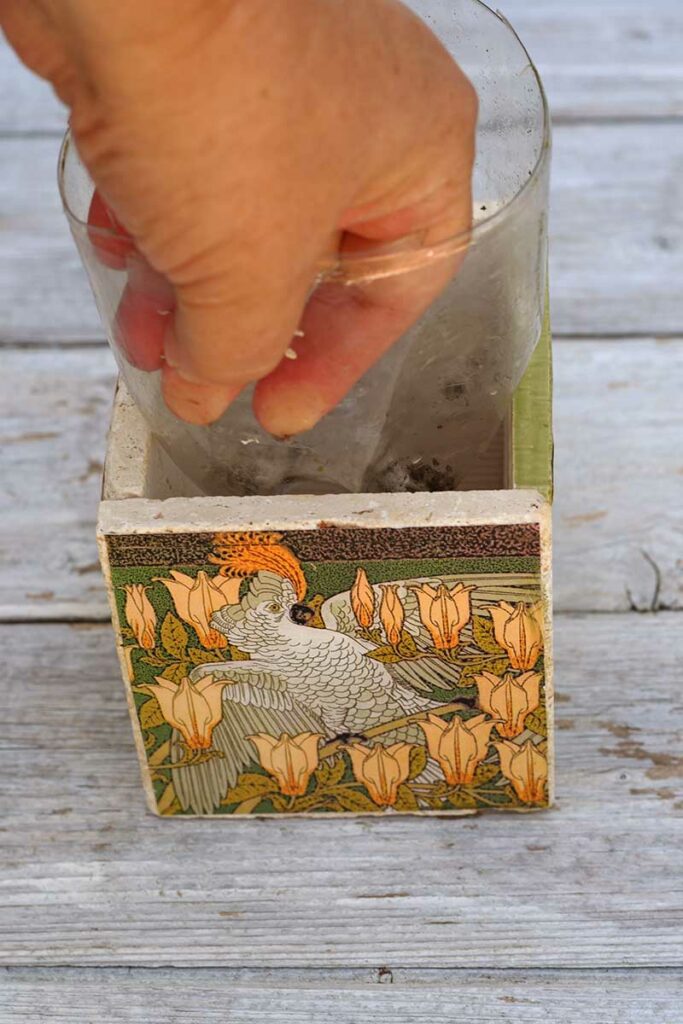

Before adding soil and plants to these tile planters, I put a layer of small stones in the base of the plastic insert. This helps with water drainage.

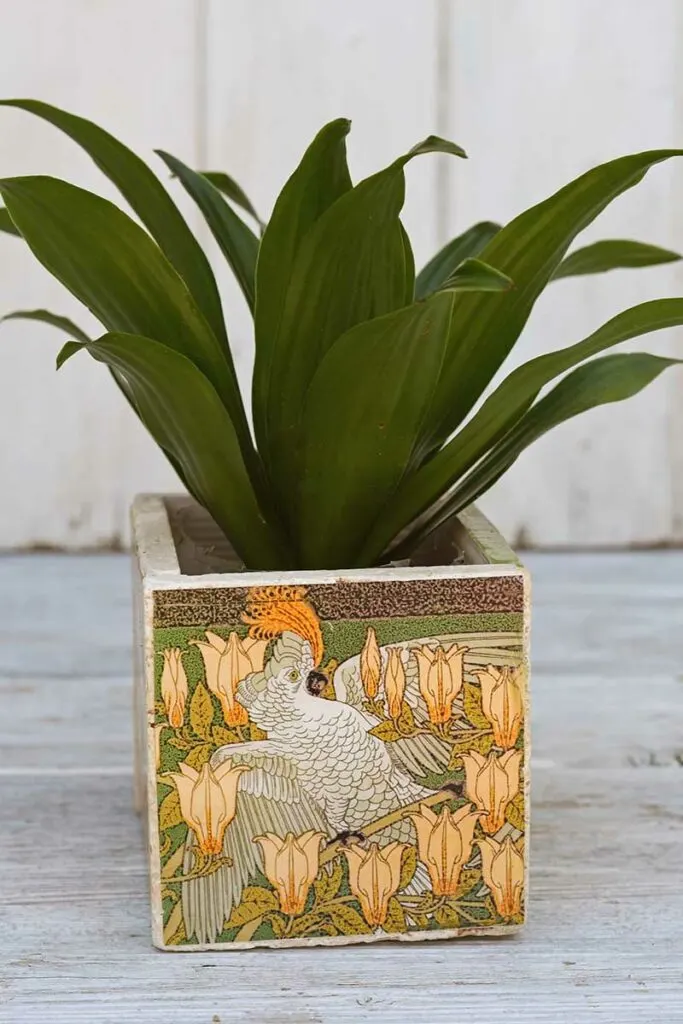
One of the best features of these tile planters is that all you need to do is turn the planter to get a different pattern. You can get four different looks from one single planter.


All the wonderful vintage Japanese art prints on Pictureboxblue would also make wonderful DIY tile coasters and planters. Especially the Japanese prints of Watanabe Seitei.
Don’t forget to check out the other craft and DIY ideas on Pictureboxblue for using vintage images, including these beautiful botanical crafts.

These beautiful Art Nouveau tile patterns would be great for other decorative decoupage projects, like a decoupage tray table or decoupage placemats.
Check out these other cool DIY coaster ideas.
Gina
Wednesday 30th of March 2022
The coasters and planter are lovely! I embarked on a similar project of making coasters, though I didn't use an acrylic spray. The coasters stuck to hot cups, which was a problem, as I'd made several sets for family and friends. I then tried using apoxy resin, ( such a messy ordeal!) which created a beautiful glossy, glass-like coating. Years later, this finish also sticks to hot cups! Dies your use of the acrylic spray prevent this?
claire
Thursday 31st of March 2022
You can get a heat resistant varnish, which I have used before for heat mats and has worked well. I can't remember the brand but I think I bought it off Amazon.
Pam
Wednesday 18th of August 2021
This will be one of my feautres at the Thursday Favorite Things party tomorrow. Congrats!
claire
Thursday 19th of August 2021
That's awesome, thank you so much I look forward to seeing it.
Pam
Monday 16th of August 2021
I love this post so much! I have never even thought about turning the coasters into a planter. What a great idea! I will pin this to try later. What great gifts these would make. Thanks for sharing at Thursday Favorite Things!
claire
Monday 16th of August 2021
Thank you so much. The planters are really easy to make and can be turned to get a different look each time.
Grandma's House DIY
Monday 16th of August 2021
Thanks for sharing with us at the To Grandma's house we go link party - I'll be featuring you this week!
claire
Sunday 22nd of August 2021
Thank you, that is awesome I look forward to seeing it.
Cecilia
Sunday 15th of August 2021
These are lovely, Claire! Thanks for sharing at Vintage Charm--pinned!
claire
Monday 16th of August 2021
Thank you, glad you liked them and thanks for hosting.