
I have a bit of an obsession with maps. Old road maps, tourist maps, and antique maps, I love them all!. I thought it would be great to make a personalized map pillow with my favorite vintage maps.
Don’t panic no sewing is involved. When I say make a vintage map pillow, what I mean is design the cover for the pillow and get someone else to print and make it.
I show you how to edit the map of your choice in a free editing program (CANVA). Then, how to add text and other images to your map. Which you can then send it off to a photo lab to get printed onto a pillow/cushion of your choice.
How To Make A Personalized Cool Vintage Map Pillow
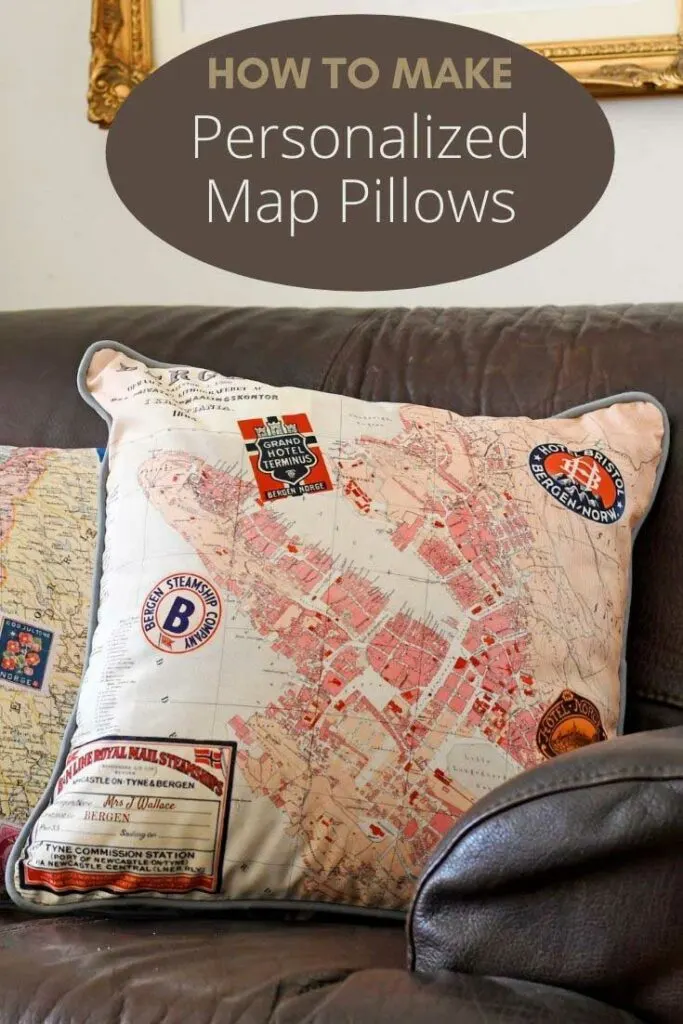
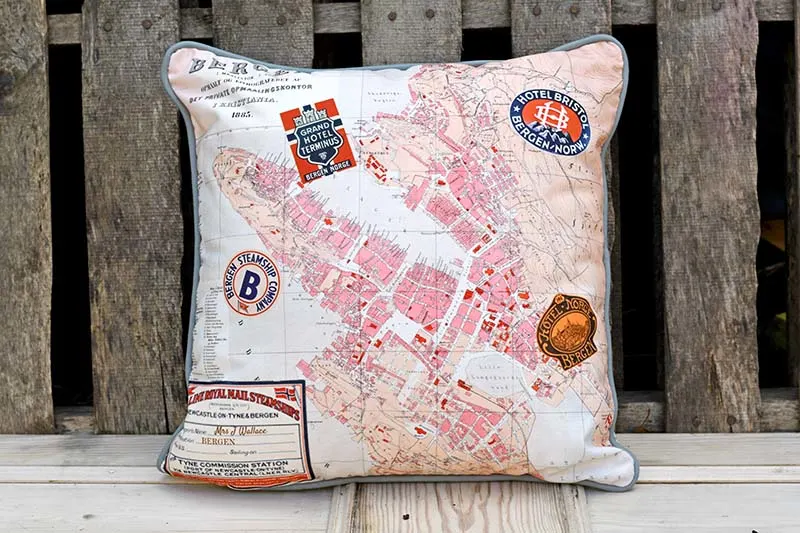
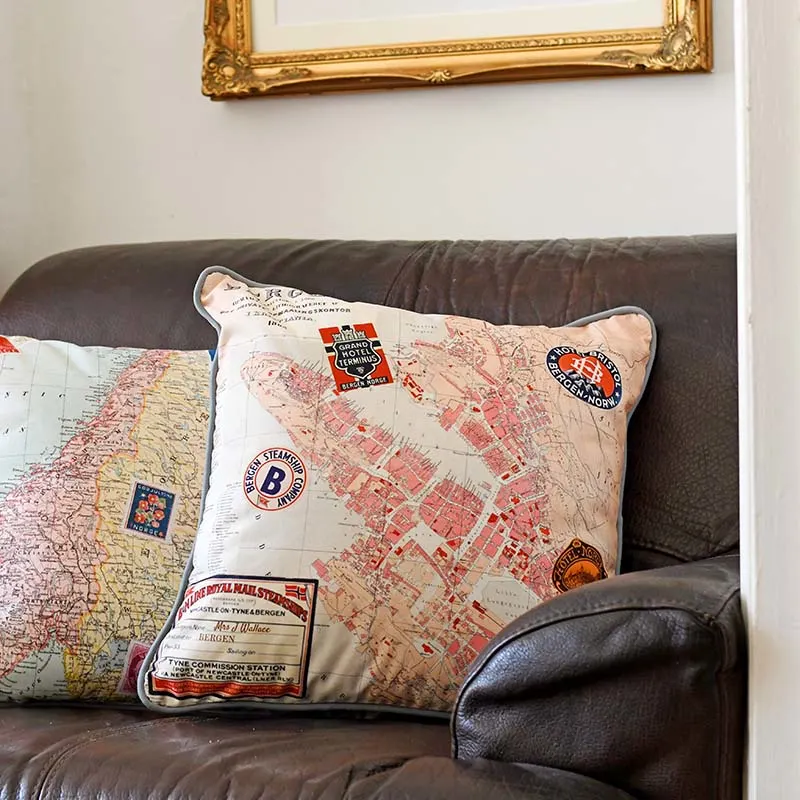
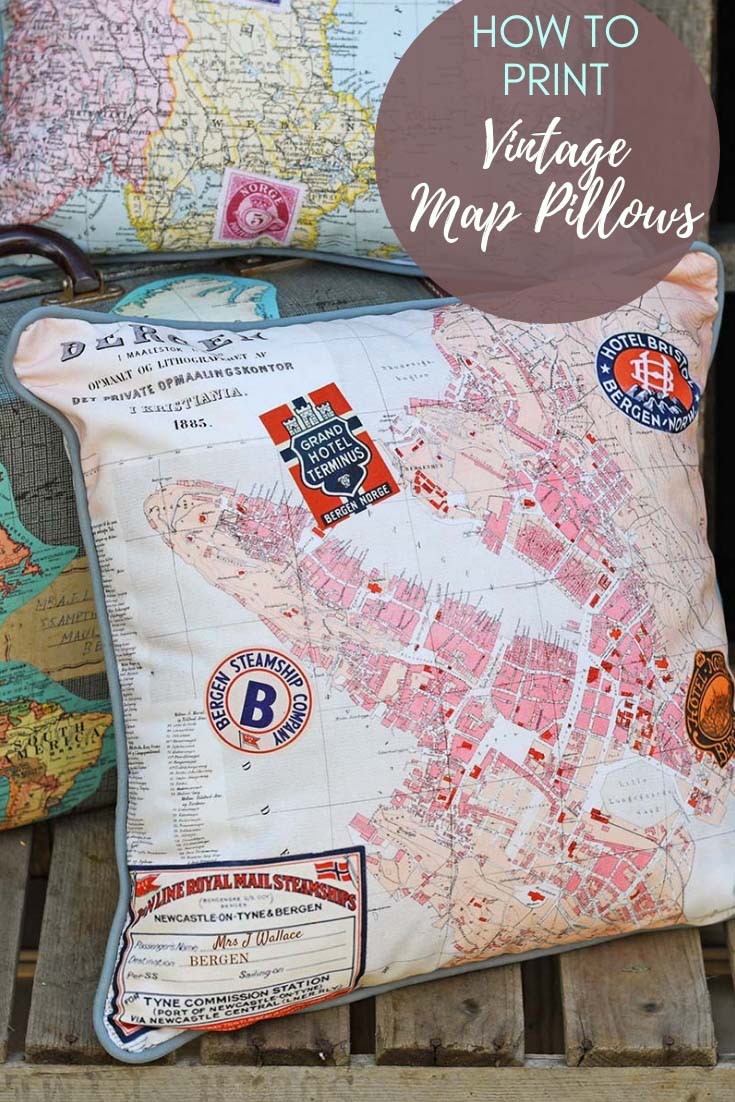
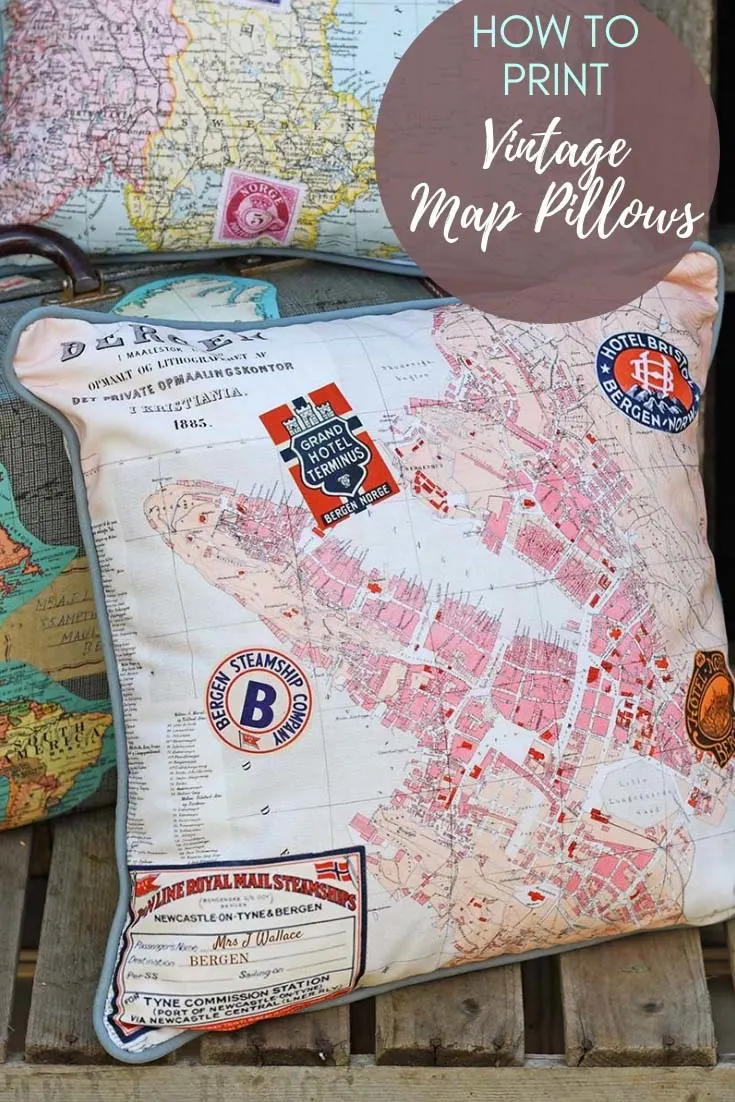
A vintage map pillow will make a fantastic personalized map themed gift. My in-laws are from Bergen in Norway and I have designed a double-sided vintage map pillow as a gift for them.
I added some extra elements like Norwegian stamps and luggage labels to the maps to personalize the pillows even more.
Of course, you don’t have to stick to maps you can download any of the wonderful vintage images and pictures on this site and edit them ready to print on a pillow. I think that some of the images in my vintage cactus paintings will make a fabulous pillow.

We participate in the Amazon Services LLC Associates Program, an affiliate advertising program designed to provide a means for us to earn fees by linking to Amazon.com and affiliated sites. As an Amazon Associate, I earn from qualifying purchases.
How to edit pictures for your vintage map pillow
I will show you how to edit your image in Canva to design a pillow, but your online printers often have their own software that will help you with pillow designs.
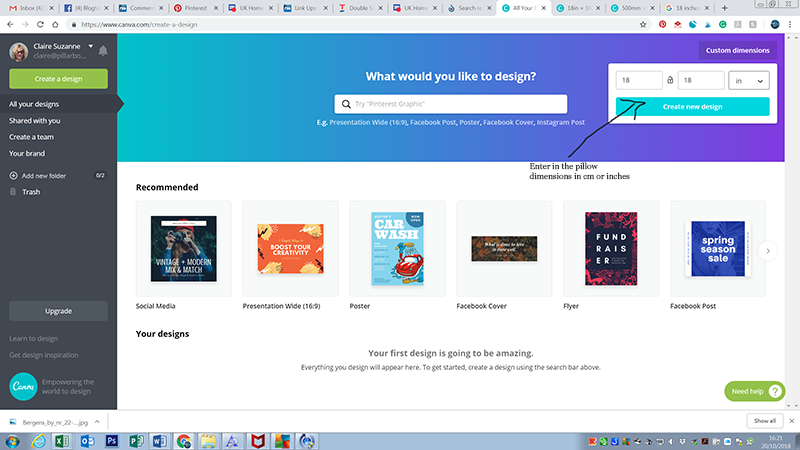
1.. First, go to Canva.com and create an account. A free account will be perfectly fine for this project.
On the Canva home page in the top right-hand corner, there is a box marked “Custom Design”. Click on this box and enter the dimensions of your pillow cover.
I designed a standard square pillow size of 18inches square.
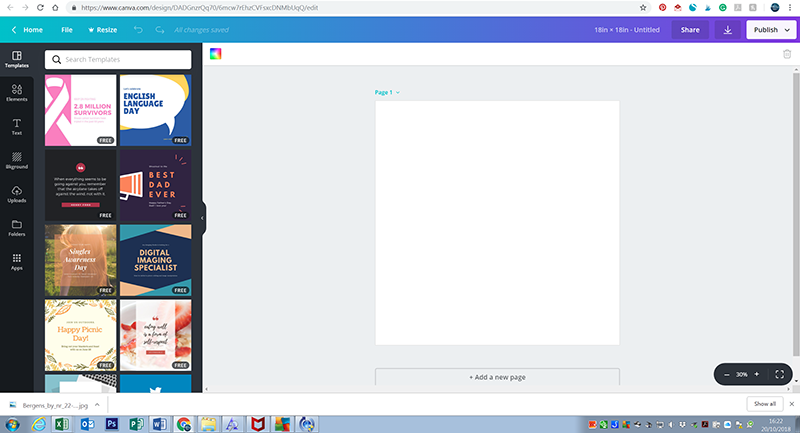

2. Next, upload the maps that you are going to use for your pillow design.
You can scan in any map you want or simply download one of the many maps available on Pictureboxblue. Also, upload any other images you would like to add to the pillow. I uploaded some Norwegian luggage labels to add to the pillow designs. To upload the images, click on the “Uploads” menu button. This is on the far left of the screen.
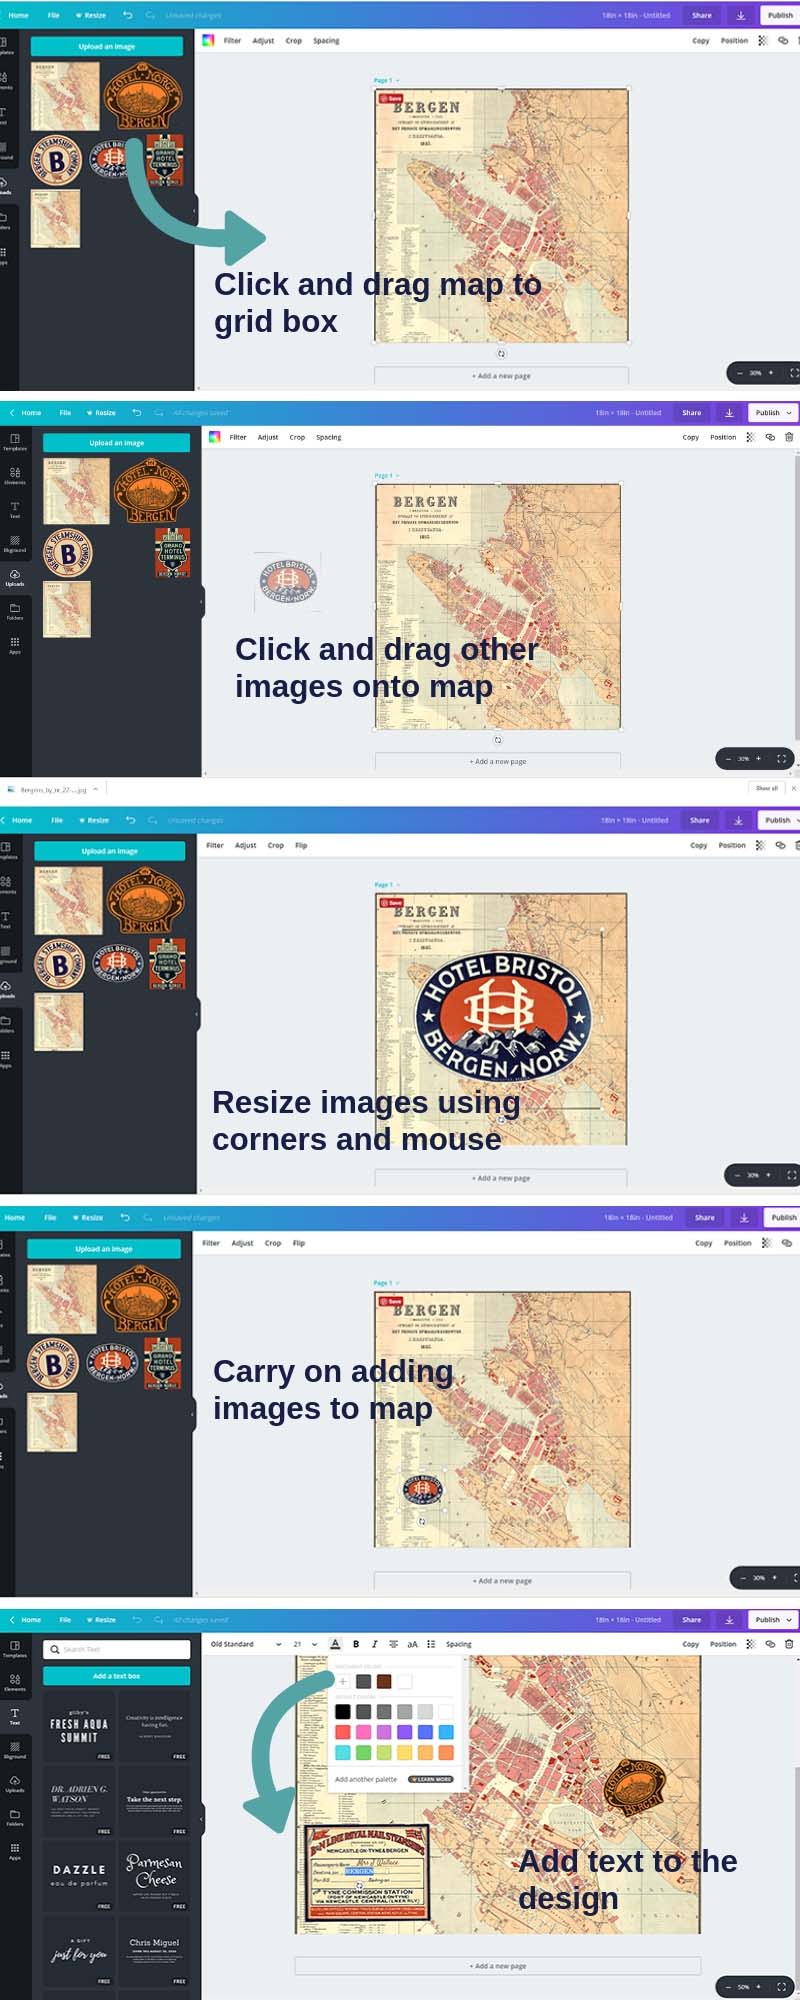
3. Then, to place the map image onto the canvas, click the “elements” menu button on the far left of the screen. Then, select grids and select the first option, the single square picture icon (the one with the cloud in the sky).


4. Next, the maps and the images are added to the grid one by one, by drag and drop. Click on the uploaded map first and drag it to the grid and then drop it in.
Add any other images you would like on the map one by one. Clicking and dragging the corners of each image once selected with the mouse will resize them.
To add any text to your design, click the text menu button on the far left-hand side of the screen. Then click the “add text box” button. You can choose your font type, size, and color. Position the text by dragging and dropping with the mouse.

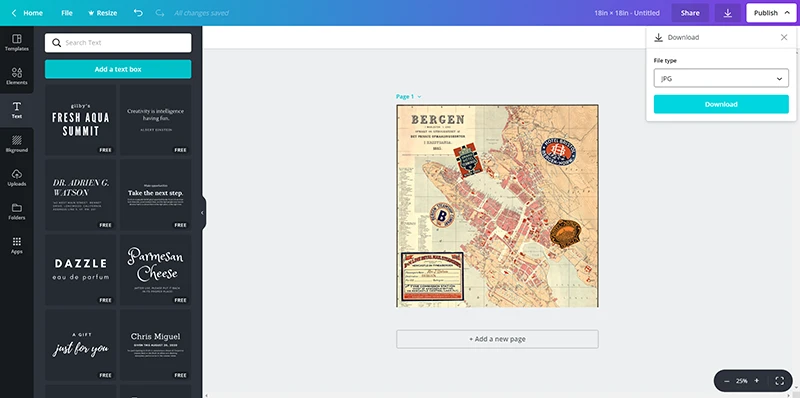
5. Finally, once you are happy with your vintage map pillow design, download the jpg file to your computer. To do this, click on the publish button on the top right of the screen and select the download option.

Printing a Vintage Map Pillow
Most photo printing services these days offer the option to print a photo onto a pillow/cushion, such as Amazon.
It is often a case of shopping around for the best price and deals. All the services are basically the same. You simply upload your image onto a mock-up of the pillow. Some photo printing services offer you the choice of different fabrics and piping.
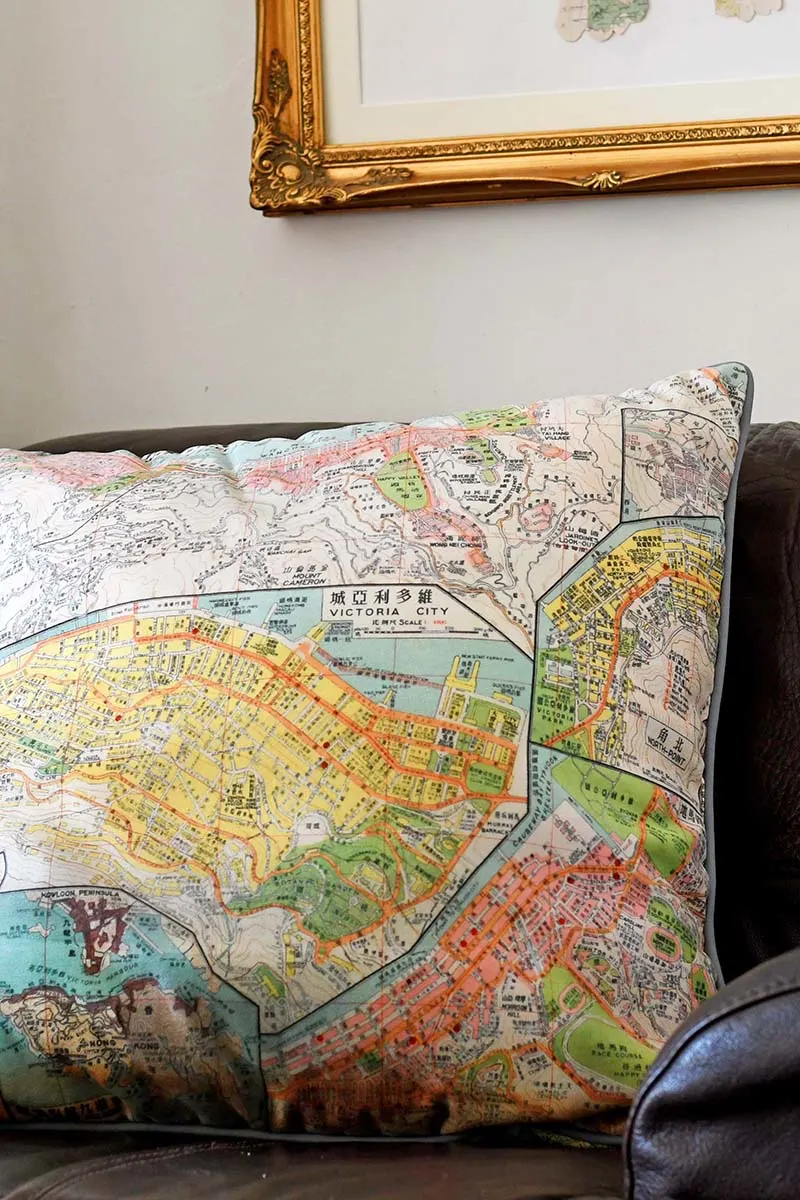
For my vintage map pillow, I chose double-sided printing and piping for my pillows. I printed a different map on each side. In the past, I have printed map pillows on both faux suede and canvas fabrics and have been very happy with both finishes.
The Zodiac star charts on Pictureboxblue would also make great personalized printed pillows.
I think that these vintage map pillows make a fabulous personalized gift. You could print one for your loved one using maps of places special to you.


There is a tutorial here for a personalized map corkboard that would go great with these pillows. If you are making map pillows to give as a gift, one of these embroidered map ornaments would be a great accompaniment.
Check out these other DIY pillow cover design ideas.
Maria
Thursday 30th of November 2023
I love this idea, how cute and unique! Would you please link a printing service the offers different fabric choices and piping as options??
I'm not finding any with piping, and only see polyester and polyester blend options.
Thank you
claire
Friday 1st of December 2023
Thank you, I'll have a look. I'm based in the UK and used TESCO photo services but I don't know about the US.
9 Of The Best Upcycled Lighting Ideas Using Maps - Pillar Box Blue
Wednesday 6th of February 2019
[…] I use maps to decoupage furniture, hang on the wall and to make lamps and lights with. I have even printed my own map pillows. Old road maps are great to repurpose or you can simply download and print vintage maps from the […]
55 Unique Housewarming Gift Ideas to Wow Your Hosts | Shutterfly
Wednesday 9th of January 2019
[…] Source: Picture Box Blue […]
Free Gorgeous Vintage Maps of France - Picture Box Blue
Monday 10th of December 2018
[…] making personalized Christmas presents. I’m going to print a couple of them as a personalized map pillows, for a Christmas gift. Also, my aunt has requested that I make my Uncle a personalized map glass tray for his coins using […]
Caro | The Twinkle Diaries
Friday 16th of November 2018
Fantastic make!! I love the idea of maps for different countries — I've just read your comment about both being from different places so this is perfect!! :) #HomeEtc
Caro | https://www.thetwinklediaries.co.uk
claire
Friday 16th of November 2018
Thank you, Caro. Maps of different places are special to us as a family as we have connections to so many different countries.