

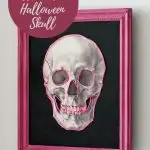
Inside: A step-by-step guide to making a neon framed skull decoration.
Some wonderful vintage human skull drawings on Pictureboxblue would look great framed for Halloween. I decided to take one of these vintage drawings up a notch by creating some fun DIY skull decor for Halloween.
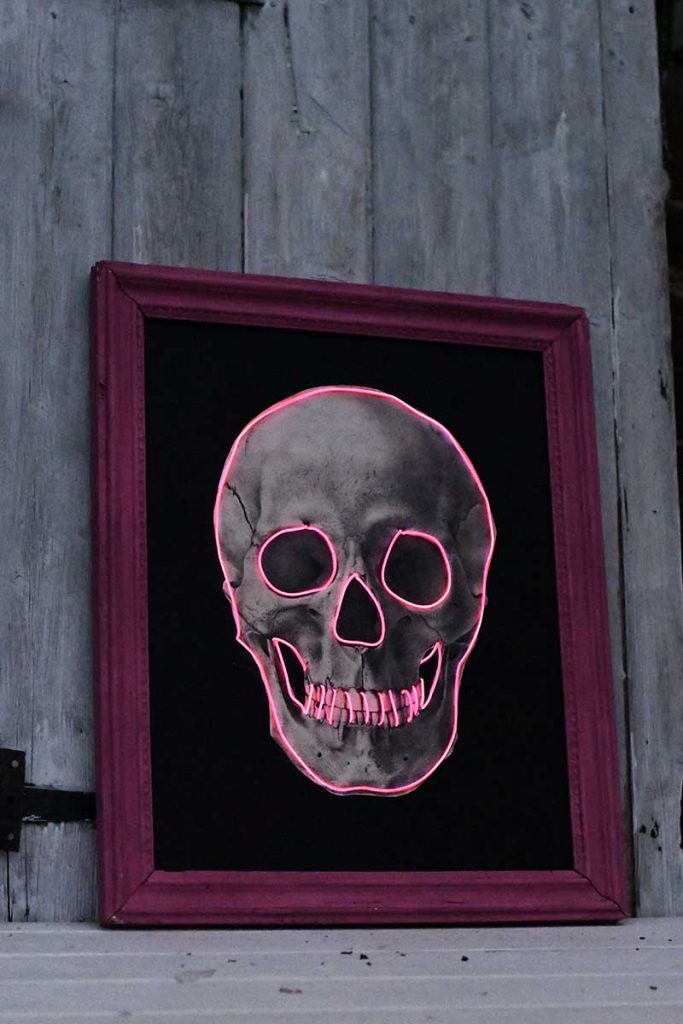
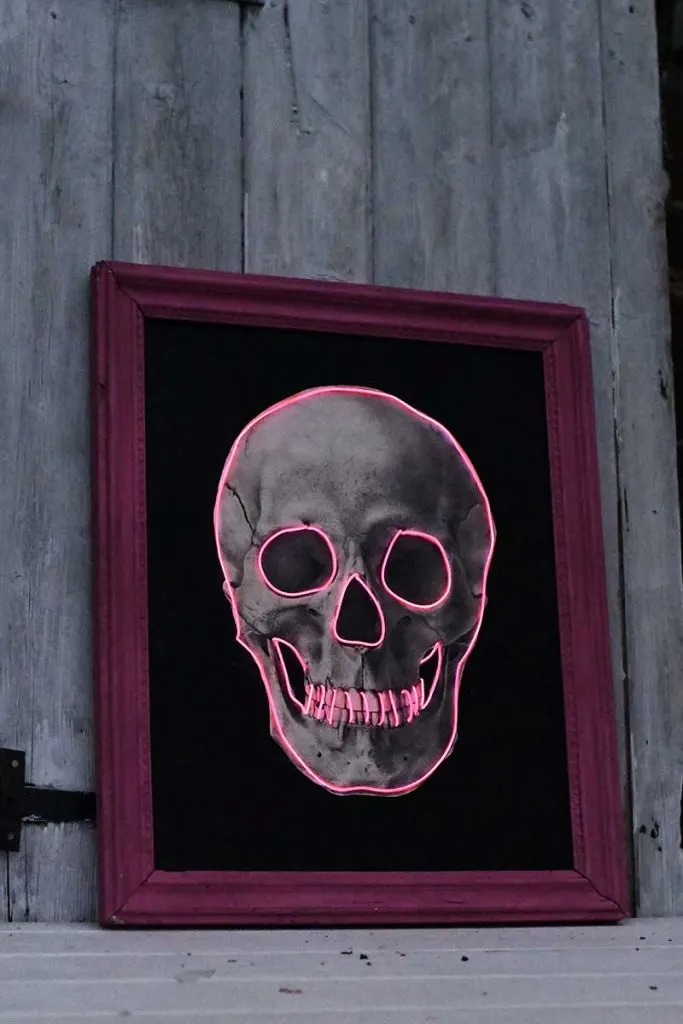
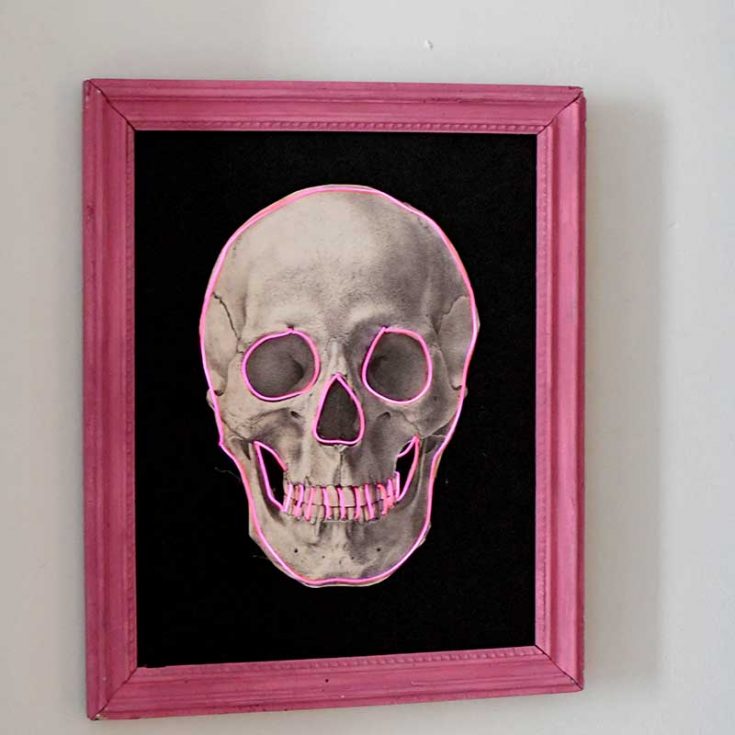
As Halloween is all about the night, I thought framing and illuminating one of the skull drawings for DIY Halloween wall decor using EL wire would be fun.
EL wire, or by its full name, electroluminescent wire, is a thin, flexible wire that emits a brilliant glow when an electric current is applied, making it an exciting material for a myriad of crafts.

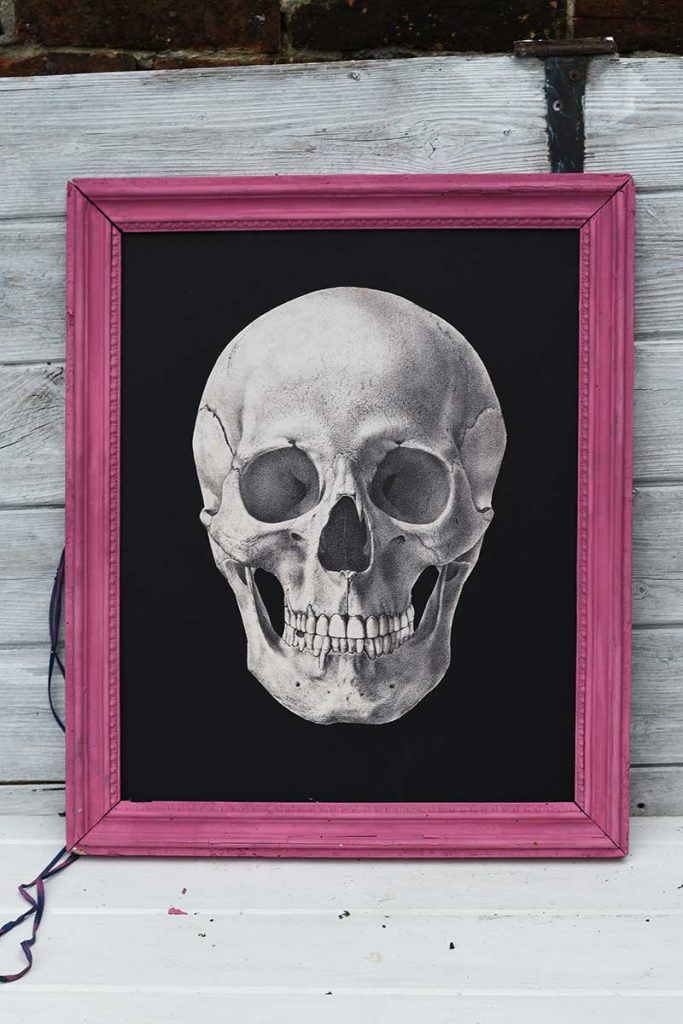
I know we usually associate Halloween with the colours black and orange. But I decided to give my DIY skull decor an extra twist by going for a pink colour theme.
I used pink neon el wire to illuminate the skull and then framed it in a complementary pink frame.
This is a very affordable simple but unique Halloween decor for the home. As the skull is illuminated in pink, I think I will actually keep the decoration up on the wall beyond Halloween.
We participate in the Amazon Services LLC Associates Program, an affiliate advertising program designed to provide a means for us to earn fees by linking to Amazon.com and affiliated sites. As an Amazon Associate, I earn from qualifying purchases.
What You Need
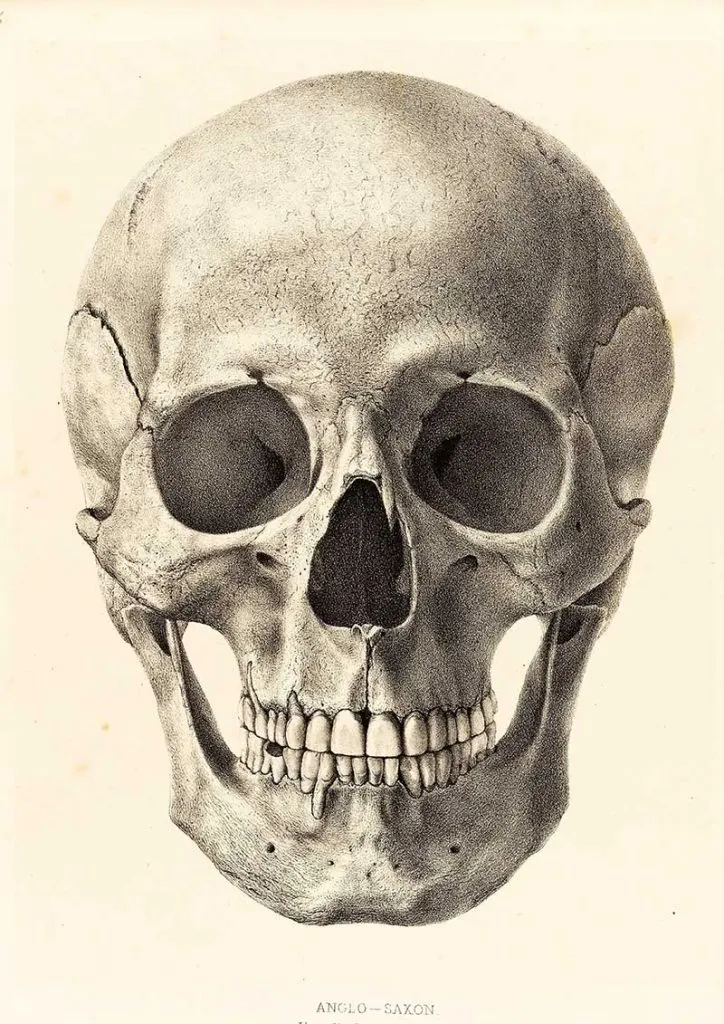
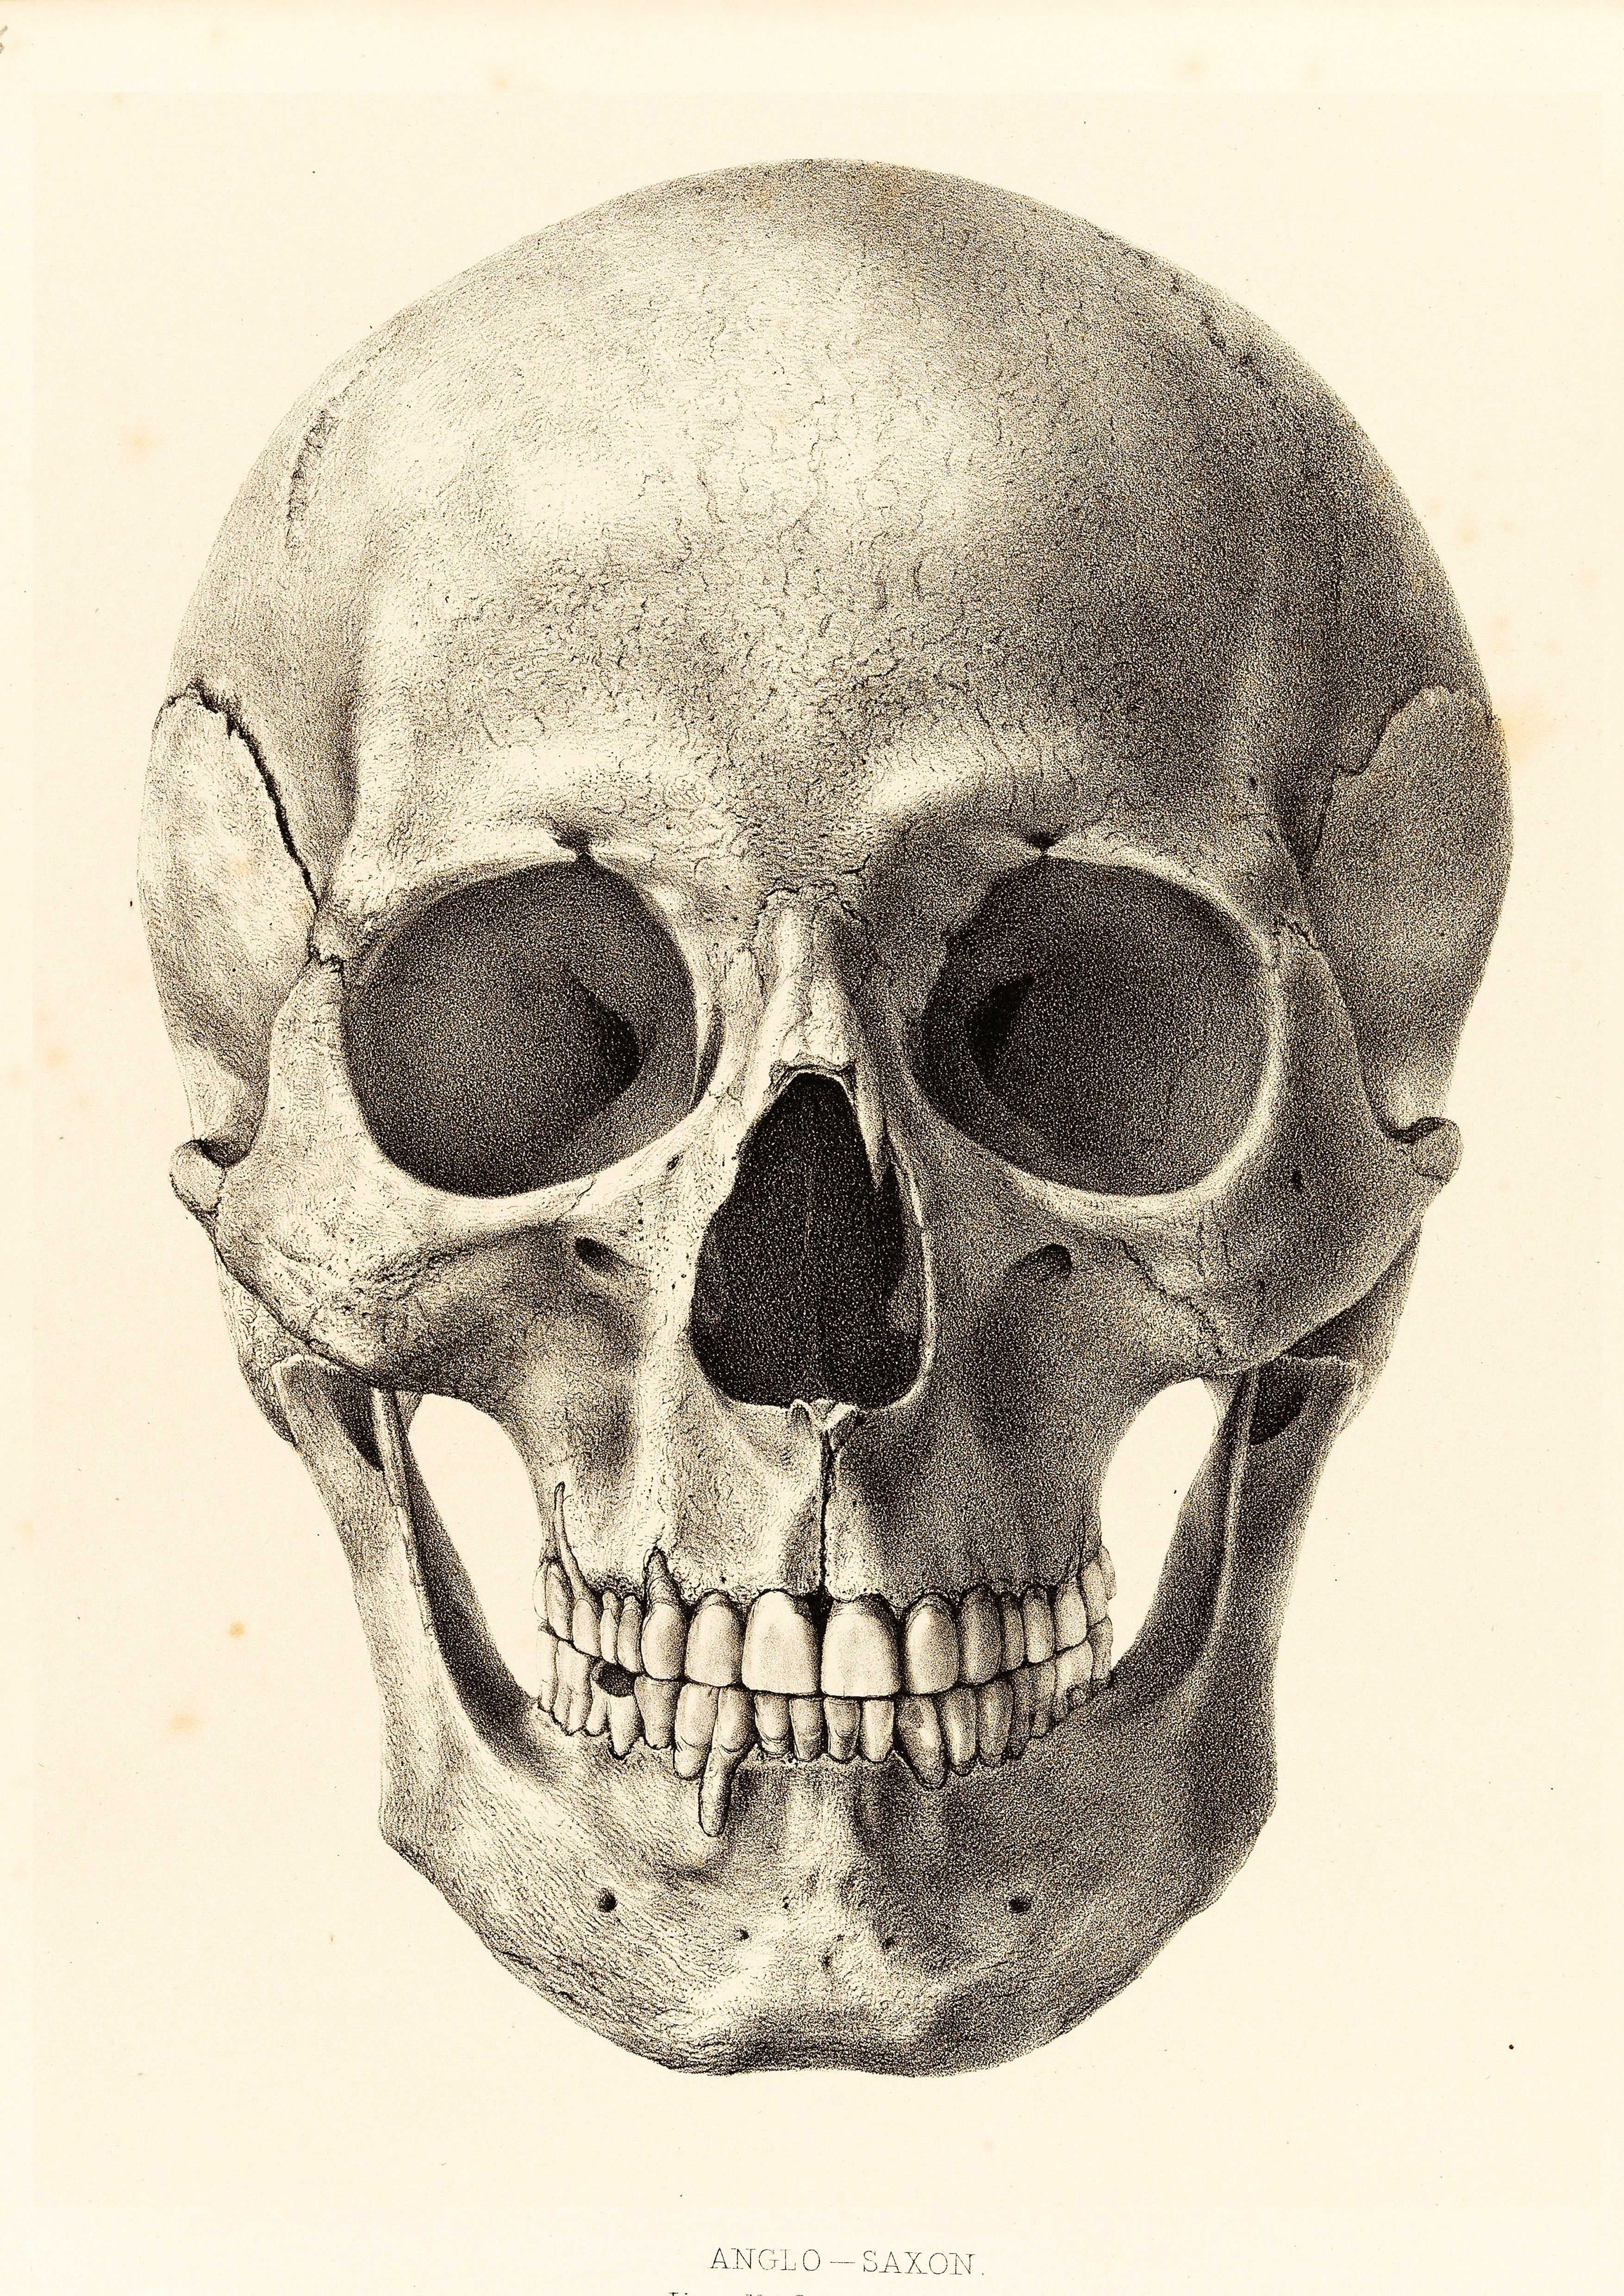
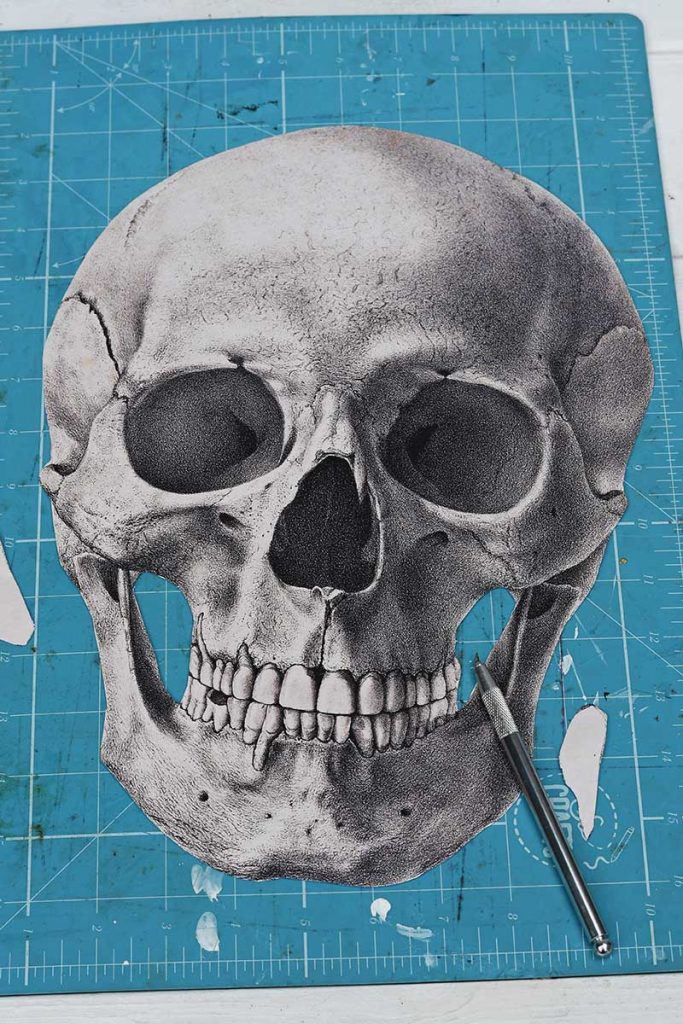
- Vintage skull drawing there is a lot to choose from on Pictureboxblue but I choose this one and printed it out on A3 sized paper.
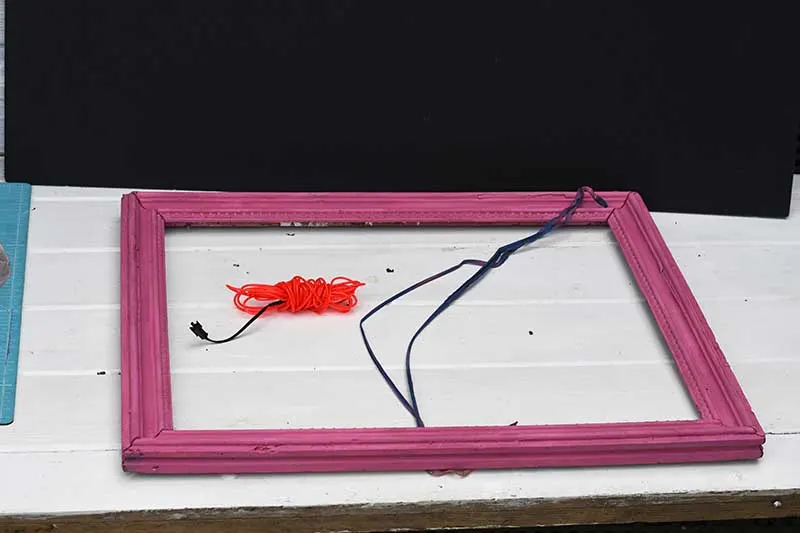
- Picture frame – I happened to have an old pink frame but you can easily paint one up.
- Black craft foam board – You want the foam board to be large enough for your frame. Boards 3mm thick will work well with this skull decor.
- Craft paper cutting knife and mat
- El wire in neon pink – 2m of wire will be enough
- Gorilla Glue Brush and Nozzle superglue clear
- Wooden skewer

How To Make Illuminated Skull Decor
Step1: Cut the foam board to fit the frame and place in the frame.


Step 2: Print out the human skull drawing on A3 paper. Then cut out the skull illustration using a craft paper knife and mat.

Step 3: Then, using a glue stick, stick the skull to the center of the framed foam board.
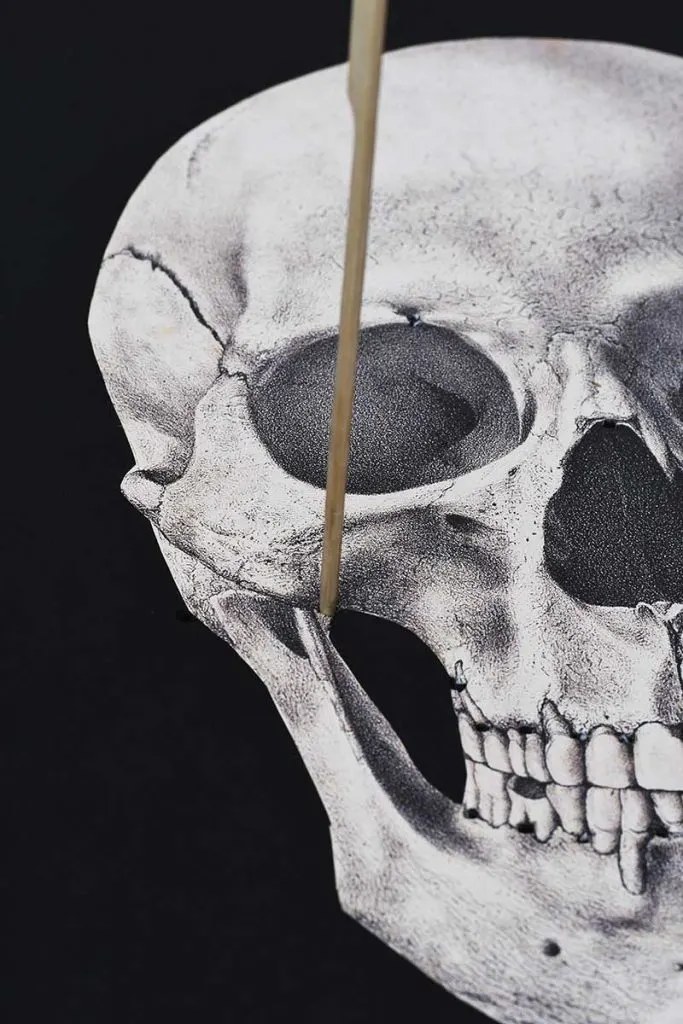
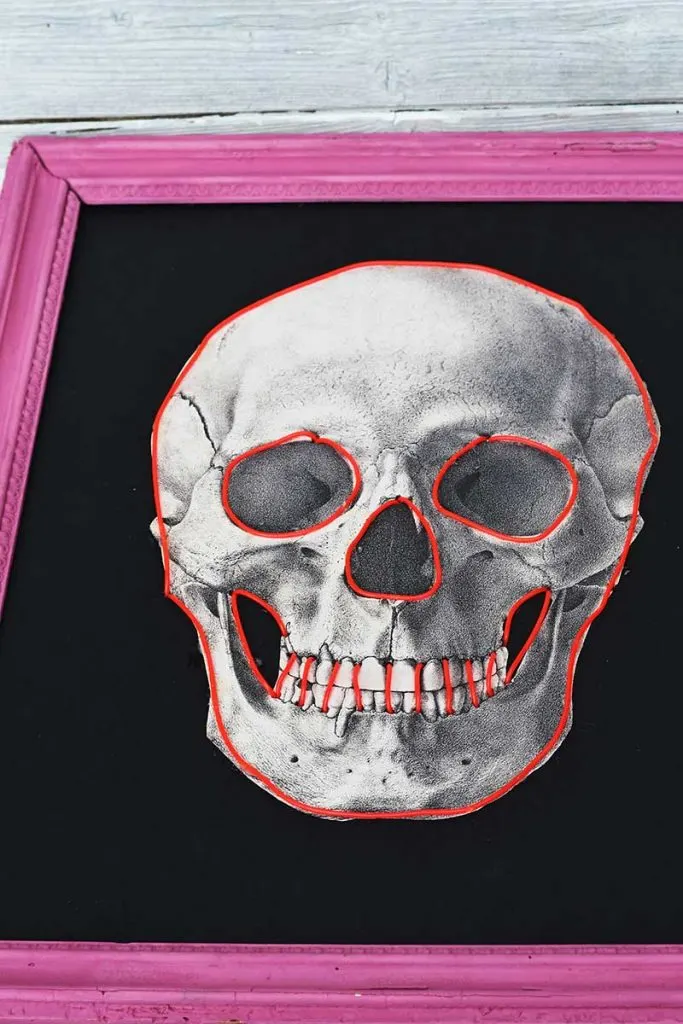
Step 4: Punch holes into the skull at the wire entry points using a sharp-pointed object such as a wooden skewer. These are highlighted in pink on the diagram below.
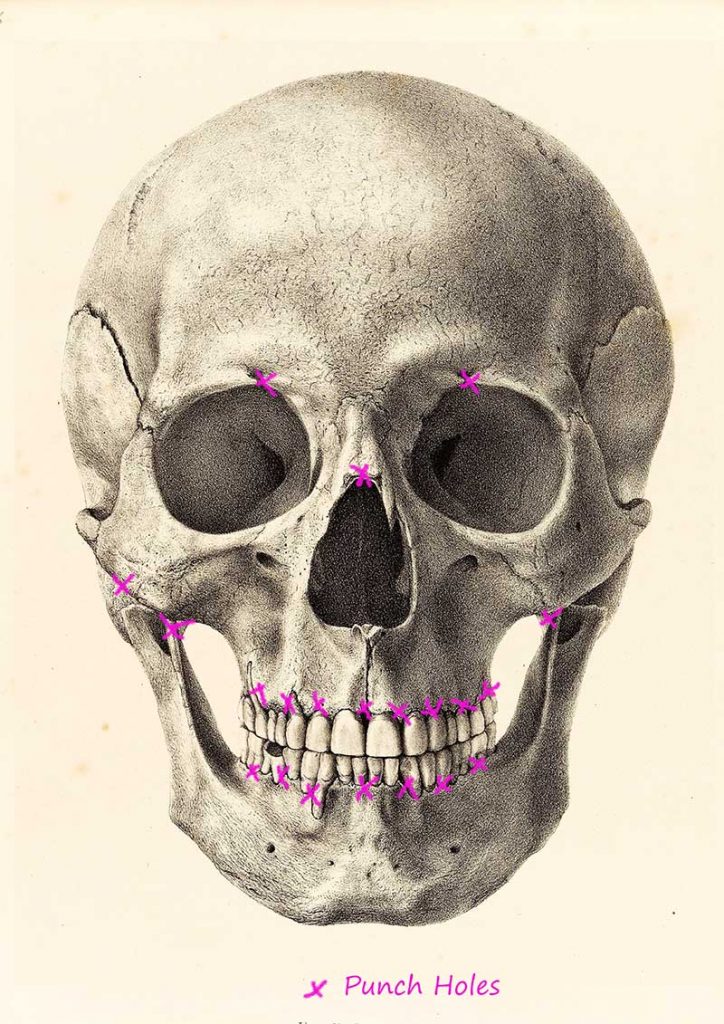

It would help if you had punch holes for the outline of the skull, one for each eye, one for the nose, two for the cheeks and several for the teeth.

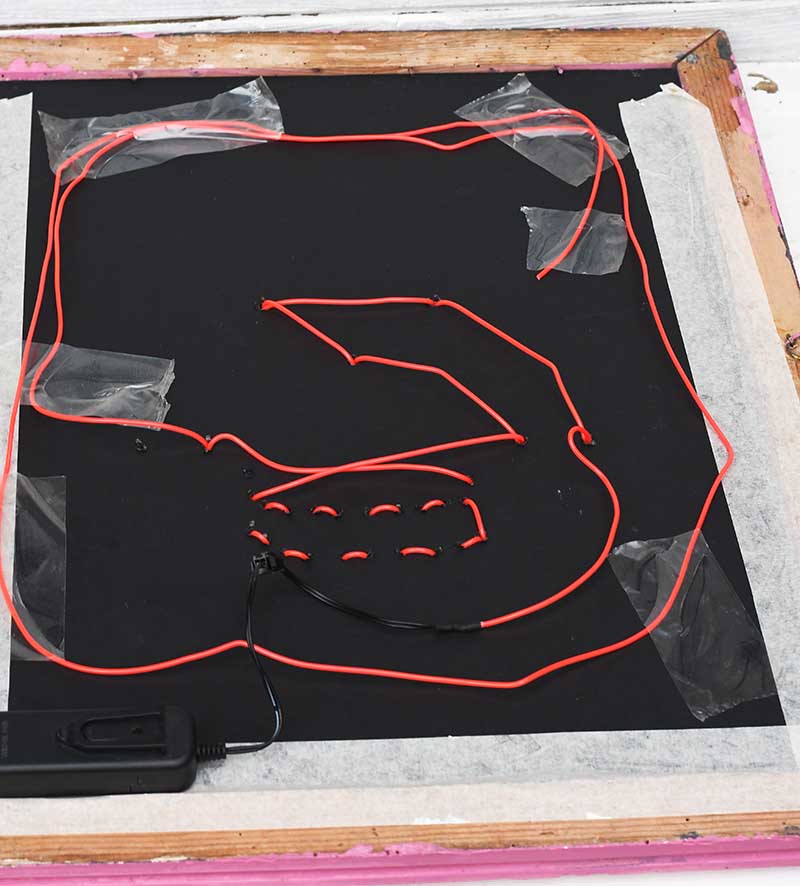
Step 5: Next, starting with the skull outline, thread the el wire through the foam board from the back to the front. Then stick the wire down to outline the skull and weave it back through the hole.
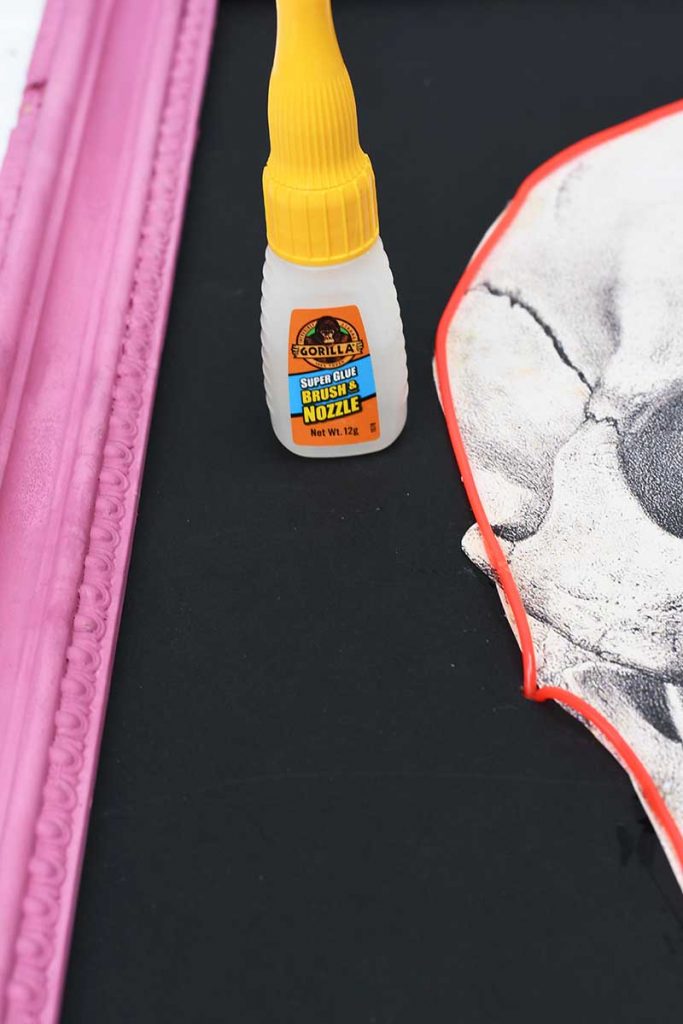

Use the brush superglue to stick the wire to the skull outline as you go around. Brush a small amount of glue onto the skull about every 2 inches. Hold the wire down onto the glue for about 20 seconds as it sets.
Step 6: Next, thread the wire up through the left eye socket and glue it around it. Thread the wire back through the same hole before repeating with the right eye socket.
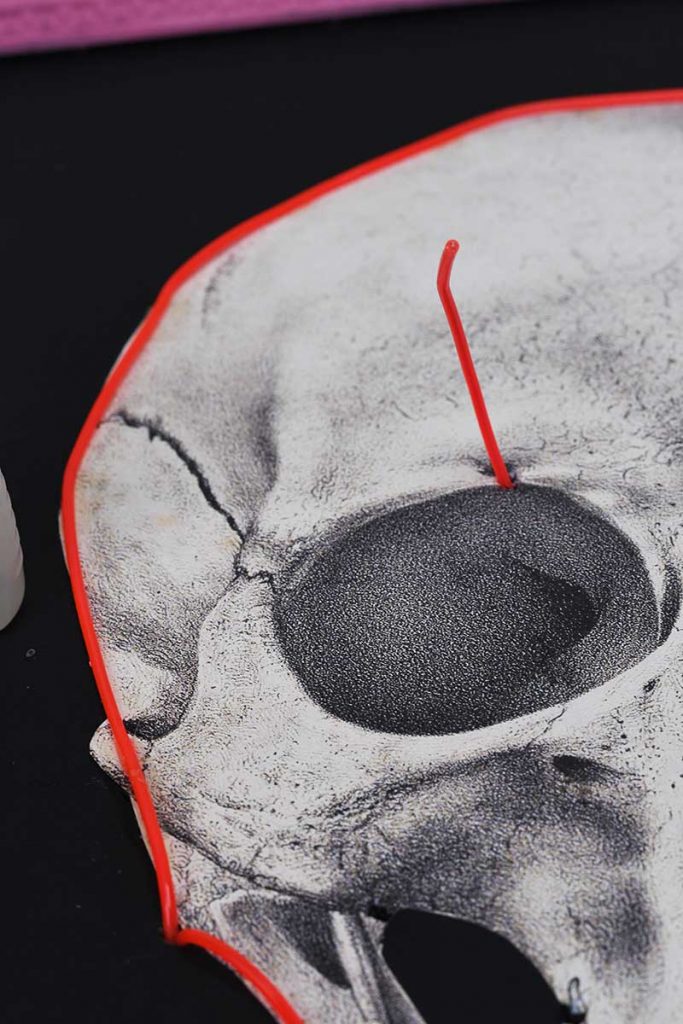

Step 7: Then repeat the same process of glueing the wire around the nose, followed by the teeth and cheeks.
I did not need to glue the wire when threading the teeth. The holes on the teeth were so close together they did not require glue to stay in place.
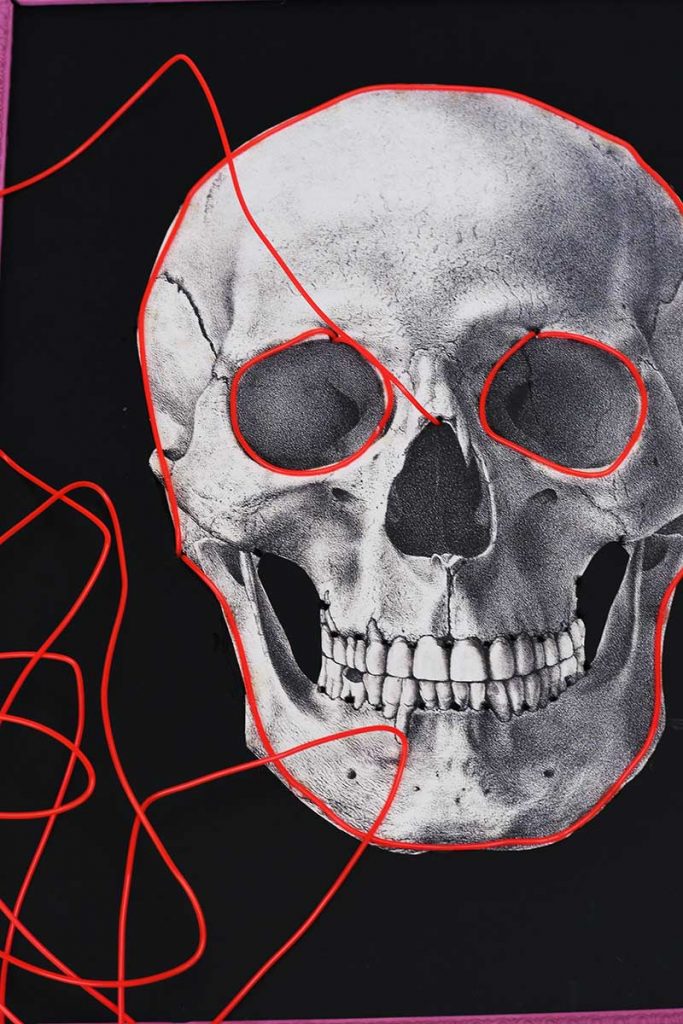


Step 8: Finish off by taping any excess wire to the back of the frame to keep it in place.
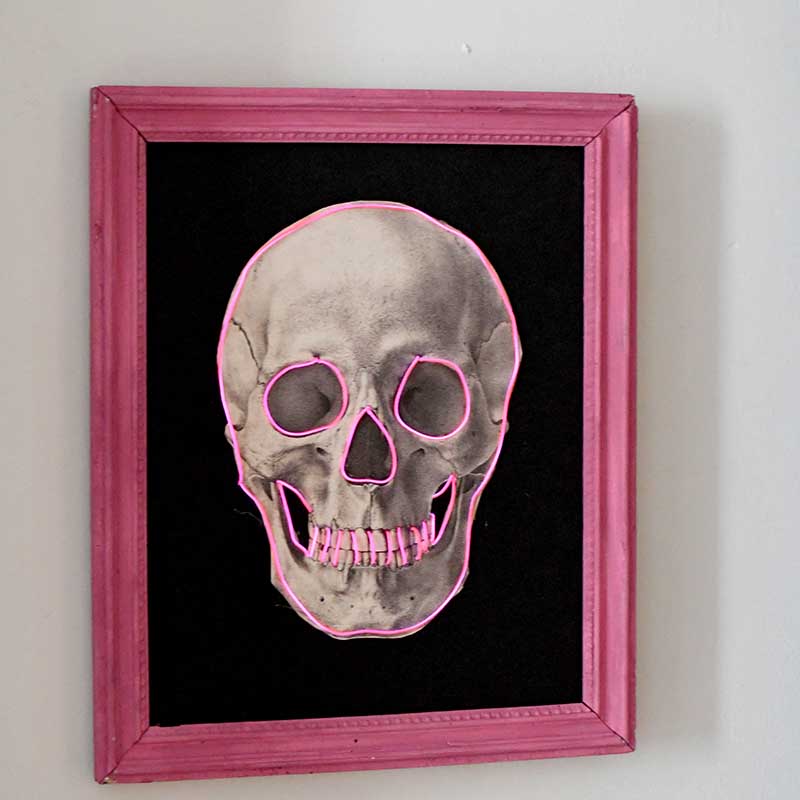
All that is left to do is hang the DIY skull decor. I will hang mine in the hallway of my home for now. But come Halloween, I’m going to hang him outside.

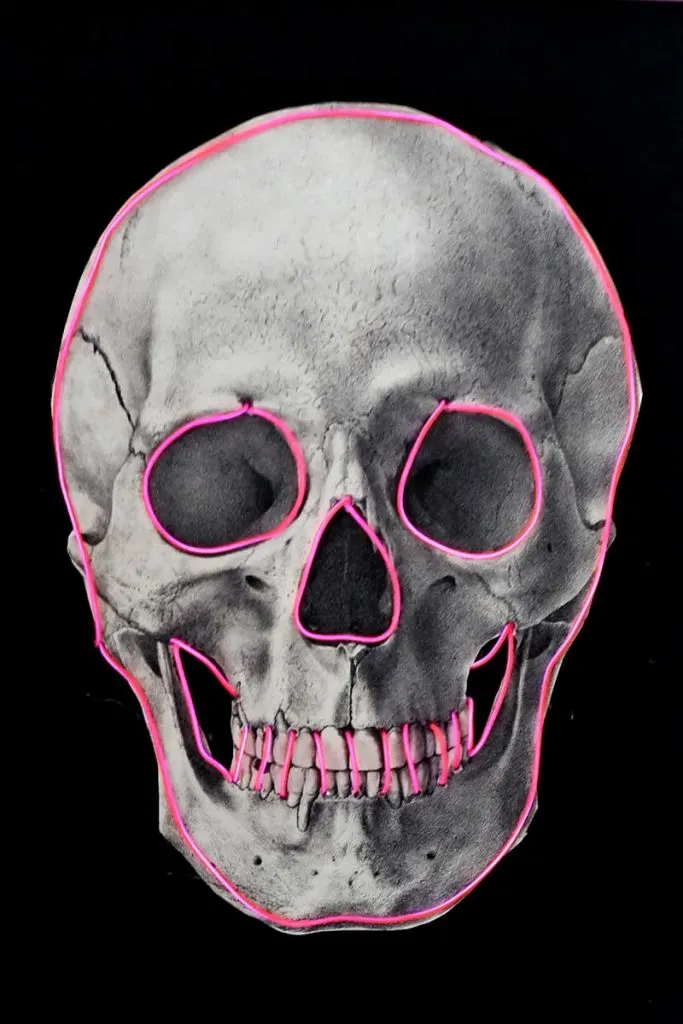
Finally, switch the lights on by pressing the button on the battery box. The lights have three modes: on, slow, and fast flash. They look really good, especially in the dark.


I have other collections of vintage images on Pictureboxblue that I also think would look good illuminated with EL wire for Halloween. These are the vintage skeleton illustrations and the spooky bat drawings.
For more EL wire crafts, check out this tutorial for a DIY neon sign on wood. And many of these string art crafts can be made with EL wire to give them an extra illuminated twist.
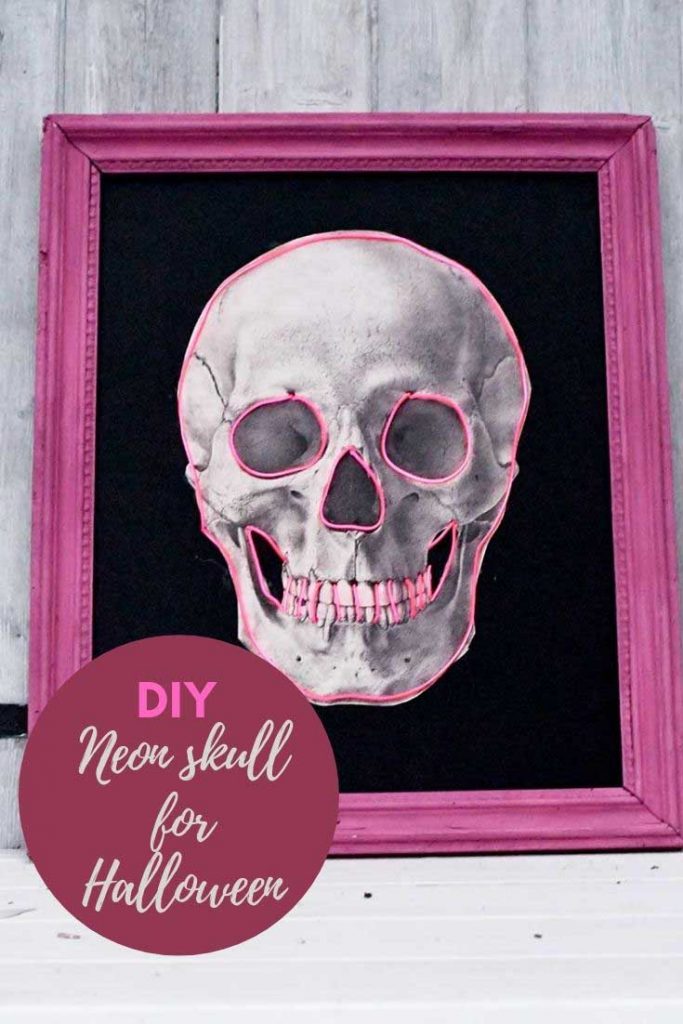
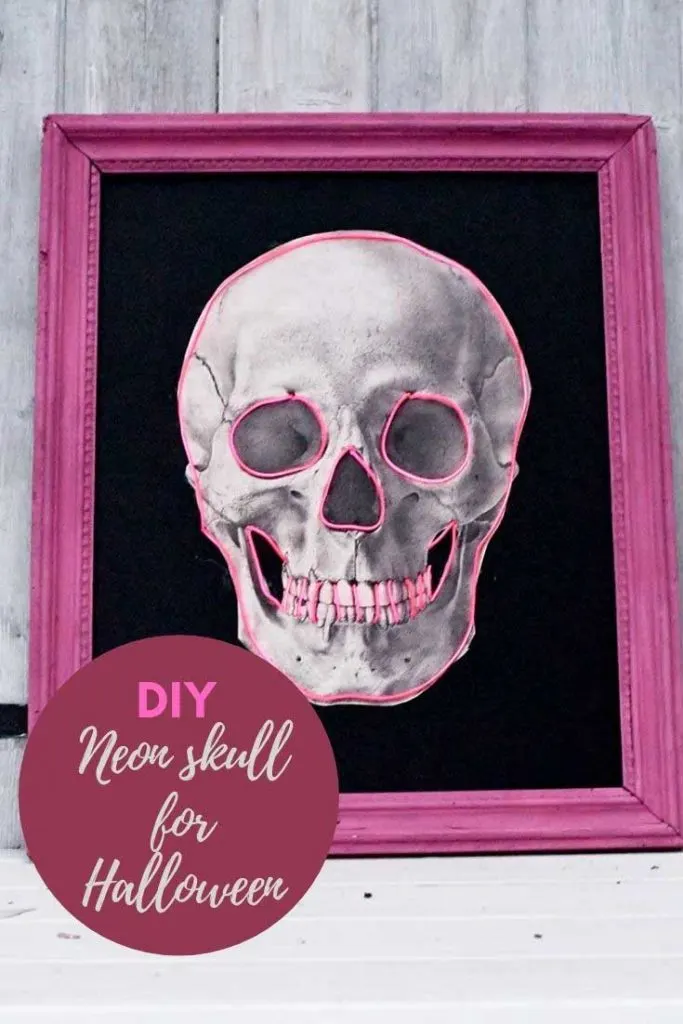
Illuminate DIY Skull Decor

Use a wonderful vintage drawing of a human skull to create some fun Halloween decor for your wall. The pink illuminated skull decor will ad a bit for fun to your home.
Materials
- Skull Drawing - Free download
- Neon Pink El Wire
- Super brush glue
- Black Foamboard
- Frame
Tools
- Wooden skewer
- Paper cutting knife and mat
Instructions
- Select the vintage skull drawing you want from the collection on Pictureboxblue.
- Print out the skull and cut it out carefully using a paper cutting knife.
- Cut black foam board to fit the frame.
- Stick the cut out skull to the black foamboard using a glue stick
- Punch holes through the skull at key points around the outiside, eye sockets and mouth.
- Thread the El wire through the hole on the out sided of the skull from the back to the front.
- Using the superglue and brush, glue the El wire to the outside of the skull and then thread the El wire through to the back again.
- Next, thread the El wire up through the eye socket and glue the wire around the eye socket and then thread back through the same hole.
- Repeat with the other eye socket and then the nose. Finish off with the mouth.
- When the whole skull is outlined with the El wire, tape any excess wire and the battery pack to the back of the frame.
- Finally, the Halloween skull decor is ready to hang. Just press the button on the battery pack to illuminate the skull.
Other Related Posts
For more spooky decor that uses the vintage images on Pictureboxblue, check out this DIY Halloween Shadow Box.
If you love the idea of illuminated Halloween decorations, you should check out these upcycled Halloween bottles and other skeleton craft ideas. Or, if you’re just a fan of pink neon lights, check out this neon pink heart for Valentine’s.
If you want a cute Halloween craft, check out this Scandinavian DIY Halloween felt decoration.
You can find more upcyled Halloween decorations here.
galen tigert
Wednesday 10th of September 2025
Did you use regular copy paper or cardstock to print images on?
claire
Wednesday 10th of September 2025
I used heavy copy paper about 240gsm.
galen tigert
Wednesday 27th of August 2025
Is 1 bundle of wire enough for 1 picture? I might do this as a library program.
claire
Wednesday 27th of August 2025
You can buy the wire in different lengths 2 metres should be enough. Have fun making it.
60 Best DIY Halloween Decorations that are Cheap and Easy | Sunny Side Design
Thursday 27th of April 2023
[…] Spooky DIY Neon Skull Decor by Picture Box Blue […]
Pastel Halloween Party Ideas - Delilahs Party Ideas
Thursday 26th of August 2021
[…] Find the tutorial for this Pink Halloween DIY Skull Decor […]
Little Cottage Link Party #70 - lovemycottage
Monday 28th of September 2020
[…] How to Make A Spooky DIY Skull Decor for Halloween from Picture Box Blue […]